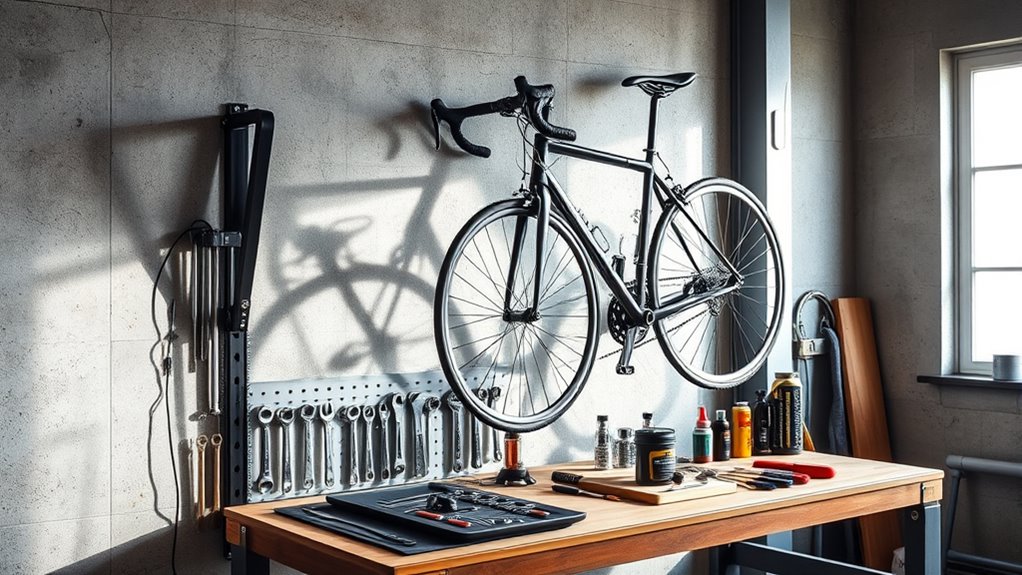
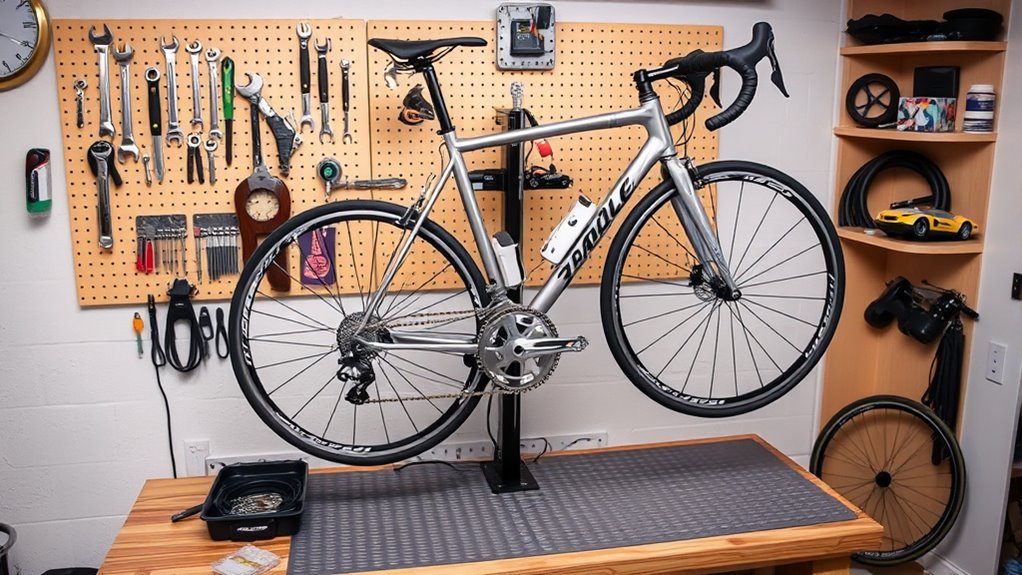
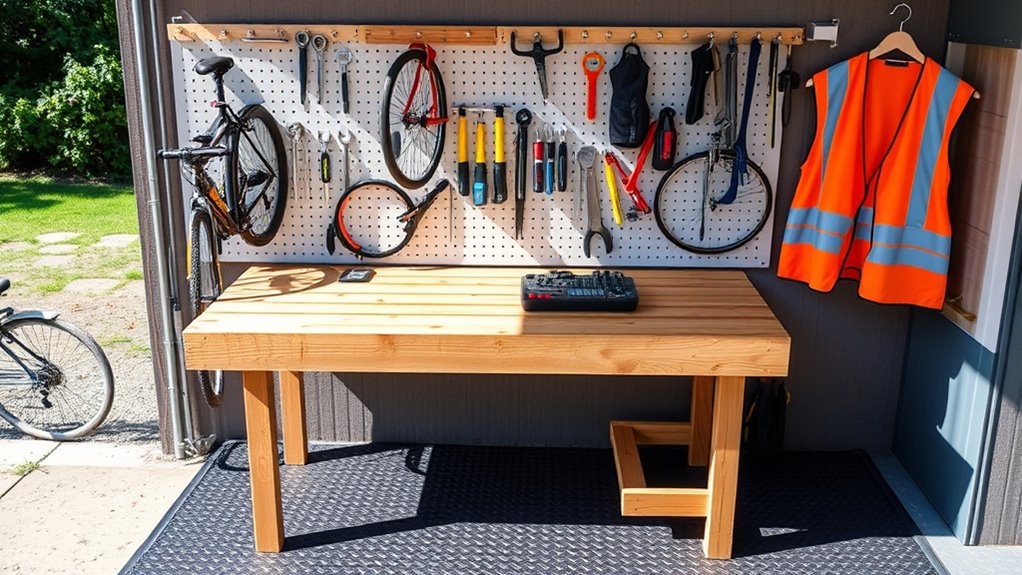
To set up a DIY bike repair station, start with a stable, spacious surface like a workbench or concrete area, ensuring good lighting with adjustable LED lights. Install a sturdy support system such as a wooden post or repurposed stand with padded cradles to hold different bikes securely. Organize your tools on pegboards or magnetic strips, and incorporate storage bins for parts. Add safety features like non-slip pads and braces. For detailed tips, keep exploring to build a functional, efficient workspace.
Key Takeaways
- Choose a stable, well-lit work surface with sufficient space, proper power sources, and anti-slip features for safety and ease of repair.
- Organize tools and parts using wall-mounted pegboards, labeled bins, and magnetic strips for quick access and efficient workflow.
- Install adjustable bike supports with padding, clamps, and reinforcement to securely hold bicycles during repairs.
- Incorporate ergonomic seating or standing arrangements, and adopt ergonomic practices to reduce fatigue during maintenance.
- Regularly inspect, maintain, and upgrade tools and setup components to ensure safety, accuracy, and adaptability for future repairs.

Schwinn Sporterra RX Gravel Bike, 700c Mens and Womens Bike, 14-Speed Drop Bar Gravel Bicycle, Mechanical Disc Brakes, Rigid Fork, Aerodynamic Riding Position, Quick Release Seat Post, Adult Bicycle
GRAVEL BICYCLE: Enjoy next level riding with the Sporterra RX by Schwinn. With 700c wheels, this mens and...
As an affiliate, we earn on qualifying purchases.
Selecting the Ideal Workspace Surface
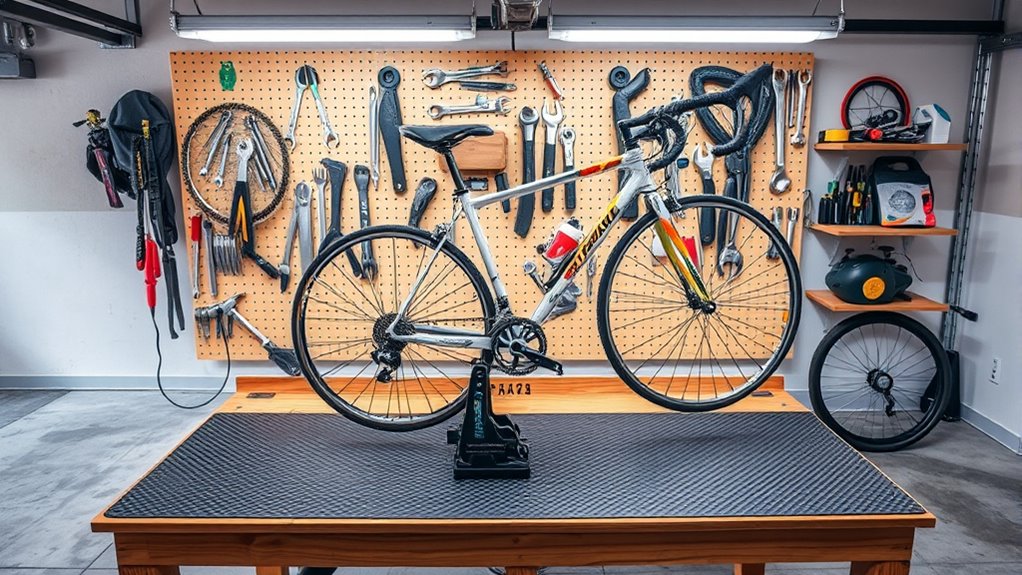
Choosing the right workspace surface is essential for a smooth bike repair experience. Make sure we’ve got a flat, stable surface like concrete or a sturdy workbench to prevent wobbling while you work. Adequate lighting is vital, so ensure the area is well-lit to see small parts clearly and avoid accidents. The surface should be resistant to oil, grease, and water, making cleanup quick and easy. Select a space that’s at least 3×3 feet, giving you enough room to maneuver comfortably around your bike. Also, consider a surface with built-in or accessible power outlets for tools and lighting—this boosts efficiency and keeps your workspace organized. With the right surface, your repair station will be both functional and safe.

SAVADECK T800 Carbon Gravel Bike, with Shimano GRX610 12-Speed, Hydraulic Disc Brakes, 700x40c Tires for Road & Off-Road Adventure, Men's/Women's Bicycle(Elegant White, 51cm)
【With SHIMANO GRX Drivetrain Setup】Equipped with SHIMANO GRX610 shifters and RX822 rear derailleur, matched with a 12-speed M6100...
As an affiliate, we earn on qualifying purchases.
Installing a Sturdy Bike Support System
To guarantee your bike stays secure during repairs, you need a support system built from durable materials like a 6×6 wooden post or a repurposed weight stand. Securely attach the support to a flat, level surface using heavy-duty screws or bolts to ensure stability and prevent wobbling under the bike’s weight. Incorporate a cradle or angled cutout lined with non-slip material or foam padding to protect the bike frame from scratches and provide a firm grip. Use a measuring tool, such as a speed square, to position the support at about 50 inches high for easy access and balance. Consider adding adjustable features or clamps to accommodate different bike sizes and prevent sway, making repairs safer and more efficient. Additionally, selecting the right self watering plant pots can serve as inspiration for designing stable and water-resistant support structures, especially since water-resistant materials are essential for outdoor or damp environments. When choosing materials, keep in mind that durable construction ensures your support system remains reliable over time, even with frequent use. Furthermore, incorporating environmentally friendly components can enhance the sustainability of your repair station and reduce its ecological impact.

Swagman Standard Fork Mount Rooftop Bike Carrier
EASY TO ASSEMBLE: The STANDARD is easy to assemble with no tools required, sets up in just minutes...
As an affiliate, we earn on qualifying purchases.
Organizing Essential Tools and Equipment
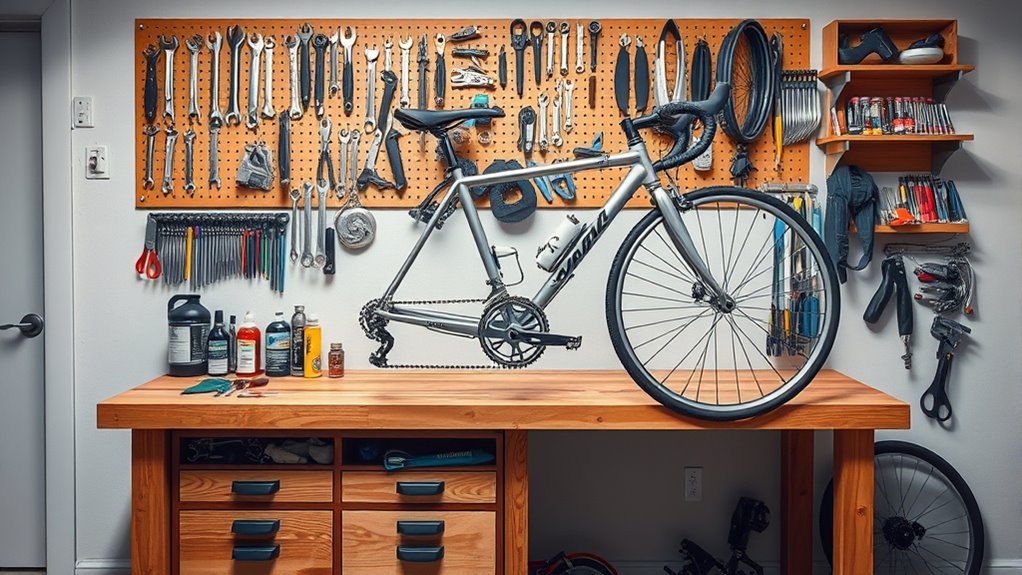
Organizing your essential bike repair tools and equipment guarantees that everything you need is easily accessible and ready when the moment arises. Use wall-mounted pegboards or tool panels to keep your go-to tools within reach, preventing clutter and saving time. Incorporate labeled storage bins or drawers for small items like screws, nuts, and lubricants, so nothing gets lost. Designate specific zones for different repair tasks—such as a tire station, drivetrain area, and maintenance workspace—to streamline your workflow. Install magnetic strips or tool rails to quickly grab common tools like screwdrivers, wrenches, and Allen keys. Use clear containers or transparent bins for frequently used parts and accessories, making it easy to identify and retrieve what you need during repairs. Additionally, consider Pimple Patch storage solutions to organize small consumables and prevent mixing up different products. Keeping an organized setup can also help you quickly identify tool organization needs and maintain a clutter-free workspace for more efficient repairs. Being aware of common symptoms of bike problems can help you diagnose and address issues promptly, ensuring smoother rides and safer cycling experiences. For electric bikes, understanding horsepower of electric dirt bikes can help you select the right tools for performance tuning and troubleshooting. Incorporating modern storage solutions can further optimize your setup, making your bike maintenance more efficient and enjoyable.
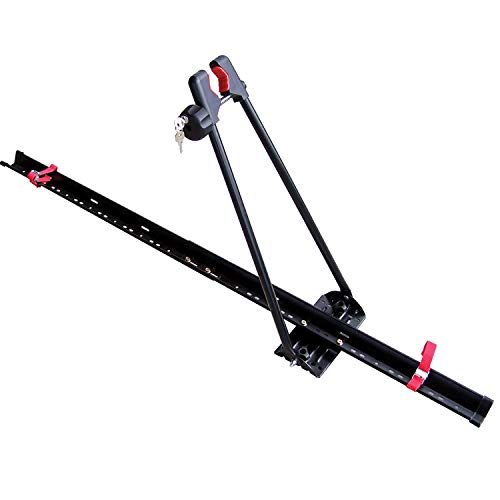
Swagman UPRIGHT Roof Mount Bike Rack
EASY TO ASSEMBLE: The UPRIGHT roof rack installs in minutes following the instructions and carries one bike with...
As an affiliate, we earn on qualifying purchases.
Incorporating Storage Solutions for Parts and Supplies

Incorporating effective storage solutions for parts and supplies keeps your bike repair station tidy and efficient. Wall-mounted shelves or pegboards above your work area help organize tools and small parts for quick access. Use labeled bins or clear containers to categorize spare parts, lubricants, and cleaning supplies, making everything easy to find. A rolling cart or portable storage unit nearby keeps frequently used items within reach. Magnetic strips or foam strips with hooks securely hold metal tools and small components. Additionally, custom wall-mounted or under-table drawers maximize space and protect parts from dust. Proper organization can significantly improve workflow and reduce clutter. Implementing storage solutions that are tailored to your space can help optimize your setup and make maintenance tasks smoother. Proper tool arrangement also enhances safety and efficiency during repairs. Here’s a quick visual overview:
| Storage Idea | Benefits |
|---|---|
| Wall-mounted shelves/pegboards | Easy tool access |
| Labeled bins/containers | Organized, visible supplies |
| Rolling cart/portable unit | Mobility and convenience |
| Magnetic/foam strips | Secure small parts and tools |
| Custom drawers | Space-efficient, dust protection |
Ensuring Proper Lighting and Comfort

Ensuring proper lighting and comfort at your bike repair station is essential for efficient and safe work. Install adjustable LED task lighting above your workspace to provide bright, focused illumination for detailed tasks. Combine overhead lights with portable work lights to eliminate shadows and improve visibility of small components. Position lights at different angles to reduce glare and shadows, making repairs more comfortable. Incorporate dimmable lighting options so you can easily adjust brightness based on the task, reducing eye strain. Additionally, set up a comfortable, ergonomic seating or standing arrangement with adequate lighting to prevent fatigue during long repairs. Proper lighting and comfort help you work more precisely and stay focused, making your bike repair sessions safer and more efficient. Leveraging automation’s role in business intelligence can also assist in planning optimal lighting setups by analyzing workspace data for better ergonomics. Comfortable workspace design further enhances focus and reduces physical strain, contributing to a more productive repair environment. Paying attention to ergonomic principles ensures your setup minimizes discomfort and maximizes efficiency during extended repair sessions. Incorporating adjustable furniture and supportive mats can also significantly improve worker comfort during prolonged repair tasks. Additionally, using smart lighting systems can automatically adjust brightness based on ambient conditions, further enhancing your workspace.
Customizing Your Setup for Specific Repair Tasks
To optimize your repair station, focus on adding adjustable mounts and clamps for tasks like wheel truing or brake adjustments. Incorporate specialized tool holders to keep essential tools within easy reach for each repair type. Customizing these features guarantees a more efficient, comfortable workflow tailored to your bike maintenance needs. Additionally, considering eco-friendly practices like organic cleaning methods can help maintain your tools and workspace sustainably. Incorporating ergonomic design principles can also reduce fatigue and improve safety during extended repair sessions. Leveraging advanced data processing speeds can also facilitate real-time diagnostics of bike components, enhancing your repair accuracy.
Adjustable Mounts and Clamps
Adjustable mounts and clamps are essential tools for customizing your bike repair station, as they allow you to securely hold various components at the right angles and positions. With quick-release or screw-based clamps, you can easily modify and switch setups for different repair tasks, saving time and effort. Multi-angle mounts help position your bike at the ideal angle for tasks like wheel removal or drivetrain work, enhancing accessibility. You can also build custom clamps from household materials or purchase specialized ones to grip delicate or complex parts securely. Properly adjustable mounts improve stability and safety, reducing the risk of slippage or damage during repairs. Tailoring your setup with these tools ensures a more efficient, comfortable, and safe repair experience.
Specialized Tool Holders
Creating specialized tool holders tailored to your repair tasks can substantially streamline your workflow. By designing storage solutions for specific tools like tire levers, wrenches, or screwdrivers, you’ll access what you need faster and keep your workspace organized. Using materials such as pegboards, PVC pipes, or wood, you can craft custom racks that fit your space and repair style. Incorporating adjustable or modular holders makes reconfiguration simple, accommodating different bike components or tasks. Labeling or color-coding these holders further enhances organization, saving time during repairs. Plus, integrating these holders into your setup keeps tools off the floor, reducing clutter and hazards. The result is a safer, more efficient bike repair station tailored precisely to your needs.
Adding Safety Features and Stability Enhancements
Enhancing safety and stability is essential for a reliable DIY bike repair station. To achieve this, add non-slip rubber feet or pads to the stand’s base, preventing slipping during repairs. Use heavy, stabilized materials like concrete or thick wood to boost overall stability. Attach additional bracing or cross supports to reinforce the structure and reduce wobbling. Incorporate adjustable clamps or straps to secure the bicycle frame firmly, minimizing sway and movement. Ensure the stand’s height and angle are ergonomically designed, reducing strain and improving safety during maintenance. Here’s a quick overview:
| Safety Feature | Benefit |
|---|---|
| Non-slip rubber feet | Prevents slipping during use |
| Heavy materials | Enhances overall stability |
| Cross supports | Reinforces structure, prevents tipping |
| Clamps or straps | Secures bike, reduces sway |
| Ergonomic design | Improves safety, reduces strain |
Maintaining and Upgrading Your Repair Station

To keep your repair station safe and efficient, you should regularly inspect and tighten all bolts and joints. Upgrading tools and adding new features, like shelves or organizers, can make your workspace more functional. Don’t forget to evaluate and adapt your setup over time to guarantee it stays comfortable and effective for your needs.
Regular Maintenance Routines
Regular maintenance is essential to keep your DIY bike repair station safe and functional. You should regularly inspect it for loose screws, unstable parts, or signs of wear that could compromise safety or stability. Clean and lubricate moving components like clamps and hinges to ensure smooth operation and prevent rust or corrosion. It’s also helpful to review your station’s layout and tools periodically, making adjustments to handle new repair techniques or different bike models. Replacing worn materials, such as foam pads or protective stops, keeps your workspace secure and scratch-free. Keeping a maintenance log allows you to track repairs, adjustments, and upgrades, which helps you plan future improvements and maintain consistent performance. Regular upkeep guarantees your station stays reliable and ready for any repair task.
Upgrading Tools and Features
Upgrading your bike repair station with new tools and features guarantees it stays efficient and safe for every repair. Regularly inspect and replace worn-out tools and components to maintain peak performance. Incorporate modular accessories like tool organizers, adjustable stands, and specialized clamps to boost functionality and organization. Technology upgrades, such as digital torque wrenches and LED lighting, enhance precision and visibility, making repairs easier and more accurate. Periodically test and calibrate your tools, especially for critical tasks like brake adjustments and hub truing, to ensure ongoing accuracy. Staying current with the latest maintenance techniques and compatible tools helps your station evolve with industry standards. These upgrades not only improve your workflow but also ensure safety and reliability during every repair session.
Frequently Asked Questions
Is a Bicycle Repair Business Profitable?
You’re wondering if a bicycle repair business is profitable. The answer is yes, especially in urban areas with high cycling traffic and limited repair options. You can achieve profit margins of 50-70%, thanks to low overhead costs and high demand. Offering specialized services like custom builds or e-bike repairs can boost your revenue. With consistent demand for maintenance, your bike repair business can be a profitable venture.
Can You Make Money Repairing Bikes?
Think of repairing bikes as planting seeds for a thriving garden—you can turn it into a steady income. Yes, you can make money repairing bikes, especially if you keep overhead low and charge competitive rates. Skilled mechanics often earn $50-$100 an hour. With minimal startup costs and options like mobile services, you can build a reputation for quality, turning your passion into a profitable venture.
Do I Really Need a Bike Repair Stand?
You might wonder if a bike repair stand is essential. While it’s not strictly necessary, having one makes repairs much easier and more comfortable. It keeps your bike stable and at a convenient height, reducing strain and preventing damage. If you frequently work on your bike or tackle complex repairs like wheel truing or bottom bracket work, investing in a stand is definitely worth it.
What Do You Put in a Bike Repair Kit?
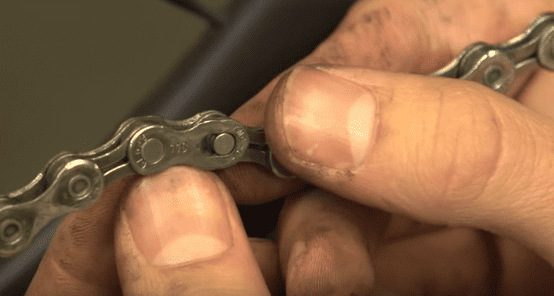
In your bike repair kit, you should include essential tools like tire levers, a multi-tool with Allen wrenches, and a mini pump. Add spare inner tubes, a patch kit, and a CO2 inflator or hand pump for quick fixes. Include a chain tool, screwdrivers, and quick links. Don’t forget gloves, rags, and a flashlight for safety, cleanliness, and visibility. Keep everything organized in a durable, portable container for easy access during rides.
Conclusion
Your DIY bike repair station transforms a simple space into a hub of creativity and independence. While organization and safety keep your repairs smooth, it’s the passion behind your efforts that truly drives progress. Just as a well-crafted bike balances strength and agility, your setup balances functionality and comfort. Embrace the process, knowing that every upgrade and tweak brings you closer to mastering your craft—reminding you that even in simplicity, there’s room for growth and innovation.