Are you ready to embark on an electrifying adventure? In this article, I will guide you through the process of building your very own electric bike.
We will explore the crucial components, from selecting the right frame to assembling the drive system.
Get ready to unleash the power of your DIY skills and create a two-wheeled masterpiece that will revolutionize your transportation experience.
Let’s dive in and electrify our ride!
Key Takeaways
- Gathering necessary components for the electric bike assembly is important.
- Careful attention to detail is required during the motor controller installation.
- Troubleshooting common drive system issues such as motor overheating or loss of power is necessary.
- Proper wiring and connecting of components is crucial for a well-functioning electric bike.

Schwinn Sporterra RX Gravel Bike, 700c Mens and Womens Bike, 14-Speed Drop Bar Gravel Bicycle, Mechanical Disc Brakes, Rigid Fork, Aerodynamic Riding Position, Quick Release Seat Post, Adult Bicycle
GRAVEL BICYCLE: Enjoy next level riding with the Sporterra RX by Schwinn. With 700c wheels, this mens and...
As an affiliate, we earn on qualifying purchases.
Choosing the Right Frame for Your Electric Bike
When choosing the right frame for your electric bike, it’s important to consider factors such as weight, durability, and riding style.
Building a lightweight frame is crucial for an electric bike, as it helps to maximize efficiency and range. One option to achieve this is by choosing a frame material that is known for its lightness, such as aluminum or carbon fiber.
Aluminum frames are popular due to their strength, affordability, and relatively low weight. On the other hand, carbon fiber frames are even lighter and offer excellent vibration damping properties. However, they can be more expensive.
Another important aspect to consider is durability. Steel frames are known for their robustness and ability to withstand heavy loads, making them a good choice for those who plan to carry cargo or ride in rough terrains.
Ultimately, the right frame material depends on your specific needs and preferences.

TOBWOLF 1 Pair MTB Disc Brake Set, Hydraulic Disc Brake Kit with 160mm Rotors, Left Front 81cm & Right Rear 147cm, Aluminum Oil Pressure Calipers Levers for Mountain Bike E-Bike Fat Bike Road Bike
【Important NOTE】-- This set works on the principle of Left Front and Right Rear, which means the left...
As an affiliate, we earn on qualifying purchases.
Selecting the Perfect Motor for Your DIY Project
Choosing the ideal motor for your DIY project is crucial. When it comes to motor power selection, it is important to consider the weight of your electric bike and the terrain you will be riding on. To determine the motor power needed, you can calculate the torque required using the formula: Torque (Nm) = Weight (kg) x Grade (%) x Wheel Radius (m). Once you have determined the torque, you can select a motor with enough power to meet this requirement.
To further emphasize this point, consider the following table:
| Weight (kg) | Grade (%) | Wheel Radius (m) | Torque (Nm) |
|---|---|---|---|
| 20 | 5 | 0.35 | 3.5 |
| 25 | 10 | 0.35 | 8.8 |
| 30 | 15 | 0.35 | 15.8 |
| 35 | 20 | 0.35 | 24.5 |
Using this table, you can determine the appropriate torque for your electric bike based on its weight, grade, and wheel radius. This will help you select the perfect motor for your DIY project.
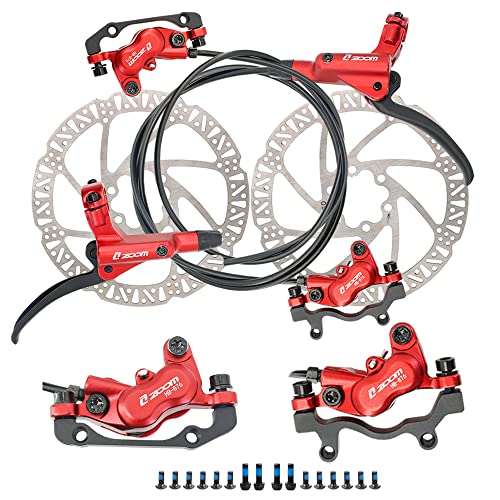
JFOYH zoom HB876 4-Piston Pre-Bled Hydraulic Disc Brake Set for Mountain Bike, Bike Disc Brake Kit with 160mm Rotors, Front and Rear Levers(PM Adapter Included) - Left-Front&Right-Rear
Experience Powerful Braking: Our 4-piston dual-way brake system provides exceptional braking force, allowing you to stop on a...
As an affiliate, we earn on qualifying purchases.
Picking the Right Battery for Your Electric Bike
To ensure you have the appropriate battery for your DIY project, it’s important to consider factors such as capacity, voltage, and weight.
When selecting a battery for your electric bike, there are a few key points to keep in mind:
-
Battery Capacity: The capacity of the battery determines how long your electric bike can run before needing a recharge. It is measured in ampere-hours (Ah), and a higher capacity means a longer range.
-
Battery Voltage: The voltage of the battery determines the power output. Most electric bikes use 36V or 48V batteries, with higher voltages providing more power but also draining the battery faster.
-
Battery Weight: The weight of the battery is an important consideration, as it directly affects the overall weight of your electric bike. Lighter batteries can improve maneuverability and efficiency.
By carefully considering these factors, you can ensure that you select the right battery with the appropriate capacity and weight for your electric bike DIY project.

4-Pistons E-Bike Hydraulic Disc Brake Set, 2-PIN Electric Power-Off Hydraulic Brakes Set with 160mm Rotors, Pre-Bled with Mineral Oil Brakes Kit for eBike, MTB, Electric Scooters
【4-Piston Powerful Braking】2026 Upgrade Hydraulic Disc Brake Set Features with a 4-piston pistons, which makes the dual-side breaking...
As an affiliate, we earn on qualifying purchases.
Understanding the Different Types of Electric Bike Controllers
Understanding the various types of e-bike controllers is essential for a successful DIY project. Electric bike controllers play a crucial role in regulating the flow of power from the battery to the motor, ensuring smooth and efficient operation. There are three main types of electric bike controllers: brushed, brushless, and sensorless.
Brushed controllers are the simplest and most affordable option. They work by using brushes to create a connection between the battery and the motor. Brushless controllers, on the other hand, use electronic commutation to control the motor’s speed and direction. They are more efficient and require less maintenance. Sensorless controllers are similar to brushless controllers but do not require sensors to determine the motor’s position. They are typically used in lower-cost electric bikes.
When choosing an electric bike controller, consider factors such as voltage, current rating, and compatibility with your motor and battery. Additionally, look for features like regenerative braking, cruise control, and throttle response. These features can greatly enhance your riding experience and make your DIY electric bike project a success.
Choosing the Best Brakes for Your DIY Electric Bike
When it comes to your DIY e-bike, it’s crucial to select the best brakes for optimal safety and control. Assembling an electric bike requires careful consideration of brake types and their performance. Here are three key factors to compare when choosing brakes for your DIY electric bike:
-
Disc Brakes: Disc brakes provide excellent stopping power and are less affected by wet conditions. They consist of a rotor attached to the wheel hub and a caliper that clamps down on the rotor to slow down the bike.
-
Rim Brakes: Rim brakes, also known as V-brakes, are a more affordable option. They grip the rim of the wheel to slow down the bike. However, they are less effective in wet conditions and can wear down the wheel rims over time.
-
Hydraulic Brakes: Hydraulic brakes offer superior stopping power and modulation. They use fluid to transfer force from the brake lever to the brake caliper, providing consistent and precise braking performance.
Considering these brake types and comparing their performance will help you make an informed decision for your DIY electric bike, ensuring safe and reliable stopping power.
Selecting the Right Wheels and Tires for Your Electric Bike
Selecting the right wheels and tires for your DIY e-bike is crucial for optimal performance and control. Customizing the look of your electric bike can be an exciting process, but it’s important to consider functionality as well.
When choosing wheels, you’ll want to pay attention to their size and weight. Larger wheels can provide better stability and smoother rides, while lighter wheels can improve acceleration and maneuverability.
Additionally, selecting tires that are suitable for your riding style and terrain is essential. Knobby tires are great for off-road adventures, while slick tires are ideal for city commuting.
It’s important to regularly maintain and service your electric bike, including checking tire pressure, inspecting for wear, and rotating tires to ensure even wear.
By carefully selecting and maintaining your wheels and tires, you can enjoy a safe and enjoyable ride while customizing the look of your electric bike.
Installing the Electrical Components on Your DIY Electric Bike
Now that we’ve selected the right wheels and tires for our electric bike, it’s time to move on to the next step: installing the electrical components. This is where the real magic happens, as we transform our regular bike into a powerful electric vehicle.
To begin, we need to gather all the necessary components, such as the motor, battery, controller, and wiring. Once we have everything in place, we can start the installation process. It’s important to follow the instructions provided with each component to ensure a proper and safe installation.
During the installation, it’s common to encounter some troubleshooting issues. These can include problems with the wiring connections, motor alignment, or controller setup. However, don’t worry, as there are various resources available online to help you troubleshoot and resolve these common issues.
By taking the time to install the electrical components correctly and troubleshooting any problems that arise, we can ensure a smooth and successful conversion of our DIY electric bike.
Assembling the Drive System for Your Electric Bike
To assemble the drive system for your DIY electric bike, you’ll need to gather the necessary components and follow the provided instructions for a smooth installation process. The drive system is responsible for transferring power from the motor to the wheels, allowing your bike to move efficiently. One key component of the drive system is the motor controller, which regulates the flow of electricity to the motor. Installing the motor controller requires careful attention to detail, as improper installation can lead to performance issues or even damage to the controller itself. It’s important to follow the manufacturer’s instructions closely and double-check all connections for accuracy. Additionally, troubleshooting common issues with the drive system, such as motor overheating or loss of power, may require troubleshooting steps specific to your particular setup. Consulting online forums or seeking advice from experienced electric bike builders can be helpful in resolving any challenges that arise.
| Common Issues with Drive System | Possible Solutions |
|---|---|
| Motor overheating | Check for proper ventilation and cooling system. Inspect wiring for loose connections. Reduce load on the motor if necessary. |
| Loss of power | Check battery voltage and charge level. Inspect wiring for any damage or loose connections. Test motor controller for faults. |
| Strange noises or vibrations | Inspect motor and drive components for any signs of wear or damage. Tighten any loose bolts or screws. Test bike on different surfaces to isolate the issue. |
Wiring and Connecting the Components of Your Electric Bike
First, gather all the necessary components and follow the provided instructions to wire and connect the components of your DIY electric bike.
To ensure a successful connection, follow these steps:
- Strip the insulation off the ends of the wires using wire strippers.
- Connect the wires according to the designated color codes. For example, red wires are commonly used for positive connections, while black wires are used for negative connections.
- Use crimp connectors or soldering to secure the wire connections.
- Once all the wires are connected, neatly organize them using zip ties or wire looms to prevent tangling and ensure a clean appearance.
Troubleshooting tips:
- Double-check all wire connections to ensure they are securely connected.
- Use a multimeter to test the voltage across the connections.
- Verify that all wires are properly insulated and protected from water or other potential damage.
By following these steps and troubleshooting tips, you can confidently wire and connect the components of your electric bike.
Testing and Fine-Tuning Your DIY Electric Bike
After wiring and connecting the components, it’s important to test and fine-tune your DIY e-bike. Fine tuning techniques and troubleshooting tips can help ensure that your electric bike is running smoothly and efficiently. One fine tuning technique is adjusting the brakes to ensure they are responsive and not too tight or loose. Another technique is adjusting the gears to ensure smooth shifting and optimal performance. Additionally, checking the tire pressure and making any necessary adjustments can improve the overall ride quality. Troubleshooting tips include checking for loose connections, ensuring the battery is charged and properly connected, and checking the controller settings. By testing and fine-tuning your DIY electric bike, you can ensure that it is safe to ride and performing at its best.
| Fine Tuning Techniques | Troubleshooting Tips |
|---|---|
| Adjusting the brakes | Checking for loose connections |
| Adjusting the gears | Ensuring the battery is charged and properly connected |
| Checking tire pressure | Checking the controller settings |
Frequently Asked Questions
Can I convert any regular bike into an electric bike?
Yes, any regular bike can be converted into an electric bike through a straightforward converting process. The benefits of electric bikes include increased speed, reduced effort, and reduced environmental impact.
What is the average range of an electric bike?
The average range of an electric bike depends on several factors, including battery capacity, terrain, rider weight, and assist level. Factors affecting electric bike range include wind resistance, tire pressure, and riding style.
How long does it take to charge an electric bike battery?
Charging an electric bike battery takes an average of 4-6 hours, depending on the battery capacity. It is important to note that frequent fast charging can reduce the battery lifespan, so it’s best to avoid it when possible.
Are there any legal restrictions or regulations for riding an electric bike?
There are electric bike safety regulations that vary by country and state. In most places, riders must be at least 16 years old to operate an electric bike. It’s important to familiarize yourself with local laws before riding.
How much does it usually cost to build an electric bike from scratch?
Building an electric bike from scratch can cost an average of $500 to $2000, depending on the components and quality you choose. The building process involves selecting a suitable frame, installing a motor, battery, and controller, and wiring them together for a functional electric bike.
Conclusion
In conclusion, building an electric bike requires careful consideration and attention to detail. By choosing the right frame, motor, battery, controller, brakes, and electrical components, you can create a DIY electric bike that is both efficient and reliable.
It is important to assemble the drive system and wire the components correctly to ensure smooth operation. Finally, testing and fine-tuning your creation will guarantee its optimal performance.
So, saddle up and start building your very own electrifying, efficient, and exhilarating electric bike!