Connect with us

Electric Bike

Electric Bike Road Trip Where To Charge

Published

on

An image featuring a picturesque scenic route winding through lush landscapes, with a row of charging stations nestled under towering trees, ready to power up electric bikes on an exciting road trip adventure

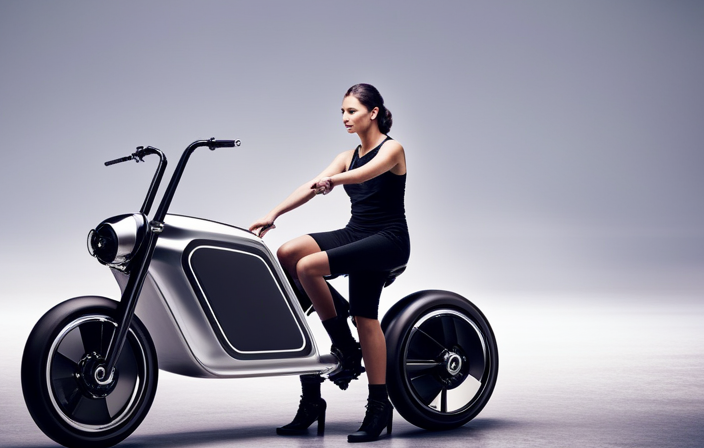
I’ve always loved going on road trips, but recently, I discovered a new way to explore the open road: on an electric bike.

Did you know that electric bikes have an average range of 40-60 miles per charge? That’s pretty impressive, right?

But the big question is, where can you charge your bike along the way? In this article, I’ll share some valuable tips and resources for finding charging stations, planning overnight charging, and connecting with fellow electric bike enthusiasts.

Get ready to experience the freedom and flexibility of an electric bike road trip like never before!

Key Takeaways

  • Planning is crucial for an electric bike road trip, including researching charging infrastructure and stations along the route.
  • Portable solar panels can be a lightweight and eco-friendly option for charging on the go, reducing the carbon footprint.
  • Connecting with local businesses and tourist attractions can provide convenient charging access and support local economies.
  • Utilizing fast charging stations and planning for overnight charging at accommodations are essential strategies to ensure a fully charged battery.

Understanding Your Electric Bike’s Range

Advertisement

Understanding your electric bike’s range is crucial when planning a road trip. It’s important to know how far you can travel before needing to charge. Electric bike range estimation is influenced by several factors.

The first factor is the battery capacity. This determines how much energy your bike can store. A higher capacity battery will allow for a longer range.

The second factor is the terrain you will be riding on. Uphill sections and rough terrain require more power, which reduces your range.

Your riding style and speed can also affect the range. Riding at higher speeds or using the highest power assist level will drain the battery faster.

By considering these factors, you can estimate your electric bike’s range and plan your road trip accordingly.

Advertisement

Transitioning into researching charging infrastructure along your route, it is essential to ensure that you have access to charging stations to recharge your bike when needed.

Researching Charging Infrastructure Along Your Route

When planning your journey, make sure to research the availability of charging stations along your route. It’s crucial to know where you can recharge your electric bike to avoid running out of power in the middle of nowhere. Evaluating charging station availability and speed options will help you make informed decisions for a smooth road trip. Here’s a table to help you compare different charging stations:

Charging Station Location Charging Speed
Station A City A Fast
Station B City B Medium
Station C City C Slow
Station D City D Fast

Utilizing Public Charging Stations

To ensure a smooth journey, make sure to research the availability and speed options of public charging stations along your route. Researching charging etiquette and maximizing charging efficiency will help you make the most of these stations.

Advertisement

Here are some tips to help you enjoy your charging experience:

  • Plan your route: Before setting off, map out the locations of public charging stations along your route. This will ensure that you have a clear idea of where you can stop to recharge.

  • Check availability: Some charging stations may be more crowded than others. Research the availability of charging spots and consider making reservations if possible.

  • Consider charging speed: Different charging stations offer varying speeds. Look for fast chargers that can replenish your battery quickly, especially if you’re on a tight schedule.

By following these guidelines, you can make the most of public charging stations and keep your electric bike powered up throughout your journey.

As you continue your search for charging options, consider exploring campgrounds and RV parks, which often provide charging facilities for electric bikes.

Finding Charging Options at Campgrounds and RV Parks

Researching different campgrounds and RV parks is essential to finding charging options for your electric bike. While public charging stations are convenient, they may not always be available or accessible during your road trip.

This is where campgrounds and RV parks can come in handy. Many of these locations are now offering charging options for electric bikes and other electric vehicles. When planning your trip, be sure to check if your chosen campgrounds or RV parks have charging stations available.

Advertisement

This way, you can avoid any unexpected charging challenges and ensure that you have a reliable source of power for your electric bike. Once you have identified these locations, you can also start exploring charging networks and apps to further enhance your charging options.

Exploring Charging Networks and Apps

Once you’ve found campgrounds and RV parks with charging stations, you can now broaden your options by exploring different charging networks and apps.

When embarking on an electric bike road trip abroad, it’s important to research the charging options available in your destination. Different countries may have varying charging networks, so it’s crucial to familiarize yourself with the local providers and their coverage.

Additionally, comparing charging speeds at different stations will help you plan your route efficiently. Some charging networks may offer fast charging stations, while others may have slower options. By considering the charging speeds, you can estimate how long you’ll need to stay at each station to fully recharge. This knowledge will enable you to optimize your travel time and ensure a smooth journey.

Planning stops at hotels and accommodations with charging stations provides a convenient way to recharge your electric bike while enjoying a comfortable stay.

Advertisement

Planning Stops at Hotels and Accommodations with Charging Stations

After exploring the various charging networks and apps available for electric bike road trips, it’s time to plan our stops at hotels and accommodations with charging stations.

These establishments cater to the needs of electric vehicle users, offering convenient and reliable charging options for our bikes. Staying at hotels with charging options provides several benefits.

Firstly, it eliminates the worry of finding a charging point in a new location, ensuring we have a full battery each day. Additionally, these accommodations often have dedicated parking spaces for electric vehicles, providing added security and peace of mind.

Not only do we get to recharge our bikes overnight, but we also get to recharge ourselves in comfortable and well-equipped accommodations.

Now that we have our charging stops planned, let’s consider portable charging solutions for those times when we need a quick boost on the road.

Advertisement

Considering Portable Charging Solutions

When you’re planning your stops at hotels and accommodations with charging stations, it’s important to consider portable charging solutions for those times when you need a quick boost on the go.

Portable charging options come in handy when you don’t have access to a charging station or need to charge your electric bike while exploring remote areas. One key factor to consider when choosing a portable charger is battery capacity. Make sure to select a charger with sufficient capacity to fully charge your electric bike’s battery. It’s also advisable to opt for a lightweight and compact charger that won’t take up much space during your travels.

Considering these portable charging options will ensure that you have a reliable backup plan in case you can’t find a charging station nearby.

Now, let’s delve into using solar power for charging on the go.

Using Solar Power for Charging on the Go

Using solar power is a convenient and eco-friendly way to keep your devices charged while on the go. Portable solar panels offer numerous benefits for charging on the road.

Advertisement

Firstly, they are lightweight and compact, making them easy to carry in your backpack or attach to your bike. Secondly, they harness the power of the sun, which is a renewable energy source, reducing your carbon footprint. Additionally, solar powered charging allows you to stay connected even in remote locations where electricity may not be readily available.

With the advancements in technology, portable solar panels have become more efficient and can charge your devices quickly.

Transitioning into the next section, another option for charging on the go is to ask local businesses and restaurants for charging access.

Asking Local Businesses and Restaurants for Charging Access

After exploring the possibilities of using solar power for charging on the go, I discovered another valuable resource for keeping my electric bike powered up during my road trip: local businesses and restaurants.

Many establishments are willing to partner with electric bike riders to provide charging access, recognizing the growing popularity and environmental benefits of this mode of transportation. By reaching out to these businesses and establishing partnerships, I not only gained access to convenient charging stations but also supported local economies and built connections with the community.

Advertisement

Additionally, I found that some businesses offered alternative charging options, such as pedal-powered chargers or renewable energy sources. These innovative solutions not only helped me keep my electric bike charged but also highlighted the creativity and commitment of local businesses to sustainable practices.

Now, let’s explore how we can take advantage of charging opportunities at tourist attractions.

Taking Advantage of Charging Opportunities at Tourist Attractions

To make the most of your visit to tourist attractions, don’t forget to explore the charging opportunities available to keep your electric bike powered up. Many popular tourist spots now offer charging stations, so you can conveniently recharge while enjoying the sights.

Here are some tips to help you navigate the tourist attractions charging etiquette and maximize your charging time efficiency:

  • Look for designated charging areas or stations at the attractions.
  • Follow any guidelines or instructions provided for charging your electric bike.
  • Be mindful of others who may also need to use the charging stations.

By taking advantage of these charging opportunities, you can ensure that your electric bike remains fully charged throughout your visit.

However, for quick boosts and when time is of the essence, utilizing fast charging stations can be a game-changer. These stations provide a rapid charge, allowing you to get back on the road quickly and continue your electric bike road trip without unnecessary delays.

Advertisement

Utilizing Fast Charging Stations for Quick Boosts

When you’re in a hurry and need a quick boost, fast charging stations can be a game-changer, allowing you to get back on the road quickly. The benefits of fast charging are undeniable. These stations are equipped with high-power chargers that can significantly reduce the charging time compared to regular charging stations. This means you can spend less time waiting and more time enjoying your electric bike road trip.

To make the most out of fast charging, there are a few best practices to keep in mind. First, always check the compatibility of your electric bike with the charging station to ensure a seamless charging experience. Second, plan your routes and identify fast charging stations along the way to avoid any unforeseen charging delays. Lastly, be mindful of the charging etiquette and try not to occupy the charging station for longer than necessary.

By following these best practices, you can maximize the benefits of fast charging and make your road trip even more efficient.

Speaking of charging, let’s now move on to planning for overnight charging at your accommodations.

Planning for Overnight Charging at Your Accommodations

At your accommodations, it’s important to ensure that overnight charging is available for your electric bike. Researching charging options ahead of time will save you from any surprises or inconveniences during your trip.

Advertisement

Here are some key factors to consider when managing charging time:

  • Check if your accommodation offers charging facilities or has partnerships with nearby charging stations.
  • Look for accommodations with secure parking areas where you can safely leave your bike charging overnight.
  • Consider the charging speed of the available outlets to optimize your charging time.
  • If your accommodation doesn’t provide charging options, inquire about nearby public charging stations or alternative solutions.

By planning for overnight charging at your accommodations, you can ensure a fully charged battery each morning, ready for your day’s adventures.

Connecting with other electric bike enthusiasts for charging tips can provide valuable insights and recommendations for the best charging locations along your route.

Connecting with Other Electric Bike Enthusiasts for Charging Tips

Connect with fellow enthusiasts to gather valuable tips and recommendations for optimizing your charging experience. One of the best ways to do this is by connecting with online communities dedicated to electric bike enthusiasts.

These communities are filled with knowledgeable individuals who have already experienced the challenges and triumphs of electric bike road trips. By sharing your own experiences and asking for advice, you can tap into a wealth of information that will help you make the most of your charging opportunities.

Whether it’s learning about hidden charging stations along your route or discovering the best charging strategies for maximizing battery life, these communities are a valuable resource. So don’t hesitate to reach out and connect with others who share your passion for electric biking.

Advertisement

Speaking of charging, it’s also important to be prepared with backup charging options in case you encounter any unexpected challenges on your journey.

Being Prepared with Backup Charging Options

It’s important to have backup options for charging in case you encounter any unexpected challenges on your journey. When it comes to electric bike road trips, having reliable backup power sources can be a lifesaver. Here are a few emergency charging options to consider:

  • Portable Solar Panels: These lightweight panels can harness the power of the sun to charge your electric bike’s battery, providing a sustainable and renewable energy source.

  • Power Banks: Investing in a high-capacity power bank is a smart choice. These portable chargers can give your electric bike’s battery a boost when you’re in a pinch.

  • Bike-Integrated Generators: Some electric bikes come equipped with built-in generators that can produce electricity while you pedal, ensuring a continuous power supply.

  • Public Charging Stations: Research and map out public charging stations along your route. These stations can provide a reliable backup option if you run out of battery unexpectedly.

Enjoying the Freedom and Flexibility of an Electric Bike Road Trip

When you embark on an electric bike adventure, you’ll experience unparalleled freedom and flexibility. Electric bikes offer a unique way to explore the world around you, allowing you to cover more ground while still enjoying the scenic beauty of your surroundings. Safety is a top priority when it comes to electric bike road trips, so it’s important to familiarize yourself with the rules of the road and wear appropriate safety gear. Planning your route is also key, as some roads may not be suitable for electric bikes or may have limited charging options. Speaking of routes, there are some truly breathtaking scenic routes that are perfect for electric bike road trips. From coastal roads to mountain passes, these routes offer stunning views and unforgettable experiences. So, grab your electric bike and hit the road for an adventure like no other!

Scenic Route Location
Pacific Coast Highway California, USA
Ring of Kerry County Kerry, Ireland
Great Ocean Road Victoria, Australia
Trollstigen Rauma, Norway

These routes not only provide picturesque landscapes but also offer convenient charging stations along the way, ensuring that your electric bike adventure is both enjoyable and worry-free. So, pack your bags, charge up your bike, and get ready to experience the freedom and flexibility of an electric bike road trip.

Frequently Asked Questions

Are there any local businesses or restaurants along the route that offer charging access for electric bikes?

Yes, there are local businesses and restaurants along the route that offer charging access for electric bikes. They understand the needs of electric bike riders and provide convenient charging options to ensure a hassle-free journey.

Advertisement

How can I connect with other electric bike enthusiasts to get charging tips and recommendations?

To connect with electric bike enthusiasts for tips and recommendations, join online forums or social media groups dedicated to electric bikes. You can ask for advice on finding local businesses or restaurants with charging access and receive valuable recommendations from fellow enthusiasts.

What are some backup charging options in case I cannot find a charging station or outlet?

When I can’t find a charging station, I rely on alternative methods like portable solar panels or kinetic energy chargers. These backup options give me peace of mind and ensure I can keep riding without worrying about running out of power.

Is it possible to charge my electric bike using solar power while on the go?

Yes, it is possible to charge my electric bike using solar power while on the go. Portable solar chargers provide a convenient and efficient way to harness the sun’s energy and keep my bike powered up during my journey.

Are there any fast charging stations available along the route for quick boosts?

Yes, there are fast charging stations available along the route for quick boosts. These stations utilize fast charging technology, allowing for faster charging times. Additionally, there are alternative charging methods such as portable chargers or battery swapping services.

Conclusion

So there you have it, folks! Embarking on an electric bike road trip is an exhilarating adventure that offers endless possibilities.

Advertisement

Did you know that there are over 80,000 public charging stations across the United States? That means you’ll never have to worry about running out of power while exploring new horizons.

With careful planning, utilizing charging networks, and connecting with fellow electric bike enthusiasts, you’ll be able to enjoy the freedom and flexibility of an electric bike road trip like never before.

So what are you waiting for? Hit the road and let your electric bike take you on an unforgettable journey!

Olivia's writing is not only informative but also inspiring. She has a knack for telling stories that capture the essence of cycling and the joy it brings to people's lives. Her writing has been praised by readers and industry experts alike for its clarity, depth, and authenticity. In addition to her writing, Olivia is also an avid cyclist. She enjoys exploring new trails and routes and has participated in several cycling events and races. Her first-hand experience with cycling gives her a unique perspective on the sport, reflected in her writing. Overall, Olivia is a talented writer passionate about cycling and dedicated to producing high-quality content for FlatironBike. Her contributions to the magazine have helped make it a go-to source for cycling enthusiasts worldwide.

Continue Reading
Advertisement

Electric Bike

How To Turn On Nakto Electric Bike

Published

on

By

An image showcasing a close-up of a hand firmly gripping the Nakto Electric Bike's handlebar, while the other hand reaches down to press the power button located on the battery pack

So you just got your hands on a new Nakto electric bike, and you’re ready to start riding.

But wait! Before you can embark on your thrilling adventure, you need to know how to turn on this sleek and powerful machine.

In this article, I will guide you through the step-by-step process of familiarizing yourself with the controls, checking the battery level, and activating the power button.

Get ready to unleash the full potential of your Nakto electric bike and experience the exhilaration of effortless riding.

Key Takeaways

  • Locate the power button on the display panel
  • Ensure the battery is fully charged before turning on the bike
  • Familiarize yourself with icons and symbols on the display panel
  • Press the power button to turn on the bike

Familiarizing Yourself with the Controls

Advertisement

To turn on the Nakto electric bike, familiarize yourself with the controls. Understanding the gear system is crucial for a smooth and efficient ride. The Nakto electric bike typically comes with a gear selector located on the handlebars.

By shifting gears, you can adjust the bike’s resistance and speed. Lower gears are ideal for climbing uphill or starting from a stop, while higher gears are suitable for cruising at faster speeds. Take some time to practice shifting gears before hitting the road to ensure a comfortable ride.

Additionally, it is essential to know how to use the brakes effectively. The Nakto electric bike usually has both front and rear brakes that can be engaged by squeezing the brake levers. Practice applying the brakes gradually and evenly to ensure a safe and controlled stop.

Familiarizing yourself with the gear system and mastering the art of using the brakes effectively will enhance your overall riding experience on the Nakto electric bike.

Checking the Battery Level

First, you’ll want to check the level of your battery. This is an important step in battery maintenance to ensure that you have enough power for your ride.

Advertisement

Here are some charging tips to help you keep your Nakto electric bike battery in good condition:

  1. Locate the battery indicator on your bike’s control panel. It is usually a series of bars or a digital display.

  2. Turn on the bike by pressing the power button.

  3. Look at the battery indicator to see the current level. If it is low, you’ll need to charge the battery before riding.

  4. To charge the battery, plug the charger into a power outlet and connect it to the battery port on your bike. Make sure the charger is securely plugged in.

Remember to follow the manufacturer’s instructions for charging and maintaining your battery. Regularly checking the battery level will help ensure a smooth and enjoyable ride.

Adjusting the Seat and Handlebars

Adjusting the seat and handlebars is an essential step in customizing your riding experience. It ensures that you are comfortable and in control while riding your Nakto electric bike. When adjusting the seat, make sure it is set at a height that allows your feet to touch the ground when seated and provides a slight bend in your knee when pedaling. The handlebars should be adjusted to a position that allows you to maintain a relaxed and upright posture.

Advertisement

In order to adjust the brakes, locate the brake levers on the handlebars. Squeeze the levers to test the brakes and make sure they engage properly. If they feel too loose or too tight, adjust the tension using the barrel adjuster located near the brake levers.

Finding the right gear is crucial for a smooth and efficient ride. Use the gears to match your pedaling speed with the terrain you are riding on. Shift to a lower gear when climbing hills or starting from a stop, and shift to a higher gear when riding on flat or downhill surfaces. Experiment with different gears to find the one that feels most comfortable and efficient for you.

Adjusting the seat, handlebars, brakes, and finding the right gear will greatly enhance your riding experience on your Nakto electric bike. Take the time to make these adjustments and enjoy a comfortable and safe ride.

Seat Adjustment Handlebar Adjustment Brake Adjustment Gear Selection
Adjust height for feet to touch ground Adjust for relaxed and upright posture Test and adjust tension Match pedaling speed to terrain
Slight bend in knee when pedaling Comfortable grip and reach Proper engagement Lower gear for climbing, higher gear for flat or downhill surfaces
Personalize for optimal comfort Enhance control and maneuverability Ensure responsiveness Experiment for best performance

Turning on the Display Panel

Make sure you know how to power on the display panel. It is an essential step in getting your Nakto electric bike up and running.

Once you have adjusted the seat and handlebars to your liking, it’s time to dive into the display panel. This is where you can adjust the gears and understand the display settings.

Advertisement

Here are a couple of tips to help you navigate the display panel like a pro:

  • Adjusting the gears:

  • Use the up and down arrows to shift between gears.

  • Experiment with different gear settings to find the one that suits your riding style and terrain.

  • Understanding the display settings:

  • Familiarize yourself with the different icons and symbols on the display panel.

  • Pay attention to important information like battery level, speed, and distance traveled.

By mastering these aspects of the display panel, you will have complete control over your Nakto electric bike.

Activating the Power Button

To activate the power button, simply press the button located on the display panel. This button is usually marked with a power symbol or labeled ‘on/off.’

Advertisement

If you are experiencing any power issues with your Nakto electric bike, troubleshooting the power system can help identify and resolve the problem. Start by checking the battery level and ensuring it is fully charged. If the battery is low, connect the charger and wait for it to reach a sufficient charge before attempting to turn on the bike.

Additionally, familiarize yourself with the different power modes available on your electric bike. Understanding these modes can help you optimize the bike’s performance and battery life. It’s important to note that different Nakto models may have varying power modes and features, so refer to the user manual for specific instructions.

Engaging the Pedal Assist Mode

Engaging the pedal assist mode is a simple way to enhance your riding experience. It allows you to effortlessly glide through various terrains while enjoying the benefits of electric assistance.

To activate the pedal assist mode on your Nakto electric bike, follow these steps:

  • Press the power button to turn on the bike.
  • Once the bike is powered on, locate the pedal assist button on the handlebar.
  • Press the pedal assist button to cycle through the different pedal assist settings.

The pedal assist mode offers several benefits. It provides an extra boost of power when you pedal, making uphill climbs and long rides more manageable. The different pedal assist settings allow you to customize the level of assistance according to your preference and riding conditions.

Whether you want a gentle assist or a more powerful boost, the pedal assist mode on your Nakto electric bike can be adjusted to suit your needs.

Advertisement

Testing the Throttle

Once you’ve activated the pedal assist mode, you can test the throttle by gently twisting it to experience the instant acceleration and control it provides.

The throttle on the Nakto electric bike is designed to give you a seamless riding experience. When you twist the throttle, the bike responds immediately, providing you with a burst of power that propels you forward.

It’s important to test the throttle in a safe and controlled environment, ensuring that you have enough space to maneuver and adjust to the acceleration.

Additionally, while testing the throttle, it’s a good idea to also test the brakes to ensure they are responsive and functioning properly. This will give you confidence in your ability to control the bike’s speed and come to a stop when necessary.

Lastly, don’t forget to adjust the gear shift to find the most comfortable and efficient setting for your riding style.

Advertisement

Ensuring Proper Safety Measures

Make sure you follow all safety precautions to ensure a safe riding experience. One of the most important safety measures to take when riding a Nakto electric bike is wearing a helmet. Wearing a helmet can significantly reduce the risk of head injuries in case of an accident. It is important to choose a helmet that fits properly and meets safety standards. Additionally, it is recommended to wear other protective gear such as knee and elbow pads, especially for beginners or when riding on uneven terrains.

To emphasize the importance of safety, here is a table highlighting some key safety precautions to follow when riding a Nakto electric bike:

Safety Precautions
Wear a helmet
Use proper hand signals
Follow traffic rules
Check brakes and tires regularly
Be aware of surroundings

Remember, taking these safety precautions can greatly reduce the risk of accidents and injuries while enjoying your Nakto electric bike. Stay safe and happy riding!

Troubleshooting Common Issues

Troubleshooting common issues with your Nakto e-bike can help resolve any problems you may encounter while riding. Here are four common problems and their solutions:

  1. Troubleshooting motor issues: If your Nakto electric bike’s motor is not working, first check the battery to ensure it is properly charged. Then, inspect the motor connections to make sure they are secure. If these steps don’t solve the issue, it might be a faulty motor that needs professional repair or replacement.

  2. Troubleshooting display panel errors: If you encounter errors on the display panel, start by checking the connections between the display and the controller. Ensure they are tightly connected. If the problem persists, try resetting the display panel by turning off the e-bike and turning it back on. If none of these steps work, contact Nakto customer support for further assistance.

Remember, troubleshooting is an essential skill to maintain your Nakto e-bike’s performance and ensure a smooth riding experience.

Advertisement

Enjoying Your Nakto Electric Bike Ride

Having fun on your Nakto e-bike ride is all about embracing the exhilarating experience of electric biking. To fully enjoy your ride, it is important to choose the right riding gear and maintain your electric bike properly. The right riding gear will ensure your safety and comfort throughout your journey. It is recommended to wear a helmet, gloves, and appropriate clothing that allows freedom of movement. Additionally, maintaining your Nakto electric bike is crucial for a smooth and enjoyable ride. Regularly check the tire pressure, brakes, and battery level before each ride. Clean the bike regularly and lubricate the chain to prevent rust and ensure smooth pedaling. By following these tips, you can maximize your enjoyment and make every Nakto e-bike ride a memorable experience.

Riding Gear Maintenance
Helmet Check tire pressure
Gloves Inspect brakes
Appropriate clothing Battery level
Clean and lubricate bike

Frequently Asked Questions

How do I charge the battery of my Nakto electric bike?

To charge the battery of my Nakto electric bike, I simply connect the charger to the bike’s charging port. I ensure the charger is properly plugged in and wait for the battery to fully charge. If I encounter any issues, I troubleshoot common battery problems.

Can I adjust the speed settings on my Nakto electric bike?

Yes, you can adjust the speed settings on your Nakto electric bike. To do this, you will need to navigate the troubleshooting display panel and make the necessary adjustments according to the bike’s user manual.

What do I do if the display panel on my Nakto electric bike is not turning on?

If the display panel on your Nakto electric bike is not turning on, there may be some common display panel issues. Troubleshooting the display panel involves checking the battery connection, ensuring the display is properly installed, and contacting customer support if needed.

How long does it take for the battery of my Nakto electric bike to fully charge?

The battery of my Nakto electric bike takes approximately 4-6 hours to fully charge, depending on the model. This ensures a longer battery life and allows me to enjoy extended rides without worrying about running out of power.

Advertisement

Is there a specific maintenance routine I need to follow for my Nakto electric bike?

To properly maintain my Nakto electric bike, I should follow a specific maintenance routine. This includes regular cleaning, checking tire pressure, lubricating the chain, and inspecting the brakes. Additionally, troubleshooting the display panel is important for identifying any potential issues.

Conclusion

After following these steps, you’re now ready to enjoy your ride on the Nakto electric bike.

First, familiarize yourself with the controls. Make sure you know how to operate the throttle, brakes, and any other features specific to your model.

Next, check the battery level. It’s important to know how much charge you have left before setting off on your ride. This will help you plan your route accordingly.

Then, adjust the seat and handlebars to ensure a comfortable riding position. This will help prevent any discomfort or strain during your ride.

Advertisement

Now, you’ve ensured a comfortable and safe ride. Some may argue that electric bikes are not as powerful as traditional bikes, but imagine the thrill of effortlessly gliding down the road. Feel the wind in your hair and the freedom of the open road.

So, hop on your Nakto electric bike and experience the joy of an eco-friendly and convenient mode of transportation.

Continue Reading

Electric Bike

How To Turn The Light On My Electric Bike

Published

on

By

An image capturing a close-up of a hand firmly grasping the bike's handlebar, fingers positioned on the power button, with the other hand reaching towards the front light switch, ready to toggle it on, showcasing the step-by-step process of turning on the electric bike's light

Are you tired of riding in the dark on your electric bike? Are you wondering how to light up your path and stay safe? Look no further!

In this comprehensive guide, we’ll walk you through the step-by-step process of turning on the light on your electric bike. From familiarizing yourself with the bike’s controls to troubleshooting common light issues, we’ve got you covered.

So, grab your bike and let’s shed some light on the road ahead!

Key Takeaways

  • Locate the light switch on the handlebar or control panel
  • Check the battery level regularly and keep it between 20% and 80%
  • Press the power button to turn on the bike’s power
  • Activate the display panel to adjust light settings and personalize preferences

Familiarizing Yourself with the Bike’s Controls

You’ll need to familiarize yourself with the bike’s controls before you can turn the light on. Understanding the bike controls is crucial for a seamless riding experience.

Advertisement

Start by locating the handlebar, where you’ll find various features and buttons. Look for the control panel, which is usually positioned near the center of the handlebar. This panel allows you to access different functions, including the light switch.

Take a moment to study the layout and labels on the control panel. Each bike may have different symbols or icons, so it’s essential to understand what each one represents.

Once you’ve grasped the basic functions, locate the light switch. It is commonly marked with a light bulb symbol. By pressing or flipping this switch, you can easily turn the light on and illuminate your path.

Locating the Light Switch

To find the switch, look for a small button or lever near the handlebars. The light switch location on electric bikes can vary depending on the model, but it is typically located within easy reach of the rider’s thumb or fingers. Some bikes have a dedicated switch for the lights, while others may have a multifunctional button that controls various features, including the lights. Make sure to familiarize yourself with your specific bike’s controls to locate the light switch easily.

Using bike lights at night is crucial for your safety and visibility. It not only helps you see the road ahead but also makes you more visible to other road users. Once you have found the light switch, you can turn on the lights and ride confidently in low-light conditions.

Advertisement

Now, let’s move on to checking the battery level.

Checking the Battery Level

When checking the battery level, it’s important to know how much power is left in order to plan your ride accordingly. To check the battery level on your electric bike, locate the battery indicator on the display panel. This indicator will show you the current charge level of your battery.

It’s recommended to regularly check the battery level to ensure you have enough power for your desired distance. Proper battery maintenance is crucial for prolonging battery life. To maximize the lifespan of your battery, avoid completely draining it and try to keep it between 20% and 80% charged. This will help prevent excessive wear and tear on the battery cells.

Advertisement

Now that you know how to check the battery level, let’s move on to turning on the bike’s power and getting ready for your ride.

Turning on the Bike’s Power

To start your ride, simply press the power button on the control panel. This button is usually located near the handlebars, within easy reach. Once you press the power button, the bike’s power system will activate, and you’ll be ready to go.

Here are four key things to keep in mind when turning on your electric bike:

  1. Check the battery level: Before starting your ride, it’s important to ensure that the battery has enough charge. You can do this by glancing at the battery indicator on the control panel.

  2. Safety precautions: Always make sure that you are in a safe and stable position before turning on the bike’s power. This will help you maintain balance and prevent any accidents.

  3. Listen for the startup sound: When you press the power button, listen for a startup sound or a beep. This indicates that the bike’s power system has successfully turned on.

  4. Confirm the bike’s readiness: Take a quick look at the control panel to ensure that all the necessary indicators, such as speed, assist level, and battery level, are active and functioning properly.

Once you have turned on the bike’s power, you can proceed to activate the display panel, which will provide you with additional information about your ride.

Activating the Display Panel

Advertisement

To activate the display panel, simply press the corresponding button on the control panel.

The display panel is an essential part of your electric bike as it provides important information about your ride and allows you to access various settings.

Once activated, you will be able to see your speed, battery level, and distance traveled.

Additionally, the display panel also allows you to activate the headlight on your electric bike. This is crucial for ensuring visibility and safety, especially when riding in low light conditions or at night.

Advertisement

To activate the headlight, navigate to the display panel settings and select the option to turn on the headlight. By doing so, you can have a clear view of the road ahead.

Next, we will delve into accessing the settings menu, where you can personalize your bike’s features and preferences.

Accessing the Settings Menu

Accessing the settings menu allows you to customize the features and preferences of your bike.

To access the settings menu, locate the display panel on your electric bike. This panel is usually located on the handlebars or near the center of the bike. Once you have located the display panel, press the power button to turn it on.

Use the buttons on the display panel to navigate through the menu options until you find the settings menu.

Advertisement

Once you have accessed the settings menu, look for the option to customize light settings. This option will allow you to adjust the brightness, mode, and other settings related to the lights on your electric bike.

By customizing the light settings, you can ensure optimal visibility and safety while riding.

To navigate to the lights option, simply scroll through the settings menu until you find the appropriate category.

Navigating to the Lights Option

Once you have located the display panel, simply scroll through the settings menu until you find the category for adjusting the lights on your e-bike.

To navigate to the lights option, follow these steps:

Advertisement
  1. Press the power button on the display panel to turn on the e-bike.
  2. Use the arrow buttons to scroll through the menu options until you see the settings icon.
  3. Press the settings icon to enter the settings menu.
  4. Within the settings menu, continue scrolling until you find the lights option.

Once you have successfully navigated to the lights option, you can proceed to adjust the light settings according to your preference.

This will allow you to select the light mode that best suits your needs.

Selecting the Light Mode

When you have reached the lights option, you can easily choose the light mode that suits your preferences. Ensure proper light alignment by adjusting the light intensity using the controls provided. Here is a table to help you understand the different light modes available:

Light Mode Description
Low Provides a dim light for conserving battery
Medium Offers a moderate amount of brightness for regular use
High Gives a bright light for enhanced visibility

By selecting the appropriate light mode, you can ensure that you have the desired level of brightness while riding your electric bike. Once you have adjusted the light intensity, you can proceed to the next step of adjusting the brightness level.

Adjusting the Brightness Level

To adjust the brightness level, simply use the provided controls to increase or decrease the intensity of the light. On most electric bikes, you can find these controls near the handlebars or on the display panel. By adjusting the brightness level, you can customize the lighting to suit your preference and riding conditions.

If you’re riding in a well-lit area, you may want to lower the brightness level to conserve battery power. On the other hand, if you’re riding in low light conditions or at night, increasing the brightness level will enhance visibility and safety.

Advertisement

Additionally, some electric bikes allow you to adjust the angle of the light, allowing you to direct the beam where you need it most.

Once you have adjusted the brightness level and angle, you can move on to choosing between steady or flashing light modes, which we will cover next.

Choosing Between Steady or Flashing Light

Now that you have adjusted the brightness level of your electric bike’s light, it’s time to choose between a steady light or a blinking light.

The steady light emits a continuous beam of light, providing a consistent source of illumination. This is particularly helpful when riding in low-light conditions or on dark roads, as it allows other road users to easily see you. The steady light also helps improve visibility and reduces the risk of accidents.

On the other hand, the blinking light flashes intermittently, which can attract attention and make you more noticeable to others on the road. However, it may not provide as much visibility as the steady light.

Advertisement

Now that you understand the benefits of using a steady light, let’s move on to testing the functionality of the light.

Testing the Light Functionality

Before proceeding, it’s important to ensure that the light on your electric bike is functioning properly. To test the light functionality, follow these steps:

  1. Turn on the bike’s power and locate the light switch or button.
  2. Press or toggle the switch to activate the light.
  3. Check if the light turns on and stays steady or flashes, depending on your preference.
  4. If the light doesn’t turn on, check the battery connection and make sure it’s securely attached.
  5. Ensure that the light bulb is not burnt out by visually inspecting it or replacing it with a new one.
  6. If the light still doesn’t work, consider upgrading your bike’s lighting system to a more reliable and brighter option.

Troubleshooting common light issues will be discussed in the next section, where we will address potential problems and provide solutions.

Troubleshooting Common Light Issues

If your bike’s light is not functioning properly, troubleshooting common light issues can help you identify and solve the problem. Here are some steps to troubleshoot the connections and replace light bulbs:

  • First, check the connections between the light and the battery or power source. Ensure that all the cables are securely connected and free from any damage or corrosion.

  • If the connections are fine, then the issue might be with the light bulb itself. To replace the light bulb, refer to the manufacturer’s instructions or user manual. Usually, you would need to remove the casing or cover of the light and carefully unscrew the old bulb. Replace it with a new bulb of the same type and wattage.

  • After replacing the light bulb, test the functionality by turning on the light. If it still doesn’t work, consider seeking professional help or contacting the manufacturer for further assistance.

To ensure the longevity and proper functioning of the light, it is crucial to maintain and clean it regularly.

Maintaining and Cleaning the Light

To keep your bike light in optimal condition, make sure to regularly clean and maintain it. Cleaning techniques for your electric bike light will depend on the specific model, but most can be wiped clean with a soft cloth and mild soap and water. Avoid using harsh chemicals or abrasive materials that could damage the light. Additionally, check the light for any loose or damaged parts and tighten or replace them as needed. It’s important to keep the light free from dirt, dust, and moisture to ensure it functions properly. Regularly inspect the wiring and connections to make sure they are secure and undamaged. By following these maintenance tips, you can ensure your bike light stays in top shape for years to come. Now, let’s move on to using additional light accessories to enhance your biking experience.

Advertisement

Using Additional Light Accessories

Using extra light accessories can enhance your biking experience by increasing visibility and safety. When it comes to bike light installation, choosing the right light accessories is crucial. Here are three essential accessories to consider:

  1. Headlights: Invest in a powerful headlight that emits a bright beam to illuminate the path ahead. Look for headlights with multiple brightness settings and a long battery life.

  2. Taillights: A taillight is essential for visibility from behind. Opt for a taillight with a flashing mode to grab the attention of drivers and ensure they can see you, especially in low-light conditions.

  3. Reflective gear: In addition to lights, wearing reflective gear such as vests, arm bands, and ankle straps can greatly increase your visibility. These accessories reflect light from car headlights, making you more noticeable on the road.

By incorporating these additional light accessories into your biking routine, you can stay safe and visible on the road, ensuring a worry-free ride.

Staying Safe and Visible on the Road

Make sure you wear bright and reflective clothing to stay safe and visible on the road.

Nighttime visibility is crucial when riding your electric bike, as it can be difficult for drivers to see you in the dark. Reflective clothing helps to increase your visibility by reflecting light from car headlights, making you more noticeable.

It is important to choose clothing that has reflective strips or patches on the front, back, and sides. This will ensure that you are visible from all angles. Additionally, consider wearing a reflective vest or jacket for added visibility.

Advertisement

Remember, the more visible you are, the safer you will be on the road. So, make it a priority to wear bright and reflective clothing every time you ride your electric bike at night.

Frequently Asked Questions

How do I change the light bulb on my electric bike?

To change the light bulb on your electric bike, start by locating the light assembly. Depending on the model, you may need to remove a cover or unscrew the assembly.

Once exposed, carefully remove the old bulb and replace it with a new one of the same type and wattage.

If you’re still experiencing light issues after changing the bulb, consider troubleshooting the wiring connections or checking the battery power.

Can I use a different type of light on my electric bike?

Switching up the light on your electric bike? No worries, there are a plethora of alternative light options available in the market.

Advertisement

To make the best choice, consider reputable brands known for their stellar performance, like [insert best light brands here]. These brands offer a range of lights designed specifically for electric bikes, ensuring optimal brightness, energy efficiency, and durability.

So go ahead, illuminate your ride with a new light that suits your style and needs!

How often should I clean and maintain the light on my electric bike?

To clean and maintain the light on your electric bike, start by disconnecting the light from the power source.

Use a soft cloth or sponge to gently wipe away any dirt or debris on the surface of the light.

For stubborn stains, you can use a mild soap and water solution.

Advertisement

After cleaning, make sure the light is completely dry before reconnecting it to the power source.

Regularly check for any loose connections or damage to ensure proper functioning.

Are there any regulations or laws regarding the use of lights on electric bikes?

To ensure your safety and comply with regulations, it’s crucial to understand the rules regarding lights on electric bikes.

The brightness of the light must meet specific regulations, typically ranging from 300 to 1000 lumens.

Additionally, the required light colors vary depending on your location. For example, in some areas, a white light is required at the front, and a red light at the rear.

Advertisement

Familiarize yourself with the regulations in your region to ensure your electric bike’s lights meet the necessary requirements.

Can I adjust the angle or direction of the light on my electric bike?

To adjust the angle or direction of the light on your electric bike, look for a small screw or lever near the light housing. Loosen the screw or move the lever to change the position of the light.

Adjusting the light angle has several benefits, including increased visibility and improved safety during nighttime rides. A brighter light can help you see the road ahead more clearly, making your rides safer and more enjoyable.

Conclusion

As you embark on your electric bike journey, remember that the light represents more than just illumination. It symbolizes safety, visibility, and a connection to the world around you.

By understanding the bike’s controls, locating the light switch, and ensuring the battery is charged, you can activate this powerful symbol.

Advertisement

Maintain and clean the light, and consider using additional accessories to enhance your visibility.

As you ride, let the light guide you, and may it serve as a beacon of safety on your path.

Continue Reading

Electric Bike

How To Turn Your Bike Into An Electric One.

Published

on

By

An image showcasing a bicycle with a sleek, low-profile electric motor attached to the rear wheel

Are you prepared to upgrade your regular bike into an electrifying adventure? Prepare to enjoy the excitement of easy pedaling and increased range with an electric bike conversion.

In this comprehensive guide, I’ll walk you through the step-by-step process of turning your regular bicycle into a powerful, eco-friendly electric bike.

From choosing the right bike for conversion to installing the electric conversion kit and adding extra features, you’ll have all the information you need to embark on this exciting transformation.

Get ready to revolutionize your cycling experience.

Key Takeaways

  • Lithium-ion batteries are commonly used for their high energy density and long lifespan in electric bike conversion kits.
  • Hub motors provide direct power to the wheels and are simpler to install, while mid-drive motors offer better balance and performance by driving the crankshaft.
  • When choosing a bike for conversion, consider factors such as frame size, weight capacity, and the bike’s weight and balance for a smooth and safe riding experience.
  • Necessary tools and materials for the conversion include a motor kit, battery pack, and miscellaneous tools like wrenches and screwdrivers. Prioritize safety by ensuring components meet safety standards and sourcing them from reputable suppliers.

Understanding Electric Bike Conversion Kits

Advertisement

Understanding electric bike conversion kits can be a game-changer for transforming your regular bike into an electric one.

When it comes to understanding battery technology, it’s crucial to know that lithium-ion batteries are the most common choice due to their high energy density and long lifespan. They provide efficient power delivery while being lightweight and easy to recharge.

Comparing different motor options is equally important. There are two main types: hub motors and mid-drive motors. Hub motors are simpler to install and provide direct power to the wheels, while mid-drive motors offer better balance and performance by driving the crankshaft.

Ultimately, the choice between the two depends on your specific needs and preferences.

By understanding battery technology and comparing motor options, you can make an informed decision when converting your bike into an electric one.

Advertisement

Choosing the Right Bike for Conversion

When choosing the right bike for conversion, it’s important to consider factors like frame size and weight capacity. Choosing the right frame for your conversion is crucial in ensuring a successful electric bike transformation.

The frame should be sturdy enough to support the added weight of the electric components without compromising its integrity. Additionally, considering the weight and balance of the bike is essential for a smooth and safe riding experience.

A heavier bike may require more powerful motor and battery to maintain balance and provide adequate propulsion. On the other hand, a lighter bike may be more agile but may not have enough stability for the added weight.

Carefully evaluating the frame’s weight capacity and balance will help you select the right bike for your electric conversion project.

Gathering the Necessary Tools and Materials

Advertisement

To gather the necessary tools and materials, you’ll need to make a list of items required for the conversion process. Here are the essential components you’ll need:

  1. Motor kit: This includes a motor, controller, and wiring harness. Make sure to choose a motor that is compatible with your bike’s frame and wheel size.

  2. Battery pack: Select a lithium-ion battery with a suitable voltage and capacity for your desired range. Consider factors like weight and mounting options.

  3. Miscellaneous tools: You will need a set of wrenches, screwdrivers, wire cutters, and crimping tools to install the components properly.

When sourcing components, it’s crucial to prioritize safety considerations. Ensure that the motor and battery meet safety standards and have built-in protection features. Additionally, choose a reputable supplier to guarantee the quality of the components.

Remember to wear protective gear when working with electrical components and follow all safety guidelines provided by the manufacturer.

Removing the Bicycle’s Existing Components

Start by removing the existing components of your bicycle. This is a crucial step in the process of turning your bike into an electric one. The first component to remove is the chain, which can be done by using a chain tool to break the chain and remove it from the bike. Next, remove the pedals by using a pedal wrench to unscrew them from the crank arms. Then, remove the front and rear derailleurs by loosening the bolts that hold them in place and sliding them off the bike. Finally, remove the brake calipers by loosening the bolts that attach them to the frame.

Advertisement

Removing these components allows for a clean slate to work with when installing the electric components. It is important to note that there are alternative methods of converting a bike into an electric one, such as using a conversion kit that can be attached to the existing components. However, removing the existing components provides a more seamless integration of the electric components and ensures optimal performance.

The following table showcases the components that need to be removed and the tools required for each:

Component Removal Method Required Tool
Chain Use chain tool Chain tool
Pedals Unscrew from crank arms Pedal wrench
Front Derailleur Loosen bolts and slide off Allen wrench
Rear Derailleur Loosen bolts and slide off Allen wrench
Brake Calipers Loosen bolts and remove Allen wrench

Removing the existing bike components may seem daunting, but with the right tools and a bit of patience, it can be accomplished smoothly. Once these components are removed, you will be ready to move on to the next step of the conversion process.

Installing the Electric Conversion Kit

Advertisement

First, you’ll need to install the electric conversion kit onto your bicycle. This kit includes a motor, battery, controller, and wiring. Here’s a step-by-step guide on how to install it:

  1. Start by removing the bottom bracket of your bike using a wrench. This is where the motor will be installed.

  2. Attach the motor onto the bottom bracket using the provided brackets and screws. Make sure it’s securely fastened.

  3. Connect the motor to the controller using the wiring harness. Follow the color-coding instructions for proper connection.

  4. Mount the battery onto the frame of your bike using the included battery mount. Ensure it’s in a secure and stable position.

  5. Connect the battery to the controller using the wiring harness. Double-check the connections to avoid any issues.

  6. Finally, test the electric conversion kit by turning on the battery and controller. Troubleshoot common issues like faulty wiring or loose connections if necessary.

By following these steps, you can successfully install the electric conversion kit onto your bike and enjoy the benefits of an electric bicycle.

Connecting the Motor and Battery

Once you have securely attached the motor onto the bottom bracket, the next step is to connect it to the battery. Motor and battery compatibility is crucial to ensure optimal performance and safety. Before making any connections, it is essential to check the specifications provided by the manufacturer for both the motor and battery. This will ensure that they are compatible in terms of voltage, current, and power output.

To make the necessary connections, refer to the wiring diagram provided with the electric conversion kit. This diagram will guide you on how to connect the motor and battery correctly. It is important to follow the instructions carefully to avoid any damage or malfunction.

In order to keep the audience engaged, let’s take a look at a table that summarizes the wiring connections for a typical electric bike conversion:

Advertisement
Motor Connections Battery Connections
Motor "+" wire Battery "+" wire
Motor "-" wire Battery "-" wire
Motor control wire Battery control wire

By following this table and the provided wiring diagram, you can ensure a successful connection between the motor and battery, allowing your bike to run smoothly as an electric one.

Testing and Adjusting the Electric System

To test and adjust the electric system, I should begin by ensuring that all the connections between the motor and battery are secure and correctly wired according to the provided diagram. This step is crucial to ensure the proper functioning of the electric bike.

Once the connections are checked, I can move on to testing the system. One important testing technique is to use a multimeter to measure the voltage and current at different points in the system. This will help me identify any potential issues or weak spots.

Additionally, I can test the performance of the electric system by taking the bike for a ride and observing its speed, acceleration, and overall power. Based on the test results, I can make adjustments to optimize the performance of the electric system, such as adjusting the voltage or current levels.

By thoroughly testing and adjusting the electric system, I can ensure that my bike operates smoothly and efficiently.

Advertisement

Adding Additional Features and Accessories

Adding extra features and accessories can enhance the functionality and style of your electric bike.

When it comes to upgrading brakes, you have several options. One option is to replace the stock brake pads with high-performance ones that offer better stopping power and durability. Another option is to upgrade to hydraulic disc brakes, which provide even more stopping power and better modulation.

Upgrading the suspension is another way to improve the overall performance of your electric bike. Consider replacing the stock suspension fork with a high-quality one that offers better damping and adjustability. This will provide a smoother and more controlled ride, especially when tackling rough terrains.

Additionally, you can add accessories like a rack and panniers for increased carrying capacity, or a comfortable saddle for long rides. These upgrades will not only improve the functionality of your electric bike but also elevate its style and make it a more enjoyable ride.

Maintaining and Troubleshooting Your Electric Bike

Make sure you regularly check the battery level and keep it properly charged to maintain the optimal performance of your electric bike. Troubleshooting battery issues is crucial for ensuring a smooth ride.

Advertisement

If you notice a sudden decrease in battery life, first check for any loose connections or damaged wiring. Clean the battery terminals regularly to prevent corrosion, as this can affect the battery’s performance.

In case of battery failure, it’s important to replace it with a compatible and high-quality battery.

Maintaining the motor is equally important. Regularly inspect the motor for any signs of wear or damage. Keep it clean and lubricated to reduce friction and extend its lifespan.

If you encounter any issues with the motor, consult the manufacturer or a professional electric bike technician for assistance.

Enjoying the Benefits of Your Electric Bike

Get ready to experience the many benefits of riding an electric bike. With an electric bike, you can enjoy the convenience of commuting without the hassle of traffic or the struggle of pedaling up hills.

Advertisement

Here are some reasons why electric bike commuting is beneficial:

  • Increased Efficiency:

  • Electric bikes provide a boost of power when needed, allowing you to cover more distance with less effort.

  • The pedal-assist feature helps you maintain a consistent speed, reducing fatigue during long rides.

  • Health Benefits:

  • Electric biking still requires pedaling, which provides a good cardiovascular workout and helps improve endurance.

  • Regular electric bike commuting can contribute to weight loss and muscle toning.

By incorporating an electric bike into your daily routine, you can enjoy the convenience of commuting while reaping the health benefits of regular exercise.

So, get ready to pedal your way to a healthier and more efficient lifestyle.

Frequently Asked Questions

How much does it cost to convert a regular bike into an electric one?

Converting a regular bike into an electric one can cost anywhere from $500 to $2000, depending on the quality of components and battery. However, the benefits of electric bikes, such as increased speed and reduced effort, outweigh the cost comparison.

Can I convert any type of bike into an electric bike?

Yes, any type of bike can be converted into an electric bike. Electric bike advantages include faster speeds, longer distances, and easier uphill climbs. There are different types of electric bike motors, such as hub motors and mid-drive motors.

Advertisement

How long does it take to install an electric conversion kit?

The installation time for an electric conversion kit can vary depending on your experience and the complexity of the kit. On average, it takes about 2-4 hours. Common issues may include compatibility problems and troubleshooting electrical connections.

Is it possible to switch back to a regular bike after converting it into an electric one?

Yes, it is possible to switch back to a regular bike after converting it into an electric one. However, there are pros and cons to consider. Converting offers convenience and speed, but it may reduce the bike’s range and require additional maintenance.

Are there any legal restrictions or requirements for riding an electric bike?

There are legal restrictions and requirements for riding an electric bike. It is important to follow electric bike regulations and be aware of safety concerns, such as wearing a helmet and obeying traffic laws.

Conclusion

After going through the process of converting my bike into an electric one, I can confidently say that the theory of turning a regular bike into an electric one is indeed true.

By following the steps outlined in this article, I was able to successfully transform my bike and enjoy the benefits of an electric ride.

Advertisement

It was a technical and detailed process that required the right tools and materials, but the end result was well worth the effort.

So, if you’re considering converting your bike, don’t hesitate to give it a try – you won’t be disappointed.

Continue Reading
Advertisement

Affiliate disclaimer

As an affiliate, we may earn a commission from qualifying purchases. We get commissions for purchases made through links on this website from Amazon and other third parties.

About us

We are a passionate team driven by the belief that cycling is a fantastic and accessible way to stay active while enjoying the beauty of the outdoors. Our mission is to share our love for cycling with as many people as possible. We provide a welcoming environment for individuals of all ages, abilities, and backgrounds to come together and ride bikes. With Ralf’s visionary leadership, Zane’s expertise in cycling adventures, and Olivia’s dedication to community building, we strive to create a vibrant space where everyone can experience the joy of cycling. Through group rides, workshops, and inclusive events, we inspire and empower individuals to embrace an active lifestyle. Join us in our quest to pedal together, embrace the joy of cycling, and foster connections that last a lifetime.

Advertisement

Trending