
Ever thought about how to accurately measure a bike tire? Knowing the size and dimensions of your tire is essential for top performance and safety.
In this article, I will guide you through the process of measuring a bicycle tire, step by step. From gathering the necessary tools to choosing the right tire for your needs, I will provide you with the technical knowledge and detailed instructions you need to ensure a smooth and successful measurement.
So, let’s dive in and explore the world of bicycle tire measurement together.
Key Takeaways
- Use a measuring tape or ruler to determine the rim diameter
- Measure from the inner edges of the rim for accuracy
- Remove the tire from the rim before measuring
- Ensure proper tire fitting with an accurate rim diameter measurement
Understanding Tire Size and Measurement
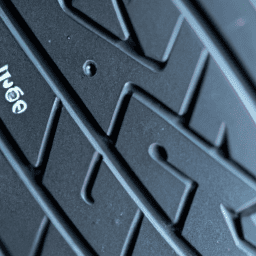
To measure your bicycle tire, you’ll need to understand tire size and measurement. Understanding tire pressure is crucial for maintaining optimal performance and safety. Different types of tire treads are designed for specific terrains and conditions. They can vary from smooth and slick for maximum speed on pavement, to knobby and aggressive for off-road adventures.
Tire size is typically indicated on the sidewall and consists of numbers and letters. The numbers represent the tire’s width, while the letters indicate the tire’s diameter and type. It’s essential to know these measurements to ensure compatibility with your bicycle and to select the right replacement tire when needed.
Now that you understand tire size and measurement, let’s move on to gathering the necessary tools for the measurement process.
Gather the Necessary Tools
First, gather all the tools you need. To measure a bicycle tire, you’ll need a few essential tools: a tape measure or ruler, a tire gauge, and a pump. These tools will ensure accurate measurements and help you maintain proper tire pressure.
Here is a table that summarizes the importance of choosing the right tire brand and maintaining proper tire pressure:
| Tire Brand | Importance |
|---|---|
| Quality | Ensures durability and performance. |
| Proper Size | Provides a safe and comfortable ride. |
| Tread Pattern | Affects traction and grip on different surfaces. |
| Puncture Resistance | Reduces the risk of flats and punctures. |
| Rolling Resistance | Influences the bike’s efficiency and speed. |
Choosing the right tire brand and maintaining proper tire pressure are crucial for a smooth and safe ride. Once you have gathered the necessary tools, you can move on to the next step of removing the wheel from the bike.
Remove the Wheel from the Bike
Next, you’ll need to remove the wheel from your bike. Start by flipping your bike upside down and resting it on its handlebars and seat. This will allow for easier access to the wheel.
Locate the quick release lever or nuts that secure the wheel to the frame. If your bike has a quick release lever, simply open it by flipping it to the open position. If your bike has nuts, use a wrench to loosen and remove them.
Once the wheel is loose, carefully pull it out of the frame. Be cautious not to damage any of the gears or brake components.
Now that the wheel is removed, you can move on to the next step of choosing a bike pump and checking for tire wear, before locating the tire size information.
Locate the Tire Size Information
Once the wheel is removed, you can easily find the tire size information on the sidewall of the tire. The tire size is typically indicated in a sequence of numbers and letters. To choose the right tire size for your bicycle, you need to understand how to read this information.
Here is a breakdown of what each number and letter represents:
-
The first number represents the tire width in millimeters. This is the measurement from one sidewall to the other when the tire is inflated.
-
The second number represents the aspect ratio of the tire, which is the ratio of the tire’s height to its width. This number is expressed as a percentage.
-
The third number indicates the diameter of the tire in inches. This is the measurement of the rim size the tire fits.
Finding the correct tire size is crucial for ensuring optimal performance and safety on your bicycle.
Now, let’s move on to measuring the diameter of the tire.
Measure the Diameter of the Tire
To find the diameter of your tire, simply locate the third number on the sidewall, which indicates the rim size in inches.
Understanding tire pressure and calculating tire circumference are essential for maintaining optimal performance and safety.
The diameter of a bicycle tire is crucial because it affects the overall ride quality and compatibility with your bike’s frame. It is also necessary for selecting the correct inner tube or tire size.
To calculate the tire circumference, multiply the diameter by π (pi). This measurement is crucial for determining the distance your bike travels with one revolution of the tire.
Once you have determined the diameter, you can proceed to measure the width of the tire, which ensures proper fitting and stability.
Measure the Width of the Tire
To determine the width of your tire, simply locate the second number on the sidewall, which represents the width in millimeters. This measurement is crucial as it affects the overall performance and ride quality of your bicycle.
Here are some advantages of wider tires:
-
Increased traction: Wider tires provide a larger contact patch with the road, resulting in improved grip and stability. This is especially beneficial when riding on uneven or slippery surfaces.
-
Enhanced comfort: Wider tires offer greater cushioning, absorbing more vibrations from the road. This translates into a smoother and more comfortable ride, reducing fatigue on longer journeys.
-
Better cornering capabilities: With a wider tire, you can lean into corners with confidence, as the increased surface area provides greater traction and stability during turns.
-
Choosing the right tire pressure: Wider tires require lower tire pressures, allowing for better shock absorption and improved traction. It is essential to find the optimal pressure for your specific tire width and riding conditions.
Considering the advantages of wider tires, it is crucial to determine the tire’s aspect ratio to further optimize your bicycle’s performance and ride quality.
Determine the Tire’s Aspect Ratio
The tire’s aspect ratio can be determined by dividing the tire’s height by its width and multiplying by 100. This ratio gives an indication of the tire’s sidewall height as a percentage of its width. To calculate the aspect ratio, measure the height of the tire from the rim to the tread surface, and divide it by the tire’s width. Multiply the result by 100 to get the aspect ratio. For example, if the tire’s height is 5 inches and its width is 25 inches, the aspect ratio would be 20%.
To engage the audience, here is a table that compares different aspect ratios and their corresponding tire types:
| Aspect Ratio | Tire Type |
|---|---|
| 70 | Performance |
| 60 | All-season |
| 50 | High-performance |
| 40 | Low-profile |
| 30 | Ultra-low-profile |
Understanding the tire’s aspect ratio is crucial for tire inflation and maintenance. It helps determine the appropriate tire pressure and ensures optimal performance. Checking the tire’s tread pattern and type is the next step in evaluating the overall condition of the tire.
Check the Tire’s Tread Pattern and Type
Next, take a look at the tire’s tread pattern and type to assess its overall condition. The tread pattern plays a crucial role in maintaining traction and stability, so it is essential to check for any signs of wear. Look for uneven wear patterns or bald spots, as these indicate a need for replacement.
Additionally, inspect the depth of the tread grooves using a tread depth gauge to ensure it meets safety standards. Another important aspect to consider is the tire’s type. Different types of tires are designed for specific terrains and weather conditions, so it’s important to choose the right one for your needs.
Lastly, analyzing the tire pressure is crucial as improper inflation can affect the tire’s performance and longevity. Pay attention to the recommended psi rating for your specific bicycle tire, as this will ensure optimal performance.
Now, let’s move on to the next step and inspect the tire’s psi rating.
Inspect the Tire’s PSI Rating
Check the tire’s PSI rating to ensure it is within the recommended range for optimal performance and safety. Maintaining the correct tire pressure is crucial for a smooth and efficient ride.
To assess the tire’s condition, start by inspecting the sidewalls for any cracks, bulges, or signs of wear. A damaged tire can lead to blowouts and accidents, so it is essential to replace it if necessary.
Next, assess the tire’s durability by checking the tread depth. A worn-out tread can compromise traction and increase the risk of skidding, especially on wet or slippery surfaces. Additionally, look for any embedded objects like glass or nails that could cause punctures.
Lastly, examine the valve stem for any leaks or damage. Once you have checked the tire’s PSI rating and assessed its condition, you can move on to measuring the rim diameter for proper tire fitting.
Measure the Rim Diameter
To accurately determine the rim diameter, simply use a measuring tape or ruler. The rim diameter, also known as the bead seat diameter, is the distance between the inner edges of the rim where the tire fits. Start by removing the tire from the rim and placing the measuring tape across the widest part of the rim. Make sure to measure from the inner edges rather than the outer edges. This measurement will help you determine the correct inner tube size and ensure a proper fit.
Now that you have measured the rim diameter, you can proceed to determine the tire’s compatibility with your bike by checking its width and circumference.
Determine the Tire’s Compatibility with Your Bike
Now that you know the rim diameter, it’s important to ensure that the tire is compatible with your bike. Here are two key factors to consider:
-
Tire pressure: It’s crucial to match the recommended tire pressure provided by the manufacturer. Riding with incorrect tire pressure can affect your bike’s performance and safety. Low pressure can lead to increased rolling resistance and a higher risk of flats, while high pressure can result in a harsh and uncomfortable ride.
-
Tire tread maintenance: The tire tread determines your bike’s grip on the road or trail. Regularly inspect the tread for wear and tear. If the tread is worn down, it’s time to replace the tire for optimal traction and control. Additionally, make sure to clean any debris stuck in the tread to prevent punctures.
Considering the terrain and riding style is the next step in choosing the right tire for your bike. This will ensure optimal performance and an enjoyable riding experience.
Consider the Terrain and Riding Style
Take into account the type of terrain you will be riding on and your personal riding style when selecting the appropriate tire for your bike. Different terrains require different tire designs to maximize performance and safety. For example, if you’ll be riding mostly on paved roads, a smooth tire with minimal tread is ideal for low rolling resistance and efficient riding. On the other hand, if you’ll be tackling off-road trails or rough terrains, a tire with aggressive tread patterns and wider widths will provide better traction and stability. Additionally, consider your riding technique. Are you an aggressive rider who enjoys fast descents and sharp turns? In this case, a tire with a higher grip and puncture resistance is recommended. Lastly, don’t forget to adjust your tire pressure according to the terrain and your weight to optimize comfort and control. With these factors in mind, you can choose the right tire for your needs and ride with confidence.
Choose the Right Tire for Your Needs
Consider your terrain and riding style when choosing the appropriate tire for your needs. It is important to select a tire that is suitable for the conditions you will be riding in.
For example, if you frequently ride on rough or uneven terrain, a tire with a thicker tread pattern and larger volume may be more beneficial. On the other hand, if you primarily ride on smooth pavement, a tire with a smoother tread pattern and smaller volume may be more suitable.
Additionally, consider the benefits of using tubeless tires. Tubeless tires offer improved puncture resistance, lower rolling resistance, and the ability to run lower tire pressures for increased traction. These advantages can greatly enhance your riding experience.
When choosing the right tire for your needs, it is essential to take into account your specific terrain and riding style. This will ensure that you have the optimal tire for your cycling adventures.
In the next section, we will discuss how to replace the tire if necessary.
Replace the Tire if Necessary
To replace the tire if necessary, start by loosening the bolts on the wheel using a wrench. Once the bolts are loosened, carefully lift the wheel off the ground and remove it from the bicycle frame.
Before removing the old tire, release any remaining air by pressing the valve stem. Next, utilize a tire lever to pry the tire off the rim. Take caution to avoid damaging the inner tube.
Now that the old tire is removed, inspect the rim for any signs of wear or damage. If the rim is in good condition, align the new tire with the rim and begin fitting it onto the wheel. Use the tire lever to carefully tuck the tire into the rim, ensuring it is evenly seated.
Finally, transition into properly inflating the new tire by attaching a tire pump and adding the appropriate amount of air pressure.
Properly Inflate the New Tire
When replacing a bicycle tire, it’s crucial to properly inflate the new tire to ensure optimal performance and safety. Choosing the right tire pressure is essential for a smooth and efficient ride.
Underinflated tires can negatively affect your bike’s handling and increase the risk of pinch flats, while overinflated tires can reduce traction and make the ride uncomfortable. To determine the appropriate tire pressure, refer to the sidewall of the tire where you can find the recommended range.
It’s important to avoid common mistakes when inflating tires, such as using a pump without a pressure gauge or relying on visual estimation. Investing in a reliable pressure gauge and regularly checking the tire pressure will help maintain the ideal inflation level and enhance your biking experience.
Frequently Asked Questions
How do I remove a tire from a bicycle rim?
To remove a tire from a bicycle rim, start by deflating the tire completely. Use tire levers to pry the bead of the tire away from the rim. Once the bead is free, carefully slide the tire off the rim. This process is essential for repairing punctures.
What is the recommended PSI for a bicycle tire?
The recommended psi for a bicycle tire depends on the type of bike and the rider’s weight. Maintaining proper tire pressure is crucial for optimal performance, grip, and safety. Incorrect tire pressure can lead to decreased control and increased risk of flats.
How do I determine the aspect ratio of a bicycle tire?
To determine the aspect ratio of a bicycle tire, divide the height of the tire by its width. This ratio is expressed as a percentage and can help in understanding tire sizing and determining the appropriate tire pressure.
What are the different types of tread patterns available for bicycle tires?
To optimize bicycle tire traction, various tread patterns are available. The knobby pattern enhances grip on loose terrain, while slick tires provide minimal rolling resistance on smooth surfaces. Each pattern offers distinct benefits depending on the riding conditions.
How do I choose the right tire for my specific riding style and terrain?
To choose the right tire for your riding style and terrain, consider tire width and sidewall construction. Narrower tires provide higher speed on smooth surfaces, while wider tires offer better traction on rough terrain. Sidewall construction affects durability and ride quality.
Conclusion
In conclusion, measuring a bicycle tire is a crucial step in ensuring a smooth and safe ride. By understanding tire size and measurement, gathering the necessary tools, and following the steps to remove and measure the tire, cyclists can make informed decisions when it comes to choosing the right tire for their needs.
For example, let’s consider a case study where a cyclist who primarily rides on rough terrains measures their tire and realizes it is not suitable for such conditions. They can then replace it with a tire specifically designed for off-road riding, enhancing their cycling experience.
Remember to always properly inflate the new tire to avoid any mishaps on your next adventure.