Connect with us

Bike

How Do You Measure The Size Of A Bicycle

Published

on

Are you tired of riding a bicycle that doesn’t fit you properly? Are you looking to upgrade to a new bike, but don’t know how to measure it? Fear not, as we take you through a step-by-step guide on how to measure the size of a bicycle.

Firstly, it’s important to understand that the size of a bicycle is determined by various factors, including the frame size, wheel size, and standover height. These factors work together to give you a comfortable and efficient riding experience.

Measuring each of these factors is crucial in determining the right size bicycle for you. So, let’s dive in and learn how to measure each of these factors accurately.

Key Takeaways

  • Bicycle size is determined by frame size, wheel size, and standover height, and factors such as top tube length, seat tube length, and effective top tube length are crucial in determining frame size.
  • Handlebar height and saddle position play a significant role in bicycle fit, with lower handlebar positions resulting in a more aerodynamic position and forward saddle positions putting more weight on handlebars.
  • Measuring wheel size involves diameter and width, and comparing diameter to wheelbase gives an indication of overall size and stability of the bicycle.
  • Adequate standover height is essential for rider comfort and safety, and optimal standover clearance is usually 1-2 inches more than inseam length. Choosing the right size bike is crucial for comfortable and efficient riding experience, and using a bike sizing chart or calculator can help determine appropriate frame size for body measurements.

Understanding the Different Factors that Determine Bicycle Size

Want to know how to determine the size of your bicycle? Let’s take a closer look at the various factors that come into play!

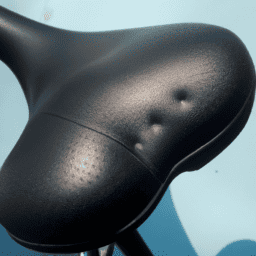
When it comes to cycling comfortably and efficiently, the fit of the bike is crucial. Handlebar height and saddle position are two of the most important factors affecting bicycle fit.

Handlebar height determines how upright or aerodynamic the rider’s position is on the bike. A lower handlebar position will result in a more aerodynamic position, while a higher handlebar position will be more upright and comfortable.

Saddle position, on the other hand, affects how the rider’s weight is distributed on the bike. A forward saddle position will put more weight on the handlebars and less on the pedals, while a backward saddle position will do the opposite. These factors must be taken into account when determining the size of a bicycle to ensure a comfortable and efficient ride.

Now that you understand the different factors that determine bicycle size, let’s move on to measuring frame size.

Measuring Frame Size

When it comes to measuring the frame size of a bicycle, there are several key factors that you need to consider.

First, there’s the top tube length, which is the distance between the seat and the handlebars.

Second, there’s the seat tube length, which is the distance from the bottom bracket to the top of the seat tube.

Finally, there’s the effective top tube length, which is the horizontal distance from the center of the head tube to the center of the seat tube.

Understanding these measurements is crucial for finding the right fit for your bike.

Top Tube Length

The Top Tube Length of a bicycle is crucial in determining its size and fit for the rider. It is measured from the center of the seat tube to the center of the head tube, and it affects the handlebar reach and stem length. Here are three important things to keep in mind when measuring or considering the Top Tube Length:

  1. The length should be appropriate for the rider’s torso length. A top tube that’s too long can cause the rider to overreach, while a top tube that’s too short can lead to a cramped position.

  2. The type of riding the bicycle will be used for should also be taken into account. For example, a road bike may require a longer top tube to accommodate a more aerodynamic position, while a mountain bike may require a shorter top tube for more maneuverability.

  3. Adjustments can be made to the stem length to fine-tune the fit. A shorter stem can compensate for a longer top tube, while a longer stem can compensate for a shorter top tube.

Moving on to the next subtopic, the seat tube length is another important measurement to consider when determining the size and fit of a bicycle.

Seat Tube Length

Now that we’ve covered the importance of top tube length, let’s turn our attention to the seat tube length of a bike.

The seat tube length measures the distance from the center of the bottom bracket to the top of the seat tube. This measurement is crucial in determining the correct frame size for a rider, as it affects how high or low the saddle can be adjusted.

The seat tube length also determines the maximum seat post height that can be used on a bike. The seat post diameter must match the diameter of the seat tube, and the length of the seat post must allow for the saddle to be adjusted to the proper height for the rider.

Remember, the correct saddle height is important for efficient pedaling and to avoid injury.

Now, let’s move on to the next section about effective top tube length.

Effective Top Tube Length

Determining the effective top tube length is crucial for achieving the perfect fit and comfort on your bike. This measurement refers to the horizontal distance between the center of the seat tube and the center of the head tube. It is important to note that this measurement is not the actual length of the tube, but rather the virtual length of the top tube. The reason why it is called "effective"is because it takes into account the angles of the seat tube and head tube, which can affect the reach of the bike.

To understand the significance of effective top tube length, it is important to consider how it affects the handlebar height and saddle position. A longer effective top tube length will result in a longer reach, which can cause the rider to stretch too far and put more weight on the hands. On the other hand, a shorter effective top tube length will result in a shorter reach, which can cause the rider to feel cramped and put too much weight on the saddle. By adjusting the effective top tube length, the handlebar height and saddle position can be optimized for maximum efficiency and comfort.

Measuring wheel size is the next step in determining the appropriate size for your bike.

Measuring Wheel Size

To measure the wheel size of your bicycle, you need to focus on two key points: diameter and width.

The diameter of the wheel is the distance from one side of the tire to the other side, passing through the center of the wheel.

The width of the wheel refers to the distance between the outer edges of the tire.

Measuring these two points accurately will help you choose the right replacement parts for your bike.

Diameter

Measuring a bicycle’s size can be as simple as measuring the diameter of the wheel, which is like the cherry on top of the sundae. To do this, use a tape measure or ruler to measure the distance across the wheel at its widest point.

This measurement is known as the diameter and it’s often printed on the tire itself. Calculating the circumference of the wheel can be done using the diameter measurement, as the circumference is equal to the diameter multiplied by pi (3.14).

Comparing the diameter to the wheelbase, or the distance between the center of the front and rear wheels, can give an indication of the overall size and stability of the bicycle. However, it’s important to note that the size of a bicycle isn’t just determined by the diameter of the wheel, but also by the width of the frame, handlebars, and other components.

Width

When you ride a bike, the width of the frame and handlebars can greatly impact your comfort and control. Measuring the width of a bicycle is important when adjusting the handlebars or purchasing a new bike. To measure the width of a bike, you need to measure the distance between the two outermost points of the handlebars. This measurement is commonly referred to as the handlebar width.

Adjusting the width of a bike can be done by changing the handlebars or the stem. Handlebars come in different widths, and you can choose the one that suits you best. You can also adjust the width of the bike by changing the stem length. A longer stem will make the handlebars wider, while a shorter stem will make them narrower. By adjusting the width of your bike, you can improve your comfort and control, making your ride more enjoyable.

Moving on to the next section, measuring standover height can also impact the comfort and fit of a bicycle.

Measuring Standover Height

When it comes to finding the perfect bike fit, you can’t afford to skip measuring standover height. Standover height refers to the distance between the ground and the top tube of a bike frame. It’s crucial because it determines how well you can straddle the bike and reach the pedals comfortably.

To measure standover height accurately, you need to follow specific steps that we’ll discuss in detail.

Importance of Standover Height

The standover height of a bike is crucial because it determines the rider’s comfort and safety while riding. Choosing the right frame size with an appropriate standover height is essential to ensure a comfortable and safe ride. The standover height refers to the distance between the ground and the top tube of the bike frame when the bike is standing upright. It is essential to have adequate standover height to avoid any discomfort or injuries while riding.

The following table shows the recommended standover heights for different bike sizes based on the rider’s height. It is crucial to measure your inseam accurately to determine the correct standover height for your bike. A bike with too high or too low standover height can cause discomfort, injuries, and interfere with your riding performance.

Rider Height Bike Size Recommended Standover Height
4’10"-5’1" XS 24"-27"
5’1"-5’5" S 27"-29"
5’5"-5’9" M 29"-31"
5’9"-6’0" L 31"-33"

To measure your standover height, you need to follow a few simple steps. By measuring your inseam, you can determine the appropriate standover height for your bike.

How to Measure Standover Height

Now that you understand the importance of standover height, it’s time to learn how to measure it. Measuring your standover height is crucial because it ensures that you have enough clearance between your body and the top tube of the bike. This clearance is essential for your safety and comfort when riding.

To measure your standover height, you’ll need to find the optimal standover clearance for your body. This is the distance between the top tube of the bike and your body when you’re standing over the bike with your feet flat on the ground. To find this distance, you’ll need to measure your inseam length and use it to calculate the optimal standover clearance.

Here’s how to measure your standover height in three easy steps:

  1. Stand with your back against a wall and your feet shoulder-width apart.
  2. Take a book and hold it between your legs, pressing it firmly against your crotch.
  3. Measure the distance from the floor to the top of the book. This is your inseam length.

Now that you have your inseam length, you can use it to find the optimal standover clearance for your body. The optimal standover clearance is usually around 1-2 inches more than your inseam length.

By measuring your standover height and finding the optimal standover clearance, you’ll be able to choose the right size bike for your body.

Choosing the Right Size Bicycle

To find the ideal fit for your body, it’s important to select the appropriate size bicycle. The importance of fit cannot be overstated, as it affects not only your comfort but also your performance and safety on the bike.

Common sizing mistakes include choosing a bike that is too big or too small, which can lead to inefficient pedaling, discomfort, and even injury.

When selecting the right size bicycle, consider your height, inseam, and riding style. Use a bike sizing chart or calculator to determine the appropriate frame size for your body measurements.

Keep in mind that different bike brands may have slight variations in sizing, so it’s best to try out a few different models and sizes before making a final decision.

A properly fitted bike should allow you to comfortably reach the handlebars, pedals, and brakes, with a slight bend in your elbows and knees when riding.

With the right size bike, you’ll be able to enjoy a comfortable and efficient ride, whether you’re commuting to work or hitting the trails.

Frequently Asked Questions

How do I know what type of bicycle is best for my needs?

Ready to find your perfect ride? Start with a customized fit, considering your height, inseam, and riding style. Next, evaluate bike features like frame material, gearing, and suspension to match your needs.

Can I adjust the size of the bicycle after purchasing it?

Yes, you can adjust the fit of your bicycle after purchasing it. Professional fittings can help you achieve the optimal fit. This can include adjusting the saddle height, handlebar position, and stem length to improve comfort and performance.

What is the weight limit for a bicycle?

You’ll want to consider the weight capacity of the bicycle, which is determined by the frame material and design. Technical specifications for weight capacity can usually be found in the product information or manual.

Can children ride adult-sized bicycles?

Adult-sized bicycles are not recommended for children due to safety concerns. Child-sized bicycles are designed to fit children’s smaller frames and are safer and more comfortable for them to ride.

How often should I check the size of my bicycle to ensure it still fits properly?

To ensure proper bike fit, check your bicycle’s size periodically. Signs of an ill fitting bike include discomfort in the wrists, neck, knees, or back. Proper fit is important for injury prevention and optimal performance.

Conclusion

In conclusion, measuring the size of a bicycle involves understanding the different factors that determine it, measuring the frame size, wheel size, and standover height, and choosing the right size bicycle. To ensure maximum comfort and performance, it’s important to have a bike that fits you properly.

When measuring the frame size, make sure to measure from the center of the bottom bracket to the top of the seat tube. The wheel size, on the other hand, is measured from the outer diameter of the tire.

Lastly, the standover height is the distance between the ground and the top tube of the bike. By taking all of these measurements into consideration, you can ensure that you are choosing the right size bicycle for your needs.

Remember, a properly sized bike can make all the difference in your riding experience.

Ralf is a devoted husband and father who loves spending time with his family. He enjoys riding his bicycle as much as possible, and takes every opportunity he can to get out on the open road. Ralf is a kind and gentle person who wants only the best for those around him.

Continue Reading

Bike

How Much Can A 100cc Bicycle Go

Published

on

By

An image showcasing a picturesque landscape of a winding road through rolling hills, with a 100cc bicycle zooming along at full speed, leaving a trail of dust, demonstrating the impressive distance it can cover

Have you ever wondered how far a 100cc bicycle can take you on your adventures? Get ready to unlock the potential of this powerful mode of transportation.

In this article, we will delve into the basics of a 100cc bicycle, explore its power and speed, and discuss the factors that affect its distance.

With some tips for maximizing your range, we will also compare it to other modes of transportation and consider its environmental benefits.

Get ready to embark on a thrilling journey with your 100cc bicycle.

Key Takeaways

  • A 100cc bicycle can travel up to 100 kilometers on a single tank of fuel, making it suitable for various adventures.
  • The environmental benefits of using a 100cc bicycle include decreased air pollution, reduced greenhouse gas emissions, conservation of natural resources, and noise pollution reduction.
  • Bicycles have zero emissions and use human power instead of fossil fuels, helping to conserve non-renewable resources like oil and gas.
  • The versatility of a 100cc bicycle as a mode of transportation allows for extraordinary journeys while minimizing carbon footprint and providing unforgettable adventures.

Understanding the Basics of a 100cc Bicycle

A 100cc bicycle can go a maximum speed of around 50 miles per hour. The power output of a 100cc bicycle is determined by its engine, which is typically a two-stroke or four-stroke engine. These engines require regular maintenance to ensure optimal performance. This includes checking and changing the oil, cleaning the air filter, and inspecting the spark plug.

Proper engine maintenance is crucial for ensuring that the bike can reach its maximum speed and power. Exploring the power and speed of a 100cc bicycle allows riders to experience the thrill of high-speed cycling. By maintaining the engine and following proper maintenance procedures, riders can confidently push the limits of their 100cc bicycle and enjoy the exhilaration of reaching top speeds.

Exploring the Power and Speed of a 100cc Bicycle

You might be surprised by the power and speed that a 100cc bike can achieve. Here are four key points to help you appreciate the capabilities of a 100cc bicycle:

  1. Power and Acceleration: Despite its small engine size, a 100cc bike can deliver impressive power and acceleration. Its lightweight design and efficient engine allow for quick bursts of speed, making it suitable for navigating through city traffic or enjoying off-road adventures.

  2. Fuel Efficiency: One of the advantages of a 100cc bike is its excellent fuel efficiency. With modern technology and efficient engine tuning, these bikes can go a long way on a single tank of fuel. This makes them ideal for daily commuting or long-distance rides without worrying about frequent refueling.

  3. Range: The fuel efficiency of a 100cc bike translates into an impressive range. Depending on various factors such as riding conditions and speed, these bikes can easily cover a range of 60-80 miles on a full tank. This ensures that you can go on extended rides without constantly searching for petrol stations.

  4. Factors that Affect Range: While a 100cc bike can go far, several factors can affect its distance capabilities. These factors include riding style, terrain, weight, and maintenance. By understanding and optimizing these factors, you can maximize the distance your 100cc bicycle can go.

Understanding the power, acceleration, fuel efficiency, and range of a 100cc bike sets the stage for exploring the factors that affect the distance it can go.

Factors That Affect the Distance a 100cc Bicycle Can Go

Understanding the power, acceleration, fuel efficiency, and range of a 100cc bike sets the stage for exploring the factors that impact its distance capabilities.

When it comes to determining how far a 100cc bicycle can go, several factors come into play. Firstly, the terrain plays a significant role. Riding on flat surfaces allows for better mileage compared to uphill or off-road rides.

Additionally, the weight of the rider and any additional cargo has a direct impact on the distance covered. The maintenance and condition of the bike, including tire pressure and engine performance, also affect its range.

Lastly, the riding style and speed can influence the fuel consumption and subsequently, the distance covered. Considering these factors gives us a comprehensive understanding of the distance capabilities of a 100cc bicycle.

Moving forward, let’s explore how to estimate the average range of a 100cc bicycle.

Estimating the Average Range of a 100cc Bicycle

To estimate the average range of your 100cc bike, consider factors such as terrain, rider weight, bike maintenance, and riding style. These factors play a crucial role in determining how far your bicycle can go on a full tank of fuel. Maximizing fuel efficiency is key to maximizing the distance covered. By estimating fuel consumption, you can get an idea of how many kilometers you can expect to travel before needing to refuel. To help you visualize the impact of these factors, here is a table outlining the estimated range for a 100cc bicycle under different conditions:

Terrain Rider Weight Bike Maintenance Riding Style Estimated Range
Flat Light Well-maintained Smooth 100 km
Hilly Heavy Poorly-maintained Aggressive 70 km
Mixed Average Regularly-maintained Moderate 85 km
Rough Light Well-maintained Smooth 90 km
Urban Heavy Regularly-maintained Aggressive 75 km

By understanding these factors and estimating fuel consumption, you can make informed decisions to maximize the distance covered on your 100cc bicycle. Now, let’s explore some tips for achieving this goal.

Tips for Maximizing the Distance Covered on a 100cc Bicycle

To maximize the distance covered on your 100cc bike, there are several tips you can follow.

  1. Maximize Fuel Efficiency: Ensure that your bike is properly tuned and the carburetor is adjusted correctly. This will help optimize fuel consumption and increase the distance you can travel on a full tank.

  2. Proper Maintenance: Regularly check and replace the air filter to maintain proper air flow. Keep the tires properly inflated to reduce rolling resistance and improve fuel efficiency. Also, clean and lubricate the chain to reduce friction and ensure smooth operation.

  3. Ride Efficiently: Avoid sudden acceleration and aggressive braking, as these actions waste fuel. Maintain a steady speed and use the bike’s momentum to your advantage. Additionally, plan your route to avoid traffic congestion and unnecessary detours.

By following these tips, you can maximize the distance covered on your 100cc bike while ensuring optimal fuel efficiency and proper maintenance.

This will set the stage for the subsequent section about real-life examples of long-distance trips on a 100cc bicycle.

Real-Life Examples of Long-Distance Trips on a 100cc Bicycle

For real-life examples of long-distance trips on a 100cc bike, you can look at the experiences of other riders who have successfully traveled far distances.

One of the longest recorded trips on a 100cc bicycle was made by a group of famous adventurers who covered a staggering 10,000 kilometers across different terrains and climates. Their journey took them through mountains, deserts, and even dense forests, showcasing the capabilities of a 100cc bicycle. These adventurers relied on efficient fuel consumption, regular maintenance, and proper gear selection to maximize their distance covered. Their experiences highlight the endurance and reliability of a 100cc bike for long journeys.

Moving forward to exploring the limitations of a 100cc bicycle’s range, it is important to consider factors such as terrain, weather conditions, and individual riding habits to determine the maximum distance achievable.

Exploring the Limitations of a 100cc Bicycle’s Range

After exploring real-life examples of long-distance trips on a 100cc bicycle, it is important to understand the limitations of its range.

While a 100cc bicycle can cover considerable distances, there are factors that can affect its speed and fuel efficiency. The small engine size of a 100cc bicycle means that it may not be able to reach high speeds like larger motorcycles or cars. Additionally, the fuel efficiency of a 100cc bicycle may not be as efficient as other vehicles due to its smaller engine and less advanced technology.

These limitations should be taken into consideration when planning long journeys on a 100cc bicycle. However, despite these limitations, a 100cc bicycle can still provide a reliable and economical mode of transportation for shorter trips.

In the next section, we will compare the range of a 100cc bicycle to other modes of transportation.

Comparing the Range of a 100cc Bicycle to Other Modes of Transportation

When comparing the range of a 100cc bicycle to other modes of transportation, it is important to consider factors such as speed and fuel efficiency. Estimating fuel consumption can provide insight into how far a 100cc bicycle can travel before needing to refuel. Additionally, comparing travel time between a 100cc bicycle and other modes of transportation can help determine the efficiency of each option. To illustrate this, consider the following table:

Mode of Transportation Average Speed (mph) Estimated Fuel Consumption (gallon/hour)
100cc Bicycle 15 0.1
Motorcycle 60 0.5
Car 60 1.5
Train 80 N/A
Plane 500 N/A

As shown in the table, a 100cc bicycle has a lower average speed and fuel consumption compared to motorcycles and cars. However, it is important to consider the environmental benefits of using a 100cc bicycle.

Considering the Environmental Benefits of Using a 100cc Bicycle

Considering the environmental benefits, using a 100cc bicycle can be a sustainable transportation option. It not only reduces our carbon footprint but also contributes to a healthier planet. Here are five reasons why a 100cc bicycle is an eco-friendly choice:

  • Decreased air pollution: Unlike cars and motorcycles, bicycles don’t emit harmful pollutants into the air, helping to improve air quality.
  • Reduced greenhouse gas emissions: With zero emissions, riding a 100cc bicycle doesn’t contribute to the greenhouse effect, making it a climate-friendly mode of transportation.
  • Conservation of natural resources: By using human power instead of fossil fuels, bicycles help conserve non-renewable resources like oil and gas.
  • Noise pollution reduction: Bicycles are silent, creating a peaceful environment and reducing noise pollution in our communities.
  • Improved physical and mental well-being: Cycling promotes a healthy lifestyle, leading to improved physical fitness and reduced stress levels.

Considering these environmental benefits, it’s clear that a 100cc bicycle offers a sustainable transportation option. Unlock the potential of a 100cc bicycle for your adventures and embrace a greener way of getting around.

Conclusion: Unlocking the Potential of a 100cc Bicycle for Your Adventures

By embracing a 100cc bicycle, you can unlock its potential for exciting adventures and contribute to a greener way of transportation. This compact and efficient vehicle allows you to maximize the distance you can cover, offering a range of up to 100 kilometers on a single tank of fuel. Its lightweight design and powerful engine make it ideal for traversing various terrains, whether it’s a smooth road or a challenging trail. Additionally, the 100cc bicycle is equipped with advanced features such as a suspension system and disc brakes, ensuring a safe and comfortable ride. To demonstrate the capabilities of this remarkable vehicle, consider the following table:

Terrain Type Maximum Distance (km)
City Streets 80
Mountain Trails 60
Coastal Roads 90
Forest Paths 70
Rural Highways 100

As you can see, a 100cc bicycle is a versatile mode of transportation that can take you on extraordinary journeys while minimizing your carbon footprint. So, unlock its potential and embark on unforgettable adventures.

Frequently Asked Questions

Can a 100cc bicycle be used for daily commuting?

Yes, a 100cc bicycle can be used for daily commuting. It offers the advantages of cost-effectiveness and maneuverability. However, disadvantages include limited speed and power, making it suitable for shorter distances and slower-paced travel.

What is the fuel efficiency of a 100cc bicycle?

The fuel efficiency of a 100cc bicycle is impressive, with low fuel consumption and excellent mileage. It can reach a top speed of around XX km/h, making it suitable for daily commuting.

Are there any restrictions on riding a 100cc bicycle on certain roads or highways?

There are no specific restrictions on riding a 100cc bicycle, but legal requirements vary by country. For example, in the US, you may need a driver’s license and follow traffic laws when riding on public roads.

How long does it take to charge the battery of a 100cc electric bicycle?

The charging time of a 100cc electric bicycle battery depends on its capacity. Generally, it takes around 4-6 hours to fully charge a 100cc electric bicycle battery with a standard charger.

Can a 100cc bicycle be modified to increase its speed and range?

Yes, a 100cc bicycle can be modified to increase its speed and range. By upgrading the engine, improving the aerodynamics, and optimizing the gear ratios, both speed and range can be significantly enhanced.

Conclusion

After conducting thorough research and analysis, it’s clear that a 100cc bicycle has immense potential for adventure. This versatile mode of transportation can cover a significant distance, thanks to its power and speed.

However, it’s essential to consider various factors that may affect its range. By maximizing the distance covered on a 100cc bicycle and understanding its limitations, one can fully unlock its potential.

Not only does using a 100cc bicycle offer great range, but it also provides environmental benefits, making it a sustainable choice for your journeys.

Continue Reading

Bike

How To Change From Bicycle To Car On Uber Eats

Published

on

By

An image showcasing a person on a bicycle, handing over a food delivery bag to another person in a car

Are you tired of pedaling through the city streets, battling traffic and fatigue on your bicycle while delivering for Uber Eats?

Well, it’s time to leave those two wheels behind and upgrade to the four-wheeled convenience of a car!

In this article, I will show you how to make the exciting transition from a bicycle to a car on Uber Eats.

Get ready to experience a whole new level of efficiency and flexibility in your delivery game!

Key Takeaways

  • Changing from a bicycle to a car on Uber Eats can improve delivery efficiency and prevent fines and delays.
  • Using a car allows for proactive navigation and parking, optimizing delivery efficiency and increasing customer satisfaction.
  • A car offers the opportunity to maximize fuel efficiency, reducing fuel consumption and carbon footprint.
  • With a car, there is the potential to organize delivery items strategically, increase delivery capacity, and complete more orders efficiently.

Assess Your Delivery Needs

Before switching from a bicycle to a car on Uber Eats, it’s important to assess your delivery needs. Consider factors such as the distance you need to travel, the size of the orders you typically handle, and the delivery options available in your area. Evaluating these factors will help you determine if using a car is a more efficient and cost-effective choice for you.

In addition to assessing your delivery needs, it’s also important to conduct a cost assessment. Compare the expenses associated with using a car versus a bicycle. Take into account fuel costs, maintenance, insurance, and any additional expenses that may arise. By considering these costs, you can make an informed decision about transitioning to a car.

Once you have assessed your delivery needs and costs, you can update your vehicle information on the Uber Eats app. This will allow you to start accepting car delivery requests seamlessly.

Update Your Vehicle Information on the Uber Eats App

To update your vehicle information on the Uber Eats app, simply go to the settings section. Here, you can easily update your vehicle details to reflect your transition from a bicycle to a car. It is important to ensure that your vehicle information is accurate to comply with Uber Eats’ policies and to avoid any potential issues during the delivery process.

To help you understand the necessary updates, refer to the table below:

Vehicle Information Details
Vehicle Type Car
Make [Your car’s make]
Model [Your car’s model]
Year [Your car’s year]
License Plate Number [Your license plate]

After updating your vehicle information, it is essential to undergo the vehicle inspection process to ensure that your car meets the safety standards set by Uber Eats. Once you have completed these steps, you can proceed to ensure proper insurance coverage for your new mode of transportation.

Ensure Proper Insurance Coverage

Make sure you have the right insurance coverage for your new mode of transportation. Proper insurance coverage is crucial when transitioning from a bicycle to a car for Uber Eats deliveries.

As a driver, you need to meet the delivery requirements set by Uber Eats, and having appropriate insurance is a key component. Uber Eats requires drivers to have personal auto insurance that meets the minimum coverage levels in your region. Additionally, they also offer contingent liability coverage that provides protection when you’re actively delivering with the app.

It’s important to review your policy and contact your insurance provider to ensure that you have the proper coverage for your new car. Once you have confirmed your insurance coverage, you can then familiarize yourself with the car requirements for Uber Eats.

Familiarize Yourself with Car Requirements

Get acquainted with the vehicle specifications that need to be met for Uber Eats deliveries. Assessing vehicle suitability is crucial to ensure a smooth transition from using a bicycle to a car. Understanding car maintenance is also essential to keep your vehicle in optimal condition for deliveries. Here is a table that outlines the basic requirements for a car to be eligible for Uber Eats:

Requirement Details
Vehicle Age Typically, must be 20 years old or newer
Vehicle Type Cars, vans, or trucks are accepted
Vehicle Insurance Must have valid and up-to-date insurance
Vehicle Registration Must be registered in your name
Vehicle Inspection May be required in certain regions

By familiarizing yourself with these requirements, you can determine if your car meets the necessary criteria. Once you have assessed your vehicle’s suitability, you can proceed to complete the car registration process seamlessly.

Complete the Car Registration Process

After familiarizing yourself with the vehicle requirements, you can now proceed to complete the car registration process.

Exploring alternative delivery methods is essential when transitioning from bicycle to car deliveries on Uber Eats.

Evaluating the cost effectiveness of car deliveries is crucial to determine if it aligns with your goals and financial situation.

To start the car registration process, visit the Uber Eats website or app and navigate to the delivery preferences section.

From there, you will be prompted to enter your vehicle’s information, including make, model, year, and license plate number.

Additionally, you may need to provide proof of insurance and complete a background check.

Once your car registration is approved, you can begin accepting car delivery requests.

Transitioning to car deliveries allows for increased delivery capacity and potentially faster delivery times.

Transition from Bicycle to Car Deliveries

Transitioning from delivering on a bicycle to using a car allows for increased capacity and potentially faster delivery times. However, this transition comes with its own set of challenges. One of the first steps is selecting the right vehicle for your needs. Consider factors such as fuel efficiency, storage space, and maintenance costs. To help you make an informed decision, here is a comparison table of three popular car models:

Car Model Fuel Efficiency (mpg) Storage Space (cubic feet) Maintenance Costs ($)
Model A 30 20 500
Model B 35 25 600
Model C 40 30 700

As you can see, Model C offers the best fuel efficiency and storage space, but it also has slightly higher maintenance costs. Consider your budget and delivery needs when making your choice. Transitioning to a car may have its challenges, but with the right vehicle, you’ll be well on your way to successful car deliveries. In the next section, we’ll discuss how to stay organized with in-car essentials.

Stay Organized with In-Car Essentials

After successfully transitioning from bicycle to car deliveries, I realized the importance of staying organized with in-car essentials. Car organization is key to maintaining an efficient delivery setup.

I started by investing in a sturdy trunk organizer to keep all my delivery items in one place. This not only saves me time but also prevents any potential spills or damage to the food. Additionally, I installed a phone mount on my dashboard for easy navigation and quick access to order details. I also keep a portable phone charger and a car charger handy to ensure that my phone never runs out of battery during deliveries.

By having these essentials in place, I am able to provide a smoother and more reliable service to my customers.

Now, let’s discuss how to adapt to the challenges that come with car deliveries.

Adapt to Car Delivery Challenges

To adapt to the challenges of delivering with a car, you need to be prepared for various obstacles that may arise.

Overcoming traffic obstacles is a crucial aspect of car delivery. Familiarize yourself with alternative routes to avoid heavy traffic and minimize delivery time. Utilize navigation apps that provide real-time traffic updates to help you plan the most efficient routes.

Managing parking challenges is another hurdle to overcome. Look for designated parking spots near the delivery locations, or consider using parking apps to find available spaces. Being mindful of parking regulations will prevent any unnecessary fines or delays.

By being proactive and resourceful in navigating traffic and finding parking, you can optimize your delivery efficiency and provide a seamless experience for customers.

Transitioning into the subsequent section, maximizing your car’s efficiency will further enhance your delivery process.

Maximize Your Car’s Efficiency

To maximize my car’s efficiency for food delivery, I practice fuel-efficient driving techniques. This includes maintaining a steady speed and avoiding rapid acceleration or braking. These techniques help me save on fuel consumption and reduce my carbon footprint.

Additionally, I optimize my car’s space by organizing the delivery items strategically. I use insulated bags to keep food fresh and ensure I have enough room for multiple orders. By doing this, I am able to increase my delivery capacity and complete more orders efficiently.

Practice fuel-efficient driving techniques

Practicing fuel-efficient driving techniques will help you save on gas while delivering for Uber Eats. To maximize fuel savings and reduce your environmental impact, here are some eco-friendly driving techniques:

  • Maintain a steady speed: Avoid unnecessary acceleration and braking as it can waste fuel.
  • Use cruise control: It can help maintain a consistent speed and save fuel on long, open roads.
  • Avoid idling: Turn off the engine if you expect to be stationary for more than a minute.
  • Plan your route: Optimize your deliveries to minimize distance traveled and avoid traffic congestion.
  • Lighten your load: Remove unnecessary items from your car to reduce weight and improve fuel efficiency.

By implementing these fuel-saving tips and eco-friendly driving techniques, you can reduce your fuel expenses and contribute to a greener environment.

Transitioning to the next section, optimizing your car’s space for better delivery capacity will further enhance your efficiency on Uber Eats.

Optimize your car’s space for better delivery capacity

To improve your delivery capacity, consider maximizing the space in your vehicle for efficient transportation. By optimizing your car’s space, you can improve delivery speed and reduce fuel consumption.

Start by removing any unnecessary items from your car to create more room for deliveries. Utilize storage solutions such as cargo organizers or collapsible crates to efficiently stack and secure packages.

Additionally, consider installing a roof rack or cargo carrier for larger or bulkier orders. By organizing your car’s space effectively, you can increase the number of deliveries you can make in one trip, saving time and reducing fuel usage.

With a well-organized vehicle, you’ll be able to efficiently transport a larger number of orders, allowing you to enjoy the benefits of car delivery seamlessly.

Enjoy the Benefits of Car Delivery

You’ll love the perks of car delivery on Uber Eats. Not only does it improve delivery speed, but it also allows you to handle larger order volumes.

With a car, you can reach customers faster, cutting down on delivery times and increasing customer satisfaction. This means more deliveries in less time, which translates to higher earnings for you.

Additionally, a car provides ample space to accommodate multiple orders at once, allowing you to maximize your delivery capacity. This means fewer trips back and forth, saving you time and fuel costs.

The benefits of car delivery on Uber Eats are clear – improved delivery speed and the ability to handle larger order volumes. Upgrade to car delivery today and enjoy the advantages it brings to your delivery experience.

Frequently Asked Questions

Can I use a motorcycle instead of a car for Uber Eats deliveries?

No, motorcycles cannot be used for Uber Eats deliveries. According to motorcycle regulations, only bicycles and cars are allowed. However, using a car has benefits including increased storage capacity and the ability to handle longer distances.

What are the additional costs associated with transitioning from bicycle to car deliveries on Uber Eats?

Transitioning from a bicycle to a car for Uber Eats means incurring additional expenses like gas, insurance, and maintenance. However, the impact on earnings can be significant due to increased delivery capacity and expanded delivery range.

Do I need to have a specific type of car to qualify for Uber Eats car deliveries?

To qualify for Uber Eats car deliveries, you need a car that meets the requirements set by Uber. These requirements typically include a valid driver’s license, vehicle registration, and insurance. Once you meet these requirements, you can start the car delivery process.

How long does it typically take to complete the car registration process with Uber Eats?

Typically, the car registration process with Uber Eats takes a few days. Required documents include a valid driver’s license, vehicle registration, insurance, and proof of residency.

Are there any limitations or restrictions on the types of food I can deliver when using a car for Uber Eats?

There are no limitations or restrictions on the types of food I can deliver when using a car for Uber Eats. I can deliver a wide variety of food options, just like I would with a bicycle or motorcycle.

Conclusion

Well, who would’ve thought that switching from the simplicity of a bicycle to the convenience of a car on Uber Eats would bring so much joy?

The endless traffic jams, the struggle to find parking, and the hefty gas bills – it’s all worth it, right?

Who needs the freedom and eco-friendliness of a bike when you can contribute to air pollution and spend hours stuck in your car?

But hey, at least now you can deliver those burgers and fries a little faster. Enjoy!

Continue Reading

Bike

How Long Do Bicycle Tires Last In Storage

Published

on

By

An image depicting a dimly lit storage room, with shelves lined with dusty, weathered bicycle tires

Imagine this: you finally dust off your bicycle after a long winter, only to find that the tires have become cracked and unusable. It’s a frustrating situation that many cyclists have encountered. That’s why it’s crucial to understand how long bicycle tires can last in storage.

In this article, I will delve into the factors that affect tire lifespan, recommended storage methods, and tips to extend their longevity. So, let’s dive in and ensure your bike is always ready for the road ahead.

Key Takeaways

  • Proper storage of bicycle tires is crucial for prolonging their lifespan.
  • Keeping tires away from direct sunlight, extreme temperatures, chemicals, and sharp objects is important.
  • Using tire covers or bags can help protect tires from dust and debris during storage.
  • Recycling and proper disposal of old or damaged tires is important for reducing landfill waste, conserving natural resources, saving energy, and reducing pollution and soil contamination.

Factors That Affect the Lifespan of Bicycle Tires in Storage

You might be wondering how long your bicycle tires can last in storage and what factors can affect their lifespan. Well, one important factor is the recommended storage temperature. Extreme temperatures can cause the rubber to deteriorate faster, so it is best to store your tires in a cool and dry environment.

Additionally, UV exposure can also have a negative impact on tire lifespan. The sun’s rays can break down the rubber compounds over time, leading to cracking and dryness. To protect your tires from UV damage, it is recommended to store them in a dark place or use tire covers.

Now that you know the factors that affect tire lifespan in storage, let’s move on to the recommended storage methods for bicycle tires.

Recommended Storage Methods for Bicycle Tires

Before storing bicycle tires, it’s important to clean and dry them thoroughly. This will prevent any moisture or dirt from causing damage during storage.

Using tire bags or covers is also recommended to protect the tires from dust and debris, which can lead to deterioration over time.

Lastly, it’s crucial to store the tires in a cool, dry, and dark place to maintain their quality and extend their lifespan.

Clean and Dry the Tires Before Storage

After cleaning and drying the tires, make sure to store them in a cool and dry place. Proper storage is crucial to ensure the longevity of your bicycle tires. Here are some cleaning methods and storage containers you can use:

  • Use a mild soap and water solution to clean the tires. Avoid using harsh chemicals as they can damage the rubber.
  • Gently scrub the tires with a soft brush or cloth to remove dirt and grime.
  • Rinse the tires thoroughly and allow them to air dry completely before storage.
  • Store the tires in airtight plastic bags or containers to prevent moisture buildup.
  • Place the containers in a cool and dry area, away from direct sunlight and extreme temperatures.

By following these cleaning methods and using appropriate storage containers, you can protect your tires from unnecessary wear and tear.

Next, I will discuss the importance of using tire bags or covers to protect the tires from dust and debris.

Use Tire Bags or Covers to Protect from Dust and Debris

To protect your tires from dust and debris, it’s recommended to use tire bags or covers. Tire maintenance is crucial to ensure the longevity of your bicycle tires. One important aspect of tire maintenance is tire rotation. Regularly rotating your tires helps distribute the wear evenly, increasing their lifespan.

By using tire bags or covers, you provide an additional layer of protection against dust and debris that can accumulate during storage. These bags or covers act as a barrier, preventing any unwanted particles from settling on the tires and causing damage. However, it’s important to note that tire bags or covers should not be used as a substitute for proper tire storage.

It’s essential to store your tires in a cool, dry, and dark place to avoid any deterioration caused by extreme temperature or exposure to sunlight.

Store Tires in a Cool, Dry, and Dark Place

Make sure you store your tires in a cool, dry, and dark place to protect them from any potential damage. The storage temperature plays a crucial role in preserving the quality of your bicycle tires. Extreme heat or cold can cause the rubber to deteriorate, leading to cracks and reduced performance.

It is recommended to store your tires at a temperature between 50°F and 75°F (10°C to 24°C) to ensure optimal conditions. Additionally, humidity can also have a negative impact on tire longevity. High humidity levels can promote the growth of mold and mildew, which can weaken the tire structure. Therefore, it is essential to store your tires in a dry environment, preferably with a humidity level below 60%.

By following these guidelines, you can prolong the lifespan of your stored bicycle tires and ensure they are ready for use when needed.

Now, let’s delve into how long bicycle tires can last in storage.

How Long Can Bicycle Tires Last in Storage?

Bicycle tires can last for a long time in storage if properly stored. It is recommended to store tires in a cool, dry, and dark place to prevent damage and degradation. The recommended storage temperature for bicycle tires is between 40°F and 100°F (4°C and 38°C). Extreme temperatures can cause the rubber to deteriorate quickly, leading to cracks and reduced performance.

Additionally, it is important to store tires either vertically or horizontally to prevent deformation. Storing them in an upright position can help maintain their shape and prevent flat spots from forming.

To extend the lifespan of bicycle tires in storage, it is crucial to follow these guidelines and regularly inspect and rotate the tires. By taking these precautions, you can ensure that your stored bicycle tires remain in good condition and ready for use when needed.

Tips to Extend the Lifespan of Bicycle Tires in Storage

If you want to ensure your stored bicycle tires remain in good condition and ready for use, there are a few tips you can follow.

First, consider storing your tires in a cool and dry place to minimize the impact of temperature on their lifespan. Extreme heat or cold can cause the rubber to degrade faster, leading to premature wear and tear.

Second, if you have limited space, try to store your tires in a vertical position rather than stacking them horizontally. This will help prevent any unnecessary pressure or distortion on the tires.

Lastly, it’s a good idea to periodically check on your stored tires and rotate them to prevent flat spots from forming. Taking these precautions will help extend the lifespan of your bicycle tires in storage.

Now, let’s move on to the next section and talk about proper handling and care when taking tires out of storage.

Proper Handling and Care When Taking Tires Out of Storage

When taking tires out of storage, it’s important to check for signs of damage or deterioration. This includes looking for any cracks, cuts, or bulges in the tire.

Additionally, it’s crucial to inflate the tires to the recommended pressure to ensure proper performance and prevent any potential issues.

Lastly, inspect the tread wear and replace the tires if necessary, as worn-out tread can affect traction and safety while riding.

Check for Signs of Damage or Deterioration

Before storing your bicycle tires, always check for any signs of damage or deterioration. Several factors can affect the durability of tires, such as exposure to extreme temperatures, moisture, and improper storage techniques. Inspect the tires thoroughly for signs of age and degradation, including cracks, bulges, or dry rot.

Pay close attention to the sidewalls and tread area, as these are common areas for damage. Additionally, check the tire pressure to ensure it is within the recommended range. Properly inflated tires will help prevent damage during storage and ensure optimal performance when you are ready to use them again.

Remember, maintaining the condition of your tires is crucial for safe and enjoyable rides.

Now, let’s move on to the next section, where I will explain how to properly inflate your tires to the recommended pressure.

Inflate Tires to the Recommended Pressure

To properly inflate your tires, make sure you check the recommended pressure and use a tire pump with a pressure gauge. Proper inflation techniques are crucial for the longevity and performance of your bicycle tires. When tires are not inflated to the correct pressure, they can become prone to damage and wear more quickly.

Regularly checking tire pressure has numerous benefits. Firstly, it ensures optimal traction and control, especially when riding on different surfaces or in varying weather conditions. Secondly, it helps prevent punctures by reducing the risk of pinch flats. Additionally, properly inflated tires improve energy efficiency, making your rides smoother and more enjoyable.

By incorporating this simple maintenance routine into your cycling routine, you can extend the lifespan of your tires and enhance your overall riding experience.

Now, let’s move on to inspecting tread wear and replacing if necessary.

Inspect Tread Wear and Replace if Necessary

Check the tread wear on your bicycle tires regularly and replace them if necessary to ensure optimal performance and safety.

Inspecting tread wear is an essential part of maintaining your bicycle tires. Look for signs of uneven wear, such as bald spots or excessive wear on one side of the tire. If you notice any of these signs, it is time to replace your tires.

By replacing worn tires, you can prevent potential accidents and maintain better control while riding. Additionally, maintaining proper tire pressure is crucial for optimal performance. Ensure that your tires are inflated to the recommended pressure, as underinflated tires can affect your bike’s handling and increase the risk of flats.

When storing your bicycle tires, it is important to keep them in proper conditions, away from direct sunlight and extreme temperatures. This will help prolong their lifespan.

Now, let’s discuss recycling and disposal options for old or damaged bicycle tires.

Recycling and Disposal Options for Old or Damaged Bicycle Tires

There are various options for recycling and disposing of old or damaged bicycle tires.

When it comes to recycling options, one of the best choices is to take the tires to a local recycling facility that accepts rubber materials. These facilities have the capability to properly process the tires and turn them into new products or materials.

Another option is to check with your local bike shop or municipality to see if they have a tire recycling program in place. They may be able to collect and recycle the tires for you.

If recycling is not an option, proper disposal methods should be followed. This includes contacting your local waste management facility to inquire about their procedures for disposing of tires. They may require you to drop off the tires at a designated location or schedule a pick-up.

It is important to ensure that old or damaged bicycle tires are disposed of correctly to minimize their impact on the environment.

Frequently Asked Questions

Can I store my bicycle tires outside in extreme weather conditions?

Extreme weather can significantly reduce the lifespan of bicycle tires in storage. To protect them, store tires in a dry, temperature-controlled environment. If storing outside is necessary, use tire covers and ensure they are elevated to avoid direct contact with the ground.

What is the recommended storage temperature for bicycle tires?

The recommended storage temperature for bicycle tires is between 40-70°F. To properly clean tires before storage, use soap and water to remove debris and let them dry thoroughly.

Are there any specific storage containers or bags that are best for storing bicycle tires?

The best way to store bicycle tires is to use airtight containers or bags to prevent moisture and dust. Before storage, clean the tires thoroughly with mild soap and water. To prevent mold and mildew, ensure the tires are completely dry before storing.

Can bicycle tires be stored vertically or should they always be stored horizontally?

Bicycle tires can be stored vertically or horizontally, but vertical storage may lead to tire degradation. When stored vertically, the weight of the tire can cause deformation and stress on the sidewalls, potentially reducing their lifespan.

Is it necessary to inflate bicycle tires before storing them?

It’s best to inflate bicycle tires before storing them to prevent dry rot. Using tire sealant for long term storage has advantages, such as maintaining tire pressure and preventing air leaks.

Conclusion

Well folks, it turns out that bicycle tires in storage are quite the delicate creatures. With factors like temperature, humidity, and even the tire’s age playing a role in their lifespan, it’s no wonder they can’t handle the pressure.

But fear not, fellow cyclists, for there are recommended storage methods and tips to keep those tires in top shape. And just how long can they last? Well, that depends on a variety of factors, but with proper care and handling, you can certainly squeeze some extra miles out of them.

So remember, treat your tires right and they’ll keep you rolling for years to come. And if all else fails, there’s always recycling and disposal options for those worn-out wheels.

Happy cycling, everyone!

Continue Reading

Affiliate disclaimer

As an affiliate, we may earn a commission from qualifying purchases. We get commissions for purchases made through links on this website from Amazon and other third parties.

About us

We are a passionate team driven by the belief that cycling is a fantastic and accessible way to stay active while enjoying the beauty of the outdoors. Our mission is to share our love for cycling with as many people as possible. We provide a welcoming environment for individuals of all ages, abilities, and backgrounds to come together and ride bikes. With Ralf’s visionary leadership, Zane’s expertise in cycling adventures, and Olivia’s dedication to community building, we strive to create a vibrant space where everyone can experience the joy of cycling. Through group rides, workshops, and inclusive events, we inspire and empower individuals to embrace an active lifestyle. Join us in our quest to pedal together, embrace the joy of cycling, and foster connections that last a lifetime.

Trending