As a keen bike rider, nothing grinds your gears like a busted tire. That hiss of air escaping a hole can really deflate your spirits. But don’t sweat it, the trusty bike pump swoops in to rescue your ride!
In this article, I will delve into the technicalities of how a bicycle pump actually works, from the basic components to the inflation process, and even maintenance and troubleshooting tips.
At its core, a bicycle pump is a simple device that compresses air into a tire or inner tube. But the process by which this happens is actually quite complex. By understanding the different types of valves, the mechanics of air compression, and the nuances of the inflation process, you can become a more informed and confident cyclist.
So let’s dive into the world of bicycle pumps and discover what makes them tick.
Key Takeaways
- Bicycle pumps have three main components: hose, valve, and handle for pumping.
- There are two main types of valves used on bicycle tires: Presta valve and Schrader valve.
- The inflation process involves attaching the pump, checking the pressure gauge, and pumping until the recommended pressure level is reached.
- Regular maintenance and troubleshooting are essential for safe riding, as leaks and worn-out parts can be common issues with bike pumps.
Basic Components of a Bicycle Pump
The basic components of a bicycle pump include a hose, a valve, and a handle for pumping. The pump structure houses the piston mechanism, which is responsible for compressing the air inside the pump.
When the handle is pulled up, the piston moves upwards, creating a vacuum that draws air into the pump through the hose. When the handle is pushed down, the piston moves downwards, compressing the air and pushing it out of the pump through the valve and into the tire.
It’s important to note that the valve on the pump must match the valve on the tire for the pump to work effectively. There are two main types of valves used on bicycle tires: the Presta valve and the Schrader valve. The Presta valve is thinner and requires a smaller hole in the rim, while the Schrader valve is thicker and requires a larger hole.
Understanding the basic components of the pump and the proper valve type to use is crucial in ensuring that air is effectively compressed into the tire.
Moving on to how air is compressed, the piston mechanism works by creating pressure, which is what compresses the air.
How Air is Compressed
When air is squeezed into a smaller space, it becomes pressurized like a crowded elevator, with less room for the molecules to move around. This is known as adiabatic compression, where the temperature of the air increases due to the compression process. Boyle’s law states that the pressure of a gas is inversely proportional to its volume, meaning that as the volume of the air decreases inside the pump, the pressure of the air increases. In order to compress the air, the bicycle pump uses a piston that moves up and down inside a cylinder, creating a vacuum that draws air into the pump. When the piston is pushed down, it compresses the air and forces it out through the valve and into the tire.
To better understand the science behind adiabatic compression and Boyle’s law, let’s take a look at the following table:
| Pressure (P) | Volume (V) | Temperature (T) |
|---|---|---|
| High | Low | Low |
| Low | High | High |
As you can see, when the pressure of the air increases, the volume decreases and the temperature rises. Conversely, when the pressure decreases, the volume increases and the temperature drops. Understanding these concepts is crucial in comprehending how a bicycle pump works. Next, we will discuss the different types of valves commonly found on bicycle pumps.
Different Types of Valves
I’ll discuss the different types of valves used in bicycles, specifically the Schrader valve and the Presta valve.
The Schrader valve is commonly used in lower-end bicycles and is similar to the valve found in car tires.
On the other hand, the Presta valve is typically found in higher-end bicycles and is longer and narrower than the Schrader valve.
Schrader Valve
To operate the Schrader valve on a bicycle pump, simply attach the nozzle and push down to release the air. The Schrader valve is a popular type of valve found on most standard bicycles. It has a simple and durable design, making it ideal for everyday use.
Here is a table outlining the pros and cons of the Schrader valve, as well as how to properly inflate it:
| Pros | Cons | How to Properly Inflate |
|---|---|---|
| Commonly found on most bicycles | Not as efficient as other valves | Attach the nozzle and push down to release air |
| Durable and long-lasting | Heavier than other valves | Check the recommended PSI for your tire and use a pressure gauge |
| Easy to use and requires minimal maintenance | Not compatible with all pumps | Inflate the tire in small increments, checking the pressure frequently |
| Less prone to leaking air | Requires a cap to prevent debris from entering the valve | Replace the cap after inflating the tire |
Next, we will explore the Presta valve and its unique characteristics.
Presta Valve
The Presta valve, with its sleek design and narrow profile, is like the sports car of bike valves. It is commonly found on higher-end bicycles and is gaining popularity due to its advantages over the Schrader valve.
One of the main advantages of the Presta valve is its compatibility with narrow rims, which makes it a go-to choice for road bikes, mountain bikes, and other types of bicycles with narrow rims. Additionally, the Presta valve has a smaller diameter than the Schrader valve, which means that it requires a smaller hole in the rim. This allows for a stronger rim and reduces the risk of a flat tire caused by a puncture near the valve hole.
Despite its advantages, the Presta valve can present some compatibility issues, particularly when it comes to inflating the tire. Unlike the Schrader valve, which can be inflated with a standard car tire pump, the Presta valve requires a pump with a smaller head that can fit into the valve’s narrow profile. This can be a challenge for riders who don’t have a compatible pump or for those who need to inflate their tires on the go. However, with the right pump, the Presta valve can be inflated quickly and easily, providing a reliable and efficient inflation process.
Inflation Process
When you push down on the handle of a bicycle pump, air is forced into the valve and fills up the tire. The inflation process involves several steps to ensure that the tire is filled to the recommended pressure.
First, you need to attach the pump to the valve, making sure that it’s securely fastened. Then, you should check the pressure gauge to see if the tire needs more air or if it’s already inflated to the desired level.
As you start pumping, you’ll notice that the pressure gauge reading increases, indicating that the tire is being filled with air. The pumping speed should be consistent, with a steady rhythm, to ensure that the tire is inflated evenly.
Once you’ve reached the recommended pressure level, you can stop pumping and disconnect the pump from the valve. It’s important to note that over-inflating the tire can be dangerous, as it can cause the tire to burst. Therefore, it’s essential to check the pressure gauge regularly and fill the tire to the recommended level.
In order to maintain your bicycle pump and troubleshoot any issues, you need to be familiar with its parts and functions. By cleaning and lubricating the pump regularly, you can ensure that it works efficiently and lasts longer.
If you encounter any problems, such as a leaky valve or a broken handle, you can refer to the manufacturer’s instructions or seek professional help. With proper maintenance and care, your bicycle pump can be a reliable tool for inflating your tires.
Maintenance and Troubleshooting
Maintaining and troubleshooting your bike pump is essential for ensuring a smooth and safe ride. With a little regular TLC, you can keep your pump in top condition for years to come. Here are four tips to help you maintain your bike pump and troubleshoot common issues:
-
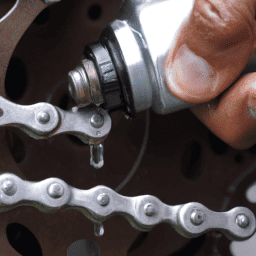
Oil lubrication – Regular oil lubrication is essential for keeping your pump functioning effectively. Apply a few drops of oil to the moving parts of your pump, including the plunger and valve, to ensure they stay lubricated and move smoothly.
-
Check for leaks – Leaks are a common issue with bike pumps, and they can be caused by a range of factors, including damaged seals and worn-out valves. Check your pump for leaks regularly, and if you spot any, take steps to repair them promptly.
-
Replace worn parts – Over time, the parts of your bike pump can wear out, which can affect its performance. Check your pump regularly for signs of wear and tear, and replace any worn parts promptly.
-
Keep it clean – Dirt and debris can build up in your pump, affecting its performance over time. To keep your pump in top condition, make sure you clean it regularly, wiping down the outside and removing any dirt or debris from the inside.
By following these tips, you can keep your bike pump in top condition and troubleshoot common issues as they arise. With a little regular maintenance, you can ensure that your pump continues to work effectively, giving you a smooth and safe ride every time.
Frequently Asked Questions
How much air pressure should I put in my bike tires?
The optimal pressure for bike tires depends on factors such as your weight and the type of terrain you’ll be riding on. A general rule of thumb is 80-130 PSI for road bikes and 30-50 PSI for mountain bikes.
Can I use a bicycle pump to inflate other inflatable items?
Yes, I can use a bicycle pump for other inflatables. However, there are limitations. The pump may not have the necessary fittings or pressure range for certain items. It’s essential to check the manufacturer’s recommendations before inflating any object.
Why does my bicycle pump make a hissing noise when I remove it from the valve?
When I remove my bicycle pump from the valve, it makes a hissing noise. This is caused by air escaping from the valve. To prevent damage to the valve, I make sure to release the pressure before removing the pump.
What should I do if my bicycle pump is not inflating my tires properly?
If my bicycle pump is not inflating my tires properly, I would first check the valve connection and make sure it is secure. If that doesn’t work, I would perform pump maintenance, such as cleaning or replacing the pump head or hose.
Is it necessary to lubricate the pump’s moving parts?
It is essential to lubricate the pump’s moving parts regularly. Failure to do so can cause friction and wear, leading to decreased efficiency and potential damage to the pump. Lubrication ensures smooth operation and prolongs the pump’s lifespan.
Conclusion
To sum it up, a bicycle pump is an essential tool for every cyclist. It works by compressing air into the inner tube of the bicycle tire through a series of basic components. These components include the handle, cylinder, and valve. The process of air compression involves the displacement of air molecules, which are then forced into a smaller space, resulting in an increase in pressure.
There are different types of valves that can be used with a bicycle pump, including the Presta and Schrader valves. Understanding the type of valve your bicycle has is crucial to ensuring proper inflation. It’s also important to regularly maintain and troubleshoot your bicycle pump to ensure optimal performance and safety.
As the saying goes, "a stitch in time saves nine."By taking the time to understand how your bicycle pump works and properly maintaining it, you can avoid potential issues on your next ride and enjoy a smooth, worry-free experience.


