For anyone who cycles, a crucial ability to possess is the proper technique for inflating your bicycle tires. Operating your bike with tires that are not sufficiently inflated can result in reduced efficiency, greater rolling resistance, and a higher chance of experiencing a flat tire.
In this article, I will guide you through the steps of how to air up your bicycle tires correctly.
The first step to inflating your bicycle tires is to determine the proper tire pressure for your specific bike and riding conditions. This information can usually be found on the sidewall of your tire or in the owner’s manual.
Once you know the recommended tire pressure, it’s time to choose the right pump for the job. With the right pump and a little bit of know-how, you can easily keep your bike’s tires at the optimal pressure, ensuring a smoother and more efficient ride.
Key Takeaways
- Properly inflating bike tires is an important skill for cyclists to avoid decreased performance, increased rolling resistance, and risk of flat tires.
- Determining proper tire pressure is the first step, and it can be found on the tire sidewall or in the owner’s manual.
- Choosing the right pump is crucial as different valve types require specific pump heads.
- Properly inflated tires ensure a smoother ride, better handling, improved fuel efficiency, and longer tire life, while overinflated or underinflated tires can affect ride quality and safety.

50 Strong Sports Water Bottles 6-Pack – Reusable 22 oz BPA-Free Plastic Bottles with Pull Top Cap – Made in USA – Top Rack Dishwasher Safe – Fits Most Bike Cages Brand - Clear
- Capacity: 22 oz per bottle
- Material: BPA-Free polyethylene
- Dishwasher Safe: Top rack dishwasher safe
As an affiliate, we earn on qualifying purchases.
Determine the Proper Tire Pressure
You’ll want to figure out the right tire pressure for your bike, so you don’t end up with a flat tire halfway through your ride. The importance of proper tire pressure cannot be overstated.
If your tire pressure is too low, you’ll notice that your bike feels sluggish and hard to handle. On the other hand, if your tire pressure is too high, you’ll feel every bump in the road and your tires will wear out faster.
Low tire pressure can also lead to pinch flats, where the tire is pinched between the rim and an obstacle, causing a puncture. High tire pressure, on the other hand, can cause blowouts, which can be dangerous if you’re riding at high speeds.
By finding the proper tire pressure for your bike, you can ensure that you have a safe and enjoyable ride. Now that you know the importance of proper tire pressure, let’s move on to choosing the right pump.
Choose the Right Pump
When it comes to choosing the right pump for my bicycle tires, I always make sure to learn the valve type first. This is essential because there are different valve types, such as Presta and Schrader, and each requires a specific pump head.
Once I know the valve type, I select a pump with a compatible valve to ensure a proper and efficient inflation process.
Learn the Valve Type
Sure, you already know the difference between a Presta and Schrader valve like the back of your hand. But do you know the importance of valve maintenance? Here are three things you should keep in mind when it comes to valve maintenance and troubleshooting valve issues:
-
Check for leaks: Before inflating your tire, make sure your valve is not leaking air. If you hear air escaping, it might be time to replace the valve core.
-
Clean the valve: Dirt and debris can get stuck in the valve, preventing it from opening and closing properly. Use a clean cloth to wipe the valve before inflating your tire.
-
Don’t over-tighten: Over-tightening the valve can cause damage to the valve stem, making it difficult to inflate your tire. Tighten it just enough to prevent air from escaping.
Now that you know the importance of valve maintenance, it’s time to select a pump with a compatible valve.
Select a Pump with a Compatible Valve
To ensure proper inflation, it’s essential to choose a pump with a valve that matches the one on your bike’s inner tube. Valve compatibility considerations should be taken into account before purchasing a pump. There are three main valve types: Schrader, Presta, and Dunlop. Each valve type requires a specific pump head to properly inflate the tire.
Finding the right pump for your valve type can be confusing. However, this can be made easier by referring to a table that outlines the valve types and the corresponding pump head. See the table below for a breakdown of valve types and compatible pump heads. Once you have identified the correct pump head, you can move on to the next step of removing the valve cap and attaching the pump.
| Valve Type | Compatible Pump Head |
|---|---|
| Schrader | Dual head |
| Presta | Presta head |
| Dunlop | Dual head or Presta |
Before inflating your bicycle tire, it’s important to know which valve type your bike has and find a pump with a compatible pump head. Once you have identified the correct pump head, you can move on to the next step of removing the valve cap and attaching the pump.
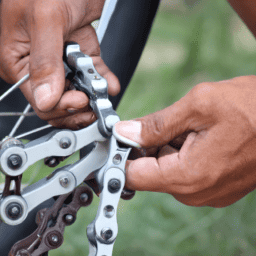
Remove the Valve Cap and Attach the Pump
First, you’ll want to unscrew the valve cap from your bicycle tire and securely attach the pump nozzle to the valve stem. It’s important to make sure that the pump nozzle fits snugly onto the valve stem to prevent any air leaks. If you’re having trouble attaching the pump nozzle, you may need to check the valve for any maintenance issues or troubleshoot any valve problems.
Valve maintenance is an important part of keeping your bicycle tires in good condition. If you notice any issues with your valve, such as air leaks or difficulty attaching the pump nozzle, it’s important to address them promptly.
Once you’ve securely attached the pump nozzle to the valve stem, you’re ready to move on to the next step: inflating the tire.
Inflate the Tire
After attaching the pump, I pump up the tire to the recommended pressure. It’s important to check the pressure with a gauge to ensure accuracy.
Overinflated or underinflated tires can affect the ride quality and safety of the bike.
So, I make sure to inflate the tire properly to avoid any mishaps.
Pump Up the Tire to the Recommended Pressure
You’ll want to make sure your tire is filled to the brim with air, like a balloon ready to burst. This is because the importance of tire pressure can’t be overstated.
Properly inflated tires ensure a smooth ride, better handling, improved fuel efficiency, and longer tire life. On the other hand, underinflated tires can lead to poor handling, reduced fuel efficiency, and even tire failure. Overinflated tires, on the other hand, can lead to a harsh ride and a higher risk of blowouts.
It’s crucial to find the right balance by inflating your tire to the recommended pressure. However, there are common mistakes while inflating your bicycle tire that you should avoid.
One of the most common mistakes is overinflating your tire. This can cause the tire to become too rigid, making it harder to control the bike and increasing the risk of punctures. Another mistake is underinflating the tire, which can lead to a sluggish ride and premature wear on the tire.
To avoid these mistakes, it’s essential to check the recommended pressure for your tire and use a gauge to ensure you reach the correct pressure. With that in mind, let’s move on to the next step of checking the pressure with a gauge.
Check the Pressure with a Gauge
After pumping up your bicycle tire to the recommended pressure, it’s important to check its accuracy using a pressure gauge. This will ensure that your tire is properly inflated and ready for your next ride. Simply pressing on the tire with your fingers won’t give you an accurate measurement, so investing in a gauge is a smart choice.
To check the pressure with a gauge, follow these steps:
- Remove the cap from the valve stem.
- Press the gauge onto the valve stem and hold it there firmly.
- Wait for the gauge to give you a reading.
- Compare the reading to the recommended pressure for your tire.
If the pressure is too low, use your pump to add more air until you reach the recommended pressure. If the pressure is too high, release some air until you reach the recommended pressure.
It’s also important to note that there are alternative pressure measurement methods, such as using a digital gauge or a pump with a built-in gauge. Regardless of the method you choose, checking the pressure accuracy is a crucial step in maintaining your bike’s safety and performance.
Now that you’ve checked the pressure accuracy of your tire, it’s time to finish up and get ready to ride.
Finish Up
Finally, pump up your bike tires until they feel firm, like a ripe piece of fruit ready to be picked. To do this, attach your pump to the valve and begin pumping. Keep an eye on the pressure gauge and stop pumping when you reach the desired pressure.
Remember to check the recommended pressure for your specific bike tire, which can usually be found on the sidewall of the tire. If you’re unsure, a general rule of thumb is to inflate a road bike tire to around 80-130 PSI and a mountain bike tire to around 30-50 PSI.
Once you’ve finished pumping up your bike tires, it’s important to store them properly to avoid any damage. Make sure to keep them in a dry, cool place away from direct sunlight, as heat and UV rays can cause the rubber to deteriorate over time. Additionally, avoid over-inflating your tires as this can cause them to blow out and always double-check that the valve is securely closed before storing your bike.
By following these tips for storing bike tires and avoiding common tire inflation mistakes, you can ensure that your bike tires will stay in good condition for many rides to come.
Frequently Asked Questions
Can I use any pump to inflate my bicycle tire?
When it comes to pump compatibility, it’s important to match the valve type on your bicycle tire to the pump head. Presta valves require a specific pump, while Schrader valves can use a wider variety. Always check your pump’s compatibility before inflating your tire.
How often should I check the tire pressure on my bicycle?
I recommend checking the tire pressure on my bicycle once a week. The recommended pressure is usually printed on the tire sidewall. Maintaining proper pressure ensures a smoother ride and reduces the risk of punctures.
What is the best way to store my bicycle pump?
Proper pump storage is key to maintaining its longevity. I recommend keeping it in a cool, dry place and avoiding extreme temperatures. Regular pump maintenance, such as cleaning and lubricating, will also extend its lifespan.
Can I overinflate my bicycle tire?
Overinflating a bicycle tire can cause it to burst, damage the rim, and make the ride uncomfortable. To prevent this, always check the recommended pressure and use a pressure gauge. If your tire is already overinflated, release air slowly until it reaches the appropriate pressure.
What should I do if the tire valve is damaged or clogged?
If my bike tire valve is damaged or clogged, I’ll need to repair or clear it. I can use a valve tool to remove debris or replace the valve entirely. It’s important to keep valves in good condition for proper air pressure and tire function.
Conclusion
So there you have it, folks – a quick and easy guide to airing up your bicycle tires. It may seem like a small task, but keeping your tires properly inflated can make all the difference in your cycling experience.
As you pump away at your tire, imagine yourself filling up a balloon with air, watching it grow larger and larger until it’s just the right size. The same principle applies to your bike tire – it needs just the right amount of air to perform at its best.
And just like a balloon, your tire can deflate over time, so make sure to check it regularly and pump it up as needed.
With a little bit of practice, you’ll be a pro at inflating your bike tires in no time. Happy cycling!