Connect with us

Electric Bike

How Long Do Electric Bike Motors Last?

Published

on

An image showcasing a close-up of an electric bike motor, highlighting its intricate components and wear over time

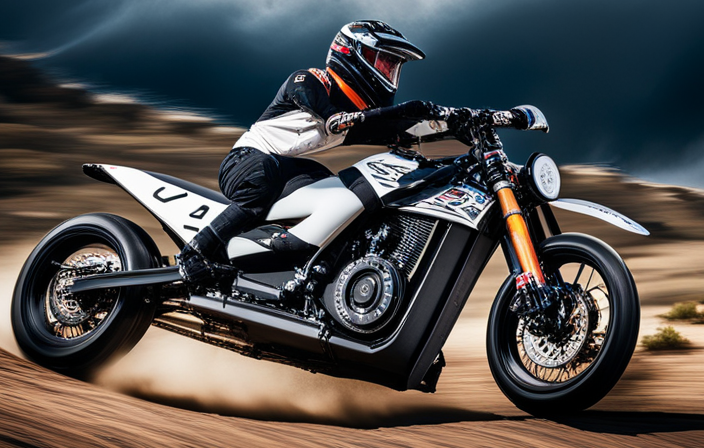
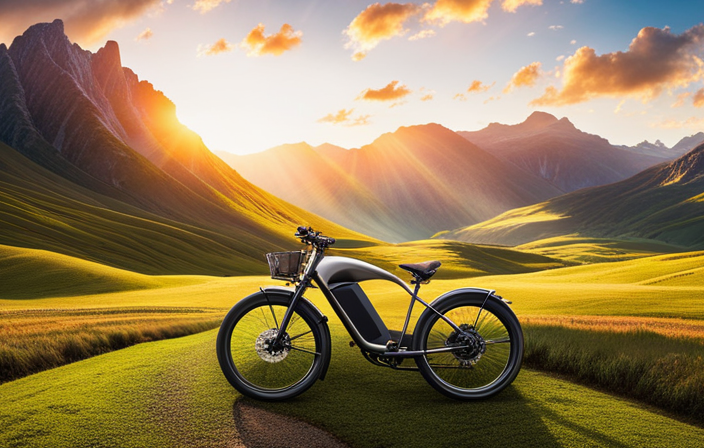
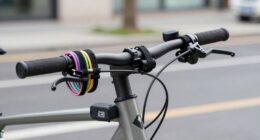
Prepare yourself for an adventure on the open road with the strength of an electric bicycle.

But before you embark on your two-wheeled adventure, it’s important to understand just how long those motors can last. Like the beating heart of your bike, these motors are the key to your smooth and effortless ride.

In this article, we’ll delve into the world of electric bike motors, exploring their average lifespan, factors that affect their longevity, and tips for keeping them going strong.

So buckle up and let’s rev up the engine of knowledge!

Key Takeaways

  • Electric bike motors have long-lasting durability, providing reliable and consistent performance.
  • These motors require less maintenance and repair costs, saving time and money in the long run.
  • Long-lasting motors are efficient for navigating hilly terrains and achieving high speeds, making them suitable for various biking adventures.
  • Investing in a long-lasting motor ensures a reliable and enjoyable biking experience for years to come, whether for commuting or leisure biking.

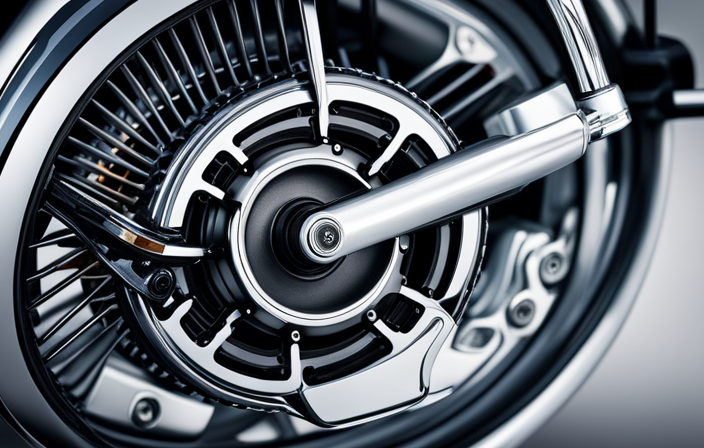
Understanding Electric Bike Motors

Advertisement

Electric bike motors typically last for several thousand miles of riding. Motor efficiency plays a crucial role in determining the lifespan of an electric bike motor. Higher efficiency motors tend to have a longer lifespan as they generate less heat and put less strain on the internal components.

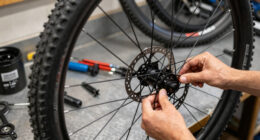
Regular motor maintenance is also essential to prolong its lifespan. This includes keeping the motor clean and ensuring proper lubrication of its moving parts. Additionally, checking and tightening any loose connections or bolts can help prevent unnecessary wear and tear.

Factors such as rider weight, terrain, and riding style can also affect the lifespan of the motor. By considering motor efficiency and performing regular maintenance, you can extend the lifespan of your electric bike motor and enjoy many miles of smooth and reliable riding.

Factors Affecting Motor Lifespan

To maximize the lifespan of your electric bike motor, it’s important to consider various factors. Proper motor maintenance plays a crucial role in ensuring its longevity. Regularly cleaning and lubricating the motor can prevent dust and debris from causing damage. Additionally, you should check the motor’s connections and wiring for any signs of wear or corrosion.

It’s also important to avoid overloading the motor by carrying excessive weight or constantly riding at maximum speed. Common motor issues include overheating, which can be caused by prolonged use without breaks or riding in extreme weather conditions. By addressing these factors and performing regular maintenance, you can significantly extend the lifespan of your electric bike motor.

Advertisement

Transitioning into the subsequent section about the average lifespan of electric bike motors, it’s important to note that understanding these factors will give you a better idea of how long your motor is likely to last.

Average Lifespan of Electric Bike Motors

On average, electric bike motors have a lifespan that can be extended with proper maintenance and consideration of various factors. Taking care of your electric bike motor is crucial to ensure its longevity. Here are four important factors to keep in mind:

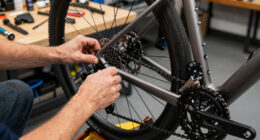
  1. Regular maintenance: Like any other mechanical device, electric bike motors require regular maintenance. This includes cleaning, lubricating, and inspecting the motor components.

  2. Avoiding overheating: Overheating can significantly reduce the lifespan of an electric bike motor. Make sure to monitor the motor temperature and avoid extended periods of high power usage.

  3. Battery care: The battery is an integral part of the electric bike motor system. Properly maintaining and charging the battery can help prolong the motor’s lifespan.

  4. Recognizing signs of wear: Keep an eye out for any unusual noises, vibrations, or decreased performance. These may be signs of motor wear that need to be addressed promptly.

By following these maintenance practices, you can significantly extend the lifespan of your electric bike motor.

Advertisement

Now, let’s move on to some tips for further increasing its longevity.

Tips for Extending Motor Lifespan

One way to increase the lifespan of your e-bike motor is by implementing proper maintenance practices. Regular maintenance is essential to ensure that your motor operates at its optimal performance level.

First, make sure to keep your motor clean and free from debris, as dirt and grime can cause damage over time. Additionally, regularly inspect the motor for any signs of wear or damage, such as frayed wires or loose connections. If you notice any issues, address them promptly to avoid further damage.

Troubleshooting common motor issues, such as unusual noises or decreased power output, can also help extend the motor’s lifespan. By following these maintenance tips and promptly addressing any issues, you can enjoy your e-bike motor for an extended period of time.

Moving forward, let’s discuss the next section about replacing electric bike motors.

Advertisement

Replacing Electric Bike Motors

If you find that your electric bike motor is no longer performing as it should, there are a few key points to consider when it comes to replacing it.

Firstly, you should consider motor replacement when your current motor is beyond repair or the cost of repairing it outweighs the cost of a new motor.

Secondly, cost considerations should be taken into account, as replacing an electric bike motor can be a significant investment.

Advertisement

Lastly, if you are looking to upgrade to a more powerful motor for increased speed or better performance, motor replacement can be a great option.

When to consider motor replacement

When to consider replacing the motor in an electric bike is an important question to address. Proper motor maintenance is crucial to ensure the longevity of your electric bike. However, there may come a time when motor failure becomes inevitable. Here are some signs to look out for that indicate it may be time to replace your electric bike motor:

  • Decreased power output: If you notice a significant decline in the power and speed of your electric bike, it could be a sign of motor failure.
  • Unusual noises: Strange grinding or clunking sounds coming from the motor can indicate internal damage.
  • Overheating: If your motor is constantly overheating, it may be a sign of a malfunctioning component.
  • Frequent breakdowns: If your motor is constantly breaking down and requiring repairs, it may be more cost-effective to replace it.

Considering these signs, it is important to evaluate the cost considerations of motor replacement.

Cost considerations

To determine whether it’s financially feasible to replace the motor in your electric bike, you should take into account the cost of the new motor and the potential savings from avoiding frequent repairs.

Electric bike motor maintenance plays a crucial role in determining its lifespan. It is important to understand that the quality of the motor greatly impacts its durability. A well-maintained high-quality motor can last up to 10,000 miles or more, while a lower-quality motor might only last half as long.

Regularly cleaning and lubricating the motor, as well as keeping it protected from harsh weather conditions, can significantly extend its lifespan. By investing in a reliable, high-quality motor and properly maintaining it, you can avoid the hassle and expenses of frequent repairs.

Advertisement

This will also allow you to consider upgrading to a more powerful motor for enhanced performance and increased range.

Upgrading to a more powerful motor

Upgrading to a more powerful motor can enhance performance and increase range on your electric bike. When considering an upgrade, it is important to take motor maintenance into account. A more powerful motor may require additional maintenance to ensure optimal performance and longevity.

Regular maintenance tasks such as lubricating the motor and inspecting the wiring connections should be performed to keep the motor running smoothly. Additionally, choosing the right motor for your specific needs is crucial. Factors such as terrain, weight, and desired speed should be considered when selecting a more powerful motor. It is recommended to consult with experts or do thorough research to find the motor that best suits your requirements.

By upgrading to a more powerful motor and properly maintaining it, you can enjoy improved performance and extended range on your electric bike.

This leads us to the subsequent section, discussing the benefits of long-lasting electric bike motors.

Advertisement

Benefits of Long-lasting Electric Bike Motors

You’ll love the benefits of electric bike motors that last a long time.

One of the key advantages of long-lasting electric bike motors is their durability. These motors are built to withstand the test of time, allowing you to enjoy your electric bike for years to come without worrying about motor failure. The durability of these motors ensures a reliable and consistent performance, whether you’re commuting to work or going on long rides.

Additionally, a long-lasting motor means less maintenance and repair costs in the long run, saving you time and money. You can trust that your electric bike will continue to provide efficient power, allowing you to effortlessly navigate hilly terrains or cruise along at high speeds.

Invest in an electric bike with a motor that lasts, and experience the many benefits it brings to your biking adventures.

Frequently Asked Questions

Are electric bike motors covered under warranty?

Yes, electric bike motors are commonly covered under warranty. This provides protection against any potential issues that may arise with the motor. Common issues with electric bike motors include overheating, motor failure, and electrical malfunctions.

Advertisement

Can I repair or replace individual components of an electric bike motor?

Yes, you can repair or replace individual components of an electric bike motor. This allows you to fix any specific issues that may arise, ensuring the motor continues to function optimally.

Are there any specific maintenance requirements for electric bike motors?

Maintaining electric bike motors involves best practices and avoiding common mistakes. Look out for common signs of motor wear and tear, such as unusual noises or decreased performance. Address these issues promptly to ensure optimal motor function.

How does the type of terrain affect the lifespan of electric bike motors?

Motor efficiency on different terrains varies due to factors like resistance and elevation changes. Steep inclines can put additional strain on the motor, potentially shortening its lifespan. Regular maintenance and proper usage can help mitigate these effects.

Can I upgrade the motor on my electric bike to improve performance or extend its lifespan?

Yes, you can upgrade the motor on your electric bike to improve performance and extend its lifespan. By upgrading the motor, you can enhance its power output, efficiency, and durability, resulting in better overall motor performance.

Conclusion

So there you have it, my friend! Electric bike motors are like the Energizer bunny on steroids – they just keep going and going!

Advertisement

With proper care and maintenance, these bad boys can last you a lifetime.

So go ahead and ride that electric bike with confidence, knowing that your trusty motor will never let you down.

And hey, if you ever need to replace it, don’t worry! There are plenty of long-lasting options out there.

Keep on riding, and may your electric bike motor continue to defy the laws of time!

Advertisement

Olivia's writing is not only informative but also inspiring. She has a knack for telling stories that capture the essence of cycling and the joy it brings to people's lives. Her writing has been praised by readers and industry experts alike for its clarity, depth, and authenticity. In addition to her writing, Olivia is also an avid cyclist. She enjoys exploring new trails and routes and has participated in several cycling events and races. Her first-hand experience with cycling gives her a unique perspective on the sport, reflected in her writing. Overall, Olivia is a talented writer passionate about cycling and dedicated to producing high-quality content for FlatironBike. Her contributions to the magazine have helped make it a go-to source for cycling enthusiasts worldwide.

Continue Reading
Advertisement

Electric Bike

How To Turn Your Bike Into An Electric Generator

Published

on

By

An image of a bicycle with a modified rear wheel, equipped with a compact electric motor

I’m here to reveal how you can turn your regular bicycle into an amazing electric generator, just like a pedal-powered dynamo.

In this technical guide, we’ll delve into the intricacies of harnessing human power to produce electricity.

With a step-by-step approach, we’ll explore the tools, materials, and techniques needed to successfully convert your bike into a reliable source of energy.

So, fasten your helmet, grab your wrench, and let’s embark on this electrifying journey together.

Key Takeaways

  • Regularly clean the generator to remove dust and debris.
  • Check and recharge the battery as needed.
  • Lubricate moving parts to reduce friction.
  • Inspect tires, brakes, and other components for good condition.

Understanding the Basics of Bike-Powered Generators

Advertisement

Now you’re going to learn the basics of how to turn your bike into an electric generator. Bike-powered generators are a great way to generate electricity using human power.

One of the main applications of bike-powered generators is bike-powered lighting. With a bike-powered generator, you can power up your lights by simply pedaling your bike. This is a fantastic alternative to conventional lighting methods, especially in areas where electricity is scarce or during outdoor activities such as camping.

There are several advantages of bike-powered generators, including their portability, low cost, and environmental friendliness. By converting your bike into an electric generator, you not only generate electricity but also get a good workout.

To get started, you’ll need to gather the necessary tools and materials for the project.

Gather the Necessary Tools and Materials

First, gather all the tools and materials you’ll need for this project. To turn your bike into an electric generator, you will need a few specific tools. These include a wrench set, screwdrivers, pliers, wire strippers, and a multimeter to test electrical connections.

Advertisement

Additionally, you will require some essential materials such as a generator hub, a 12-volt DC motor, a bike stand or trainer, a battery, a voltage regulator, and various electrical connectors and wires.

It is crucial to ensure that you have all the necessary tools and materials before starting the project to prevent any delays or complications. Once you have gathered everything, you can move on to choosing the right bike for your generator project, taking into consideration factors like frame strength and stability.

Choose the Right Bike for Your Generator Project

When choosing the appropriate bicycle for your generator project, consider factors such as frame strength and stability. Here are four key considerations to keep in mind:

Advertisement
  1. Electric Bike Compatibility: Ensure that your bike is compatible with an electric bike conversion kit. This will make the process of turning it into an electric generator much easier and more efficient.

  2. Frame Material: Opt for a bike with a sturdy frame made of materials like steel or aluminum. These materials provide the necessary strength and stability to support the additional weight of the generator mechanism.

  3. Gear System: Look for a bike with a well-functioning gear system. This will allow you to adjust the resistance and speed of the generator, giving you more control over the generated electricity.

  4. Wheel Size: Consider the wheel size of the bike, as larger wheels tend to generate more power. However, keep in mind that larger wheels may also require more effort to pedal.

With these considerations in mind, you can select the right bike for your DIY generator project. Once you have the perfect bike, it’s time to move on to installing the generator mechanism onto your bike.

Install the Generator Mechanism onto Your Bike

To install the generator mechanism onto your bicycle, start by ensuring that the bike’s frame is sturdy and compatible with the electric conversion kit. This is crucial for a safe and efficient conversion process. Once you have confirmed compatibility, attach the generator to the rear wheel of your bike. Make sure it is securely fastened to prevent any wobbling or detachment during operation.

The benefits of using a bike powered generator for off-grid living are numerous. Not only does it provide a sustainable and renewable source of energy, but it also promotes physical fitness. To maximize energy output, maintain a steady pedaling rhythm and adjust the resistance level accordingly. Additionally, consider using high-quality batteries to store excess energy for later use.

With the generator mechanism successfully installed, it’s time to connect it to your devices and enjoy the power you have generated.

Connect the Generator to Your Device(s)

Advertisement

Now, it’s time for you to connect the generator to your devices and start enjoying the power you’ve generated.

To ensure a seamless charging experience, follow these steps:

  1. Determine your charging options: Assess the devices you wish to charge and their power requirements. Some common options include USB ports, DC power outlets, or AC power inverters.

  2. Connect your devices: Use the appropriate cables or adapters to connect your devices to the generator. Ensure a secure connection to avoid interruptions during the charging process.

  3. Manage the power: Consider using a power management system to regulate the charging process. This can help distribute the generated power efficiently and prevent overcharging or damaging your devices.

With your devices connected and power management in place, you are now ready to adjust the resistance and pedal to generate electricity. This will be discussed in the subsequent section.

Adjust the Resistance and Pedal to Generate Electricity

Adjusting the resistance and pedaling will allow you to generate electricity. By carefully manipulating these two variables, you can optimize the energy efficiency of your bike-turned-generator. There are several adjustment techniques you can employ to achieve maximum power output. First, adjust the resistance level on your generator to find the sweet spot where you can pedal comfortably while still generating a significant amount of electricity. This can be done using a 3×3 table to visually represent various resistance levels, pedal speed, and power output. Experiment with different combinations until you find the ideal setting that strikes a balance between effort and energy production. Additionally, pay attention to your pedaling technique. Maintaining a consistent and smooth pedal stroke will help maximize power generation. Once you have mastered the adjustment techniques, you can move on to the next step of monitoring and managing the power output without compromising your cycling experience.

Advertisement

Monitor and Manage the Power Output

Now that we have adjusted the resistance and pedal to generate electricity, it is important to monitor and manage the power output efficiently.

Power monitoring allows us to track the amount of electricity being produced by our bike-turned-generator. By keeping an eye on the power output, we can ensure that we are generating a consistent and optimal amount of electricity.

Additionally, energy management plays a crucial role in maximizing the efficiency of our electric generator. This involves finding the right balance between the power output and the energy consumed by the bike. By carefully managing the power output and energy consumption, we can ensure that our generator operates at its highest efficiency.

As we move into the next section about safety precautions and maintenance tips, it is essential to understand how to maintain and operate our electric generator safely.

Safety Precautions and Maintenance Tips

To ensure safe operation and proper maintenance, it is important to follow these safety precautions and maintenance tips.

Advertisement
  • Safety Measures:

  • Always wear protective gear, including a helmet and gloves, while operating the electric generator.

  • Keep the generator away from water or damp environments to prevent electrical shock.

  • Regularly inspect the bike’s wiring and connections for any signs of wear or damage.

  • Avoid overloading the generator by not exceeding its maximum power output capacity.

  • If any issues or abnormalities are noticed during operation, immediately turn off the generator and consult a professional.

  • Maintenance Tips:

  • Clean the generator regularly to remove dust and debris that can hinder its performance.

  • Check the battery level and recharge it as needed to maintain optimal power output.

  • Lubricate the moving parts of the generator to reduce friction and ensure smooth operation.

  • Periodically inspect the tires, brakes, and other bike components to ensure they are in good condition.

By following these maintenance tips and safety measures, you can ensure the safe and efficient operation of your electric generator. Now, let’s explore additional features and upgrades for your generator.

Explore Additional Features and Upgrades for Your Generator

You can enhance the capabilities of your electric generator by exploring additional features and upgrades. Here are some ideas to consider when looking to improve your bike-powered generator:

Feature/Upgrade Description Benefits
Adding a battery storage system Install a battery to store excess electricity generated Allows for power storage and use during low output
Exploring alternative power sources for the generator Incorporate solar panels or wind turbines Provides additional power sources for the generator

By adding a battery storage system, you can store excess electricity generated by your bike-powered generator. This allows you to use the stored power during periods of low output or when the bike is not in use. Additionally, exploring alternative power sources such as solar panels or wind turbines can provide additional sources of power for your generator. These upgrades expand the capabilities of your bike-powered generator, making it more versatile and reliable.

Now, let’s move on to the next section to learn about how to enjoy the benefits of bike-powered electricity.

Enjoy the Benefits of Bike-Powered Electricity

Experience the advantages of powering your devices with electricity generated by pedaling a bicycle. Bike-powered charging stations offer a sustainable and efficient alternative energy source for bikes.

Advertisement

Not only can you generate electricity while getting exercise, but you can also reduce your carbon footprint and save money on electricity bills. These charging stations typically consist of a stationary bike connected to a generator, which converts mechanical energy from pedaling into electrical energy.

The generated electricity can then be used to charge various devices such as smartphones, tablets, and even small appliances. By utilizing bike-powered electricity, you can have a reliable source of energy wherever you go, whether it’s during outdoor adventures, camping trips, or even in areas with limited access to power grids.

Embrace the benefits of bike-powered electricity and contribute to a greener and more sustainable future.

Frequently Asked Questions

Can I use any type of bike for this generator project?

Yes, the efficiency of generating electricity depends on the type of bike used. Certain types, like road bikes with lightweight frames and smooth tires, provide better efficiency compared to heavier and more rugged mountain bikes.

How much electricity can I generate with a bike-powered generator?

I’m amazed at how much electricity I can generate with my bike-powered generator! By calculating its energy efficiency, I found it produces a significant amount of power. I’m excited to explore its potential applications in various settings.

Advertisement

Can I connect multiple devices to the generator at the same time?

Yes, multiple devices can be connected to the generator, but there are power output limitations. The generator’s power output is determined by factors like the bike’s speed and the efficiency of the conversion system.

Is it possible to store the generated electricity for later use?

Yes, it is possible to store the electricity generated by a bike powered generator for later use. This opens up alternative uses for the stored electricity and hints at the future of energy storage with bike powered generators and their potential impact.

Are there any specific safety precautions I need to follow while using a bike-powered generator?

There are several safety tips to follow when using a bike-powered generator. Some common mistakes include not wearing protective gear, overloading the generator, and not properly securing the bike.

Conclusion

In conclusion, turning your bike into an electric generator is a fascinating and practical project that allows you to harness your own physical energy to generate electricity. By following the steps outlined in this article, you can create a sustainable and eco-friendly power source for your devices.

Did you know that a typical bike-powered generator can produce around 100 watts of electricity? This means that with just an hour of pedaling, you could charge your phone for up to 10 hours!

Advertisement

So, why not give it a try and experience the benefits of bike-powered electricity for yourself?

Continue Reading

Electric Bike

How To Turn Your Bicycle Into An Electric Bike

Published

on

By

An image showcasing a bicycle with a sleek conversion kit attached, displaying the step-by-step process of transforming it into an electric bike

Have you ever imagined smoothly ascending hills on your bike, with the wind blowing through your hair as you effortlessly conquer any type of terrain? If so, you can now turn that dream into reality!

In this article, I will show you how to turn your ordinary bicycle into an electrifying powerhouse. With the right conversion kit and a little know-how, you can transform your humble two-wheeler into a high-performance electric bike.

Get ready to embark on a thrilling journey of DIY ingenuity and experience the joy of riding like never before.

Key Takeaways

  • Install the electric system by securely attaching throttle and brake levers and connecting electric system wires to handlebar components.
  • Test and adjust the electric system by checking battery voltage, testing throttle and brakes, troubleshooting issues, and addressing problems before proceeding.
  • Ensure safety and legal compliance by familiarizing yourself with local regulations, making necessary modifications, adhering to safety gear requirements, and avoiding fines or legal issues.
  • Maintain and care for the electric bike by regularly checking and recharging the battery, keeping electric components clean and dry, storing the bike in a dry place, and maximizing battery lifespan by following proper charging tips.

Assess Your Bicycle’s Suitability for Conversion

Assess if your bicycle is suitable for conversion into an electric bike. Choosing the right conversion kit is crucial to ensure compatibility with your bicycle.

Advertisement

First, consider the type of bicycle you have. Electric bike conversion kits are typically designed for standard bicycles, such as road bikes, mountain bikes, or hybrid bikes.

Assessing the bicycle’s compatibility involves checking the frame, fork, and wheel sizes. Additionally, consider the weight capacity of the kit and ensure that it can support your weight and any additional cargo you may carry.

Take into account the installation process and determine if you have the necessary tools and skills.

Once you have assessed your bicycle’s suitability, you can proceed to choose the right electric bike conversion kit, which will be discussed in the subsequent section about choosing the right electric bike conversion kit.

Choose the Right Electric Bike Conversion Kit

Selecting the appropriate electric bike conversion kit is crucial. Electric bike conversion kits offer a convenient way to transform your regular bicycle into an electric-powered one. There are various benefits to converting your bicycle, such as increased speed and reduced effort while riding. However, it is important to consider the drawbacks as well, such as the added weight and the need for regular maintenance.

Advertisement

When choosing a conversion kit, it is essential to consider the motor and battery combination that best suits your needs. The motor should provide enough power to support your desired speed and terrain, while the battery should offer sufficient range for your intended rides. By carefully selecting the right components, you can ensure a successful electric bike conversion.

Now, let’s move on to gathering the necessary tools and equipment for the conversion process.

Gather the Necessary Tools and Equipment

To successfully convert your regular bicycle to an electric-powered one, you’ll need to gather the tools and equipment necessary for the process. Assessing compatibility is crucial to ensure that the conversion kit you choose will work seamlessly with your bicycle.

Advertisement

Common tools required for this conversion include a set of Allen wrenches, a socket wrench, pliers, and a screwdriver. Additionally, you will need a conversion kit that typically includes an electric motor, a battery pack, a controller, and a throttle. Troubleshooting common issues such as motor or battery malfunctions may require a multimeter to test electrical connections and diagnose any problems.

Once you have gathered all the necessary tools and equipment, you can move on to the next step of the conversion process: removing the bicycle’s front wheel and installing the electric motor.

Remove the Bicycle’s Front Wheel and Install the Electric Motor

Start by removing the front wheel of your bicycle and then proceed to install the electric motor. To install the electric motor, follow these steps:

  1. Place the motor bracket on the front fork of the bicycle and align it with the mounting holes.
  2. Insert the bolts through the bracket and secure them tightly with a wrench.
  3. Attach the electric motor to the bracket using the provided screws and ensure it is securely fastened.
  4. Connect the motor wires to the controller following the manufacturer’s instructions. Make sure to match the color-coded wires correctly.
  5. Next, wire the battery pack to the controller using the provided connectors. Double-check the wiring to ensure proper connections.
  6. Test the motor by turning on the battery pack and gently applying throttle.

Now that the electric motor is installed and wired, you can move on to the next step of installing the battery pack and controller.

Install the Battery Pack and Controller

Advertisement

To ensure optimal weight distribution, I positioned the battery pack in the center of the bicycle frame. This allows for a balanced and stable ride.

Next, I connected the controller to both the motor and the battery pack, establishing the crucial link between the two. This enables efficient communication and control over the electric system, ensuring a smooth and responsive performance.

Position the Battery Pack for Optimal Weight Distribution

Place the battery pack in a central location on your bicycle for balanced weight distribution. This is crucial to ensure optimal handling and stability when riding your electric bike.

By positioning the battery pack in the middle of the frame, you distribute the weight evenly between the front and rear wheels, allowing for better control and maneuverability. Avoid placing the battery too far forward or backward, as it can negatively affect the bike’s balance and overall performance.

Additionally, make sure the battery is securely fastened to the frame to prevent any movement or vibrations during rides.

Advertisement

Once you have positioned the battery pack correctly, you can proceed to connect the controller to the motor and battery, which will enable the electric assistance and power delivery.

Connect the Controller to the Motor and Battery

Now that you’ve positioned the battery pack correctly, you can easily connect the controller to the motor and battery. This step is crucial in turning your bicycle into an electric bike. Here are the steps to follow:

  • Start by identifying the wiring and connections on the controller. Refer to the manufacturer’s instructions for guidance.
  • Connect the wires from the motor to the appropriate terminals on the controller. Make sure to match the colors correctly.
  • Connect the wires from the battery to the corresponding terminals on the controller. Double-check the polarity to avoid any damage.
  • Secure the connections using zip ties or electrical tape to prevent any loose wires.
  • Finally, test the connections by turning on the system and checking if the motor responds accordingly.

In addition to connecting the controller, it’s important to consider the battery installation. Research different types of batteries and choose the one that suits your needs in terms of capacity and weight. Remember to regularly check the battery’s life and perform maintenance tasks to ensure optimal performance.

Now that the controller and battery are connected, let’s move on to the next step of connecting the electric system to the bicycle’s existing components.

Connect the Electric System to the Bicycle’s Existing Components

To connect the electric system to my bicycle’s existing components, I first attach the throttle and brake levers. This allows me to control the speed and apply the brakes effortlessly.

Next, I connect the electric system to the bicycle’s lighting and display, ensuring that I have clear visibility and can monitor the system’s performance.

Advertisement

These steps are crucial in transforming my bicycle into an electric bike and ensuring a seamless integration of the electric components with the existing ones.

Attach the Throttle and Brake Levers

Attach the throttle and brake levers by sliding them onto the handlebars.

To begin, install the throttle by locating the appropriate location on the handlebars and sliding it into place. Ensure that it is securely attached and aligned with your hand position for easy access while riding.

Next, attach the brake levers by removing the existing ones and replacing them with the electric brake levers. These levers will allow you to control both the electric motor and the brakes simultaneously. Make sure they are firmly in place and adjust them to your preferred position.

Once the throttle and brake levers are properly attached, you can move on to connecting the electric system to the bicycle’s lighting and display. This will provide you with a complete electric bike setup.

Advertisement

Connect the Electric System to the Bicycle’s Lighting and Display

Once the throttle and brake levers are securely attached, I can now connect the electric system to the bicycle’s lighting and display. This step involves connecting the wires from the electric system to the appropriate components on the handlebars. I will also need to choose the appropriate display type for my electric bike, which will allow me to monitor important information such as speed, battery level, and distance traveled.

To make it easier for you to understand, here is a table that shows the different wire connections and their corresponding components on the handlebars:

Wire Connection Component
Red Headlight
Black Taillight
Yellow Display
Green Brake
Blue Horn

Once the electric system is connected to the handlebars, I can move on to the next step of testing the electric system and making any necessary adjustments.

Test the Electric System and Make Adjustments

Now, it’s time to test the electric system and make any necessary adjustments.

Before hitting the road, it’s important to ensure that the installation is functioning properly. To begin, conduct a thorough testing procedure to confirm that all components are working as intended.

Advertisement

Start by checking the battery’s voltage and verifying that it is within the recommended range. Next, test the throttle and brakes to ensure they respond appropriately. If any issues arise, utilize troubleshooting techniques such as inspecting connections, checking for loose wires, or replacing faulty components. It’s crucial to address any problems before proceeding.

Once you’ve completed the necessary adjustments and are satisfied with the system’s functionality, you can move on to the next section, where you’ll ensure the safety and legal compliance of your electric bike.

Ensure the Safety and Legal Compliance of Your Electric Bike

To ensure the safety and legal compliance of your e-bike, it’s important to familiarize yourself with local regulations and make any necessary modifications.

Electric bike regulations vary from place to place, so it’s crucial to understand the specific requirements in your area. Some locations may have speed limits for electric bikes or restrict them from certain areas like sidewalks or bike paths. Additionally, there might be specific safety gear requirements such as helmets or reflective clothing. It is essential to adhere to these regulations to avoid fines or legal issues.

Once you have ensured that your electric bike meets all the necessary safety and legal requirements, you can move on to the next section about maintaining and caring for your electric bike.

Advertisement

Maintain and Care for Your Electric Bike

I need to regularly check and recharge the battery of my electric bike to ensure its optimal performance. This involves monitoring the battery level and charging it when necessary, following the manufacturer’s guidelines.

Additionally, I should keep the electric components of my bike clean and dry to prevent damage and ensure their longevity. This can be achieved by using a damp cloth to wipe away any dirt or debris and storing the bike in a dry place when not in use.

Regularly Check and Recharge the Battery

Make sure to regularly check and recharge the battery for your electric bike. Proper battery maintenance is crucial to ensure optimal performance and longevity. Here are some battery charging tips to keep in mind:

  • Always use the charger provided by the manufacturer to avoid any compatibility issues.
  • Charge the battery in a cool and well-ventilated area to prevent overheating.
  • Avoid charging the battery immediately after a ride to allow it to cool down.
  • Aim to keep the battery level between 20% and 80% for the best battery health.
  • If you’re storing the bike for an extended period, charge the battery to around 50% and store it in a cool, dry place.

By following these battery charging tips, you can maximize the lifespan of your electric bike’s battery.

Additionally, it’s important to keep the electric components clean and dry to ensure their proper functioning. Transitioning into the subsequent section, maintaining a clean and dry environment is essential for the overall longevity of your electric bike.

Keep the Electric Components Clean and Dry

Ensure that you regularly clean and keep the electric components of your bike dry for optimal performance and longevity. Proper electric component maintenance is crucial to prevent water damage and ensure that your electric bike functions seamlessly. Water can cause corrosion and short circuits, leading to costly repairs or even permanent damage.

Advertisement

To keep your electric components clean, use a dry cloth to wipe them down, removing any dirt or debris. Avoid using water or liquid cleaners as they can seep into sensitive areas. Additionally, make sure to store your electric bike in a dry location to prevent moisture accumulation.

By taking these simple precautions, you can enjoy your new electric bike and explore the possibilities it offers without worrying about water damage.

Enjoy Your New Electric Bike and Explore the Possibilities

Explore all the possibilities and enjoy your new electric bike to the fullest.

With your upgraded ride, you can now venture into exciting new electric bike trails and experience the many benefits of electric bike commuting.

Electric bikes provide a convenient and eco-friendly alternative to traditional modes of transportation. They allow you to effortlessly navigate through traffic, saving you time and reducing your carbon footprint.

Advertisement

Additionally, electric bikes offer a great way to explore the outdoors and connect with nature. Whether you’re commuting to work or embarking on a weekend adventure, your new electric bike opens up a world of opportunities.

So, hop on your bike, embrace the freedom it offers, and start discovering all the amazing experiences waiting for you.

Enjoy the ride!

Frequently Asked Questions

How long does it take to convert a bicycle into an electric bike?

On average, converting a bicycle into an electric bike takes a few hours. The necessary tools include a conversion kit, wrenches, pliers, and a screwdriver. The process involves attaching a motor, battery, and controller to the bike.

What is the average cost of an electric bike conversion kit?

The average cost of an electric bike conversion kit is around $500. However, it’s important to choose a reliable brand like Bafang or Voilamart for better performance and durability.

Advertisement

Can any bicycle be converted into an electric bike?

Not all bicycles can be converted into electric bikes due to limitations. Converting a bicycle into an electric bike has pros like increased speed and distance, but cons include added weight and potential damage to the frame.

Are there any weight limitations for installing an electric motor on a bicycle?

Are there weight limitations for installing an electric motor on a bicycle? What safety considerations should be taken into account? It is crucial to consider weight limitations and safety measures when adding an electric motor to a bicycle.

Do I need any special skills or knowledge to convert my bicycle into an electric bike?

No special skills or knowledge are required to convert your bicycle into an electric bike. However, some special tools and necessary components, such as an electric motor kit, battery, and controller, will be needed.

Conclusion

Well, there you have it – your very own electric bike! It may have taken some effort and a bit of tinkering, but the end result is worth it.

Just like the feeling of freedom when you first learned how to ride a bike, this new electric bike opens up a whole world of possibilities.

Advertisement

It’s like having a gentle tailwind at your back, propelling you forward effortlessly.

So hop on, explore the world around you, and let your electric bike become your trusty companion on all your adventures.

Continue Reading

Electric Bike

How To Turn On Electric Bike Light

Published

on

By

An image capturing a cyclist's hand reaching towards a sleek handlebar-mounted switch on an electric bike, delicately flipping it upward to illuminate the road ahead, as the glowing LED light pierces through the darkness

If you have ever had trouble navigating in low-light situations while riding your electric bike, do not worry! This article will show you how to turn on your electric bike light, so you can have a safe and well-lit ride.

We will explore the different types of electric bike lights, locate the light switch or button, and discuss the importance of keeping your light charged or equipped with fresh batteries.

So let’s get started and shed some light on this topic!

Key Takeaways

  • Prioritize safety by ensuring the electric bike light is turned on at all times for increased visibility.
  • Use hand signals in conjunction with the electric bike light to communicate intentions clearly and minimize accidents.
  • Be mindful of other road users and pedestrians, considering how the bike light may affect their vision and taking steps to prevent dangerous situations.
  • Conserve energy and extend battery life by turning off the electric bike light when not in use, but remember to turn it back on for low-light conditions.

Understand the Different Types of Electric Bike Lights

Electric bike lights come in various types, each with their own benefits and drawbacks. Understanding the differences between them is crucial when choosing the right electric bike light for your needs.

Advertisement

The most common types of electric bike lights are LED lights, halogen lights, and HID lights. LED lights are energy-efficient, provide good visibility, and have a long lifespan. Halogen lights are bright and affordable, but they consume more energy and have a shorter lifespan. HID lights are the brightest and have a longer lifespan, but they are more expensive and require a ballast to operate.

To choose the right electric bike light, consider factors such as brightness, battery life, and cost. Once you understand the different types, you can locate the light switch or button on your electric bike seamlessly, ensuring your safety while riding at night.

Locate the Light Switch or Button on Your Electric Bike

Find the switch or button on your e-bike that controls the light. This is an essential step in electric bike light maintenance and troubleshooting electric bike light issues. Once you locate the light switch or button, you can easily turn on or off the light whenever needed.

To grab your attention, here are two sub-lists to help you understand the importance of finding the light switch or button:

  • Proper visibility: A functioning light ensures that you can see clearly in low-light conditions, increasing your safety on the road.
  • Enhanced visibility: A bike light also helps others see you, reducing the risk of accidents and increasing your visibility to drivers.

Now that you know how crucial it is to find the light switch or button, let’s move on to the next step: ensuring your electric bike light is charged or has fresh batteries.

Ensure Your Electric Bike Light is Charged or Has Fresh Batteries

Advertisement

Make sure your e-bike light is fully charged or has new batteries. It is essential to have a properly functioning electric bike light to ensure your safety during low-light conditions.

To charge your electric bike light, follow these tips. First, check the manufacturer’s instructions to determine the charging method for your specific light. Some lights may require a USB cable, while others may need to be plugged directly into a power source. Make sure to use the correct charging cable and adapter.

If your electric bike light uses batteries, replace them with fresh ones. Troubleshoot common electric bike light issues by checking the connections, cleaning the contacts, and ensuring the switch is in the correct position.

By ensuring your electric bike light is charged or has fresh batteries, you can confidently turn on the light during low-light conditions and ride safely.

Advertisement

Turn on the Electric Bike Light During Low-Light Conditions

Ensure your e-bike light is on during low-light conditions for added safety. To maximize visibility, use reflectors on your bike and clothing. These reflective surfaces will make you more visible to others on the road.

Additionally, adjust the angle of your bike light to ensure optimal illumination. You want the light to shine directly ahead of you, without blinding oncoming traffic. This will help you see the road clearly and avoid any potential hazards.

Once your light is on and properly adjusted, you can use the light switch or button to adjust the brightness to your preference. This allows you to customize the amount of light emitted by your bike light, depending on the specific lighting conditions you encounter.

Use the Light Switch or Button to Adjust the Light’s Brightness

Advertisement

To adjust the brightness of the light, simply use the switch or button provided. Here’s a step-by-step guide on adjusting the brightness and troubleshooting light issues:

  1. Locate the light switch or button on your electric bike. It is usually found on the handlebars or near the display panel.

  2. Press the switch or button once to turn on the light. If the light doesn’t turn on, make sure the battery is fully charged and securely connected.

  3. To adjust the brightness, press and hold the switch or button. The light will cycle through different brightness levels, allowing you to choose the desired intensity.

  4. If you’re experiencing any issues with the light, such as flickering or dimming, try cleaning the contacts or replacing the battery.

Once you have adjusted the brightness, familiarize yourself with the light’s different modes (e.g., steady, flashing) to ensure you have the appropriate setting for your riding conditions.

Familiarize Yourself with the Light’s Different Modes (e.g., steady, flashing)

Once you’ve adjusted the brightness, get familiar with the different modes of the light, such as steady or flashing. The flashing modes are particularly useful during low light conditions or when you want to increase your visibility on the road. To switch between modes, simply press the mode button located on the light.

Each mode serves a specific purpose, so it’s important to understand their differences. The steady mode provides a constant source of light, ensuring that you can see the road ahead clearly. On the other hand, the flashing mode emits bursts of light, making you more noticeable to other road users.

By adjusting the brightness and exploring the different modes, you can tailor the light to suit your needs. Consider using additional lights for increased visibility, such as rear lights or reflective gear.

Advertisement

Consider Using Additional Lights for Increased Visibility

Consider using extra lights for better visibility, like rear lights or reflective gear. Adding additional light accessories to your electric bike can greatly enhance your safety on the road. These accessories come in various forms, such as clip-on lights that can be attached to your helmet or backpack, or wheel lights that provide a vibrant ring of light around your tires. By using these additional lights, you increase your visibility to other road users, especially in low light conditions or when riding in busy traffic. Not only do they make you more noticeable, but they also help you communicate your intentions to others, reducing the risk of accidents. Incorporating these extra lights into your biking routine ensures that you are taking every precaution to stay safe while on the road. Now, let’s move on to the next section about regularly checking and maintaining your electric bike light.

Regularly Check and Maintain Your Electric Bike Light

Now that you have considered using additional lights for increased visibility, it is important to regularly check and maintain your electric bike light to ensure it functions properly. By following these maintenance tips and troubleshooting guide, you can avoid any unexpected issues while riding at night.

Firstly, make sure to clean the light regularly with a soft cloth to remove any dirt or debris that may obscure the brightness.

Secondly, check the battery connection and replace the batteries if necessary. Additionally, inspect the wiring for any signs of damage and repair or replace it as needed.

Finally, test the light before each ride to ensure it is working correctly. By properly maintaining your electric bike light, you can ride with confidence knowing that you are visible to others on the road.

Advertisement

Moving on to the next section, let’s discuss how to use reflective gear and accessories to enhance visibility.

Use Reflective Gear and Accessories to Enhance Visibility

To enhance visibility, it’s important to utilize reflective gear and accessories. Wearing reflective clothing is an effective way to make yourself more visible to others on the road. Consider investing in a reflective vest, jacket, or even reflective tape that can be applied to your clothes or backpack.

Additionally, bike reflectors are a great way to increase visibility. Make sure your electric bike is equipped with front, rear, and wheel reflectors. These reflectors bounce off light to make you more noticeable to drivers, especially during low-light conditions.

By incorporating reflective gear and accessories into your biking routine, you can significantly reduce the risk of accidents.

Now, let’s move on to the next section and discuss the importance of following local laws and regulations regarding electric bike lights.

Advertisement

Follow Local Laws and Regulations Regarding Electric Bike Lights

Following local laws and regulations is crucial in ensuring that you have the proper lighting on your e-bike. To ensure you are in compliance, here are some important points to consider:

  • Check your local regulations: Different areas may have different laws regarding electric bike lights. It’s important to familiarize yourself with the specific requirements in your area.

  • Understand the specifications: Local laws may dictate the type of lights you need, such as white headlights, red taillights, or reflective materials. Make sure you understand these specifications and equip your e-bike accordingly.

  • Regularly maintain your lights: Keep your lights clean, functional, and properly aligned. Regularly check for any damage or malfunction and replace or repair as needed.

  • Be visible at all times: Turn on your electric bike lights whenever you ride, even during the day. This will increase your visibility to other road users and help prevent accidents.

By following local laws and regulations, you can ensure that your e-bike is properly equipped with the necessary lighting.

Now, let’s explore how to use the electric bike light in combination with hand signals.

Use the Electric Bike Light in Combination with Hand Signals

Using the e-bike light in conjunction with hand signals can enhance your visibility and communication with other road users. It is essential to use hand signals effectively when riding an electric bike to indicate your intentions to turn or stop. By extending your arm out to the side when making a turn, you can alert drivers and pedestrians of your planned movement.

Additionally, using the electric bike light simultaneously can greatly improve your visibility, especially in low light conditions or at night. Being visible on the road is crucial for your safety, as it allows other road users to anticipate your actions and adjust their driving accordingly.

Advertisement

By combining hand signals and the e-bike light, you can ensure that your intentions are clear and minimize the risk of accidents. It is important to be mindful of other road users and pedestrians, so always be vigilant and considerate while riding. This will help create a safer environment for everyone sharing the road.

Be Mindful of Other Road Users and Pedestrians

Be considerate of other road users and pedestrians while riding your e-bike. It is important to prioritize their safety and be mindful of their presence on the road. When using your electric bike light, it is crucial to be aware of how it may affect other road users. To illustrate, imagine you are riding your e-bike at night, and you encounter a pedestrian crossing the road. Without a well-functioning light, you might not be able to see them clearly, potentially leading to a dangerous situation. Similarly, it is essential to remember that your bike light can also affect the vision of drivers and other cyclists. By being considerate and using your electric bike light responsibly, you can ensure the safety of everyone on the road.

To continue conserving energy, remember to turn off the electric bike light when not in use.

Turn off the Electric Bike Light When Not in Use to Conserve Energy

When you’re not using it, remember to switch off your e-bike light to save energy. Conserving energy is important not only for the environment but also for extending the battery life of your electric bike. By turning off the light when it’s not needed, you can ensure that the battery power is reserved for other essential functions.

However, it is crucial to remember to turn the light back on when riding in low light conditions for your safety and visibility. Investing in a high-quality electric bike light is also recommended to ensure long-term durability and reliable performance. With a durable light, you can confidently ride in various lighting conditions, knowing that you have a reliable source of illumination.

Advertisement

Invest in a High-Quality Electric Bike Light for Long-Term Durability

To ensure long-term durability, it’s worth investing in a high-quality e-bike light. When it comes to riding at night or in low-light conditions, having a reliable light is crucial for both your safety and the safety of others on the road. By investing in a high-quality electric bike light, you can prioritize safety on the road and enjoy peace of mind knowing that you are visible to drivers and pedestrians.

When choosing a bike light, it’s important to consider factors such as brightness, battery life, and durability. Look for lights that have a high lumen output to ensure maximum visibility. Additionally, opt for lights with long-lasting batteries or the ability to recharge easily. Finally, choose a light that is built to withstand the elements and any potential impacts from riding.

By investing in a high-quality electric bike light, you can ride with confidence knowing that you are well-prepared for any low-light conditions. Practice safe riding habits and stay alert on the road to further enhance your safety.

Practice Safe Riding Habits and Stay Alert on the Road

Maintaining safe riding habits and staying alert on the road is essential for ensuring your own safety and that of others. As an electric bike rider, it is crucial to practice safe riding techniques to reduce the risk of accidents.

One way to do this is by maintaining visibility at all times. Here are three important tips to help you practice safe riding and maintain visibility:

Advertisement
  • Use your electric bike light: Make sure to turn on your electric bike light whenever you are riding, especially in low-light conditions or at night. This will not only help you see the road ahead but also make you more visible to other vehicles.

  • Wear reflective clothing: Invest in reflective clothing or accessories, such as a reflective vest or ankle bands. These will increase your visibility to drivers, especially when riding in dimly lit areas.

  • Follow traffic rules: Obey traffic laws, including traffic signals, stop signs, and speed limits. Always ride in the same direction as traffic and use hand signals to indicate your intentions.

By practicing safe riding habits and maintaining visibility, you can greatly reduce the risk of accidents and ensure a safer riding experience for yourself and others on the road.

Frequently Asked Questions

How do I adjust the brightness of my electric bike light?

To adjust the brightness of my electric bike light, I can start by checking if there are any troubleshooting issues like loose connections or dead batteries. Then, I can adjust the light angle using the provided knobs or screws for optimal brightness.

Are there different modes available for the electric bike light?

Did you know that the electric bike light has different color modes? Not only can you adjust the brightness, but you can also choose between different colors to suit your mood. Plus, it has a long battery life for extended use.

Should I use additional lights for better visibility?

Using reflectors is essential for better visibility on an electric bike. However, using additional bright lights can provide even more benefits. They increase your visibility to others on the road, reducing the risk of accidents and ensuring a safer ride.

How often should I check and maintain my electric bike light?

Maintaining my electric bike light is crucial for my safety. Regular checks and proper maintenance increase its longevity. I recommend inspecting it monthly for any damage or loose connections. Troubleshooting tips include checking the battery, wires, and switch functionality.

Advertisement

Are there any local laws or regulations regarding electric bike lights that I should be aware of?

I am aware of the local laws and regulations regarding electric bike lights. It is important to know these rules to ensure your safety and avoid any penalties.

Conclusion

So there you have it, folks! Turning on the electric bike light is a simple yet crucial step to ensure your safety on the road. By understanding the different types of lights, locating the switch or button, and keeping the light charged or with fresh batteries, you can ride with confidence even in low-light conditions.

Adjusting the brightness, being mindful of others, and conserving energy are all important factors to consider.

Lastly, investing in a high-quality light and practicing safe riding habits will guarantee a smooth and enjoyable journey.

Stay safe and happy riding!

Advertisement

Continue Reading
Advertisement

Affiliate disclaimer

As an affiliate, we may earn a commission from qualifying purchases. We get commissions for purchases made through links on this website from Amazon and other third parties.

About us

We are a passionate team driven by the belief that cycling is a fantastic and accessible way to stay active while enjoying the beauty of the outdoors. Our mission is to share our love for cycling with as many people as possible. We provide a welcoming environment for individuals of all ages, abilities, and backgrounds to come together and ride bikes. With Ralf’s visionary leadership, Zane’s expertise in cycling adventures, and Olivia’s dedication to community building, we strive to create a vibrant space where everyone can experience the joy of cycling. Through group rides, workshops, and inclusive events, we inspire and empower individuals to embrace an active lifestyle. Join us in our quest to pedal together, embrace the joy of cycling, and foster connections that last a lifetime.

Advertisement

Trending