Connect with us

Electric Bike

How Much Does An Electric Bike Kit Cos

Published

on

An image showcasing an electric bike kit with its components, including a sleek battery pack, a powerful motor, a digital display, and various cables neatly arranged on a workbench, highlighting the high-quality materials and craftsmanship

Imagine the wind in your hair, the thrill of the open road, and the eco-friendly freedom of an electric bike. Like a modern-day superhero, an electric bike kit can transform your ordinary bicycle into a powerful, motorized machine.

But before you embark on this electrifying adventure, you may be wondering, ‘How much does an electric bike kit cost?’ In this article, I will dive deep into the world of electric bike kits, exploring the different types, performance factors, additional features, and most importantly, the price range and budget considerations.

Get ready to ride into the future!

Key Takeaways

  • Electric bike kits can range in price from $200 to $1500 or more, with higher-priced kits offering advanced features and better quality.
  • Bafang is a well-known brand in the conversion industry and offers reliable and powerful electric bike kits typically costing around $500.
  • Swytch offers affordable electric bike kits that are easy to install, compatible with different bike types, and competitively priced.
  • E-BikeKit provides seamless and efficient transitions to electric bikes, allowing riders to effortlessly tackle hills and longer distances while enjoying the benefits of a smoother ride and reduced car travel.

Types of Electric Bike Kits

There are different types of electric bike kits available in the market. These kits are designed to convert regular bicycles into electric bikes. One important factor to consider when choosing an electric bike kit is compatibility. Make sure the kit you choose is compatible with your bike’s frame and components.

Advertisement

Electric bike kits offer several advantages. First, they provide an affordable alternative to buying a new electric bike. You can simply upgrade your existing bike with a kit. Second, electric bike kits allow you to customize your ride according to your preferences. You can choose the motor power, battery capacity, and other features that suit your needs.

Now, let’s move on to the next section about motor power and performance, where we will explore how these factors impact the overall performance of an electric bike.

Motor Power and Performance

You can find electric bike kits with different motor powers and performance levels. When comparing motor power, it is important to consider the wattage. Higher wattage motors tend to provide more power and better performance.

Performance testing methods can help you determine the capabilities of a particular electric bike kit. These tests typically measure factors such as acceleration, top speed, and climbing ability. It’s also worth noting that motor power alone doesn’t guarantee superior performance. Other factors like the weight of the rider and terrain can also affect the overall performance.

As we move on to discussing battery capacity and range, it’s important to consider how motor power and performance work in conjunction with these aspects.

Advertisement

Battery Capacity and Range

When comparing electric bike kits, it’s essential to consider the battery capacity and range. The battery capacity determines how long the bike can run on a single charge, while the range refers to the distance it can cover before needing to be recharged.

A higher battery capacity means a longer battery life and allows you to ride for longer periods without worrying about running out of power. Additionally, a greater range ensures that you can travel further without needing to stop and recharge.

It’s important to note that battery life and charging time can vary depending on factors such as terrain, rider weight, and speed. Considering these factors will help you determine the most suitable electric bike kit for your needs.

Moving on to additional features and accessories, you’ll find even more ways to customize your electric bike experience.
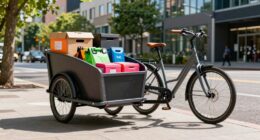
Additional Features and Accessories

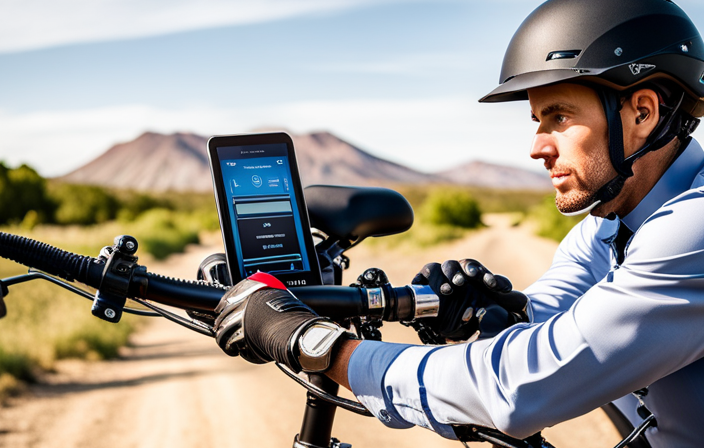
Consider adding additional features and accessories to enhance your electric biking experience.

Advertisement

There are a variety of options available to customize your electric bike kit. One popular accessory is a display panel that provides real-time information such as speed, battery level, and distance traveled. This allows you to easily monitor your ride and make necessary adjustments.

Another useful accessory is a rear rack, which provides a convenient place to carry items like groceries or a backpack. Additionally, you may want to invest in fenders to protect yourself from mud and water splashes.

There are also customization options available, such as different colors and designs for your bike frame. These additional accessories and customization options can make your electric biking experience more enjoyable and personalized.

Moving on to the next section about quality and brand reputation, it is important to consider these factors when choosing your electric bike kit.

Quality and Brand Reputation

Advertisement

To ensure a satisfying electric biking experience, it’s important to prioritize the quality and reputation of the brand you choose for your kit. When it comes to electric bike kits, there are numerous brands to choose from, each with their own unique features and customer satisfaction ratings. Reading electric bike kit reviews can provide valuable insights into the quality and reliability of a particular brand. Customers often share their experiences and opinions, giving you a better understanding of the product’s performance and durability. Additionally, considering the reputation of a brand is crucial. Established brands with a strong reputation for producing high-quality electric bike kits are generally a safer bet. Investing in a reputable brand can provide peace of mind and confidence in your purchase. Moving on to the next section about installation and maintenance, it’s essential to understand the steps required to ensure the longevity of your electric bike kit without compromising its performance.

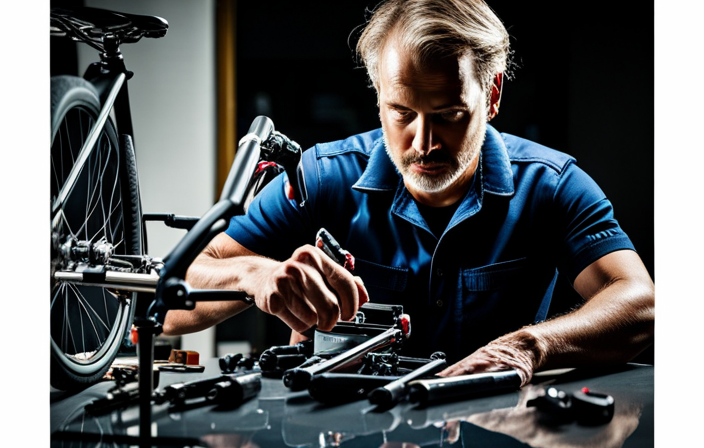
Installation and Maintenance

When it comes to installing and maintaining an electric bike kit, there are a few key points to consider.

First, you’ll need to decide whether to take the DIY route or seek professional help. If you choose to do it yourself, make sure you have the necessary tools and equipment, such as wrenches, screwdrivers, and a torque wrench.

Additionally, routine maintenance, like checking the battery and motor, as well as troubleshooting tips for common issues, will ensure your electric bike kit operates smoothly and efficiently.

Advertisement

DIY Installation vs. Professional Help

Installing an electric bike kit yourself can save money, but it may be easier to seek professional assistance. When deciding whether to go the DIY route or hire a professional, there are a few factors to consider:

  • DIY vs. Professional cost: DIY installation typically costs less as you won’t have to pay for labor. However, keep in mind that if you make any mistakes during the installation, it could end up costing you more in the long run to fix them.

  • Pros of DIY installation: DIY allows you to learn about your electric bike kit and gain valuable skills. You can customize the installation to your preferences and have a sense of accomplishment.

  • Cons of DIY installation: It can be time-consuming and require technical knowledge. If you don’t have experience with electrical systems or bike mechanics, it may be challenging.

  • Professional help: Hiring a professional ensures that the installation is done correctly and efficiently. They have the expertise and tools needed to handle any challenges that may arise.

  • Transition: Once you’ve decided between DIY and professional installation, the next step is to gather the necessary tools and equipment for the job.

Now let’s move on to discussing the tools and equipment needed for installing an electric bike kit.

Tools and Equipment Needed

The tools and equipment needed for installing an e-bike kit can vary depending on the specific kit and installation instructions. However, there are some common tools and equipment recommendations that can help make the installation process smoother.

Firstly, a set of basic hand tools such as screwdrivers, wrenches, and pliers is essential. Additionally, a torque wrench is recommended to ensure that all bolts are tightened to the correct specifications. It is also important to have a wire cutter/stripper and electrical tape for properly connecting the wires.

Common installation mistakes include not tightening bolts enough or over-tightening them, which can lead to damage or malfunctioning of the electric bike kit. It is crucial to carefully follow the installation instructions provided with the kit to avoid these mistakes.

Advertisement

Once the installation is complete, routine maintenance and troubleshooting tips can help ensure the optimal performance of the e-bike kit. [Transition sentence into the subsequent section about routine maintenance and troubleshooting tips.]

Routine Maintenance and Troubleshooting Tips

For optimal performance of the e-bike kit, it’s important to regularly maintain and troubleshoot any issues that may arise. Common troubleshooting issues with electric bike kits include motor malfunctions, battery problems, and electrical wiring faults.

To address these issues, it is recommended to first check the motor connections, ensuring they are secure and properly aligned. If the motor is still not functioning, checking the battery voltage and connections is crucial. Best practices for battery maintenance include charging the battery regularly, avoiding extreme temperatures, and storing it in a cool, dry place. Additionally, it is important to inspect the electrical wiring periodically for any signs of damage or loose connections.

By following these maintenance and troubleshooting tips, you can ensure the longevity and efficiency of your e-bike kit.

Now, let’s move on to price range and budget considerations.

Advertisement

Price Range and Budget Considerations

When looking to purchase an electric bike kit, it’s important to consider your budget and the price range that fits within it. Electric bike kits can vary in price depending on the brand, features, and quality. It’s always a good idea to do a price comparison to find the best budget options available.

Some electric bike kits can be as low as $200, while others can go up to $1500 or more. The price range you choose will depend on your specific needs and preferences. Keep in mind that higher priced kits often come with more advanced features and better quality components.

However, if you’re on a tight budget, there are still options available that offer good performance and reliability. Now, let’s move on to the next section where we’ll discuss the comparison of popular electric bike kit brands.

Comparison of Popular Electric Bike Kit Brands

When it comes to electric bike kits, there are several popular brands worth considering.

Bafang is known for its high-quality and powerful motors, making it a reliable choice for those looking for a boost in performance.

Advertisement

Swytch offers a unique and versatile kit that can be easily installed on any bike, making it a convenient option for those who want to convert their existing bike into an electric one.

E-BikeKit is another reputable brand that offers a range of kits with different power options, allowing users to customize their electric bike to their specific needs and preferences.

Overall, these brands provide reliable and efficient electric bike kits that can enhance your riding experience.

Bafang

The Bafang electric bike kit typically costs around $500.

Bafang is a well-known brand in the electric bike conversion industry, offering high-quality kits that are popular among enthusiasts.

Advertisement

Their kits include a motor, battery, controller, and display, providing everything you need to convert your regular bike into an electric one.

The Bafang kit is known for its reliability and performance, with a powerful motor that can easily assist you in your rides.

It offers different options in terms of motor power and battery capacity, allowing you to choose the one that best suits your needs.

The Bafang kit is also compatible with various bike types, ensuring a seamless installation process.

Moving on to the next brand, let’s talk about Swytch.

Advertisement

Swytch

If you’re looking for a convenient and affordable way to convert your regular bike into an electric one, you should definitely check out the Swytch conversion kit. Swytch offers one of the most affordable options when it comes to electric bike kits. Their kits provide a cost-effective solution for those who want to experience the benefits of an electric bike without breaking the bank.

Here are three reasons why the Swytch conversion kit is worth considering:

  1. Competitive Pricing: Swytch offers their kits at a fraction of the cost compared to other brands, making it a budget-friendly option for those on a tight budget.

  2. Easy Installation: The Swytch conversion kit is designed for easy installation, allowing even beginners to transform their regular bikes into electric ones with minimal effort.

  3. Versatile Compatibility: The Swytch kit is compatible with a wide range of bike types, including road bikes, mountain bikes, and folding bikes, providing flexibility and convenience for riders of all kinds.

With its affordable options and user-friendly features, the Swytch conversion kit is a great choice for anyone looking to enjoy the benefits of an electric bike.

Moving on to the next section about ‘e-bikekit’, let’s explore another option in the market.

E-BikeKit

E-BikeKit offers a range of options for converting regular bikes into electric ones. Their e bike conversion kits are designed to provide a seamless and efficient transition to an electric bike. These kits include everything you need to transform your bicycle into a powerful and eco-friendly mode of transportation.

Advertisement

One of the major benefits of electric bike kits is the ability to effortlessly tackle hills and longer distances with ease. The electric motor provides an extra boost, making your ride smoother and more enjoyable. Additionally, e bike kits are environmentally friendly, as they produce zero emissions and reduce the need for car travel.

With E-BikeKit, you can easily upgrade your bike and start reaping the benefits of electric biking. So, where can you buy these convenient electric bike kits?

Where to Buy Electric Bike Kits

Looking to buy an electric bike kit? Well, you’re in luck because there are several great options available. One popular choice is the E-BikeKit, which offers a range of high-quality electric bike kits to suit different needs and preferences.

When it comes to purchasing an electric bike kit, you have a few options to consider. Here are three places where you can buy electric bike kits:

  • Local bike shops: Many local bike shops now carry electric bike kits, allowing you to see and test them in person before making a purchase.
  • Online retailers: There are numerous online retailers specializing in electric bike kits, offering a wide range of options and competitive prices.
  • Manufacturer websites: Some electric bike kit manufacturers also sell their products directly on their websites, providing a convenient way to browse and purchase.

Using an electric bike kit has several advantages. It allows you to transform your existing bike into an electric one, saving you money compared to buying a new electric bike. Additionally, electric bike kits are generally easy to install and can provide a boost to your regular cycling, making hills and long distances more manageable.

In conclusion, there are various places where you can buy electric bike kits, including local bike shops, online retailers, and manufacturer websites. Exploring these options will help you find the perfect electric bike kit for your needs and enjoy the many benefits it brings.

Advertisement

Conclusion and Final Recommendations

In conclusion, exploring the various options available for purchasing electric bike kits will help you find the perfect one for your needs and enjoy all the benefits it offers.

When considering whether to opt for a DIY installation or professional installation, it is important to weigh the pros and cons. DIY installation may be more cost-effective, but it requires technical skills and knowledge of bike mechanics. On the other hand, professional installation ensures proper assembly and reduces the risk of errors.

Once your electric bike kit is installed, routine maintenance is crucial to keep it running smoothly. Regularly check the battery levels and ensure they are charged properly. Clean the bike regularly to prevent dirt and debris from affecting its performance. Additionally, inspect the brakes, tires, and chain for any signs of wear and tear.

Proper maintenance will extend the lifespan of your electric bike kit and ensure a safe and enjoyable riding experience.

Frequently Asked Questions

Are electric bike kits legal to use on public roads?

Yes, electric bike kits are legal to use on public roads as long as they comply with electric bike regulations. They offer benefits such as increased speed, extended range, and reduced effort required for pedaling.

Advertisement

Can an electric bike kit be installed on any type of bicycle?

Installing an electric bike kit on any bike is like giving it a turbo boost. It enhances compatibility and unlocks a world of benefits like increased speed, extended range, and effortless hill climbing.

How long does it take to install an electric bike kit?

Installing an electric bike kit typically takes around 2-4 hours, depending on your experience and the complexity of the kit. Basic tools like wrenches, screwdrivers, and pliers are usually needed for the installation process.

Are there any safety precautions or regulations to consider when using an electric bike kit?

When using an electric bike kit, it is important to follow safety measures such as wearing a helmet, using proper brakes, and obeying traffic laws. Additionally, check local legal requirements for speed limits and registration.

Can an electric bike kit be removed and used on another bicycle?

Yes, an electric bike kit can be removed from one bicycle and used on another. However, it is important to ensure compatibility with the different bike’s specifications and components before doing so.

Conclusion

In conclusion, after exploring the different types of electric bike kits, considering motor power and battery capacity, and weighing the importance of additional features and brand reputation, it is clear that the cost of an electric bike kit can vary significantly.

Advertisement

Prices can range from $500 to $3000, depending on the quality and functionality of the kit. It is essential to set a budget and carefully compare different brands to ensure you find the best value for your money.

Remember, investing in a reliable and reputable brand is crucial for a long-lasting and enjoyable electric biking experience.

Ralf is a devoted husband and father who loves spending time with his family. He enjoys riding his bicycle as much as possible, and takes every opportunity he can to get out on the open road. Ralf is a kind and gentle person who wants only the best for those around him.

Continue Reading
Advertisement

Electric Bike

How To Turn Your Bike Into Electric

Published

on

By

An image showcasing a step-by-step transformation of a traditional bicycle into an electric one

Have you ever wished for your bike to transform into an electric powerhouse, effortlessly gliding through the streets with a surge of power? Well, fellow cycling enthusiasts, get ready for your wildest dreams to come true!
[Translated into English (United States)]

In this article, I will guide you through the exhilarating process of turning your ordinary bike into an electrifying marvel. Get ready to embrace a whole new level of speed, convenience, and eco-friendly transportation as we delve into the intricate world of electric bike conversions.

Let’s get electrified!

Key Takeaways

  • Power Assist Integration and Regenerative Braking enhance bike’s range and efficiency
  • Accessories and Features transform regular bike into powerful electric ride
  • Maintenance is important for optimal bike performance and safety
  • Effortless Hill Climbing, Increased Speed, and Extended Range improve overall cycling experience

Assessing Your Bike’s Compatibility

You’ll need to assess if your bike is compatible for the conversion. Evaluating compatibility is crucial to ensure a successful electric bike transformation.

Advertisement

Start by identifying necessary modifications that may be required. First, examine the frame of your bike. It should be sturdy enough to support the added weight of the electric components. Check the spacing between the rear dropouts to confirm if it can accommodate the electric motor hub.

Next, evaluate the fork and make sure it has enough clearance for the front wheel motor or battery pack. Assess the brakes and determine if they are compatible with the increased speed and weight of the electric bike. Additionally, consider the drivetrain and gears, as they may need adjustments to handle the added power.

By thoroughly evaluating compatibility and identifying necessary modifications, you can proceed confidently with your bike-to-electric conversion project.

Choosing the Right Electric Conversion Kit

When selecting the appropriate electric conversion kit, it’s important to consider the specific features that best suit your needs. Here are four key factors to consider when comparing different types of electric conversion kits:

  1. Motor power: Different kits offer varying power outputs, ranging from 250 watts to 1000 watts. Consider your intended use and terrain to choose the right power level for optimal performance.

  2. Battery capacity: The capacity of the battery determines the range of your electric bike. Higher capacity batteries allow for longer rides but may also increase the weight of your bike.

  3. Controller system: The controller manages the flow of power from the battery to the motor. Look for a kit with a reliable and efficient controller system for smooth operation.

  4. Cost and performance: Understand the cost implications of the conversion kit, including the initial purchase price and potential maintenance costs. Additionally, consider the performance implications, such as the top speed and acceleration capabilities of the kit.

By carefully considering these factors, you can choose the right electric conversion kit that meets your specific requirements.

Advertisement

Gathering the Necessary Tools and Equipment

To gather the necessary tools and equipment, start by making a list of items needed for the electric conversion. The key to a successful conversion is choosing the appropriate battery and finding the best conversion kit supplier. When it comes to selecting the battery, consider factors such as voltage, capacity, and weight. A higher voltage will give your bike more power, while a higher capacity will allow for longer rides. It’s important to find a battery that fits securely on your bike and is compatible with the conversion kit. As for the conversion kit supplier, look for a reputable company that offers a wide range of options and has good customer reviews. Research and compare different suppliers to find the best one for your needs.

Item Description Supplier
Electric Conversion Kit Includes motor, controller, and cables XYZ Electric
Lithium-ion Battery 48V, 15Ah Battery World
Battery Mount Securely attaches battery to bike frame Bike Accessories Co.
Battery Charger Charges the battery Power Tech
Conversion Kit Tools Wrenches, screwdrivers, pliers, etc. Tool Time
Wiring Harness Connects the components Electric Bike Parts Unlimited

Removing Existing Bike Components

Start by removing the existing bike components that will be replaced during the electric conversion. This process requires a careful approach to ensure the bike frame remains intact.

Begin by loosening and removing the pedals using a pedal wrench.

Advertisement

Next, detach the front and rear brakes by loosening the bolts and removing the brake calipers.

Take off the chain by using a chain tool to push out the pins and separate the links.

Remove the derailleur by unscrewing the bolts that hold it in place.

Finally, detach the handlebars by loosening the stem bolts and sliding the handlebars out.

Throughout this process, it’s crucial to handle the bike components with care to avoid any damage or misalignment.

Advertisement

Installing the Electric Conversion Kit

Now, you can begin installing the electric conversion kit by following the provided instructions. The first step is to install the motor onto the bike frame. Make sure to secure it tightly using the provided mounting brackets. Next, connect the motor to the controller using the appropriate wiring harness. The controller is the brain of the electric system and will control the speed and power output of the motor. Once the motor and controller are connected, it’s time to program the controller. This step is crucial as it allows you to customize the performance of your electric bike. Follow the instructions to set the desired speed limits, acceleration, and other parameters. After programming, double-check all the connections and make sure everything is secure before testing the electric system.

Connecting the Wiring and Battery

After securing the motor onto the bike frame, the next step is to connect the wiring and battery.

This is a crucial part of the electric conversion process as it ensures that the motor receives the necessary power to function.

Advertisement

To start, I carefully route the wiring from the motor to the battery location. I make sure to secure the wiring using zip ties to prevent any loose connections.

Next, I connect the positive and negative wires from the motor to the corresponding terminals on the battery. It is important to double-check the polarity and ensure that the connections are tight and secure.

Once the wiring is properly connected, I install the battery onto the bike frame using the provided mounting brackets. This ensures that the battery is securely in place and protected during rides.

Testing and Fine-Tuning the Electric System

After connecting the wiring and battery, the next step in turning your bike into an electric one is to test and fine-tune the electric system. This crucial phase involves evaluating the system’s performance and making any necessary adjustments to optimize its efficiency. To help you with this process, I have created a table outlining different testing methods and performance analysis techniques:

Testing Methods Performance Analysis
Range testing Battery capacity
Speed testing Motor power output
Hill climbing Torque
Acceleration Efficiency

By conducting range testing, you can determine the distance your electric bike can travel on a single charge. Speed testing allows you to assess the motor’s power output, while hill climbing tests the torque capabilities. Additionally, analyzing acceleration and efficiency provides insights into the overall performance of your electric bike. Utilizing these testing methods and performance analysis techniques will ensure that your electric conversion is successful and meets your expectations.

Advertisement

Adding Additional Accessories and Features

To enhance your electric ride, you can add extra accessories and features.

One way to improve your electric bike is by adding power assist. This feature allows you to pedal with less effort, especially when going up hills or against strong headwinds. By integrating power assist, you can increase your bike’s range and make your ride more enjoyable.

Another useful feature to consider is regenerative braking. This technology allows you to convert the energy produced during braking into electrical energy, which can then be stored in the battery for later use. Not only does this extend your bike’s battery life, but it also provides a more efficient and eco-friendly riding experience.

By adding these accessories and features, you can truly transform your regular bike into a powerful and efficient electric ride.

Maintaining and Troubleshooting Your Electric Bike

Make sure you regularly check for any maintenance issues or troubleshoot any problems that may arise with your electric bike. Proper maintenance and troubleshooting can help ensure that your bike continues to perform optimally and extend its lifespan. When it comes to troubleshooting the battery, there are several common issues to look out for. These include checking the battery connections, inspecting for any physical damage, and monitoring the battery voltage. Additionally, troubleshooting the motor involves checking the motor connections, inspecting for any physical damage, and listening for any unusual noises during operation. It is also important to refer to the manufacturer’s manual for specific troubleshooting steps and recommendations. Remember, a well-maintained and properly troubleshooted electric bike will provide you with a smooth and enjoyable riding experience.

Advertisement
Troubleshooting Battery Troubleshooting Motor
Check battery connections Check motor connections
Inspect for physical damage Inspect for physical damage
Monitor battery voltage Listen for unusual noises

Enjoying the Benefits of Electric Cycling

One of the greatest benefits of electric cycling is the ability to effortlessly cruise up steep hills. With an electric bike, you can say goodbye to the struggle of pedaling uphill and enjoy a smooth, effortless ride.

Here are some advantages and benefits of electric cycling:

  • Increased speed: Electric bikes allow you to travel at faster speeds than traditional bikes, making your commute or leisurely ride more efficient.

  • Extended range: The electric motor assists you in pedaling, extending your range and allowing you to go further without getting tired.

  • Reduced effort: Electric bikes make cycling easier on your joints and muscles, reducing the strain and effort required to pedal.

  • Eco-friendly transportation: By choosing to ride an electric bike, you are contributing to a greener environment by reducing your carbon footprint.

  • Healthy lifestyle: Electric cycling allows you to incorporate physical activity into your daily routine, helping you stay fit and active.

Embracing the electric bike lifestyle offers numerous advantages, from effortless hill climbing to a more environmentally friendly mode of transportation.

Experience the ease and enjoyment of electric cycling while reaping the benefits for your health and the environment.

Frequently Asked Questions

Can I convert any type of bike into an electric bike?

Yes, you can convert most types of bikes into electric bikes. However, there may be compatibility issues depending on the bike’s design. The conversion process involves adding a motor and battery to enhance the bike’s performance.

Advertisement

How much does an electric conversion kit typically cost?

An electric conversion kit typically costs between $400 and $1000, depending on various factors such as the quality of components, battery capacity, and additional features like regenerative braking or throttle control.

Do I need any specialized tools or equipment to complete the conversion?

To complete the conversion process, specialized tools and equipment are required. Common challenges include bike compatibility and the time required for the conversion. The cost may vary depending on the specific components needed.

What are the potential challenges or difficulties I may encounter during the installation process?

During the installation process of converting a bike into electric, potential safety risks include electrical shock, overheating of components, and injury from moving parts. Common mistakes include incorrect wiring, improper battery installation, and inadequate insulation.

How long does it typically take to convert a bike into an electric bike?

The installation time to convert a bike into an electric bike depends on various factors such as experience, tools, and the complexity of the project. It typically takes several hours to a few days. Necessary components include a motor, battery, controller, and wiring.

Conclusion

In conclusion, converting my bike into an electric one has been a game-changer. The process, although technical and detailed, was surprisingly enjoyable and relatable.

Advertisement

It allowed me to explore the world of electric cycling and experience the euphoria of effortless rides. With the right conversion kit and a little maintenance, my bike now offers a whole new level of convenience and efficiency.

So, hop on your own electric bike and discover the delightful world of pedal-assisted adventures!

Continue Reading

Electric Bike

How To Turn On Ancheer Electric Bike

Published

on

By

An image showcasing a person wearing a helmet, mounting their Ancheer Electric Bike, firmly holding the handlebars, effortlessly flipping the power switch, and confidently gliding away amidst a scenic backdrop

As I grip the smooth handlebars of my Ancheer electric bike, I feel a rush of excitement. With just a push of a button, I am whisked away into a realm of easy movement and exhilarating velocity.

In this article, I will guide you through the intricacies of turning on your own Ancheer electric bike. From checking the battery level to engaging the throttle, each step will be explained in detail, empowering you to embark on thrilling adventures with ease.

Let’s dive in and unlock the power of your Ancheer electric bike!

Key Takeaways

  • Press the power button to check the battery level.
  • Locate the power button on the Ancheer e-bike to turn it on.
  • Press and hold the power button to activate the bike’s power system and access additional features.
  • Check the battery indicator light on the handlebar console to determine the battery level.

Check the Battery Level

Check the battery level by pressing the power button on the Ancheer electric bike. This step is crucial to ensure that the bike has enough power for your ride.

Advertisement

The battery level is displayed on the bike’s control panel, indicating the percentage of charge remaining. If the battery level is low, you may need to charge it before starting your ride. Simply connect the charger to the battery and plug it into a power source.

In case the battery needs replacement, consult the user manual or contact Ancheer customer support for assistance.

Now that you have checked the battery level, let’s move on to the next step and locate the power button on the bike.

Locate the Power Button

Locating the power button on your Ancheer e-bike is easy. Once you have found it, you can perform various functions with it.

Here are three important things you can do with the power button:

Advertisement
  1. How to troubleshoot power button issues: If you encounter any problems with the power button, such as it not turning on or not functioning properly, check the connections and ensure that the battery is charged. If the issue persists, consult the user manual or contact Ancheer customer support for assistance.

  2. How to turn off the Ancheer electric bike: To turn off the bike, press and hold the power button for a few seconds until the display turns off. This will conserve battery power and ensure that the bike is completely powered down.

  3. How to turn on the Ancheer electric bike: To turn on the bike, simply press the power button once. You should see the display light up, indicating that the bike is ready to use.

Now that you know how to locate and operate the power button, let’s move on to the next step of pressing and holding the power button for other functions.

Press and Hold the Power Button

Press and hold the power button to access additional features and settings on your Ancheer e-bike. The power button is usually located on the handlebar or the control panel of the bike.

When you press and hold the power button, you activate the bike’s power system and turn it on. This allows you to start using the bike and take advantage of its electric assistance.

Advertisement

The power button is a crucial component of the bike, as it is responsible for turning the bike on and off. Once you have pressed and held the power button, you can then look for the battery indicator light, which will show you the current battery level of the bike.

This is important information to have, as it will let you know when it’s time to recharge the battery.

Look for the Battery Indicator Light

To find out the current battery level of your Ancheer e-bike, simply take a quick glance at the battery indicator light. It is located on the handlebar console and consists of a series of LED lights that indicate the remaining charge in your bike’s battery. The battery indicator light is an essential feature that allows you to monitor the battery level during your rides and plan your charging accordingly.

Here are some key points to keep in mind regarding the battery indicator light:

  • Green light: Indicates a full or almost full battery charge.
  • Yellow light: Indicates a partially depleted battery and suggests it may be time for a recharge.
  • Red light: Indicates a low battery level, and it is highly recommended to charge the battery as soon as possible.

Monitoring the battery indicator light is crucial for optimizing your riding experience and avoiding any unexpected power loss. Once you have checked the battery level, you can move on to the next step and listen for the motor to activate, indicating that your Ancheer e-bike is ready to go.

Listen for the Motor to Activate

Once you’ve checked the battery level, listen for the motor to activate, indicating that your e-bike is ready to go. Motor activation is a key step in troubleshooting any issues with your Ancheer electric bike.

Advertisement

When you turn on the bike, you should hear a distinct humming sound as the motor engages. If you don’t hear anything or if the motor sounds weak or irregular, there may be a problem with the motor or the electrical system. In such cases, it’s important to consult the user manual or contact customer support for further assistance.

Once the motor is activated and running smoothly, you can proceed to adjust the pedal assist level (if applicable) to enhance your riding experience.

Adjust the Pedal Assist Level (if applicable)

You can adjust the pedal assist level on your e-bike to enhance your riding experience. Here are four important things to know about adjusting the pedal assist level:

  1. Pedal resistance: The pedal assist level determines the amount of assistance you receive while pedaling. Higher levels provide more assistance, making it easier to pedal, while lower levels require more effort.

  2. Troubleshooting pedal assist problems: If you’re experiencing issues with the pedal assist, such as it not engaging or providing inconsistent assistance, try adjusting the level. Sometimes, a simple change in the assist level can solve the problem.

  3. Fine-tuning your ride: Adjusting the pedal assist level allows you to customize your ride to your preferences. You can increase the level when you need more assistance, like when climbing hills, or decrease it for a more challenging workout.

  4. Battery life preservation: Keep in mind that higher assist levels consume more battery power. If you want to extend your e-bike’s battery life, consider using lower assist levels when possible.

Now, let’s move on to the next section about engaging the throttle, if applicable, to further enhance your riding experience.

Engage the Throttle (if applicable)

When engaging the throttle, simply twist the handle to activate the motor. The throttle on the Ancheer electric bike is located on the handlebar, making it easily accessible while riding.

Advertisement

It is important to note that the throttle sensitivity can be adjusted according to your preference. If you find that the throttle is too sensitive or not responsive enough, you can make changes in the settings to suit your needs.

Additionally, if you encounter any issues with the throttle, such as it not working or being unresponsive, there are troubleshooting steps you can take. These may include checking the connections, ensuring the throttle is properly aligned, or consulting the user manual for further guidance.

Now, let’s move on to the next step and test the brakes and gears.

Test the Brakes and Gears

After engaging the throttle, it’s important to test the brakes and gears on your Ancheer electric bike to ensure they are in proper working order.

Start by squeezing the brake levers to check for any resistance or sticking. If the brakes feel loose or unresponsive, you may need to adjust the brake pads or replace them if they are worn out.

Advertisement

Next, shift through the gears to make sure they engage smoothly and without any skipping or grinding noises. Familiarize yourself with the different gear ratios and how they correspond to your riding style and terrain.

Proper brake maintenance and gear shifting techniques are essential for a safe and efficient ride.

Now, let’s move on to the next step and familiarize ourselves with the display panel.

Familiarize Yourself with the Display Panel

To get started, take a moment to familiarize yourself with the display panel on your Ancheer e-bike. The display panel serves as the control center for your bike, allowing you to easily navigate through various settings and modes. Here are a few key things to keep in mind:

  • Familiarize yourself with the motor settings: The display panel provides access to different motor settings, such as pedal assist levels and throttle control. Understanding these settings will help you customize your riding experience to suit your preferences.

  • Understand the different display modes: The display panel offers different modes, such as speed, distance, and battery level. Knowing how to switch between these modes will help you keep track of important information during your ride.

  • Monitor your battery level: The display panel provides a clear indication of your battery level, ensuring that you never run out of power during your ride.

  • Adjust your settings as needed: The display panel allows you to make adjustments to various settings, such as the backlight brightness and unit of measurement. Take the time to explore these options and personalize your biking experience.

Now that you are familiar with the display panel, it’s time to enjoy your ride!

Advertisement

Enjoy Your Ride!

Now that you’re familiar with the display panel on your Ancheer electric bike, it’s time to hit the road and enjoy your ride! As you embark on your journey, there are a few things you can do to improve battery life and ensure a safe and enjoyable experience.

First and foremost, it’s important to maintain a consistent speed and avoid sudden accelerations or decelerations. This will help conserve battery power and extend your riding range. Additionally, be mindful of the terrain you’re riding on. Uphill climbs and rough surfaces can put extra strain on the motor and drain the battery faster.

To further optimize battery life, make sure to keep your tires properly inflated and avoid excessive weight on the bike. Regularly check your brakes, lights, and other safety features to ensure they’re functioning correctly.

By following these safety tips and taking steps to improve battery life, you can have a smooth and enjoyable ride on your Ancheer electric bike. So, hop on, buckle up, and embrace the thrill of electric biking!

Frequently Asked Questions

How do I charge the battery of my Ancheer electric bike?

To charge the battery of my Ancheer electric bike, I first locate the charging port and connect the charger. I ensure the battery is properly inserted and wait for it to fully charge. If I encounter any issues, I troubleshoot by checking connections and contacting customer support.

Advertisement

Can I turn on the electric bike without using the power button?

When it comes to turning on an electric bike without using the power button, alternative methods and troubleshooting techniques can be used. However, it’s important to note that these methods may vary depending on the specific model and brand.

What should I do if the battery indicator light does not turn on?

If the battery indicator light on your Ancheer electric bike does not turn on, start troubleshooting by checking the power connection. Ensure that the battery is properly connected and securely attached.

How can I adjust the pedal assist level on my Ancheer electric bike?

To adjust the pedal assist level on my Ancheer electric bike, I can access the pedal assist settings on the control panel. By navigating through the menu, I can increase or decrease the level of assistance according to my preference.

Are there any safety precautions I should take before starting my ride on the electric bike?

It is important to wear a helmet while riding an electric bike for safety. To ensure a safe ride, proper maintenance is essential. Regularly check the brakes, tires, and battery, and keep the bike clean and lubricated.

Conclusion

And there you have it! Turning on your Ancheer electric bike is as easy as a breeze on a sunny day.

Advertisement

Just remember to check that battery level, locate the power button, and press and hold it until you see that battery indicator light.

Once you hear that motor purr to life, engage the throttle and feel the power at your fingertips.

Test the brakes and gears for a smooth ride, and take a moment to appreciate the display panel that keeps you informed.

Now, it’s time to hit the road and let the adventure begin!

Advertisement

Continue Reading

Electric Bike

How To Turn Mountain Bike Into Electric Bike

Published

on

By

An image showcasing a skilled cyclist effortlessly maneuvering through rugged mountain terrain on a modified electric bike

Converting your mountain bike into an electric powerhouse is an exciting project that will take your riding experience to the next level. With an electric bike conversion kit, you can easily tackle steep terrain and increase your riding range with ease.

In this comprehensive guide, we will walk you through the step-by-step process of turning your beloved mountain bike into an electrifying machine. Get ready to unlock a world of exhilaration and adventure as we delve into the intricacies of this electrifying transformation.

Key Takeaways

  • Assess frame design and consider compatibility with conversion kit components
  • Ensure sufficient space for battery pack and proper alignment of motor
  • Consider factors such as motor power, battery capacity, and overall weight when choosing a conversion kit
  • Properly remove existing bike components and keep track of small parts for smooth transition during installation

Assessing Your Mountain Bike’s Compatibility

Before you can turn your mountain bike into an electric bike, you’ll need to assess its compatibility. Start by examining your mountain bike for any specific modifications it may need for the electric bike conversion process.

Check the frame design, as some electric bike conversion kits require a certain frame type. Look for a suitable space to mount the battery pack, often located on the downtube or rear rack. Ensure that your bike has enough clearance for the motor, especially if you plan on using a hub motor. Consider the weight of the components and how it will affect your bike’s handling.

Advertisement

Once you’ve evaluated these factors, you can move on to choosing the right electric bike conversion kit, which will be discussed in the next section.

Choosing the Right Electric Bike Conversion Kit

First, you’ll want to select the appropriate conversion kit for your needs. When choosing an electric bike conversion kit, it’s important to consider the benefits and drawbacks.

On the positive side, conversion kits allow you to transform your mountain bike into an electric bike without having to buy a completely new one. This can save you money and allow you to keep using a bike you’re already familiar with.

However, there are some drawbacks to consider as well. Conversion kits can be quite expensive, especially if you opt for a high-quality kit. Additionally, the installation process can be challenging and time-consuming, requiring some technical skills.

Factors to consider when choosing an electric bike conversion kit include the motor power, battery capacity, and overall weight of the kit. You’ll want to ensure that the motor power is suitable for your desired level of assistance, whether you’re looking for a gentle boost or a more powerful ride. The battery capacity should be sufficient to meet your riding needs, and the overall weight of the kit shouldn’t make your bike too heavy or unbalanced.

Advertisement

Now that you have an understanding of the benefits and drawbacks of electric bike conversion kits and the factors to consider, it’s time to move on to gathering the necessary tools and equipment.

Gathering the Necessary Tools and Equipment

To gather all the tools and equipment you’ll need, start by checking what’s included in the electric bike conversion kit you’ve chosen. Most conversion kits will provide the necessary tools, such as wrenches, screwdrivers, and Allen keys, but it’s always a good idea to double-check.

In addition to the tools provided in the kit, you may also need some additional tools depending on your specific bike and the components you’ll be working with. Some common tools you might need include a torque wrench, a chain breaker tool, and cable cutters. Choosing the right tools is crucial to ensure proper installation and avoid any damage to your bike or the conversion kit.

Advertisement

Once you have gathered all the necessary tools, you can move on to the next step of removing the existing components.

Removing the Existing Components

Now, you’ll need to remove the components currently on your bike.

Before doing so, it’s important to assess the compatibility of your bike with an electric conversion kit. Look for a conversion kit that matches the specifications of your mountain bike, including the wheel size and frame type.

Once you have chosen the right conversion kit, you can begin the process of removing the existing components. Start by disconnecting the brakes, derailleurs, and chain from your bike. Use appropriate tools, such as a wrench or screwdriver, to carefully remove these components. Take your time and make sure to keep track of any small parts that you remove. This will ensure a smooth transition when installing the electric bike conversion kit later on.

With the existing components removed, you’re now ready to move on to installing the electric bike conversion kit.

Advertisement

Installing the Electric Bike Conversion Kit

Once you have removed the existing components, it’s time to begin installing the electric bike conversion kit. To ensure a smooth installation, follow these steps:

  • Carefully read the instructions provided with the kit.
  • Begin by installing the motor correctly on the frame. Make sure to align it properly and tighten all bolts securely.
  • Attach the motor controller to the frame, ensuring it is positioned in a way that allows for easy access and proper ventilation.
  • Connect the motor controller to the motor using the provided wiring harness, following the color-coding instructions.

Installing an electric bike conversion kit can sometimes present challenges. Troubleshooting common conversion issues such as motor alignment and wiring connectivity is crucial. Double-check all connections and consult the troubleshooting guide if any problems arise.

Now that the electric bike conversion kit is installed, it’s time to move on to connecting the battery and controller.

Connecting the Battery and Controller

Make sure you connect the battery and controller properly for the electric bike conversion kit to function correctly.

Advertisement

Begin by locating the battery and controller compartments on your mountain bike. Open the compartments and identify the positive and negative terminals on both the battery and controller.

Connect the positive terminal of the battery to the positive terminal of the controller, and the negative terminal of the battery to the negative terminal of the controller. Ensure the connections are secure and tight.

Once connected, double-check that the battery is fully charged and the controller is properly programmed. To maintain the battery, periodically check its voltage and charge it as needed.

Troubleshooting common issues such as loose connections or faulty wiring can help ensure the smooth operation of your electric bike.

With the battery and controller properly connected, you can now move on to mounting the motor and wiring.

Advertisement

Mounting the Motor and Wiring

To mount the motor and connect the wiring, you’ll need to locate the appropriate spots on your bike and secure the motor in place. Start by choosing a suitable location for the motor, typically near the bottom bracket or the rear wheel dropout. Ensure that the motor is aligned properly with the chain and sprocket. Use mounting brackets or clamps to secure the motor to the frame securely. Next, connect the wiring between the motor and the controller. Refer to the user manual or wiring diagram provided by the manufacturer for the correct connections. Make sure all connections are tight and insulated to prevent any electrical issues.

To engage the audience, here is a table with mounting techniques and wiring tips:

Mounting Techniques Wiring Tips
Choose a suitable location for the motor Refer to the wiring diagram for correct connections
Align the motor with the chain and sprocket Ensure all connections are tight and insulated
Secure the motor using mounting brackets or clamps Double-check all wiring connections before finalizing

Once you have successfully mounted the motor and connected the wiring, you can move on to adjusting the bike’s gearing system, improving the overall performance of your electric mountain bike.

Adjusting the Bike’s Gearing System

Now you can fine-tune the gearing system on your bike for optimal performance. Making the right gearing adjustments is crucial to ensure a smooth and efficient ride when converting your mountain bike into an electric bike.

One important aspect to consider is the gear ratio optimization. This involves finding the perfect balance between the motor’s power and your pedaling effort. Start by experimenting with different gear combinations to see which ones work best for your riding style and terrain. You may need to adjust the front and rear derailleurs to achieve the desired gear ratio.

Advertisement

Keep in mind that a lower gear ratio will provide more torque for climbing steep hills, while a higher gear ratio will give you more speed on flat roads.

Once you have fine-tuned the gearing system, you can move on to the next section about testing and fine-tuning the electric bike’s overall performance.

Testing and Fine-Tuning the Electric Bike

After adjusting the bike’s gearing system, it’s important to test and fine-tune the electric bike for optimal performance. Here are some fine-tuning techniques and troubleshooting common issues to help you with this process:

  1. Test the motor: Ensure that the motor engages smoothly and provides consistent power throughout the ride. Check for any unusual noises or vibrations.

  2. Adjust the pedal assist levels: Fine-tune the pedal assist settings to match your desired level of assistance. Test each level to ensure they’re functioning properly and providing the desired amount of assistance.

  3. Check the battery life: Monitor the battery’s performance by testing its capacity and range. Make sure it’s charging and discharging correctly and adjust any settings if needed.

  4. Troubleshoot common issues: Address any issues such as poor acceleration, uneven power delivery, or erratic behavior. Check the wiring connections, controller settings, and make necessary adjustments.

Once you have completed the testing and fine-tuning process, you can move on to ensuring safety and compliance with local regulations for your electric bike.

Ensuring Safety and Compliance

Make sure you prioritize safety and comply with local regulations when using your electric bike. Ensuring safety is crucial to prevent accidents and injuries. Additionally, meeting legal requirements will help you avoid fines and penalties. Before riding your electric bike, make sure to wear a helmet and other protective gear. Familiarize yourself with the bike’s features and controls, and always follow traffic laws and signals. It is also important to regularly inspect your bike for any damage or loose parts. Maintain a safe speed and be aware of your surroundings. To help you understand the importance of safety and compliance, consider the following table:

Advertisement
Safety Measures Legal Requirements Benefits
Wear protective gear Register your electric bike Prevent injuries
Follow traffic laws Obtain necessary permits Avoid fines
Regular inspections Install required lights Ensure bike’s safety

By ensuring safety and complying with legal requirements, you can enjoy a safe and trouble-free electric bike experience. Now let’s move on to maintaining and servicing your electric bike.

Maintaining and Servicing Your Electric Bike

Maintaining and servicing your e-bike is essential for its longevity and optimal performance. To maximize battery life and ensure smooth operation, follow these tips:

  • Keep your battery charged between 20% and 80% to avoid overcharging or deep discharging, which can shorten its lifespan.
  • Clean the battery terminals regularly with a soft cloth to prevent corrosion and ensure a good connection.
  • Store your e-bike in a cool and dry place, away from extreme temperatures and moisture, to prevent damage to the battery and electronic components.

Troubleshooting common issues can help you identify and fix problems quickly:

  • Check the connections and wiring for any loose or damaged parts.
  • Test the throttle, brakes, and motor to ensure they are functioning properly.
  • If you encounter any issues beyond your expertise, consult a professional e-bike technician for assistance.

By maintaining and troubleshooting your electric bike, you can enjoy its benefits for years to come.

Now, let’s explore how to upgrade and customize your e-bike.

Upgrading and Customizing Your Electric Bike

To enhance your riding experience, you can personalize and improve various aspects of your e-bike. There are a variety of customizing options available that allow you to make your electric bike unique to your preferences.

One way to upgrade your e-bike is by improving its performance. You can consider installing a more powerful motor or upgrading the battery for increased speed and range. Additionally, you can enhance the braking system by installing hydraulic disc brakes for better stopping power. Another option is to upgrade the suspension system to improve the bike’s handling and comfort on rough terrains.

Advertisement

Furthermore, you can customize the appearance of your electric bike by adding accessories such as fenders, lights, and racks. By making these performance enhancements and personalizing your e-bike, you can optimize your riding experience.

Now, let’s explore different riding modes and power levels.

Exploring Different Riding Modes and Power Levels

There are various riding modes and power levels available to choose from when using an e-bike. These options allow you to customize your riding experience and make the most out of your electric mountain bike.

When exploring different riding modes, you can select between modes such as pedal-assist, throttle-only, or a combination of both. Each mode offers a unique level of assistance and control, allowing you to adapt to different terrains and riding conditions.

Additionally, you can also adjust the power level of your e-bike, which determines the amount of assistance the motor provides. This is particularly useful when exploring battery life and finding the right balance between performance and range.

Advertisement

Comparing different motor options is also important, as each motor has different power outputs and efficiency levels. By understanding these factors, you can select the motor that best suits your riding style and needs.

With these various riding modes and power levels, you can truly customize your e-bike experience.

Now, let’s move on to some tips and tricks for maximizing performance.

Tips and Tricks for Maximizing Performance

Get the most out of your e-biking experience by implementing these tips and tricks to maximize performance. One of the key factors in maximizing performance is maximizing battery life. To do this, make sure to charge your battery fully before each ride and avoid overcharging. Additionally, try to ride in lower power levels whenever possible, as higher power levels drain the battery faster.

Troubleshooting common issues is also important for optimizing performance. If you notice a decrease in power or range, check for any loose connections or damaged wires. Clean the bike regularly to prevent dirt and debris from affecting the motor and battery.

Advertisement

To further enhance your e-biking experience, consider joining the electric bike community. This will allow you to connect with fellow e-bikers, share tips and tricks, and discover new trails.

Joining the Electric Bike Community

Joining the e-bike community allows you to connect with other riders, share tips, and discover new trails. When you become part of this community, you gain access to a wealth of knowledge and experience.

One of the first things you’ll notice is the wide variety of electric bike accessories available. From powerful batteries to comfortable saddles, these accessories can enhance your riding experience and make your electric bike even more efficient.

Additionally, being part of the e-bike community opens up a world of benefits. Electric biking not only provides a thrilling and exhilarating experience, but it also allows you to cover longer distances with ease. The electric assist feature helps you conquer challenging terrains and steep hills effortlessly.

Moreover, electric biking is an eco-friendly alternative to traditional modes of transportation, reducing your carbon footprint and contributing to a greener environment.

Advertisement

So, join the e-bike community today and start experiencing the numerous benefits of electric biking.

Frequently Asked Questions

Can I convert any type of mountain bike into an electric bike?

Yes, you can convert any type of mountain bike into an electric bike. The mountain bike conversion process involves adding an electric motor, battery, and controller to your existing bike.

By converting your mountain bike into an electric bike, you can enjoy the benefits of electric bike conversion, such as increased speed and range, easier uphill climbs, and reduced effort required while riding.

This conversion allows you to transform your regular mountain bike into a powerful and efficient electric bike.

How much does an electric bike conversion kit typically cost?

Converting your mountain bike into an electric bike with a conversion kit is a cost-effective option. The price for an electric bike conversion kit typically ranges from $200 to $1000, depending on the quality and features you desire.

Advertisement

There are various types of conversion kits available, such as front-wheel, rear-wheel, and mid-drive kits. Each type has its pros and cons, so it’s important to consider factors like ease of installation, power output, and battery life when choosing the right kit for you.

Are there any specific tools or equipment that I need to gather for the conversion process?

To successfully convert your mountain bike into an electric bike, there are a few essential tools and equipment you’ll need.

  • First, make sure to have a wrench set, screwdrivers, and pliers for disassembling and reassembling parts.

  • Additionally, an electric bike conversion kit, including a motor, battery, controller, and throttle, is crucial.

  • When choosing a battery, consider its capacity, voltage, and weight.

  • Avoid common mistakes like improper wiring or mismatched components.

  • Research extensively for the right battery that suits your conversion needs.

Is it possible to convert my mountain bike back to its original state after installing the electric bike conversion kit?

Yes, it’s possible to convert your mountain bike back to its original state after installing the electric bike conversion kit. This ensures that you have the flexibility to switch between an electric bike and a regular mountain bike whenever you desire.

The mountain bike conversion process offers numerous benefits. It includes increased speed and range, smoother rides, and the ability to tackle challenging terrains with ease. By installing the conversion kit, you can enjoy these advantages while still having the option to revert to your original bike.

Are there any legal requirements or regulations I should be aware of when converting my mountain bike into an electric bike?

When converting your mountain bike into an electric bike, it’s important to be aware of the legal requirements and regulations. Safety precautions should be a priority, such as wearing a helmet and following traffic laws.

Advertisement

Some advantages of converting include increased speed and assistance on uphill climbs. However, there are also disadvantages such as added weight and limited range.

It’s crucial to research and ensure your conversion complies with local laws to avoid any legal issues.

Conclusion

Congratulations on successfully transforming your mountain bike into an electric bike! By following the step-by-step process outlined in this article, you have joined a growing community of electric bike enthusiasts.

Did you know that the sale of electric bikes has been steadily increasing over the past few years? In fact, in 2020 alone, the global sales of electric bikes reached a staggering 40 million units! So, not only have you made a smart and eco-friendly choice, but you’ve also become part of a global trend.

Get out there and enjoy your new electric bike adventure!

Advertisement

Continue Reading
Advertisement

Affiliate disclaimer

As an affiliate, we may earn a commission from qualifying purchases. We get commissions for purchases made through links on this website from Amazon and other third parties.

About us

We are a passionate team driven by the belief that cycling is a fantastic and accessible way to stay active while enjoying the beauty of the outdoors. Our mission is to share our love for cycling with as many people as possible. We provide a welcoming environment for individuals of all ages, abilities, and backgrounds to come together and ride bikes. With Ralf’s visionary leadership, Zane’s expertise in cycling adventures, and Olivia’s dedication to community building, we strive to create a vibrant space where everyone can experience the joy of cycling. Through group rides, workshops, and inclusive events, we inspire and empower individuals to embrace an active lifestyle. Join us in our quest to pedal together, embrace the joy of cycling, and foster connections that last a lifetime.

Advertisement

Trending