Connect with us

Bike

How Much Is A Boulder Giant Bicycle Worth

Published

on

An image showcasing a sleek Boulder Giant bicycle against a stunning backdrop of majestic mountains

I was recently asked about the worth of Boulder Giant bicycles.

As a knowledgeable enthusiast in the cycling world, I understand the meticulous attention to detail that goes into determining a bicycle’s worth.

In this article, we will explore the various factors that contribute to the value of a Boulder Giant bicycle, including its condition, age, rarity, brand reputation, and the experiences of satisfied riders.

By the end, you’ll have a thorough understanding of what makes a Boulder Giant bicycle truly valuable.

Contents

Key Takeaways

  • The value of a Boulder Giant bicycle is influenced by factors such as brand reputation, age, condition, and upgrades/accessories.
  • Well-maintained bikes in excellent condition with minimal scratches, dents, and rust tend to have higher value.
  • Older and rare models of Boulder Giant bicycles can be more valuable, especially if they are limited edition or discontinued.
  • Boulder Giant’s reputation for high quality, durability, and performance adds value to their bicycles, making them a solid investment with good resale value.

Overview of Boulder Giant Bicycles

Advertisement

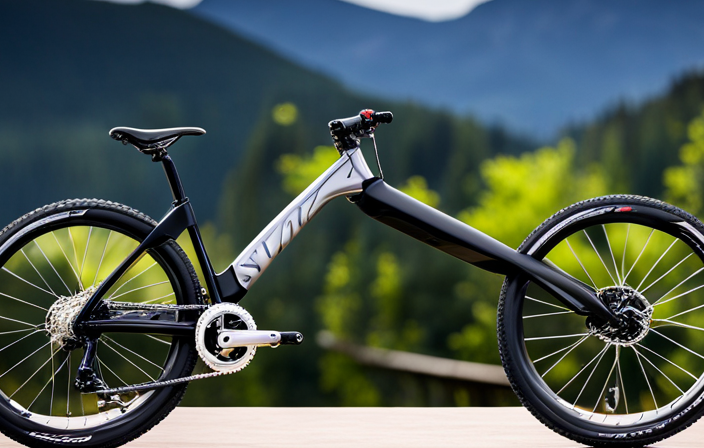
Boulder Giant bicycles are known for their high quality and durability. They offer a wide range of bicycle models that cater to different types of riders, from beginners to advanced cyclists. The Boulder Giant lineup includes mountain bikes, road bikes, hybrid bikes, and electric bikes, all designed with cutting-edge technology and innovative features.

One of the standout features of Boulder Giant bicycles is their advanced suspension system, which provides a smooth and comfortable ride, even on rough terrains. Additionally, these bicycles are equipped with high-performance brakes, lightweight frames, and ergonomic handlebars, ensuring optimal control and maneuverability.

When it comes to the value of a Boulder Giant bicycle, several factors come into play, such as the model, age, condition, and any customizations or upgrades. These factors can significantly affect the price of a Boulder Giant bicycle and should be considered when determining its worth.

Factors that Determine the Value of a Boulder Giant Bicycle

When determining the value of your Boulder Giant bicycle, you should consider various factors. These factors influence bicycle pricing and can significantly affect the second-hand value of your bike. Here are three important factors to keep in mind:

  1. Brand reputation: Boulder Giant is known for producing high-quality bicycles, which can increase the value of your bike compared to lesser-known brands.

  2. Age and condition: The age and condition of your bicycle play a crucial role in determining its value. A well-maintained and newer model will generally have a higher value than an older or heavily worn-out bike.

  3. Upgrades and accessories: Any upgrades or additional accessories you have added to your Boulder Giant bicycle can add value. This includes components such as upgraded gears, suspension, or high-quality accessories like a bike computer or carbon fiber handlebars.

Considering these factors, the condition of the bicycle is an essential aspect to evaluate when determining its value.

Advertisement

a. Condition of the Bicycle

The condition of the bike greatly impacts its value. When determining the value of a Boulder Giant bicycle, there are several pricing factors to consider. A well-maintained bicycle will generally have a higher value compared to one that is in poor condition. Factors such as scratches, dents, and rust can significantly decrease the value of a bike. Additionally, the functionality of components like brakes, gears, and suspension systems also plays a role in determining value. To help you understand this better, here is a table summarizing the impact of different conditions on the value of a Boulder Giant bicycle:

Condition Impact on Value
Excellent High
Good Moderate
Fair Low

Considering these factors will assist you in determining the value of a Boulder Giant bicycle based on its current condition. Moving forward, we will explore how age and rarity further contribute to its overall worth.

b. Age and Rarity

To determine the value of a Boulder Giant bicycle, you should consider the age and rarity, which can greatly impact its overall worth.

Age plays a significant role in determining the value of a bicycle. Older models are often considered more valuable due to their rarity and historical significance.

Rarity, on the other hand, refers to how uncommon a particular model is. Limited edition or discontinued models tend to have higher value due to their scarcity in the market.

Advertisement

Additionally, market trends and demand also affect the value of a Boulder Giant bicycle. Popular models that are in high demand will generally have a higher value compared to less sought-after ones.

Taking all these factors into account, it is important to thoroughly research the age, rarity, market trends, and demand for a Boulder Giant bicycle to accurately determine its worth.

Moving forward, the next section will focus on the importance of brand reputation in assessing the value of a Boulder Giant bicycle.

c. Brand Reputation

Advertisement

Considering the brand reputation, you’ll want to research Boulder Giant bicycles to determine their value.

Boulder Giant is a well-known and respected brand in the cycling industry, known for producing high-quality bicycles. Their reputation for durability and performance adds value to their products, as buyers are willing to pay a premium for a trusted brand.

When it comes to resale value, Boulder Giant bicycles tend to hold their worth quite well. This is due to their reputable brand name and the demand for their bicycles in the market. Buyers are often willing to pay a higher price for a Boulder Giant bicycle compared to other brands, making them a solid investment.

Moving on to the next section about ‘d. upgrades and accessories,’ it’s important to note that these can also impact the value of a Boulder Giant bicycle.

d. Upgrades and Accessories

Upgrades and accessories can greatly enhance the value of a Boulder Giant bike. When it comes to upgrading options, Boulder Giant offers a wide range of choices to cater to different riding preferences. Here are three items that can take your biking experience to the next level:

Advertisement
  1. Suspension Upgrade: A better suspension system can improve your bike’s performance on rough terrains, providing a smoother and more comfortable ride.

  2. Wheelset Upgrade: Upgrading to a lighter and sturdier wheelset can enhance your bike’s speed and maneuverability, giving you an edge on the trails.

  3. Accessories Availability: Boulder Giant offers a variety of accessories such as bike racks, lights, and fenders, allowing you to customize your bike to meet your specific needs and preferences.

By exploring these upgrading options and taking advantage of the accessories availability, you can maximize the value of your Boulder Giant bike.

Now, let’s delve into researching the market value to ensure you make an informed decision.

Researching the Market Value

After exploring the various upgrades and accessories available for the Boulder Giant bicycle, it’s important to conduct thorough research to determine its market value.

Research methods play a crucial role in understanding the pricing variations of this particular model. To accurately assess the worth of the bicycle, one can start by checking out online forums and communities dedicated to cycling enthusiasts. These platforms often provide insights into similar sales and prices, giving a general idea of what to expect.

Another effective approach is to browse online marketplaces and websites specializing in used bicycles. By analyzing the listings, one can identify trends and patterns in pricing, taking into account factors such as bike condition, age, and any unique features.

Advertisement

This meticulous research will help determine a fair market value for the Boulder Giant bicycle. Now, let’s delve into the world of online auctions and marketplaces to explore further options for selling or purchasing this bike.

a. Online Auctions and Marketplaces

To get the best deal for your bike, you can explore online auctions and marketplaces. These platforms offer a wide range of options, allowing you to compare prices and find the most competitive offers.

When selling or buying a Boulder Giant bicycle, it is important to consider different pricing strategies to maximize your profit or savings. Here are four key strategies to keep in mind:

  1. Set a reserve price: This ensures that you won’t sell your bike for less than a specified amount, protecting your investment.

  2. Monitor bidding activity: Keep an eye on the number of bids and the bidding trend to gauge the demand for your bike and adjust your pricing accordingly.

  3. Optimize listing details: Provide accurate and detailed information about your bike’s specifications, condition, and any additional accessories to attract potential buyers and justify your asking price.

  4. Research similar listings: Look for similar Boulder Giant bicycles on the platform to see how they are priced, helping you determine a competitive and reasonable price for your bike.

Now, let’s delve into the next section about bicycle shops and dealerships.

b. Bicycle Shops and Dealerships

One option for purchasing or selling a Boulder Giant bike is through bicycle shops and dealerships. These establishments can offer a wide range of models to choose from and provide expert advice on bicycle maintenance and choosing the right size. Riding a bike that is not the right size for you can lead to discomfort and even injury, so it’s important to find the perfect fit for your body type and riding style. Bicycle shops and dealerships have knowledgeable staff who can guide you through this process.

Advertisement

If you’re looking to sell your Boulder Giant bike, these establishments can also assist you in finding the right buyer. By consulting bicycle experts, you can ensure a smooth and successful transaction.

c. Consulting Bicycle Experts

Looking for advice on finding the perfect fit for your body type and riding style? Consult the experts at bicycle shops and dealerships.

When it comes to choosing the right bicycle, it’s crucial to seek the guidance of professionals who have extensive knowledge and experience in the field. Consulting experts can provide valuable insights into the various factors to consider, such as frame size, suspension, and components, ensuring that you find a Boulder Giant bicycle that suits your specific needs.

These experts can offer expert opinions on the best models for different terrains and riding styles, helping you make an informed decision. By seeking their advice, you can ensure that you invest in a bicycle that provides optimal comfort, performance, and durability.

Transitioning into the subsequent section about the pricing guide for different models of Boulder Giant bicycles, it is important to understand the value of the advice provided by these experts.

Advertisement

Pricing Guide for Different Models of Boulder Giant Bicycles

The pricing guide provides information on the cost of various models of Boulder Giant bicycles. When determining the fair price of a used Boulder Giant bicycle, there are several factors that affect the resale value. These factors include the model, year of production, condition, and any additional features or modifications.

To help you determine the right price, here are some tips:

  • Research the current market value for similar models and compare prices online.
  • Consider the overall condition of the bike, including any wear and tear, maintenance history, and any recent repairs or upgrades.
  • Take into account the demand for the specific model in your area.

By considering these factors and using the pricing guide, you can determine a fair price for a used Boulder Giant bicycle.

Moving on to road bikes…

a. Road Bikes

After exploring the pricing guide for different models of Boulder Giant bicycles, I am now delving into the world of road bikes.

When it comes to road bike prices, Boulder Giant is known for offering excellent value for money. They have a range of road bikes to suit various budgets and preferences. Boulder Giant is considered one of the best road bike brands in the market, offering high-quality construction, top-notch components, and exceptional performance. Whether you are a beginner or a seasoned cyclist, you can find a Boulder Giant road bike that meets your needs. From entry-level models to high-end racing bikes, Boulder Giant offers a wide selection to choose from.

Advertisement

Now, let’s shift gears and explore the remarkable world of mountain bikes.

b. Mountain Bikes

You can find a variety of mountain bikes from Boulder Giant that are perfect for tackling off-road trails and adventurous rides. When it comes to mountain bike maintenance, Boulder Giant provides durable and reliable bikes that are built to withstand the demands of rough terrains. These bikes are designed with high-quality components and advanced suspension systems to ensure a smooth and comfortable ride. Whether you’re a beginner or an experienced rider, Boulder Giant offers mountain bikes for every skill level.

When it comes to finding the best mountain bike trails, Boulder Giant has you covered. From challenging singletracks to scenic trails, there are plenty of options to explore and conquer. So, if you’re ready to hit the trails and experience the thrill of mountain biking, look no further than Boulder Giant.

Now, let’s move on to the next section about ‘c. hybrid bikes’.

c. Hybrid Bikes

Looking for a versatile ride? Hybrid bikes from Boulder Giant are a great option for riders of all skill levels. These bikes combine the best features of both road and mountain bikes, offering a comfortable and efficient ride on various terrains.

Advertisement

One of the key advantages of hybrid bikes is their versatility. They are equipped with wider tires and a suspension fork, allowing riders to smoothly transition from paved roads to gravel paths or even light off-road trails. Hybrid bikes also come with a wide range of gears, ensuring that you can easily tackle different inclines and speeds. Additionally, these bikes often feature disc brakes for reliable stopping power in any weather condition.

The next section will explore the exciting world of electric bikes, offering an even more thrilling riding experience.

d. Electric Bikes

Electric bikes, also known as e-bikes, provide an exhilarating riding experience with their electric motor assistance. These bikes have gained popularity in recent years due to their unique features. One of the key features of electric bikes is the electric motor, which provides assistance while pedaling, making it easier to climb hills and ride longer distances. Another feature is the battery, which powers the motor and can be recharged.

Pros of electric bikes include the ability to ride at higher speeds without exerting as much effort, making them great for commuting or leisurely rides. They also allow for a more eco-friendly mode of transportation, as they produce zero emissions. However, there are also some cons to consider. Electric bikes can be more expensive than traditional bikes, and the battery life can limit the distance you can ride.

In the next section, I will provide tips for buying or selling a boulder giant bicycle, including factors to consider and how to determine its worth.

Advertisement

Tips for Buying or Selling a Boulder Giant Bicycle

When buying or selling a Boulder Giant bicycle, there are several tips to consider in order to make an informed decision.

First, it is important to research the different buying options available. You can choose to buy from a local bike shop, online marketplace, or directly from the manufacturer. Each option has its own advantages and disadvantages, so it’s crucial to weigh them carefully.

Additionally, pricing factors should be taken into account. Factors such as the condition of the bike, its age, and any accessories or upgrades can affect its value. It’s important to compare prices from different sources to ensure you are getting a fair deal.

By considering these tips, you can make a well-informed decision when buying or selling a Boulder Giant bicycle.

Moving on to the next section about properly documenting the bicycle’s history, it is essential to keep track of any repairs, maintenance, or upgrades that have been done.

Advertisement

a. Properly Documenting the Bicycle’s History

Properly documenting the bicycle’s history can provide valuable information about any repairs, maintenance, or upgrades that have been done. It allows potential buyers to assess the condition of the bike and make informed decisions about its value. When documenting the history of a Boulder Giant bicycle, conducting provenance research is essential. This involves gathering information about previous owners, any accidents or damages, and any notable events the bike has been a part of. A well-documented history can increase the bike’s value and attract more buyers. To organize this information, I recommend creating a table with three rows and two columns. The first column can include details about repairs, maintenance, and upgrades, while the second column can list the corresponding dates or years. By presenting this information in a structured manner, it becomes easier for buyers to understand the bike’s history and make an informed decision. Moving on to negotiating the price, it’s important to consider various factors that can influence the final value of the bicycle.

b. Negotiating the Price

To negotiate the price, you should consider various factors that can affect the final value of the bike. Start by researching the market value of Boulder Giant bicycles and gather information about the specific model you are interested in. This will give you an idea of the bike’s worth and help you set a budget.

When negotiating, be confident but also flexible. Use effective negotiating techniques such as starting with a lower offer and gradually increasing it, or finding bargaining chips like any repairs or maintenance needed. It’s important to stay polite and respectful throughout the process.

Once you have agreed on a price, ensure safe payment and delivery by using a secure payment method and discussing shipping arrangements with the seller. This will help protect both parties and ensure a smooth transaction.

Now, let’s move on to the next step about ensuring safe payment and delivery.

Advertisement

c. Ensuring Safe Payment and Delivery

Make sure you use a secure payment method and discuss shipping arrangements with the seller to ensure safe payment and delivery. When it comes to ensuring secure payment, it’s crucial to choose a reliable and reputable payment platform that offers buyer protection. This will safeguard your money and personal information throughout the transaction process.

Additionally, discussing shipping arrangements with the seller is vital to ensure the timely and safe delivery of your purchased Boulder Giant bicycle. Consider the following imagery to help visualize this process:

  • Confirm the shipping method: Determine whether the seller will use a courier service or a shipping company to transport the bicycle.

  • Packaging and handling: Inquire about how the seller plans to package and protect the bicycle during transit to prevent any damage.

  • Tracking information: Request tracking information from the seller so you can monitor the shipment’s progress.

By taking these precautions, you can minimize the risk of encountering counterfeit or fake Boulder Giant bicycles in the market.

Identifying Counterfeit or Fake Boulder Giant Bicycles

To avoid purchasing counterfeit or fake Boulder Giant bicycles, you need to be vigilant and look out for any signs of authenticity. Counterfeit bikes often have subtle differences in their appearance, packaging, or components that can help you identify them. Here are some common signs to watch out for:

Signs of Counterfeit Bicycles Authentic Boulder Giant Bicycles
Poor quality materials High-quality construction
Inaccurate logos or branding Genuine Boulder Giant branding
Mismatched or incorrect colors Consistent color schemes
Cheap or faulty components Reliable and durable parts
Unusual pricing Fair and market-competitive

If you come across a seller who you suspect is selling counterfeit Boulder Giant bicycles, it is important to report them to the appropriate authorities or the manufacturer. This helps protect other consumers from falling victim to scams. Moving forward, let’s delve into authenticating the bicycle’s serial number.

Advertisement

a. Authenticating the Bicycle’s Serial Number

Check the serial number of the bicycle to authenticate its authenticity. This step is crucial in identifying stolen bicycles and ensuring that you are purchasing a genuine Boulder Giant bicycle. To authenticate the serial number, follow these steps:

  • Start by locating the serial number on the bicycle frame. It is usually engraved on the underside of the bottom bracket or near the rear dropouts.

  • Once you have found the serial number, compare it to the manufacturer’s records. Boulder Giant keeps a detailed database of all their bicycles and their corresponding serial numbers.

  • Look for any signs of tampering or alterations on the serial number. Counterfeit bicycles often have fake or altered serial numbers.

  • You can also contact Boulder Giant directly to verify the authenticity of the serial number.

By authenticating the serial number, you can confidently determine if the Boulder Giant bicycle you are considering is genuine.

Now, let’s move on to the next step of checking for genuine parts and components.

b. Checking for Genuine Parts and Components

Once you’ve authenticated the serial number, it’s important to ensure that the bicycle has genuine parts and components. This step is crucial in determining the true value of a Boulder Giant bicycle. Checking for counterfeit parts is essential, as there are many counterfeit components in the market.

One way to identify genuine components is to compare them with original manufacturer specifications. Look for any inconsistencies in branding, logos, or markings. Pay close attention to the quality of the materials used, such as the frame, wheels, and drivetrain. Additionally, check if the bicycle has any aftermarket modifications, as these can affect its authenticity.

Advertisement

By thoroughly inspecting the parts and components, you can guarantee that you’re getting a genuine Boulder Giant bicycle.

Now, let’s move on to verifying the seller’s reputation without compromising your decision-making process.

c. Verifying the Seller’s Reputation

Before proceeding with your purchase, it’s essential to ensure that the seller has a reputable track record. Verifying the seller’s reputation helps you avoid scams and ensures a smooth transaction. To do this, you can check online reviews and ratings, ask for references from previous customers, or even inquire in online cycling communities. Additionally, it’s important to look out for warning signs such as unrealistic prices, lack of contact information, or suspicious payment methods. By taking these precautions, you can minimize the risk of falling victim to fraudulent sellers. Moving forward, once you have found a trustworthy seller, it’s important to also understand how to properly maintain and care for your Boulder Giant bicycle.

Maintenance and Care for Boulder Giant Bicycles

Proper maintenance and care are crucial for keeping your Boulder Giant bike in top condition. To ensure longevity and optimal performance, here are some maintenance tips for your bicycle.

  • Regularly inspect your bike for any signs of wear or damage, such as loose bolts or cracked frames. This will help prevent any potential issues before they escalate.

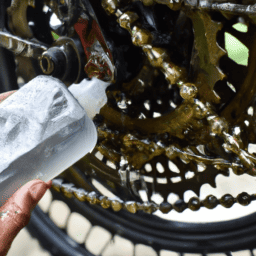
  • Keep your bike clean by regularly washing it with soap and water, paying extra attention to the drivetrain and braking system. Additionally, lubricate the chain and other moving parts to reduce friction and ensure smooth operation.

  • Check and adjust the tire pressure regularly to optimize ride quality and avoid flats.

By following these maintenance tips and addressing common issues promptly, you can enjoy a smooth and trouble-free riding experience.

Advertisement

Now, let’s move on to discussing the importance of regular cleaning and lubrication.

a. Regular Cleaning and Lubrication

Make sure you regularly clean and lubricate your bike to keep it in optimal condition. Regular maintenance is key to ensuring the longevity and performance of your Boulder Giant bicycle.

Cleaning your bike after every ride will help remove dirt, grime, and debris that can accumulate and potentially damage the components. Use a mild soap and water solution to gently scrub the frame, wheels, and drivetrain.

After cleaning, it’s important to lubricate the moving parts of your bike. Apply a high-quality bicycle lubricant to the chain, derailleurs, and other pivot points to reduce friction and ensure smooth operation. Regular lubrication will not only extend the lifespan of your components but also improve shifting and overall performance.

Moving on to inspecting and replacing worn components, it’s essential to keep an eye out for any signs of wear or damage.

Advertisement

b. Inspecting and Replacing Worn Components

After ensuring that my Boulder Giant bicycle is clean and properly lubricated, it’s time to move on to the next step: inspecting and replacing worn components.

This crucial maintenance task ensures that my bike continues to perform at its best and minimizes the risk of any unexpected issues while riding. I meticulously examine each part, from the chain and gears to the brake pads and tires, looking for signs of wear and tear.

If I spot any worn components, I promptly replace them with high-quality replacements to maintain optimal performance and safety. To emphasize the importance, here is a numeric list of key components to inspect and potentially replace:

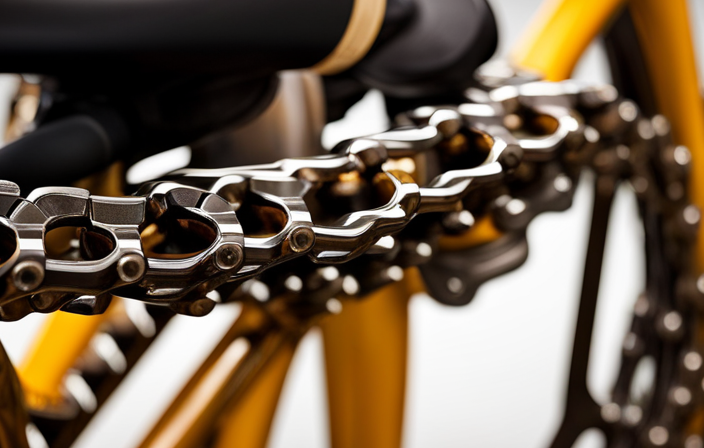
  1. Chain: Check for rust, stretching, or stiff links.
  2. Brake pads: Look for excessive wear or unevenness.
  3. Gears: Ensure smooth shifting and no skipping.
  4. Tires: Inspect for worn tread or cracks.

By carefully inspecting and replacing worn parts, I can ensure that my Boulder Giant bicycle remains in top condition and ready for my next adventure.

Now, let’s move on to the next section about properly storing the bicycle.

c. Storing the Bicycle Properly

To ensure your bicycle stays in good condition, it’s important to properly store it when not in use. There are several storing methods and maintenance techniques that can help protect your Boulder Giant bicycle.

Advertisement

First, find a cool, dry place to store your bike to prevent moisture damage. It’s best to store it indoors, away from extreme temperatures and direct sunlight. If space is limited, consider using a bike rack or wall mount to keep it off the ground and protected from potential damage.

Additionally, regularly clean your bike before storing it to prevent dirt and grime from causing corrosion. Lubricate the chain and other moving parts to keep them in good working condition.

By following these storing and maintenance practices, you can ensure that your Boulder Giant bicycle remains in top shape for years to come. When you’re ready to take it to the next level, consider upgrading and customizing your bike to enhance its performance and style.

Upgrading and Customizing Boulder Giant Bicycles

Upgrading and customizing your Boulder Giant bike can greatly enhance its performance and style. There are several options available when it comes to upgrading your bike. Here are some ideas to get you started:

  • Install a new set of high-performance tires to improve traction and handling.
  • Upgrade the suspension system to provide a smoother and more controlled ride.
  • Replace the stock saddle with a more comfortable and ergonomic one for long rides.
  • Add accessories like fenders, lights, and a bike computer to enhance functionality and safety.

In addition to upgrading, proper maintenance is crucial for keeping your bike in top shape. Regularly clean and lubricate the drivetrain, check and adjust the brakes, and inspect the frame for any signs of damage. Following these maintenance tips will ensure your Boulder Giant bike performs at its best.

Now, let’s move on to the next section about choosing compatible components.

Advertisement

a. Choosing Compatible Components

When choosing compatible components for your bike, it’s important to consider factors such as compatibility with your existing setup and your specific riding needs.

Upgrading and customizing your Boulder Giant bicycle can greatly enhance your riding experience, but it’s crucial to select components that work harmoniously together.

Start by understanding the specifications of your bike frame, including the wheel size, brake type, and bottom bracket compatibility. This will help you narrow down your options when choosing components like wheels, brakes, and drivetrain.

Additionally, consider your riding style and terrain preferences. Are you a mountain biker who loves tackling technical trails, or a road cyclist who prefers long-distance rides? Your answers will guide you in selecting the appropriate suspension, tires, and handlebars.

Remember, choosing compatible components is key to achieving optimal performance and safety.

Advertisement

As you delve further into upgrading and customizing, seeking professional assistance can provide valuable guidance in making the right choices.

b. Seeking Professional Assistance

If you’re unsure about how to choose compatible components for your bike, seeking professional assistance can provide valuable guidance. Not only can a bicycle expert help you select the right parts, but they can also offer a professional appraisal of your bike’s worth. Seeking their expertise ensures that you make informed decisions and avoid costly mistakes.

When hiring a bicycle expert, consider the following:

  • Look for a certified professional with experience in bike appraisals.
  • Ask for references from previous clients to gauge their reputation.
  • Discuss your specific needs and expectations upfront to ensure they can meet them.

By seeking professional appraisal and guidance, you can make informed choices that maximize the value of your bike. This sets the stage for the next step in personalizing the bicycle’s appearance.

c. Personalizing the Bicycle’s Appearance

After seeking professional assistance to determine the worth of my Boulder Giant bicycle, I decided to take the next step in personalizing its appearance.

As an avid cyclist, I believe that a bicycle should not only perform well but also reflect my own style and preferences. Boulder Giant offers a range of customizing options, allowing me to make my bicycle truly unique. From choosing the color scheme to adding accessories such as a bell, lights, or a customized saddle, I can create a bicycle that stands out from the crowd.

Advertisement

These options not only enhance the aesthetic appeal of the bicycle but also improve its functionality and safety. By incorporating these personalized touches, I can make my Boulder Giant bicycle a true reflection of my personality and cycling needs.

Now, let’s delve into testimonials and reviews from other Boulder Giant bicycle owners to gain further insights.

Testimonials and Reviews from Boulder Giant Bicycle Owners

To gain further insights, let’s delve into testimonials and reviews from other Boulder Giant bicycle owners.

Reading testimonials can be a valuable way to gauge the overall satisfaction of customers who have purchased this bike. Many testimonials highlight the exceptional quality and performance of the Boulder Giant bicycle. Customers rave about the smooth ride and durability of the bike, praising its ability to handle various terrains with ease. They also appreciate the comfortable seating and ergonomic design, which allows for long rides without discomfort.

Additionally, customer reviews often mention the excellent customer service provided by Boulder Giant, with prompt responses to inquiries and efficient handling of any issues that arise. These testimonials and reviews demonstrate the high level of satisfaction that Boulder Giant bicycle owners experience. They serve as a testament to the quality and value of this bike, making it a worthwhile investment.

Advertisement

Moving on to positive experiences and satisfaction with the Boulder Giant bicycle…

a. Positive Experiences and Satisfaction

You’ll be pleased to hear that many Boulder Giant bicycle owners have had positive experiences and are highly satisfied with their purchase. Here are just a few reasons why customers have given positive reviews and are overall satisfied with their Boulder Giant bicycles:

  1. Superior Quality: Customers rave about the exceptional build quality and attention to detail in their Boulder Giant bicycles. From the sturdy frame to the smooth gear shifting, every component is designed to withstand the test of time.

  2. Comfortable Ride: Owners appreciate the comfortable ride that Boulder Giant bicycles provide. The ergonomic design ensures a pleasant experience, even on long rides or rough terrain.

  3. Excellent Performance: Boulder Giant bicycles are known for their impressive performance. Whether you’re tackling steep hills or cruising along flat roads, these bikes deliver a smooth and efficient ride.

  4. Durability: Customers are delighted with the durability of their Boulder Giant bicycles. These bikes are built to last, withstanding the rigors of regular use without compromising performance or safety.

With positive customer reviews and overall satisfaction, it’s no wonder that Boulder Giant bicycles are highly regarded. Now let’s delve into the next section about the performance and durability of these bikes.

b. Performance and Durability

Customers have found that the performance and durability of Boulder Giant bicycles exceed their expectations. The performance testing conducted on these bicycles has consistently shown outstanding results. Whether it’s tackling rough terrains or conquering steep hills, these bikes deliver exceptional performance.

The engineering and design of Boulder Giant bicycles ensure optimal efficiency, allowing riders to effortlessly glide through various trails. Moreover, the long-term durability of these bicycles is truly impressive. Even after years of rigorous use, customers have reported minimal wear and tear, with the bicycles retaining their original strength and functionality. This level of durability ensures that Boulder Giant bicycles can withstand the test of time, making them a reliable investment for any avid cyclist.

Advertisement

Moving on to the next section about ‘value for money,’ it’s important to note that these exceptional qualities also come at an affordable price point.

c. Value for Money

When it comes to evaluating the value for money of a Boulder Giant bicycle, there are a few factors to consider.

First and foremost, the brand reputation plays a significant role. Boulder Giant is known for producing high-quality bicycles that are built to last. Their commitment to performance and durability ensures that you are getting a reliable and long-lasting product.

To determine the market value of a Boulder Giant bicycle, it is essential to research and compare prices from various sources. This will give you a better understanding of the average price range and help you make an informed decision.

By considering both the brand reputation and researching market value, you can ensure that you are getting a bicycle that is worth the investment.

Advertisement

In conclusion, understanding the value of a Boulder Giant bicycle involves considering its performance, durability, brand reputation, and market value. Now, let’s delve into the next section and gain a comprehensive understanding of the overall worth of a Boulder Giant bicycle.

Conclusion: Understanding the Value of a Boulder Giant Bicycle

To fully grasp the value of a Boulder Giant bicycle, it’s important to consider its performance, durability, brand reputation, and market value.

When understanding the resale market, it’s crucial to research similar models and their selling prices. This will give you an idea of the demand and market value of the bicycle.

Additionally, determining the value for insurance purposes requires taking into account the bicycle’s age, condition, and any customizations or upgrades. It’s advisable to consult with an appraiser or use online resources to get an accurate estimation.

Remember that the value of a Boulder Giant bicycle can vary depending on the specific model, year, and overall condition. By considering all these factors, you can make an informed decision about the worth of your Boulder Giant bicycle in the resale market or for insurance purposes.

Advertisement

Frequently Asked Questions

Are there any specific factors that can significantly increase the value of a Boulder Giant bicycle?

There are several factors that can significantly increase the value of a Boulder Giant bicycle. Some tips for increasing its value include regular maintenance, upgrading components, and keeping it in good condition.

How can I determine the authenticity of a Boulder Giant bicycle?

To determine the authenticity of a Boulder Giant bicycle, look for specific features such as the logo, serial number, and quality of materials. Spotting fakes involves examining the overall build, components, and comparing it with genuine models.

What are some common maintenance and care tips for Boulder Giant bicycles?

Maintenance tips and care guide for Boulder Giant bicycles include regular cleaning, lubricating the chain, checking tire pressure, adjusting brakes and gears, and inspecting for any wear or damage. Attention to these details ensures optimal performance and longevity.

Are there any recommended sources for researching the market value of Boulder Giant bicycles?

Recommended sources for researching the market value of Boulder Giant bicycles include online marketplaces like eBay and Craigslist, as well as bicycle-specific forums and websites such as Bicycle Blue Book and Pinkbike’s Buy/Sell section. These platforms provide comprehensive information and user feedback to help determine market value accurately.

Can you provide any tips for upgrading and customizing a Boulder Giant bicycle?

When it comes to upgrading options and customization ideas for a Boulder Giant bicycle, there are various possibilities. From swapping out components like the handlebars and saddle, to adding accessories like fenders or a rack, the choices are endless.

Advertisement

Conclusion

After carefully considering the various factors that determine the value of a Boulder Giant Bicycle, it is evident that these bikes offer exceptional quality and performance.

The condition, age, and rarity of the bicycle contribute to its overall worth, while the brand’s reputation further enhances its value.

Positive experiences and satisfaction from riders, along with the bicycle’s performance and durability, make it a worthwhile investment.

Ultimately, Boulder Giant Bicycles provide excellent value for money, making them a prudent choice for cycling enthusiasts.

So, why settle for anything less when you can have the best?

Advertisement

Ralf is a devoted husband and father who loves spending time with his family. He enjoys riding his bicycle as much as possible, and takes every opportunity he can to get out on the open road. Ralf is a kind and gentle person who wants only the best for those around him.

Continue Reading
Advertisement

Bike

How To Motorize A Bicycle

Published

on

By

An image showcasing a bicycle with its frame modified to include a powerful electric motor, complete with a sleek battery pack mounted near the rear wheel and a set of futuristic LED headlights

Imagine elevating your cycling experience by transforming your ordinary bicycle into a powerful machine that effortlessly propels you forward.

In this article, I will guide you through the detailed process of motorizing your bicycle, step by step. From choosing the right motor kit to ensuring safety measures, you will learn everything you need to know to create your very own motorized bicycle.

Get ready to embark on an exciting journey of innovation and adventure.

Key Takeaways

  • Familiarize yourself with local laws and regulations
  • Understand the required equipment for riding
  • Learn where motorized bicycles are allowed
  • Avoid legal issues by following regulations

Choose the Right Motor Kit for Your Bicycle

You should choose the right motor kit for your bicycle. Choosing the right motor kit can greatly enhance your riding experience and make your commute more efficient.

Advertisement

When considering motor power, factors such as terrain, weight, and desired speed need to be taken into account. For hilly terrains or heavier bicycles, a higher motor power will be required to ensure smooth operation and adequate speed. On the other hand, if you plan to use your motorized bicycle mainly on flat surfaces, a lower motor power may suffice.

Additionally, when it comes to battery capacity, it is important to explore the different options available and choose the right capacity based on your riding needs and distance requirements. A larger battery capacity will allow for longer rides without needing to recharge.

Now that we have discussed choosing the right motor kit, let’s move on to gathering the necessary tools and materials for the installation process.

Gather the Necessary Tools and Materials

To get started, it’s important to gather all the tools and materials needed for the project. Here are the essential items you’ll need:

  • Wrench set: You’ll need a set of wrenches to loosen and tighten bolts on your bicycle.
  • Screwdriver set: A variety of screwdrivers will be necessary for removing and installing parts.
  • Wire cutter/stripper: This tool will come in handy when dealing with electrical connections.
  • Allen wrench set: Many motor kits require the use of Allen wrenches for assembly.
  • Battery and charger: Make sure to choose a battery that is compatible with your motor kit.
  • Motor kit: This is the heart of your motorization project. Choose a kit that suits your needs and budget.

Choosing the right motor kit is crucial to ensure a smooth installation process. Additionally, be prepared to troubleshoot common motorization issues that may arise during the project.

Once you have gathered all the necessary tools and materials, you can proceed to prepare your bicycle for motorization by following the next steps.

Advertisement

Prepare Your Bicycle for Motorization

Before starting, make sure that your bike is in good condition and ready for the motor installation. Inspect the frame, wheels, and brakes for any signs of damage or wear. Check the tire pressure and ensure that they’re properly inflated.

Remove any accessories or attachments that may interfere with the motor installation process.

Next, determine the type of bike modification you want to do, whether it’s a gas-powered engine or an electric bike conversion. This will dictate the specific steps and materials needed for the motorization process.

Advertisement

Additionally, make sure you have all the necessary tools and equipment on hand.

Once your bike is prepared, you can move on to the next section and install the motor kit onto your bicycle, transforming it into a motorized ride.

Install the Motor Kit onto Your Bicycle

Once the motor kit is installed onto your bike, it will be transformed into a motorized ride. To install the electric motor, begin by removing the rear wheel from the bicycle frame. Next, attach the motor bracket onto the frame using the provided screws and secure it tightly. Place the motor onto the bracket, aligning the mounting holes, and fasten it securely. Connect the motor’s wiring to the battery and controller according to the provided instructions, ensuring proper connections. Once everything is connected, double-check all the connections and tighten any loose screws. To troubleshoot motor issues, refer to the troubleshooting section in the motor kit manual. Now, we can move on to the next step and connect the motor to the bicycle’s drive system, allowing it to propel the bike forward effortlessly.

Connect the Motor to the Bicycle’s Drive System

Advertisement

Now you can connect the motor to your bike’s drive system and start enjoying effortless propulsion.

To connect the motor to the bicycle’s drivetrain, follow these steps:

  • First, locate the motor mounting bracket on your bike frame. Ensure it is securely attached.
  • Next, align the motor’s sprocket with the bike’s chainring. Use a chain tool to remove the necessary links from the bike’s chain if needed.
  • Connect the motor’s sprocket to the bike’s chainring using a chain connector.
  • Double-check the alignment and tension of the chain. Ensure it is neither too loose nor too tight.
  • Once connected, test the motor by pedaling the bike. The motor should engage and provide assistance.

If you encounter any issues during this process, such as chain slipping or misalignment, consult the motor kit’s troubleshooting guide for assistance.

With the motor now connected to the bicycle’s drive system, we can move on to installing the throttle and control mechanisms.

Install the Throttle and Control Mechanisms

To begin the installation process, attach the throttle and control mechanisms to your bike’s handlebars. The throttle allows you to control the speed of the motor, while the control mechanisms enable you to activate the motor and make necessary adjustments. Proper installation of these components is crucial for a smooth and efficient motorization system.

Below is a table that illustrates the installation steps for the throttle and control mechanisms:

Advertisement
Step Procedure
1 Position the throttle grip on the handlebars and secure it using the provided clamp.
2 Connect the throttle cable to the motor. Ensure a secure and tight connection.
3 Adjust the throttle sensitivity according to your preference using the provided throttle adjustment feature.

Once the throttle and control mechanisms are securely installed, you can proceed to test and adjust the motorization system. This will ensure that everything is functioning properly and any troubleshooting issues can be resolved before hitting the road.

Transitioning into the next section, it is important to thoroughly test and adjust the motorization system to guarantee optimal performance.

Test and Adjust the Motorization System

After securely installing the throttle and control mechanisms, it is essential to thoroughly test and adjust the motorization system for optimal performance. Here are the steps to follow:

  1. Testing the Motor: Start by engaging the motor and observing its response. Ensure it starts smoothly and accelerates without any hitches. Listen for any unusual noises or vibrations.

  2. Adjusting Motor Performance: Fine-tune the motor’s power output by adjusting the throttle. Increase or decrease the throttle sensitivity to achieve the desired speed and responsiveness.

  3. Troubleshooting Common Motorization Issues: Monitor the motor for overheating or excessive battery drain. Inspect all connections for loose wires or faulty components. Resolve any issues promptly to prevent further damage.

  4. Test Ride and Fine-tuning: Take the motorized bicycle for a test ride, paying attention to its overall performance and handling. Make any necessary adjustments to the motor or control mechanisms to improve the riding experience.

Now that the motorization system has been tested and adjusted, it is crucial to ensure safety measures are in place for worry-free riding.

Ensure Safety Measures are in Place

Make sure you have all the necessary safety measures in place to ensure a worry-free riding experience. The importance of wearing protective gear cannot be emphasized enough when motorizing a bicycle. A helmet, knee pads, and elbow pads are essential to protect yourself from potential accidents and injuries.

Advertisement

Additionally, it is crucial to understand and abide by local laws and regulations regarding motorized bicycles. Different jurisdictions may have specific rules about speed limits, required equipment, and where motorized bicycles are allowed to be ridden. Familiarize yourself with these regulations to avoid any legal issues.

By prioritizing safety and following the rules, you can enjoy the benefits of a motorized bicycle without compromising your well-being or breaking the law.

Now, let’s move on to learning how to operate and maintain your motorized bicycle smoothly.

Learn How to Operate and Maintain Your Motorized Bicycle

Learning how to operate and maintain your motorized bike is essential for a smooth and hassle-free riding experience. To ensure that your motorized bicycle functions optimally, here are three key tips:

  1. Troubleshooting common issues with motorized bicycles: Familiarize yourself with common problems such as engine starting issues, fuel system malfunctions, or electrical failures. This knowledge will help you diagnose and fix problems efficiently.

  2. Tips for increasing the lifespan of your motorized bicycle: Regularly check and change the engine oil, clean the air filter, and inspect the spark plug. Additionally, avoid overloading the bike and adhere to the manufacturer’s recommended maintenance schedule.

  3. Properly maintaining the bike’s components: Regularly lubricate the chain, inspect the brakes, and ensure the tires are inflated to the correct pressure. These simple maintenance tasks will ensure your motorized bicycle performs at its best.

By following these guidelines, you can enjoy the benefits of your motorized bicycle without any interruptions.

Advertisement

Enjoy the Benefits of Your Motorized Bicycle

To fully experience the advantages of your motorized bike, you’ll love the increased speed and convenience it brings to your daily commute.

Riding a motorized bicycle in your daily commute has numerous benefits. Firstly, it allows you to travel at a faster pace, reducing travel time and making your commute more efficient. With the added power of the motor, you can easily navigate through traffic and reach your destination faster.

Additionally, using a motorized bicycle is a sustainable and eco-friendly option, reducing your carbon footprint and contributing to a cleaner environment.

To ensure the longevity of your motorized bicycle, it is essential to follow best practices for maintenance. Regularly inspect and clean the bike, check tire pressure, and lubricate the chain. Proper maintenance will not only enhance the performance but also extend the lifespan of your motorized bicycle, allowing you to enjoy its benefits for years to come.

Frequently Asked Questions

How much does a motor kit for a bicycle typically cost?

Motor kits for bicycles typically range in cost from around $200 to $1500, depending on the type of motor. There are various types available, including electric hub motors and mid-drive motors.

Advertisement

Are there any legal requirements or restrictions for using a motorized bicycle?

Sure, let’s dive into the legal requirements and restrictions for using a motorized bicycle. In terms of registration, it depends on your location, but some places require you to register your motorized bicycle. As for speed limits, again, it varies, but typically motorized bicycles are subject to the same speed limits as regular bicycles.

Can any type of bicycle be motorized, or are there specific requirements?

Any type of bicycle can be motorized, but there are specific requirements. Motorizing mountain bikes involves adding a motor and battery to the frame, while converting road bikes requires installing a motor kit onto the existing bike.

What kind of maintenance is required for a motorized bicycle?

Maintenance tips for a motorized bicycle include regular oil changes, checking spark plugs, and inspecting the chain for wear. Troubleshooting common issues such as starting problems or strange noises may require adjusting the carburetor or cleaning the fuel system.

Are there any safety concerns or precautions to be aware of when operating a motorized bicycle?

Motorized bicycle safety concerns are critical to understand. It is essential to prioritize safety precautions, such as wearing a helmet, using reflectors, maintaining brakes, and following traffic rules, to ensure a safe and enjoyable ride.

Conclusion

In conclusion, as I reflect on my journey of motorizing my bicycle, I can’t help but feel a sense of liberation and excitement.

Advertisement

Like a phoenix rising from the ashes, my bicycle has transformed into a powerful steed, ready to conquer any path ahead.

The precision and attention to detail required in this process have not only enhanced my technical skills but also my appreciation for the beauty of mechanics.

Now, as I ride into the sunset, I am filled with a sense of pride and joy, knowing that I have unlocked a new world of possibilities with my motorized companion.

Continue Reading

Bike

How To Change Gears On A Gravel Bike

Published

on

By

An image capturing a close-up of a rider's gloved hand gripping a gravel bike's gear lever, fingers delicately adjusting it

Prepare yourself to enhance your gravel biking abilities with this in-depth guide on mastering gear changes like a professional.

Mastering the art of gear shifting is crucial for any cyclist, especially when tackling unpredictable terrains.

In this article, I will walk you through the ins and outs of understanding your bike’s gear system, perfecting your technique, troubleshooting common issues, and ultimately enjoying a smooth ride with perfectly timed gear changes.

So grab your helmet and let’s dive in!

Key Takeaways

  • Gravel bikes have a wide range of gears for different terrains.
  • Proper gear shifting technique ensures a smooth and efficient ride.
  • Familiarize yourself with the gear levers and their correct operation.
  • Choose the correct gear ratio based on the anticipated terrain changes.

Understanding the Gear System on a Gravel Bike

Advertisement

To change gears on your gravel bike, you’ll need to understand the gear system. The gear selection on a gravel bike is crucial for optimizing performance and ensuring a smooth ride on various terrains.

Gravel bikes typically come with a wide range of gears to accommodate different riding conditions, including steep climbs and fast descents.

One important aspect of the gear system is the gear ratios. Gear ratios determine how much power is transferred from your legs to the wheels. Higher gear ratios provide more power but require more effort, making them suitable for flat or downhill sections. Lower gear ratios, on the other hand, offer less power but are easier to pedal, making them ideal for climbing steep hills or navigating rough terrain.

Understanding how to select the right gear ratio for each situation is essential in maximizing efficiency and preventing unnecessary strain on your body. By choosing an appropriate gear ratio, you can maintain a consistent cadence while adapting to changes in terrain without exerting excessive force.

Proper gear shifting technique plays a vital role in achieving seamless transitions between gears without interruption or damage to the drivetrain components.

Advertisement

Importance of Proper Gear Shifting Technique

Remember, it’s crucial to use the correct technique when shifting gears on your gravel bike. Proper gear shifting technique not only ensures a smoother and more efficient ride but also prevents unnecessary wear and tear on your drivetrain. By following these guidelines, you can optimize your gear shifting experience and reap the benefits of efficient gear shifting.

One key aspect of proper gear shifting technique is timing. It’s important to anticipate shifts in terrain or cadence and initiate gear changes before they become necessary. This allows for a seamless transition between gears, minimizing any disruption to your pedaling rhythm.

Another important factor is maintaining consistent pedal pressure while shifting gears. Applying too much force when changing gears can cause the chain to jump or slip, leading to potential damage. On the other hand, releasing pedal pressure entirely can result in a loss of momentum. Finding the right balance between applying pressure and easing up slightly will ensure a smooth transition from one gear to another.

To further emphasize this point, consider the following table:

Gear Shifting Technique Benefits
Anticipating shifts Smoother transitions
Consistent pedal pressure Prevents chain slippage
Balancing pressure Maintains momentum

By implementing these techniques, you’ll experience improved efficiency and durability in your gravel biking adventures.

Advertisement

Transitioning into the subsequent section about familiarizing yourself with the gear levers, it’s essential to understand how they function to make precise gear changes effortlessly.

Familiarize Yourself with the Gear Levers

Before getting started, it’s important to know how the gear levers on your gravel bike work. Familiarizing yourself with the gear lever functions and proper hand placement will ensure smooth and efficient gear shifting while riding.

Most gravel bikes are equipped with a combination of two gear levers, one for controlling the front derailleur and the other for the rear derailleur. The left lever is responsible for shifting between the chainrings, which control the bike’s front gears. On the other hand, the right lever controls the rear gears by moving the derailleur across different cogs on the cassette.

Advertisement

To shift gears using these levers, place your hands firmly on both hoods of your handlebars. Your index fingers should rest lightly on top of each lever, ready to initiate shifts when needed. When you want to shift to an easier gear (a smaller cog or a smaller chainring), push either lever sideways using your thumb or index finger. For harder gears (larger cogs or larger chainrings), pull back on either lever.

Understanding how to operate these gear levers and maintaining proper hand placement is crucial in achieving optimal performance and preventing any potential damage to your gravel bike’s drivetrain components.

With this knowledge in mind, let’s move onto starting with the right gear ratio…

Start with the Right Gear Ratio

Begin with the correct gear ratio to ensure optimal performance and prevent potential damage to your drivetrain components. Gear selection is crucial when changing gears on a gravel bike. By choosing the right gear ratio, you can maximize efficiency and power transfer while minimizing unnecessary strain on your bike’s components.

To start with the right gear ratio, it’s important to consider the terrain you’ll be riding on. If you’re facing a steep climb or challenging off-road section, it’s best to select a lower gear that provides more torque for easier pedaling. On the other hand, if you’re riding on flat or downhill sections, choosing a higher gear will allow you to maintain speed without excessive spinning of the pedals.

Advertisement

Finding the ideal gear ratio may require some trial and error, especially when encountering varying terrains during your ride. Pay close attention to how your bike responds to different gears and adjust accordingly. Anticipate terrain changes by smoothly shifting gears before reaching them, ensuring a seamless transition between ratios.

By starting with the right gear ratio and adjusting as needed, you can optimize your gear selection for maximum efficiency and enjoy a smoother ride on your gravel bike. Anticipating terrain changes will further enhance your overall biking experience.

Anticipate Terrain Changes

To optimize your riding experience, it’s important to anticipate shifts in terrain while on your gravel bike. Understanding the terrain and adapting your gear strategy accordingly can greatly enhance your performance and enjoyment. By being proactive in adjusting gears before encountering changes in the landscape, you can maintain a steady cadence and ensure smooth transitions.

Advertisement

To help you understand how to adapt your gear strategy based on terrain, refer to the table below:

Terrain Type Recommended Gear Strategy
Uphill Shift to a lower gear for easier pedaling
Downhill Shift to a higher gear for increased speed
Flat Maintain a comfortable gear ratio
Loose Gravel Shift to a lower gear for better traction
Sand or Mud Shift to an even lower gear for stability

By anticipating these terrain changes and adjusting gears accordingly, you’ll be able to maintain optimal control of your gravel bike. Remember, it’s always better to shift before you need to rather than struggling with shifting under pressure during challenging sections. This will not only improve your overall riding experience but also prevent unnecessary strain on yourself and the bike. Transitioning into the next section about ‘shift before you need to’ will further enhance your understanding of proper gear management on a gravel bike.

Shift Before You Need to

Make sure you shift gears on your gravel bike in anticipation of upcoming terrain changes. Anticipating terrain changes is essential to maintaining a steady pedaling cadence and ensuring a smooth ride.

Here are four crucial tips for shifting gears effectively:

  • Pay attention to the road ahead: Keep your eyes focused on the trail, looking out for any obstacles or changes in terrain that may require gear adjustments.

  • Shift before you need to: Don’t wait until you’re struggling to pedal uphill or losing control on a descent. Shift gears proactively, allowing yourself enough time to adjust smoothly without interrupting your flow.

  • Know your bike’s gear range: Familiarize yourself with the different gear combinations available on your gravel bike. Understand which gears are best suited for climbing, descending, and cruising on flat terrain.

  • Practice shifting techniques: Experiment with shifting both up and down the gears while riding at varying speeds. This will help you develop a feel for how your bike responds and ensure seamless transitions between gears.

Maintaining a steady pedaling cadence is crucial for efficient riding and preventing unnecessary strain or fatigue. Transitioning into the next section about ‘maintain a steady pedaling cadence,’ it is equally important to find the right gear ratio that allows you to maintain an optimal cadence throughout different terrains.

Advertisement

Maintain a Steady Pedaling Cadence

When it comes to changing gears on a gravel bike, one important aspect to consider is maintaining a steady pedaling cadence. This not only helps in improving your efficiency but also ensures a smoother transition between gears.

To maintain cadence, it is crucial to anticipate gear changes and shift before you actually need to. By doing so, you can avoid sudden spikes or drops in resistance that can disrupt your rhythm. Instead, aim for seamless transitions that allow you to keep spinning at a consistent cadence.

Maintaining a steady pedaling cadence has several benefits. Firstly, it reduces the strain on your muscles and joints by distributing the workload evenly across different gears. Secondly, it allows you to generate power consistently without wasting energy due to abrupt gear changes.

By focusing on maintaining cadence while changing gears on your gravel bike, you will find yourself riding with greater efficiency and endurance. So remember, smooth shifts are key!

In the next section about using both front and rear gears, we will explore another essential technique for optimizing gear changes without any interruption in your ride flow.

Advertisement

Use Both Front and Rear Gears

Using both the front and rear gears on your gravel bike is essential for achieving optimal gear changes without any interruption in your ride flow. When it comes to front gear selection, you have multiple options available.

The smaller chainring is ideal for climbing steep hills or tackling difficult terrain, as it provides a lower gear ratio that allows for easier pedaling. On the other hand, the larger chainring is great for riding on flat roads or when you want to go faster, as it offers a higher gear ratio that maximizes your speed.

In terms of rear gear selection, your gravel bike typically has a wide range of gears to choose from. The smaller cogs provide easier pedaling and are perfect for uphill climbs or rough surfaces where you need more control. Conversely, the larger cogs offer higher resistance and are suitable for riding on flat roads or when you want to pick up speed.

By utilizing both front and rear gears effectively, you can optimize your riding experience by seamlessly transitioning between different terrains and conditions. However, it’s important to note that you should avoid ‘cross chaining,’ which refers to using extreme combinations such as the small chainring with the smallest cog or the large chainring with the largest cog. This can cause excessive wear on your drivetrain components and may result in poor shifting performance.

Transitioning into the next section about ‘don’t cross-chain,’ it’s crucial to understand how improper gear selection can negatively impact your ride quality and potentially damage your bicycle’s drivetrain components.

Advertisement

Don’t Cross Chain

Avoiding cross-chaining is important to maintain the performance and longevity of your drivetrain components. Cross-chaining occurs when you use the extreme combination of gears, such as using the big chainring in the front and the biggest cog in the rear, or vice versa. This puts excessive stress on your chain and can lead to premature wear and tear. Additionally, cross-chaining reduces efficiency and can cause poor shifting.

To prevent cross-chaining, it is essential to understand your gear ratios and make conscious decisions when shifting. When riding on a gravel bike, it’s recommended to avoid extreme gear combinations that strain your drivetrain unnecessarily. Instead, aim for a balanced use of gears that allows for smooth transitions between them.

Regularly inspecting and maintaining your gears is also crucial for optimal performance. Clean your drivetrain regularly to remove dirt and grime that can affect shifting quality. Lubricate the chain appropriately to minimize friction.

By avoiding cross-chaining and practicing good gear maintenance habits, you can ensure a longer lifespan for your drivetrain components while optimizing your cycling experience.

Now let’s delve into adjusting gear shifters for comfort without compromising functionality.

Advertisement

Adjusting Gear Shifters for Comfort

To achieve a more comfortable riding experience, it’s important to make adjustments to your gear shifters. Proper gear shifter maintenance and adjusting gear cable tension are crucial for smooth and efficient shifting.

Here are two key steps you can take to optimize the performance of your gear shifters:

  1. Check and adjust the gear cable tension: Begin by shifting your bike into the highest gear (smallest cog). Locate the barrel adjuster on the derailleur or shifter body. Turn it clockwise to increase tension or counterclockwise to decrease tension until the shifting feels crisp and precise.
  • Fine-tune while riding: Take your bike for a spin around a quiet area, such as an empty parking lot. Shift through all gears while paying attention to any hesitation or lag in shifting. If needed, make additional adjustments using the barrel adjuster until you achieve seamless shifting across all gears.
  1. Evaluate lever position and reach: Ensure that your shift levers are positioned comfortably within reach of your hands while gripping the handlebars. Adjust their angle if necessary, so you can easily access them without straining or stretching.

By maintaining and adjusting your gear shifters correctly, you’ll enhance both comfort and performance on your gravel bike.

Now, let’s move on to practice shifting gears on different surfaces for even greater control during rides without compromising safety or efficiency.

Practice Shifting Gears on Different Surfaces

Start by practicing shifting gears on a variety of surfaces to improve your control and adaptability while riding. It’s important to become familiar with the different gear ratios and how they affect your bike’s performance. Shifting on loose gravel can be particularly challenging, as the surface provides less traction and stability. To navigate this terrain effectively, you need to anticipate changes in resistance and adjust your gears accordingly.

To help illustrate the concept, here is a table showing examples of suitable gear ratios for different surfaces:

Advertisement
Surface Gear Ratio
Paved road High gear (big chainring)
Gravel road Medium gear
Loose gravel Low gear (small chainring)
Uphill Low gear

When shifting on loose gravel, it’s crucial to smoothly transition between gears to avoid any sudden loss of traction. Start by approaching the shift with a steady pedal stroke, then quickly but gently shift into a lower gear before you encounter the loose section. This will allow you to maintain momentum without losing control.

As you practice shifting gears on different surfaces, pay attention to how your bike responds. Listening to your bike can provide valuable feedback about whether you need to make further adjustments or if everything is running smoothly.

Transitioning into the subsequent section about ‘listening to your bike,’ we’ll explore how understanding its cues can enhance your overall riding experience.

Listen to Your Bike

When you’re riding, it’s essential to listen closely to your bicycle for valuable feedback. Your bike can tell you a lot about its condition and how well it’s performing. By paying attention to the sounds it makes, you can detect any potential issues and address them before they become major problems.

Here are some key components of your gear system that you should listen for:

Advertisement
  • Chain noise: A noisy chain could indicate that it needs lubrication or that there is excessive wear.
  • Gear skipping: If your gears are skipping or jumping when you shift, it may be a sign of misalignment or cable tension issues.
  • Grinding sound: This could mean that your drivetrain components are not properly aligned or that there is dirt and debris causing friction.

By regularly listening to these sounds and identifying any abnormalities, you can take proactive steps in bike maintenance to keep your gear system running smoothly.

In the next section, we will discuss fine-tuning your gear shifting skills for an even better riding experience.

Fine-Tuning Your Gear Shifting Skills

Fine-tuning your gear shifting skills can greatly enhance your cycling experience. When it comes to gravel biking, mastering gear shifting techniques is crucial for maintaining control and maximizing efficiency on unpredictable terrain. The key to efficient gear shifting lies in anticipating changes in the trail ahead and adjusting your gears accordingly.

One important technique is preemptive shifting. By planning ahead and shifting into an appropriate gear before you encounter a steep climb or descent, you can maintain momentum and avoid stalling or spinning out. This requires paying close attention to the terrain ahead and using your knowledge of gear ratios to select the optimal gear.

Another technique is called cadence management. Maintaining a consistent pedaling rhythm not only improves efficiency but also reduces strain on your legs. To achieve this, you should shift gears based on your current cadence rather than relying solely on speed or intensity. Experiment with different cadences to find what feels most comfortable for you.

By honing these gear shifting techniques, you can improve your overall performance and enjoyment while riding a gravel bike.

Advertisement

Transitioning now into troubleshooting common gear shifting issues, understanding how to address these problems will ensure a smooth and uninterrupted ride experience without any hiccups along the way.

Troubleshooting Common Gear Shifting Issues

To troubleshoot common gear shifting issues, pay attention to any unusual noises or resistance while pedaling. Here are some common gear shifting problems and how to fix them:

  • Misalignment: If your gears aren’t shifting smoothly, they may be misaligned. To fix this, use the barrel adjuster on your derailleur to make small adjustments until the gears shift smoothly.

  • Chain skipping: If your chain is skipping over the teeth of the cassette or chainring, it could be due to a worn-out chain or cassette. Replace these components if necessary to resolve the issue.

  • Cable tension issues: If your gears aren’t shifting properly, it could be due to incorrect cable tension. Use the barrel adjuster on your shifter or derailleur to fine-tune the cable tension for smooth gear changes.

  • Bent derailleur hanger: A bent derailleur hanger can cause poor shifting performance. Inspect the hanger for any signs of damage and replace if necessary.

By troubleshooting these common gear shifting problems, you can ensure that your gravel bike performs optimally. Enjoy the smooth ride with perfectly timed gear changes in the subsequent section about ‘enjoying the smooth ride with perfectly timed gear changes.’

Enjoy the Smooth Ride with Perfectly Timed Gear Changes

Achieve a smooth and enjoyable ride by mastering the art of perfectly timed gear shifts. When riding a gravel bike, it is essential to have precise control over your gears to navigate various terrains. Perfecting gear transitions allows you to maintain an optimal cadence and power output, ensuring efficiency and comfort throughout your ride.

To achieve perfect gear changes, start by understanding the concept of optimal gear ratios. This involves finding the right balance between the front chainring and rear cassette gears. The goal is to select a combination that provides enough resistance for efficient pedaling without straining your muscles or causing unnecessary fatigue. Experiment with different combinations on different terrains to find what works best for you.

Advertisement

Timing is crucial when shifting gears. Anticipate changes in terrain or gradient ahead of time, allowing yourself ample time to shift smoothly. Avoid shifting under heavy load as this can cause mechanical stress on your drivetrain components. Instead, ease off the pedals momentarily while making the transition.

When executing a gear change, apply steady pressure on the shifter while simultaneously releasing pressure on the pedals momentarily. This allows for smoother shifting as the chain moves from one gear to another seamlessly.

By practicing and perfecting your gear transitions, you will enjoy a smoother ride with optimal power delivery and reduced strain on your body. Remember that mastering this skill takes time and experience, so don’t be discouraged if it doesn’t come naturally at first. Keep experimenting with different techniques until you find what works best for you and enjoy every moment of your gravel bike adventures!

Frequently Asked Questions

What are the different types of gear ratios available on a gravel bike?

There are various gear ratios available on a gravel bike to cater to different riding conditions. Gear ratio selection is crucial as it determines the ease or difficulty of pedaling.

Lower gear ratios, such as 1:1 or 0.8:1, provide more torque for climbing steep hills or navigating rough terrain.

Advertisement

Higher gear ratios, like 2:1 or 2.5:1, offer greater speed on flat surfaces and descents.

Choosing the right gear ratio can optimize efficiency and power output while riding a gravel bike.

How do I know if I’m using the correct gear ratio for a specific terrain?

To determine if you’re using the correct gear ratio for a specific terrain, there are a few factors to consider.

Firstly, observe your cadence (the speed at which you pedal). If it feels too easy or difficult, you may need to adjust the gear ratios accordingly.

Additionally, monitor your speed and power output. If you’re struggling to maintain speed or exerting excessive effort, troubleshooting gear shifting and adjusting gear ratios can help optimize your performance on different terrains.

Advertisement

Can I shift gears while standing up on my gravel bike?

Yes, you can shift gears while standing up on your gravel bike. When climbing steep terrain, it’s important to use the correct shifting technique to maintain momentum and efficiency.

As you approach a climb, anticipate the gear change by slightly easing off the pedals. Then, shift to a lower gear smoothly and quickly, using both your hands and body weight to apply pressure on the pedals.

This will ensure a seamless transition and allow you to conquer those challenging ascents with ease.

How often should I clean and lubricate my gear shifters?

I clean and lubricate my gear shifters regularly to ensure optimal performance and prolong their lifespan.

It is recommended to clean and lubricate the gear shifters every 100-200 miles or whenever they become dirty or sticky.

Advertisement

Start by wiping them down with a damp cloth, then apply a small amount of lubricant to the moving parts.

This will keep the gear shifters functioning smoothly and prevent any unnecessary wear or damage.

Are there any specific techniques for shifting gears smoothly and quickly on a gravel bike?

Shifting gears on a gravel bike requires finesse and precision, much like conducting a symphony. The key is to anticipate the terrain ahead and choose the appropriate gear ratio.

By mastering this art, you can seamlessly transition between gears, ensuring optimum power transfer and a smooth riding experience.

Correct gear ratios allow you to conquer various terrains effortlessly. Whether it’s climbing steep hills or navigating through loose gravel, the right technique is your ticket to gravel biking nirvana.

Advertisement

Conclusion

In conclusion, mastering the art of gear shifting on a gravel bike is essential for a smooth and enjoyable ride.

By understanding the gear system, familiarizing yourself with the levers, and anticipating terrain changes, you can ensure that your gear changes are perfectly timed.

Just like a well-oiled machine, your bike will respond seamlessly to your commands, allowing you to conquer any trail with ease.

So why wait? Embrace the thrill of gravel biking and let your gears dance in perfect harmony as you embark on new adventures.

Advertisement

Continue Reading

Bike

What Equipment Must A Bicycle Have When Used At Night?

Published

on

By

An image showcasing a bicycle equipped with a front and rear light, reflectors on pedals, spokes, and front/rear tires, along with a reflective vest worn by the cyclist, ensuring maximum visibility and safety during nighttime rides

Like a single bright star in the night sky, a bicycle with the appropriate gear guarantees safe travels once the sun goes down. Being an experienced cyclist, I understand the significance of being visible on the road, particularly during nighttime.

In this article, I will guide you through the essential equipment that every bicycle must have when used at night, from powerful lights and reflectors to reflective clothing and properly inflated tires.

Let’s embark on this journey of knowledge to enhance your nighttime cycling experience.

Key Takeaways

  • Reflective gear, such as reflective tape and decals, is essential for increased visibility when cycling at night.
  • High-visibility accessories like flags and vests should be used to maximize visibility.
  • Properly inflated tires and good tread are important for optimal control and safety.
  • Consider the terrain and choose a tread pattern accordingly, and regularly check tire pressure for safe night riding.

White Front Light

You must have a white front light on your bicycle when riding at night. It is essential for your safety and the safety of others on the road.

Advertisement

A white front light helps you see what’s ahead, making sure you can spot any potential hazards, obstacles, or changes in the road surface. Additionally, it allows other road users to see you coming from a distance, reducing the risk of accidents.

A good quality white front light will have a strong beam, illuminating the path ahead effectively. It is important to choose a light that meets the legal requirements for brightness and visibility.

Once you have your white front light secured, the next step is to ensure you have a red rear light, which I will discuss in the next section.

Red Rear Light

A bicycle at night should be equipped with a red rear light. The importance of a red rear light cannot be overstated when it comes to ensuring the safety of both the cyclist and other road users.

Not only does it allow drivers to easily spot the bicycle from a distance, but it also helps them determine the direction in which the cyclist is traveling. In many countries, including the United States, it is a legal requirement for bicycles to have a red rear light when riding at night. This is because it significantly reduces the risk of accidents and enhances visibility.

Advertisement

However, simply having a red rear light is not enough. Reflectors on the front, rear, pedals, and wheels are also crucial in maximizing visibility. These reflectors work in conjunction with the red rear light to make the bicycle more visible from all angles and ensure a safe ride.

Reflectors on the Front, Rear, Pedals, and Wheels

Reflectors on the front, rear, pedals, and wheels are essential for maximizing visibility and ensuring a safe ride. When it comes to reflectors, placement and regulations are important factors to consider.

In most places, bicycles are required to have a white reflector on the front, a red reflector on the rear, and amber reflectors on the pedals. Additionally, reflectors on the wheels can provide extra visibility, especially when they are in motion. These reflective accessories work by bouncing back light from other sources, making you more visible to drivers and pedestrians. By using reflectors in accordance with regulations, you can greatly reduce the risk of accidents while cycling at night. They are a simple yet effective way to enhance your safety on the road.

Advertisement

Transitioning into the next topic, reflective clothing also plays a crucial role in increasing visibility during nighttime rides.

Reflective Clothing

Wearing reflective clothing is essential for increasing visibility and ensuring a safe ride at night. When cycling in the dark, it is crucial to be seen by motorists and other cyclists, and reflective clothing plays a vital role in achieving this. The importance of wearing reflective clothing cannot be overstated. It can make a significant difference in preventing accidents and ensuring your safety on the road.

To choose the right reflective clothing for night time cycling, opt for garments with built-in reflective strips or patches. Look for materials that reflect light well, such as fluorescent or bright colors. Additionally, consider wearing accessories like reflective arm or leg bands to enhance your visibility further. These simple measures can greatly enhance your safety while cycling at night.

Transitioning into the next section, let’s now discuss the importance of wearing a helmet with reflective strips.

Helmet with Reflective Strips

Advertisement

Make sure you choose a helmet that has reflective strips to increase your visibility while cycling at night. Helmet safety is essential, and having reflective strips on your helmet can greatly enhance your safety on the road. These reflective strips are designed to catch the light from car headlights, making you more visible to drivers.

When choosing a helmet, look for ones that have strategically placed reflective strips on the sides, front, and back. This will ensure that you are visible from all angles. Additionally, there are various reflective gear options available that you can attach to your helmet to further enhance your visibility. These include reflective stickers, bands, or even LED lights.

With the right helmet and reflective gear, you can significantly reduce the risk of accidents while cycling at night. As you focus on helmet safety, don’t forget to consider adding a bell or horn for audible signaling, ensuring that you have multiple ways to alert others of your presence on the road.

Bell or Horn for Audible Signaling

Don’t forget to attach a bell or horn to your helmet for audible signaling while cycling. It is important to have a way to alert others of your presence, especially when riding at night. In addition to the helmet with reflective strips and reflective clothing, an audible signaling device is crucial for your safety. To help you visualize the necessary equipment, refer to the table below:

Advertisement
Equipment Importance
Bell or Horn Essential for signaling
Reflective Clothing Increases visibility
Helmet with Reflective Strips Ensures safety
Rearview Mirror Enhances awareness
High Visibility Flag or Vest Promotes visibility
Properly Inflated Tires Ensures a smooth ride
Good Tread Provides better traction
Reflective Tape Enhances visibility
Front Light Illuminates the path ahead
Rear Light Increases visibility from behind
Reflectors Enhance visibility from all angles

By having all these equipment and taking necessary precautions, you can ensure your visibility and safety while cycling at night. Now, let’s discuss the next important aspect: the rearview mirror for increased awareness.

Rearview Mirror for Increased Awareness

Using a rearview mirror while cycling increases awareness of surrounding traffic. It is an essential equipment for night riding, as it allows me to keep an eye on vehicles approaching from behind without having to turn my head. The benefits of using a rearview mirror are numerous.

Firstly, it enhances my safety by providing a constant visual reference of what’s happening behind me.

Secondly, it allows me to anticipate potential hazards and make informed decisions while on the road.

Thirdly, it helps me maintain a steady and straight line while riding, as I can easily adjust my position based on the traffic behind me.

Advertisement

Lastly, it gives me peace of mind knowing that I have a clear view of my surroundings at all times.

Other alternative rearview options include helmet-mounted mirrors and handlebar-mounted mirrors. These options provide similar benefits but may vary in terms of comfort and ease of use.

Now, let’s move on to the next section about reflective tape on the frame and forks.

Reflective Tape on the Frame and Forks

Reflective tape on the frame and forks increases visibility and helps cyclists stay safe on the road. When riding at night, it is crucial to have equipment that enhances visibility, and reflective tape does just that. The tape reflects light from car headlights, making the bicycle more visible to drivers. This is especially important when riding on poorly lit roads or in areas with heavy traffic.

Reflective tape is an effective way to enhance nighttime visibility because it can be easily applied to the frame and forks of a bicycle. It comes in various colors, such as white, silver, or fluorescent, which further increases visibility. Additionally, the tape is durable and weather-resistant, ensuring its effectiveness even in harsh conditions.

Advertisement

While reflective tape is a popular choice, there are alternatives available for improving visibility on bicycle frames and forks. Some cyclists opt for reflective decals or stickers, which can be customized to suit their preferences. These decals work similarly to reflective tape by reflecting light and increasing visibility.

Transitioning into the subsequent section about the high-visibility flag or vest for added visibility, cyclists can further enhance their safety by incorporating a high-visibility flag or vest. These additional measures ensure maximum visibility and alert drivers to the presence of the cyclist on the road.

High-Visibility Flag or Vest for Added Visibility

One effective way to increase visibility and promote cyclist safety on the road is by incorporating high-visibility accessories such as a flag or vest. These accessories are designed to make cyclists more visible to motorists, especially in low-light conditions.

High-visibility flags can be attached to the rear of the bicycle or the back of the cyclist, while vests can be worn over clothing to enhance visibility from all angles. The importance of reflective gear cannot be overstated, as it significantly reduces the risk of accidents by making cyclists more easily seen by drivers.

In addition to reflective tape on the frame and forks, incorporating a high-visibility flag or vest is crucial for cyclists who ride at night or in low-light conditions. By increasing visibility, cyclists can greatly enhance their safety on the road.

Advertisement

Moving on to the next section, it is also important to have properly inflated tires with good tread for optimal control and safety.

Properly inflated tires with good tread for optimal control and safety

When it comes to riding a bicycle at night, ensuring optimal control and safety is crucial. One important aspect to consider is the condition of your tires. Properly inflated tires with good tread are essential for a smooth and safe ride. Maintaining the correct tire pressure is key to achieving optimal performance and control. Underinflated tires can make it difficult to maneuver, while overinflated tires can affect traction and stability. Additionally, choosing the right tread pattern for different road conditions is important. A tire with a more aggressive tread pattern can provide better grip on wet or uneven surfaces, while a smoother tread pattern is more suitable for dry roads. So, before hitting the road at night, take some time to check your tire pressure and tread condition to ensure a safe and enjoyable ride.

Now let’s dive into a more detailed discussion about tire pressure maintenance and choosing the right tread pattern for different road conditions:

Tire Pressure Maintenance Choosing the Right Tread Pattern
1. Regularly check your tire pressure using a gauge. Consider the type of terrain you will be riding on.
2. Consult the manufacturer’s guidelines for the recommended tire pressure range. Look for tires with deeper treads for better grip on wet surfaces.
3. Adjust the pressure accordingly using a pump with a pressure gauge. Opt for tires with a smoother tread pattern for dry roads.
4. Remember to check the pressure before each ride. Experiment with different tread patterns to find the one that suits your needs best.

Frequently Asked Questions

How can I ensure that my bicycle is visible to other road users at night?

To ensure my bicycle is visible to other road users at night, I prioritize the use of reflective gear. Reflective clothing, stickers, and lights are essential for enhancing visibility and ensuring my safety on the road.

Is it necessary to have both a front and rear light on my bike when riding at night?

Yes, it is necessary to have both a front and rear light on your bike when riding at night. The front light ensures visibility and helps me see the road ahead, while the rear light increases my visibility to other road users.

Advertisement

Are there any specific laws or regulations regarding the use of reflective clothing while cycling at night?

Yes, there are laws regarding reflective clothing when cycling at night. It is important to wear reflective clothing as it increases visibility and safety for both the cyclist and other road users.

What are the benefits of using a rearview mirror on a bicycle?

Using a rearview mirror on my bike has been a game-changer. It enhances safety by providing a clear view of approaching vehicles, allowing me to react quickly. The benefits are immense and unquestionable.

Can reflective tape be applied to any part of the bike frame, or are there specific areas where it should be placed for maximum effectiveness?

When applying reflective tape to the bike frame, focus on key areas for maximum effectiveness. These include the front and rear forks, seatstays, chainstays, and rims. Additionally, consider using reflective accessories and lights to further enhance bike visibility at night.

Conclusion

As I pedal through the darkened streets, I am grateful for the equipment that guides and protects me on my nighttime cycling adventures. The white front light illuminates my path, while the red rear light signals my presence to those behind me. Reflectors on my bike and clothing shimmer like stars, capturing the attention of passing drivers.

With a helmet adorned with reflective strips, I feel like a shining knight, ready to conquer any obstacle that comes my way. A rearview mirror grants me a glimpse into the world behind, increasing my awareness and ensuring my safety. Reflective tape on the frame and forks adds an extra layer of visibility, while a high-visibility flag or vest boldly announces my presence.

Advertisement

Lastly, properly inflated tires with good tread provide the control and stability I need to navigate the roads with confidence. As I ride under the moonlit sky, I am a symbol of safety, preparedness, and adventure, embracing the beauty of the night with every turn of the pedals.

Continue Reading
Advertisement

Affiliate disclaimer

As an affiliate, we may earn a commission from qualifying purchases. We get commissions for purchases made through links on this website from Amazon and other third parties.

About us

We are a passionate team driven by the belief that cycling is a fantastic and accessible way to stay active while enjoying the beauty of the outdoors. Our mission is to share our love for cycling with as many people as possible. We provide a welcoming environment for individuals of all ages, abilities, and backgrounds to come together and ride bikes. With Ralf’s visionary leadership, Zane’s expertise in cycling adventures, and Olivia’s dedication to community building, we strive to create a vibrant space where everyone can experience the joy of cycling. Through group rides, workshops, and inclusive events, we inspire and empower individuals to embrace an active lifestyle. Join us in our quest to pedal together, embrace the joy of cycling, and foster connections that last a lifetime.

Advertisement

Trending