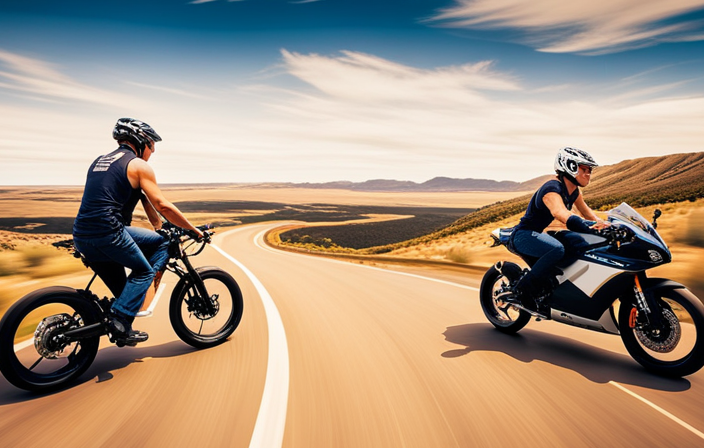
I’ve always loved the feeling of the wind rushing through my hair as I ride my bike. But lately, I’ve been wanting a little extra power to conquer those steep hills and long distances. That’s when I discovered the world of electric bike conversion kits.
With the right electric motor and a few tools, I can turn my regular bike into an electrifying ride. In this article, I’ll guide you through the process step by step, so you can experience the thrill of an electric bike too.
Let’s get started!
Key Takeaways
- Research and compare features of different electric bike conversion kits
- Consider factors like battery type, capacity, weight, and charging time when selecting the right battery for your electric bike
- Consider power output, battery capacity, and range when choosing the right electric motor for your bike
- Gather the necessary tools and equipment and prioritize safety precautions before starting the conversion process
Understand the Different Types of Electric Bike Conversion Kits
To understand the different types of electric bike conversion kits, you’ll need to do some research and compare their features. One of the key components of these kits is the battery, which powers the motor and provides the necessary energy for your electric bike.
There are several different battery options to choose from, each with its own pros and cons. The most common type is the lithium-ion battery, known for its high energy density and long lifespan. Another option is the lead-acid battery, which is more affordable but heavier and less efficient. Lastly, there are nickel-metal hydride batteries, which offer a good balance between cost and performance.
It’s important to consider factors such as capacity, weight, and charging time when selecting the right battery for your electric bike.
Now that you understand the different battery options, let’s move on to choosing the right electric motor for your bike.
Choose the Right Electric Motor for Your Bike
When selecting the ideal motor for your bicycle, make sure it suits your specific needs and preferences. Here are four key factors to consider before making your decision:
-
Power output: Determine how much power you need based on the terrain you’ll be riding on and your desired speed. Higher wattage motors offer more power and speed.
-
Battery capacity: Consider the range you need for your rides. A larger battery capacity will allow for longer distances before needing to recharge.
-
Motor type: There are various motor types available, such as hub motors and mid-drive motors. Research brands and compare prices to find the one that suits your requirements.
-
Installation: Consider the ease of installation and compatibility with your bike. Some motors may require modifications to your frame or wheels.
Gather the Necessary Tools and Equipment
Gather all the tools and equipment necessary for the installation process of the electric motor on your bicycle. Before embarking on this bike modification, it is crucial to prioritize safety precautions.
To begin, you will need a wrench set, screwdrivers, pliers, wire cutters, and a torque wrench. Additionally, ensure you have a bike stand or a sturdy workbench to comfortably work on your bike. Safety goggles and gloves are essential to protect your eyes and hands during the installation process. Don’t forget to have zip ties, electrical tape, and a multimeter for testing electrical connections.
Lastly, double-check that you have your electric motor kit, battery pack, and controller. With all the necessary tools and equipment gathered, you can now move forward to prepare your bike for the conversion.
Prepare Your Bike for the Conversion
Before starting the conversion process, make sure you have thoroughly inspected your bicycle for any existing damage or wear. This is crucial to ensure that your bike is in good condition and can handle the modifications required for adding an electric motor.
Here are some important steps to prepare your bike for the conversion:
- Clean and degrease the bike: Remove any dirt, grime, or grease from the frame and drivetrain.
- Check the brakes and tires: Make sure the brakes are functioning properly and the tires are in good condition.
- Inspect the chain and gears: Ensure that the chain is clean, lubricated, and properly tensioned. Check the gears for any signs of wear or damage.
- Secure loose parts: Tighten any loose bolts or screws on the bike to prevent them from coming undone during the conversion process.
By properly preparing your bike for the conversion, you can ensure that the modified electric bike will perform optimally and provide you with the benefits of electric bike conversion.
Now, let’s move on to connecting the electric motor to the bike’s drivetrain.
Connect the Electric Motor to the Bike’s Drivetrain
To properly connect the electric motor to the bike’s drivetrain, the first step is to install the chainring and chain.
Begin by aligning the chainring with the crankset and securely fastening it in place using the appropriate tools.
Next, thread the chain onto the chainring and rear cassette, ensuring proper tension and alignment.
Adjusting the chain tension is crucial for optimal performance and smooth operation, so take the time to fine-tune it by adjusting the rear derailleur and using a chain tensioner if necessary.
Install the Chainring and Chain
Once you’ve got the chainring and chain, it’s time to start installing them on your bike.
Begin by placing the chainring onto the crank arm and aligning the bolt holes. Use a wrench to tighten the bolts securely, ensuring the chainring is snugly in place.
Next, thread the chain onto the chainring and rear cassette. Make sure the chain is properly aligned on the chainring teeth and cassette cogs.
Once the chain is in place, you can adjust the chain tension. Proper tension is important for smooth shifting and efficient power transfer. Troubleshoot common issues such as a loose chain or excessive slack.
To adjust the chain tension, use the derailleur or tensioner to add or release tension as needed.
With the chainring and chain installed, it’s time to move on to the next step: adjusting the chain tension to ensure optimal performance.
Adjust the Chain Tension
Now that you’ve installed the chainring and chain, it’s time to adjust the chain tension for optimal performance. Proper chain tension is crucial for smooth and efficient power transfer in your electric bike. Here are some techniques to adjust the chain tension effectively:
- Start by loosening the rear wheel nuts or quick-release skewer.
- Use a chain tensioner tool to measure the tension. Aim for a tension of 1-2 cm of up and down play when pushing on the chain.
- If the chain is too loose, move the rear wheel backward to increase tension.
- If the chain is too tight, move the rear wheel forward to decrease tension.
Having the correct chain tension ensures that the chain engages properly with the chainring and sprocket, minimizing the risk of slippage or premature wear.
Once you’ve adjusted the chain tension, you can proceed to install the battery and controller, which will be covered in the next section.
Install the Battery and Controller
Before you can install the battery and controller, make sure you have all the necessary tools.
First, let’s talk about battery charging. It’s crucial to charge the battery before installation to ensure optimal performance. Most electric bike batteries come with a charger that you can plug directly into a standard wall outlet.
Once the battery is fully charged, you can proceed with the installation.
Next, let’s discuss troubleshooting common issues. If the battery is not functioning properly, check the connections to ensure they are secure. Additionally, make sure the battery is not damaged or overheating. If you encounter any issues, consult the manufacturer’s troubleshooting guide or reach out to their customer support.
Now that we have covered battery charging and troubleshooting, let’s move on to connecting the wiring and testing the electrical system.
Connect the Wiring and Test the Electrical System
To connect the wiring and test the electrical system, start by ensuring all the connections are secure and properly plugged in. Here are some tips and troubleshooting techniques to help you with this process:
- Make sure all wires are correctly connected to their respective terminals on the battery and controller.
- Check for any loose or frayed wires that may cause a short circuit and secure them properly.
- Use a multimeter to test the voltage output of the battery and controller to ensure they are within the recommended range.
- If the voltage is low, charge the battery fully before testing again.
- If the voltage is too high, check for any faulty components and replace them if necessary.
By following these steps, you can ensure a proper wiring connection and test the electrical system for any issues.
Now, let’s move on to the next section, where we will discuss how to mount the display and throttle (if applicable) without any further delay.
Mount the Display and Throttle (if applicable)
Make sure you’ve securely mounted the display and throttle (if applicable) to your bike. This step is crucial to ensure the proper functioning and accessibility of these components during your ride. Troubleshooting common display and throttle issues can save you time and frustration. To help you troubleshoot, refer to the table below for some common issues and their solutions:
| Issue | Solution |
|---|---|
| Display not turning on | Check the battery connection and replace if necessary. |
| Throttle not responding | Check the wiring connections and ensure they are secure. |
| Display showing incorrect information | Reset the display settings to factory defaults. |
In addition to troubleshooting, optimizing throttle sensitivity can greatly enhance your riding experience. Here are some tips to consider:
- Adjust throttle sensitivity settings in the display menu.
- Make sure the throttle cable is properly tensioned.
- Consider adding a throttle assist device for smoother and more controlled acceleration.
Once you have addressed any issues and optimized throttle sensitivity, you can reassemble the bike and double-check all connections to ensure a safe and reliable electric motor setup.
Reassemble the Bike and Double-Check all Connections
After successfully mounting the display and throttle, it’s time to reassemble the bike and ensure all connections are secure. This step is crucial to guarantee the smooth and safe operation of your electric motor.
To accomplish this, follow these three steps:
-
Reattach the bike’s components: Carefully reconnect the handlebars, pedals, and any other parts that were removed during the installation process. Make sure they are properly aligned and tightened.
-
Double-check all electrical connections: Take the time to inspect each connection point, such as the battery, motor, and controller. Verify that the wires are securely fastened and free from any damage or fraying.
-
Implement safety measures: Once you have confirmed all connections, use zip ties or electrical tape to secure the wires, preventing them from getting tangled or caught in the bike’s moving parts.
By carefully reassembling the bike and double-checking all connections, you are ensuring the reliability and safety of your electric motor system.
Now, it’s time to test ride and adjust the electric motor settings to optimize your riding experience.
Test Ride and Adjust the Electric Motor Settings
Once you’ve reassembled and double-checked all connections, it’s time to take the bike for a test ride and make any necessary adjustments to the electric motor settings.
Start by turning on the power and gently pedaling the bike. Observe how the motor engages and accelerates. If the motor power feels too weak or too strong, you can adjust it accordingly. Most electric bike conversion kits come with a controller that allows you to change the power output. Refer to the manufacturer’s instructions to find the proper way to adjust the motor power.
Additionally, during the test ride, pay attention to any unusual noises, vibrations, or performance issues. These may indicate common issues that need troubleshooting, such as loose connections or improper alignment. By addressing these issues promptly, you can ensure a smooth and efficient ride.
Now that you have tested and adjusted the electric motor settings, it’s crucial to learn how to properly maintain your electric bike for long-lasting performance.
Learn How to Properly Maintain Your Electric Bike
After adjusting the electric motor settings and taking the test ride, it is crucial to shift our focus to electric bike maintenance. Proper maintenance ensures that your electric bike continues to perform optimally and extends its lifespan.
Regular maintenance includes cleaning the bike, checking the tire pressure, and inspecting the brakes for wear and tear. Additionally, it is essential to troubleshoot common electric bike issues such as battery problems, motor malfunctions, and electrical connectivity.
To address battery problems, ensure that it is charged correctly and stored in a cool, dry place. In case of motor malfunctions, check the connections and consult the manufacturer’s manual for guidance. Finally, if you encounter electrical connectivity issues, inspect the wiring and connectors for any damage.
By following these maintenance practices, you can ensure your electric bike’s longevity and performance.
To continue enjoying the benefits of electric biking, it is important to follow local laws and regulations for electric bikes.
Follow Local Laws and Regulations for Electric Bikes
To ensure your safety and the safety of others, it is essential to familiarize yourself with the specific rules governing the use of electric bikes in your area. Compliance with local laws is crucial. Some common regulations may include speed limits, age restrictions, and helmet requirements. Adhering to these rules will help you avoid fines or legal troubles. It is also recommended to take safety precautions such as using lights and reflectors, wearing high visibility clothing, and following traffic signals. Being aware of local laws and taking necessary safety measures will help create a safe and enjoyable riding experience.
Now, let’s consider upgrading other bike components (optional) to enhance your electric bike’s performance.
Consider Upgrading Other Bike Components (optional)
Now that we have covered the importance of following local laws and regulations for electric bikes, let’s explore the optional step of upgrading other bike components. Upgrading your brakes and suspension can greatly enhance your riding experience and ensure your safety while riding your newly electrified bike.
When it comes to upgrading brakes, it is crucial to have reliable stopping power, especially with the added speed and weight of an electric motor. Investing in high-quality disc brakes can provide the necessary stopping force and improved modulation.
In terms of suspension improvements, upgrading to a suspension fork or adding a rear shock can greatly enhance the comfort and control of your electric bike. This is particularly beneficial if you plan to ride on rough terrains or encounter uneven surfaces.
Consider the following table to help you make informed decisions about upgrading your bike components:
| Component | Upgrading Option | Benefits |
|---|---|---|
| Brakes | High-quality disc brakes | Enhanced stopping power and improved modulation |
| Suspension | Suspension fork or rear shock | Increased comfort and control on rough terrains |
Enjoy Your New Electric Bike and Ride with Ease
You can now fully enjoy your new e-bike and ride comfortably knowing that you have upgraded your brakes and suspension for added safety and control.
With these enhancements, your electric bike will provide a smooth and controlled ride, allowing you to tackle any terrain with confidence.
To further improve your riding experience, consider upgrading your batteries for longer range and better performance. Choosing the right motor power is also crucial, as it determines the speed and power of your e-bike. Opt for a motor that suits your needs and riding style, whether it’s a high torque motor for off-road adventures or a more efficient motor for commuting.
By making these upgrades, you can maximize the potential of your electric bike and enjoy a thrilling and efficient ride.
As you continue to explore the world of e-biking, don’t forget to share your experience and recommendations with others, helping them make informed choices for their own electric bike journeys.
Share Your Experience and Recommendations with Others
When sharing my experience and recommendations with others, it’s important to highlight the benefits and drawbacks of different e-bike models. As an avid e-bike enthusiast, I have had the opportunity to try out various models and compare my experiences. By sharing my opinions and comparing experiences, I can help others make informed decisions when choosing their own e-bike. To make the information more accessible, I have created a table below that outlines the key features and specifications of four popular e-bike models. This table allows readers to easily compare the different options and make a well-informed decision based on their specific needs and preferences. Sharing our experiences and opinions is crucial in helping others navigate the vast world of e-bikes and find the perfect fit for their riding style.
| Model | Motor Power | Battery Range | Price |
|---|---|---|---|
| A | 250W | 40 miles | $1,499 |
| B | 500W | 60 miles | $2,099 |
| C | 750W | 80 miles | $2,799 |
| D | 1000W | 100 miles | $3,499 |
Frequently Asked Questions
What are the different types of electric bike conversion kits available?
There are three main types of electric bike conversion kits: hub motor kits, mid-drive motor kits, and friction drive kits. Each has its own pros and cons, including factors like cost, installation complexity, and overall performance.
How do I choose the right electric motor for my bike?
To choose the right electric motor for your bike, consider the motor power and battery capacity. Motor power determines the speed and performance, while battery capacity affects the range. Assess your needs and match them with suitable motor power and battery capacity for optimal performance.
What tools and equipment are necessary for the conversion process?
The necessary tools for the conversion process include a wrench, wire cutters, pliers, screwdrivers, and a drill. These tools are essential for removing old components, installing the electric motor, wiring the system, and making any necessary adjustments to ensure a successful conversion.
How do I properly connect the electric motor to the bike’s drivetrain?
To properly connect the electric motor to the bike’s drivetrain, start by identifying the appropriate attachment points. Use a wrench to secure the motor to the frame and connect the motor’s sprocket to the bike’s chain. Troubleshoot any issues with alignment or tension for smooth operation.
What are some tips for properly maintaining my electric bike?
Regular battery maintenance is crucial for the proper functioning of an electric bike. To prolong the lifespan of components, keep the battery charged, clean the drivetrain regularly, and inspect and tighten all connections.
Conclusion
After successfully adding an electric motor to my bike, I can confidently say that it has transformed my cycling experience. The process may seem daunting at first, but with the right knowledge and tools, anyone can do it.
The feeling of effortlessly cruising down the road, powered by the motor, is truly exhilarating. Not only does it make my daily commute easier, but it also opens up new possibilities for exploring longer distances.
If you’re considering adding an electric motor to your bike, I highly recommend it. Get ready to embark on a thrilling journey of newfound freedom and convenience.
