
Modifying the position of your bike saddle is a crucial action for guaranteeing a ride that is both comfortable and efficient. Speaking from a wealth of personal cycling experience, I can confirm that a saddle that isn’t properly adjusted can easily cause discomfort, soreness, and potentially even harm.
Fortunately, adjusting your seat is a relatively straightforward process that can be done with just a few tools and a little bit of know-how.
In this article, I will guide you through the process of adjusting your bicycle seat step-by-step. Whether you’re a seasoned cyclist looking to fine-tune your riding position, or a beginner who wants to make sure their bike is set up correctly, this guide has you covered.
From determining your ideal seat height to making final tweaks, I’ll walk you through each stage of the process in detail, so you can ride in comfort and with confidence.
So, let’s get started!
Key Takeaways
- Proper seat adjustment is crucial for comfort and injury prevention
- Ideal seat height can be determined by inseam measurement
- Choosing the right saddle is important for comfort and efficiency
- Seat angle and position also affect comfort and pedaling efficiency.
Determine Your Ideal Seat Height
Want to make sure your bike ride is comfortable and efficient? Start by figuring out your ideal seat height! This is an important step in adjusting your bicycle seat because it determines how much power you can generate with each pedal stroke.
To measure your inseam, stand with your legs about 6 inches apart and measure from the floor to your pubic bone. Then, multiply that measurement by 0.883 to get your ideal seat height.
Choosing the right saddle is also important for comfort and efficiency. Look for a saddle that is the right width for your sit bones and has enough padding to support your weight.
Once you have determined your ideal seat height and have chosen the right saddle, you can adjust the seat height by loosening the seat clamp and sliding the seat up or down until it is at the correct height.
Adjust the Seat Height
Ready to find your perfect riding position? Start by positioning your body at the ideal height with the simple tweak of a lever. Adjusting your bicycle seat is crucial for finding your ideal height and comfortable angle. Here are some tips for avoiding common seat adjustment mistakes:
- Use a measuring tape to determine the distance between your inseam and the ground.
- Loosen the seat clamp bolt with an Allen wrench, allowing you to move the seat up or down.
- Adjust the seat height to match the distance you’ve just measured.
- Tighten the seat clamp bolt to secure the seat in place.
By following these steps, you can easily adjust the height of your seat to fit your body.
However, don’t forget to also consider the angle of your seat. In the next section, we’ll discuss how to find the perfect seat angle for your ride.
Adjust the Seat Angle
Now that you’ve set your seat height, it’s important to consider the angle of your saddle, as even a small adjustment can make a big difference in your comfort and performance on the bike.
Your saddle angle affects the distribution of your weight on the bike, and can also affect your pedaling efficiency. A saddle that is angled too far up or down can cause discomfort, put pressure on sensitive areas, and even lead to injury.
When adjusting your saddle angle, it’s important to consider your personal preferences and riding style. Some riders prefer a level saddle, while others prefer a slight tilt forward or backward. Additionally, different seat cushioning options can affect the way your weight is distributed and the comfort of your ride.
Ultimately, finding the right saddle angle will depend on your individual needs and preferences, but it’s important to experiment and find what works best for you. With your seat angle adjusted correctly, you can now move on to adjusting the position of your saddle for optimal performance and comfort.
Adjust the Seat Position
To properly adjust the position of my bicycle seat, I first need to loosen the bolt that secures it in place.
Once it’s loose, I can slide the seat forward or backward to find the perfect position for my body.
Finally, I must check that the seat is level and aligned with the bike frame before tightening the bolt again.
By following these steps, I can ensure a comfortable and efficient ride.
Loosen the Bolt
First, you’ll need to loosen the bolt holding the seat in place. To do this, you’ll need a proper tool, such as an adjustable wrench or an Allen key, depending on the type of bolt used. It’s important to make sure the tool you use matches the bolt head to avoid stripping the bolt.
Once you have the appropriate tool, place it onto the bolt head and turn it counterclockwise to loosen it. The bolt should be loosened enough to adjust the seat but not so much that the seat becomes wobbly or unstable.
When loosening the bolt, make sure to use caution and follow safety precautions. The bolt and the area around it may be hot to the touch if the bike has been recently ridden, so be careful not to burn yourself. Additionally, it’s important to make sure the bike is properly supported to avoid it falling over during the adjustment.
Once the bolt is loosened to the appropriate tightness level, you can move on to adjusting the seat by moving it forward or backward. To move the seat forward or backward, you don’t need to fully remove the bolt. Instead, you can gently push or pull the seat into the desired position.
Once the seat is in the desired position, make sure to tighten the bolt securely to prevent any wobbling or instability while riding. With the seat properly adjusted, you can now enjoy a more comfortable and efficient ride.
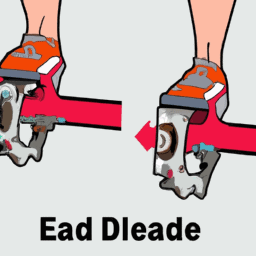
Move the Seat Forward or Backward
Picture yourself effortlessly gliding along the road, finding your perfect position by sliding the saddle either towards or away from the handlebars until you feel like you’re flying. Proper seat placement is crucial for a comfortable and efficient ride. Moving the seat forward or backward will not only affect your comfort level but also your power output, balance, and control.
To determine the correct seat placement, start by placing your feet on the pedals in the 3 o’clock and 9 o’clock positions. Check if your knees are directly above the pedals. If they are not, adjust the seat forward or backward until they are. Once your knees are aligned, sit on the saddle and check if your hips are level. If one hip is higher than the other, adjust the seat to level it out.
Benefits of correct seat adjustment include reducing the risk of injury, increasing comfort, and improving performance. A properly adjusted seat can prevent knee pain, back pain, and saddle sores. It can also improve your pedaling efficiency, allowing you to ride faster and farther with less effort. Remember to make small adjustments and test your position before making any permanent changes. With the right seat placement, you’ll be able to ride longer and more comfortably than ever before.
Before moving on to the next step, check the position of your saddle and make sure it is at the proper height.
Check the Position
Hey, have you checked if your saddle’s in the right position for a comfortable and efficient ride?
A common mistake people make is assuming that the saddle height is the only important factor when it comes to adjusting a bicycle seat. However, the position of the saddle also matters.
If the saddle is too far forward or too far back, it can cause discomfort or even pain in various parts of the body. The importance of proper seat position cannot be overstated.
If the saddle is too far forward, it can put too much weight on the hands, causing numbness and tingling in the arms. If the saddle is too far back, it can cause lower back pain and make it harder to generate power when pedaling.
Therefore, it’s crucial to check the position of the saddle and make sure it’s in the right spot before hitting the road. Once you’ve made the necessary adjustments, you can test your tweaks and make any final adjustments to ensure a smooth and comfortable ride.
Test Your Adjustments and Make Final Tweaks
Now that you’ve made the necessary adjustments, it’s time to test your seat height and angle. Did you know that a properly adjusted seat can improve your pedaling efficiency by up to 4%? Imagine how much easier it will be to tackle those hills with just a few tweaks to your seat!
To test your comfort level, take your bike for a spin around the block. Pay attention to any discomfort or numbness in your legs, buttocks, or back. If you experience any discomfort, adjust your seat accordingly.
You should also evaluate the stability of your seat by performing some quick turns and stopping abruptly. If you feel any wobbling or shifting, it’s time to make some final tweaks to your adjustment.
Remember, the key to a comfortable and efficient ride is a properly adjusted seat.
Frequently Asked Questions
How do I know if my bike seat is too narrow or too wide for me?
To determine if a bike saddle is too narrow or wide, measure your sit bone width. Sit on a piece of foam or cardboard and measure the distance between the impressions. Saddle comfort depends on finding the right width.
Can the angle of the handlebars affect my seat adjustment?
Yes, the angle of the handlebars can impact your bike fitting and handlebar comfort. If the angle is too high or low, it can affect your posture and lead to discomfort. Proper handlebar adjustment is crucial for a comfortable ride.
How often should I adjust my bike seat?
To ensure proper bike seat comfort, I adjust my seat height regularly, at least once every few months. It’s important to maintain the correct position for maximum efficiency and to prevent injury during rides.
Is it possible to adjust the height of my bike seat without using tools?
Yes, it’s possible to make hands-free adjustments to your bike seat. When stopping, dismount and stand beside the bike, then use your body weight to lower or raise the seat. For on-the-go adjustments, loosen the seat clamp and adjust with your hands.
Should I adjust my seat position differently for different types of riding (i.e. commuting vs. long-distance cycling)?
When commuting, I adjust my seat tilt forward to increase my riding posture. For long-distance cycling, I tilt my seat slightly back to reduce pressure on my lower back and increase comfort.
Conclusion
So there you have it, folks – a guide to adjusting your bicycle seat. It may seem like a simple task, but getting it just right can make a big difference in your comfort and performance on the bike.
Take the time to determine your ideal seat height, and then adjust the height, angle, and position accordingly. Test it out before making any final tweaks.
Remember that small adjustments can make a big difference, so don’t be afraid to experiment a little until you find the perfect setup for your body and riding style.
And if you’re still not sure where to start, don’t hesitate to ask for help from a bike shop or experienced cyclist. With a little patience and practice, you’ll be riding in comfort and style in no time.