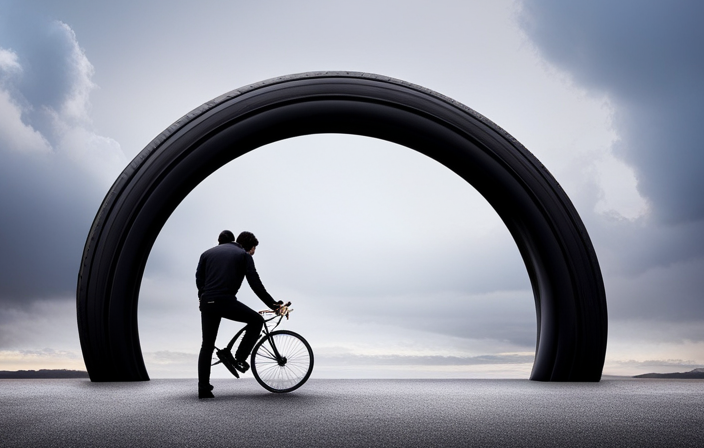

Feeling annoyed because your bike’s disc brakes aren’t working optimally? Don’t fret, I’m here to help!
In this step-by-step guide, I will show you how to adjust your bicycle’s disc brakes for optimal performance. From understanding how disc brakes work to inspecting the brake pads and aligning the brake caliper, I will cover all the necessary steps to get your disc brakes working like a dream.
So let’s roll up our sleeves and get started!
Key Takeaways
- Understanding how disc brakes work is essential for adjusting them properly.
- Regular inspection and maintenance are important for optimal performance and safety.
- Brake pad inspection and maintenance involve checking for wear, thinning, or contamination.
- Adjusting the brake caliper and lever position can improve braking efficiency and comfort.
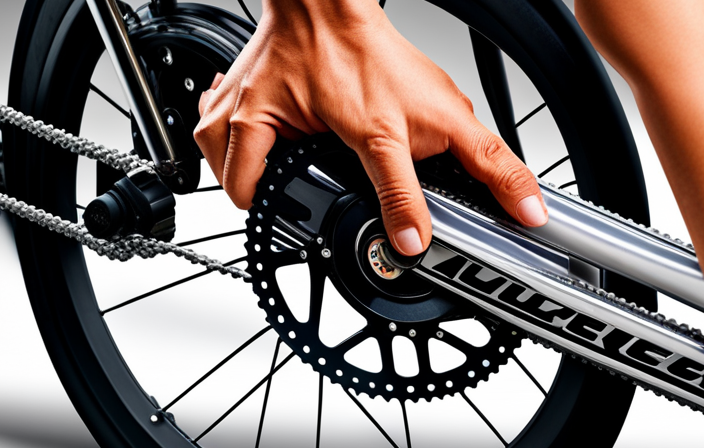
Gather the Necessary Tools
You’ll need a few tools to adjust your bicycle disc brakes. First, you’ll need a 5mm Allen wrench to loosen the brake lever adjustment bolt. This will allow you to adjust the position of the brake lever so that it is comfortable for your hand.
Next, you’ll need a set of brake pad replacement tools, which include a 2.5mm Allen wrench and a small flathead screwdriver. The Allen wrench is used to remove the brake pad retaining bolt, while the screwdriver is used to push the brake pads away from the rotor.
Once you have gathered these tools, you can move on to the next step of understanding how disc brakes work and how to adjust them properly.
Understand How Disc Brakes Work
To properly grasp the concept of disc brakes, it’s important to understand how they function.
Disc brakes are a type of braking system commonly used on bicycles. They consist of a rotor attached to the wheel and a caliper that houses the brake pads.
When the brake lever is squeezed, hydraulic pressure or cable tension is applied to the caliper, causing the brake pads to squeeze against the rotor. This creates friction and ultimately slows down or stops the bike.
Disc brake maintenance is crucial for optimal performance and safety. Regularly inspecting the brake pads and troubleshooting any issues that may arise, such as squeaking or poor braking power, is essential.
Understanding how disc brakes work will enable you to effectively inspect the brake pads and ensure their proper functioning.
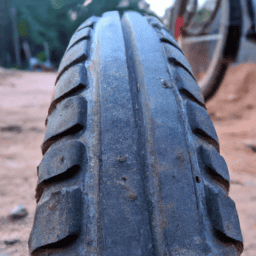
Inspect the Brake Pads
Make sure you regularly check the brake pads for any signs of wear or damage.
To inspect the brake pads, start by removing the wheel and locating the brake caliper.
Next, examine the brake pads for any uneven wear, thinning, or contamination. If the brake pads are worn down to the wear indicator line, it’s time to replace them.
Additionally, look for any glazing or discoloration on the brake pads, as this can indicate overheating. If you notice any of these issues, it’s important to replace the brake pads as soon as possible to ensure optimal braking performance and safety.
Another common issue with disc brakes is brake squealing. If you experience this problem, try cleaning the brake pads with rubbing alcohol or sanding them lightly to remove any glazed surface.
Once the brake pads have been inspected and replaced if necessary, you can proceed to adjust the brake caliper position for proper alignment and clearance.
Adjust the Brake Caliper Position
Once you’ve inspected the brake pads for wear or damage, it’s important to ensure the brake caliper is properly positioned. To adjust the brake caliper position, follow these steps:
- Loosen the mounting bolts on the brake caliper using a 5mm Allen wrench.
- Align the caliper so that it is centered over the brake rotor.
- Tighten the mounting bolts securely.
- Check the alignment by spinning the wheel and observing the clearance between the brake pads and rotor.
- If there is any rubbing or uneven clearance, repeat the adjustment process until the caliper is properly positioned.
Adjusting the brake caliper position is crucial in preventing common brake issues such as uneven braking, noisy operation, or premature wear. By troubleshooting and ensuring the correct alignment, you can optimize the performance of your bicycle disc brakes. Next, we will discuss how to align the brake caliper for optimal braking efficiency.
Align the Brake Caliper
Aligning the brake caliper ensures optimal braking efficiency. To align the caliper, follow these step-by-step adjustment techniques.
First, loosen the bolts securing the caliper to the frame using a 5mm Allen wrench.
Next, squeeze the brake lever to engage the brake pads with the rotor. While maintaining pressure on the lever, retighten the caliper bolts. This will position the caliper correctly.
Common alignment issues include the caliper being too far from the rotor or one brake pad touching the rotor while the other does not. To address these issues, adjust the caliper position by loosening the bolts and carefully repositioning it until both pads are equally close to the rotor.
Once aligned, check the rotor for warping to ensure smooth braking performance.
Check the Rotor for Warping
Checking the rotor for warping is essential to ensure smooth braking performance. To begin, inspect the rotor for any signs of rust or corrosion. If present, use a fine-grit sandpaper to gently remove the rust.
Next, measure the rotor thickness using a caliper. Refer to the manufacturer’s specifications to ensure it falls within the recommended range.
If the rotor is warped, you may notice a pulsating sensation when applying the brakes. In this case, it is necessary to straighten the rotor using a rotor truing tool. This tool allows you to carefully bend the rotor back into shape, eliminating any warping.
Once the rotor is straightened and within the correct thickness, you can proceed to adjust the brake lever reach for optimal comfort and control.
Adjust the Brake Lever Reach
After checking the rotor for warping, it’s time to move on to the next step: adjusting the brake lever reach.
This is an important adjustment because it determines the position of the brake lever and how far you have to reach to engage the brakes.
To adjust the brake lever reach, follow these steps:
- Locate the reach adjustment screw on the brake lever.
- Use a 2.5mm Allen wrench to turn the screw clockwise to bring the lever closer to the handlebar or counterclockwise to move it away.
- Test the lever position by gripping the handlebar and reaching for the lever. Adjust it until you find a comfortable reach.
Remember, the goal is to have the lever positioned in a way that allows you to easily engage the brakes without straining your hand or arm.
Once you’ve adjusted the brake lever reach, it’s time to move on to the next step: testing the brakes.
Test the Brakes
To ensure proper functionality, make sure you give the brakes a thorough test. Start by squeezing the brake lever gently and gradually increasing the pressure. Pay attention to the brake power and make note of any issues such as lack of stopping power or excessive squealing.
If the brakes feel weak, you may need to adjust the brake pads or replace them if they are worn out. To troubleshoot brake squealing, try cleaning the rotors with rubbing alcohol or sanding them lightly with fine-grit sandpaper. Additionally, check the alignment of the brake caliper and make sure it is centered and not rubbing against the rotor. Improper alignment can cause noise and reduce braking performance.
With the brakes tested, it’s time to move on to fine-tuning the brake caliper alignment.
Fine-tune the Brake Caliper Alignment
Make sure you carefully align the brake caliper to optimize its performance. Start by loosening the bolts that attach the caliper to the frame or fork. This will allow you to adjust the position of the caliper.
Next, squeeze the brake lever to activate the brakes and observe the alignment of the brake pads with the rotor. If the pads are not making even contact with the rotor, you will need to adjust the caliper position. Use a 5mm Allen key to move the caliper left or right until the pads are centered on the rotor.
Once the caliper is aligned, tighten the bolts to secure it in place. Adjusting the brake cable tension may also be necessary to ensure proper braking. Troubleshooting brake squealing may require further adjustments to the caliper alignment or brake pad position.
Now, let’s move on to replacing worn brake pads.
Replace Worn Brake Pads
To replace worn brake pads, you’ll need to remove the old pads from the caliper. Start by loosening the brake pad retaining bolt using a 5mm Allen wrench. Once the bolt is loose, slide the brake pads out of the caliper. Take note of the orientation of the pads for proper installation later.
Inspect the caliper for any dirt or debris and clean it if necessary. Now, insert the new brake pads into the caliper, making sure they are properly aligned with the rotor. Tighten the brake pad retaining bolt securely. Give the brake lever a few squeezes to ensure the pads are properly seated against the rotor.
Finally, transition into the subsequent section about ‘bleed the brakes (if necessary)’ by checking the brake lever feel and assessing if any adjustments need to be made.
Bleed the Brakes (if necessary)
To ensure optimal performance of your bicycle disc brakes, it is important to bleed the brakes if necessary. Bleeding the brakes involves removing any trapped air from the hydraulic brake system, which can cause a spongy or ineffective braking response.
Here is a step-by-step guide on how to perform the bleed procedure.
-
Gather the necessary tools and materials: brake fluid, bleed kit, and a clean cloth.
-
Locate the brake lever and the brake caliper.
-
Attach the bleed kit to the brake caliper and ensure a tight connection.
-
Open the bleed port on the brake caliper.
-
Squeeze the brake lever slowly and consistently to push the fluid and air bubbles out of the system.
-
Close the bleed port and remove the bleed kit.
-
Test the brakes for any issues and repeat the bleed process if needed.
If you encounter any problems during the bleed procedure, such as fluid leaks or inconsistent braking, refer to the troubleshooting tips provided in the brake manufacturer’s instructions.
Once the brakes have been bled successfully, it is important to clean and lubricate the brake system to maintain its performance.
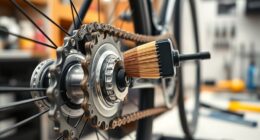
Clean and Lubricate the Brake System
After bleeding the brakes, it’s important to clean and lubricate the brake system to ensure optimal performance. Cleaning techniques are crucial for maintaining the functionality of the brakes.
Here’s a step-by-step guide for cleaning and lubricating the brake system:
-
Remove the brake pads and clean them with a degreaser to remove any dirt or grime that could affect their performance.
-
Use a clean cloth or brush to remove any debris from the brake calipers and rotor.
-
Apply a brake cleaner to the rotor and calipers to remove any remaining dirt or residue.
Proper brake maintenance is essential for the longevity and effectiveness of your brakes. Regular cleaning and lubrication help prevent brake fade, noise, and premature wear.
Once the brake system is clean and lubricated, it’s important to check for any loose or damaged components to ensure the brakes are operating safely and efficiently.
Check for any Loose or Damaged Components
Before proceeding with any further maintenance, it’s crucial to check for any loose or damaged components in the brake system. Start by inspecting the brake lever tension. Ensure that it is neither too loose nor too tight. A loose lever can result in weak braking, while a tight lever can cause excessive wear on the brake pads. Next, visually inspect the brake caliper, rotor, and mounting bolts. Look for any signs of damage, such as cracks or bent parts. Tighten any loose bolts to prevent unwanted movement. Additionally, check the brake pads for wear. If they are worn beyond the recommended thickness, replace them immediately. Lastly, examine the brake cables for fraying or kinks. Replace any damaged cables to ensure smooth and reliable braking performance. By regularly checking for loose or damaged components, you can maintain optimal brake function and ride with confidence. Next, let’s move on to practicing regular maintenance to keep your bike in top shape.
Practice Regular Maintenance
Now that we’ve checked for any loose or damaged components, let’s move on to the next step: practicing regular maintenance.
Regular maintenance is crucial for optimal performance and preventing common disc brake issues. It’s important to regularly inspect brake pads for wear and tear. Worn-out brake pads can decrease braking efficiency.
Additionally, make sure to clean brake rotors and calipers to remove dirt or debris that may affect their function. Lubricating the moving parts of the brake system will help prevent squeaking or sticking.
By performing these regular maintenance tasks, you can keep your disc brakes in top condition and ensure a safe and smooth ride.
If you encounter any issues that you can’t resolve, it’s always recommended to seek professional help.
Seek Professional Help if Needed
If you’re unable to resolve any issues, it’s always recommended to seek professional help. Seeking professional assistance can ensure that your bicycle disc brakes are adjusted correctly and safely. A professional bike mechanic has the experience and knowledge to diagnose any problems and make the necessary adjustments or repairs. They can also provide guidance on exploring alternative brake systems if needed.
When seeking professional help, it’s important to find a reputable bike shop or mechanic who specializes in disc brake adjustments. They will have the necessary tools and expertise to properly adjust your brakes. They can also provide recommendations on alternative brake systems that may better suit your needs or preferences.
Remember, properly adjusted disc brakes are crucial for your safety and the performance of your bike. Don’t hesitate to seek professional help if you’re unsure or unable to adjust your brakes yourself.
Frequently Asked Questions
How often should I adjust my bicycle disc brakes?
I should adjust my bicycle disc brakes whenever I notice any issues with their performance, such as squeaking, rubbing, or decreased stopping power. Regular maintenance, troubleshooting, and adjustments are necessary to ensure optimal brake performance and rider safety.
Can I use any type of lubricant on my disc brakes?
Using the wrong type of lubricant on your disc brakes can cause serious damage. In fact, a study found that using the wrong lubricant can reduce braking performance by up to 60%. Always use the proper lubricant recommended by the manufacturer.
What is the purpose of bleeding the brakes, and how often should it be done?
The purpose of bleeding the brakes is to remove air bubbles from the brake system, ensuring optimal brake performance. It is important to regularly bleed the brakes to maintain their effectiveness and prevent any potential brake failure.
How do I know if my brake pads need to be replaced?
To check brake pad wear, look for signs of worn brake pads like thinning or uneven wear. One interesting statistic: On average, brake pads need to be replaced every 1,000-3,000 miles of riding.
What should I do if my brake lever feels spongy or loose?
To troubleshoot spongy brakes and adjust the brake lever, start by checking for air in the brake system. Bleed the brakes if necessary. Then, adjust the brake lever reach and lever position to ensure a firm and responsive feel.
Conclusion
In conclusion, adjusting bicycle disc brakes is like fine-tuning a musical instrument. Just as a skilled musician adjusts each string to create a harmonious melody, adjusting disc brakes requires precision and attention to detail.
By inspecting and aligning the brake caliper, cleaning and lubricating the system, and practicing regular maintenance, you can ensure that your brakes perform flawlessly, like a well-played symphony.
Remember, if you’re unsure or encounter any difficulties, don’t hesitate to seek assistance from a professional to keep your rides smooth and safe.