Were you aware that almost half of all bike crashes are linked to brake issues? This underscores the importance of regularly checking and ensuring your bicycle’s braking system is accurately tuned and functioning effectively.
As an avid cyclist, I’ve learned the importance of maintaining my bike’s brakes to ensure my safety on the road. In this article, I’ll be sharing my knowledge on how to adjust the brakes on a bicycle, so you can ride with confidence and peace of mind.
Before we dive in, it’s important to note that adjusting brakes can be a bit tricky and requires some mechanical know-how. However, with the right tools and a little patience, you can easily adjust your bike’s brakes at home.
In this article, I’ll be walking you through the process step-by-step, from inspecting your brakes to making final adjustments. So, grab your tools and let’s get started!
Key Takeaways
- Properly adjusted and efficient brakes are crucial for safe cycling.
- There are two types of bike brakes: rim brakes and disc brakes.
- Inspect brake wear by examining the brake pads. If pads are less than 1mm thick, it’s time to replace them.
- Adjust brake pad alignment to ensure optimal stopping power. Brake pads should make contact with the rim evenly on both sides.

Under Armour Squeeze Water Bottles, 32 oz Water Bottles, Sideline Sports Water Bottle with Quick-Shot Lid, Quick & Easy Hydration, Gym Water Bottles, Squeeze Bottle, 1 32oz Bottle
- Easy Hydration: Quick-shot lid and one-way valve
- On-the-Go Use: One-hand operation for active hydration
- Measurement Markings: Ounces and milliliters for tracking
As an affiliate, we earn on qualifying purchases.
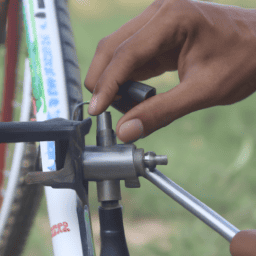
Gather the Necessary Tools
Gather the necessary tools.
You’ll need to gather the tools you’ll need before you can start adjusting the brakes. The first thing you’ll need to do is identify the type of brakes your bike has.
There are two types of bike brakes: rim brakes and disc brakes. Rim brakes are the most common type of brakes and are found on most road bikes and some mountain bikes. Disc brakes, on the other hand, are found on most mountain bikes and some road bikes.
Once you know which type of brakes you have, you’ll need to gather the appropriate tools for your bike’s brake system. Proper brake adjustment is crucial for safe and efficient cycling.
Improper brake adjustment can cause your brakes to be too tight or too loose, which can lead to accidents or poor stopping power. That’s why it’s important to gather the necessary tools before you start adjusting your brakes.
Once you have the correct tools, you can move on to inspecting your brakes to make sure they’re in good working order.
Inspect Your Brakes
First, take a close look at the condition of your braking system. Check brake wear by examining the brake pads and making sure they’re not too worn down. If the pads are less than 1mm thick, it’s time to replace them.
Also, check for any signs of damage or wear on the brake cables and housing. If there are any signs of fraying or damage, it’s best to replace the cables to ensure reliable braking.
Next, clean the braking surface. Use a clean cloth or rag to wipe down the rims or discs and remove any debris or grime that may have built up. This will help ensure that your brake pads have optimal contact with the braking surface, which is essential for effective braking.
Once you have inspected and cleaned your brakes, it’s time to move on to adjusting the brake pads.
Adjust the Brake Pads
Now it’s time to make sure your bike’s braking system is in tip-top shape by fine-tuning the brake pads for optimal performance. The brake pads are the rubber or metal components that press against the rim of the wheel to slow down or stop the bike.
It’s important to check the brake pad material and ensure they are properly aligned with the rim to maximize their effectiveness. First, inspect the brake pad material. If the pads are worn down or damaged, they need to be replaced. The rubber pads have a wear indicator line, which when reached, indicates the need for replacement. For metal pads, check for any signs of damage or excessive wear.
Next, adjust the brake pad alignment. The brake pads should be positioned so that they make contact with the rim evenly on both sides, with no rubbing on the tire or the rim sidewall. This ensures optimal stopping power and minimizes wear on the pads and rim. To adjust the brake pad alignment, use a wrench to loosen the nut that holds the brake pad in place. Then, adjust the pad position using your fingers, making sure it’s parallel to the rim. Tighten the nut back in place and repeat the process for the other brake pad.
With the brake pads properly aligned, you’ll be able to stop your bike with ease and avoid any potential accidents. Now, let’s move on to the next step of adjusting the brake cable tension.
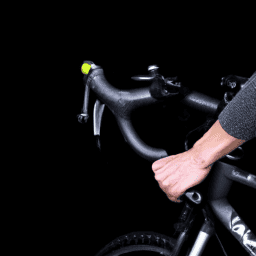
Adjust the Brake Cable Tension
Make sure your bike is safe to ride by ensuring that the brake cable tension is properly set. Once you’ve adjusted the brake pads, the next step is to adjust the brake cable tension.
Start by squeezing the brake lever and observing how much play there is before the brake pads engage. If there’s too much play, you’ll need to tighten the cable; if there’s too little play, you’ll need to loosen the cable.
To tighten the cable, locate the barrel adjuster on the brake lever or the brake caliper. Turn the barrel adjuster clockwise to tighten the cable. Make small adjustments and test the brake lever after each adjustment. Common mistakes include tightening the cable too much, which can cause the brake pads to rub against the rim even when the brake lever isn’t engaged.
Troubleshooting tips include checking that the brake cable is properly seated in the cable housing and that there is no damage to the cable or housing.
With the brake cable tension properly adjusted, it’s time to test your brakes and make final adjustments. But before we move onto that step, it’s important to note that if you’re unsure about adjusting your brakes, it’s best to take your bike to a professional mechanic. Safety should always be your top priority when riding a bike.
Test Your Brakes and Make Final Adjustments
Once your brake cable tension is set, it’s time to put it to the test and ensure your bike is fully equipped for safe riding.
Start by spinning your wheels and checking if they stop immediately when the brakes are applied. If not, check for any common issues such as worn brake pads, loose bolts, or misaligned calipers.
If your brakes are still not working properly, try troubleshooting tips such as adjusting the toe-in of the brake pads or checking the brake lever for any damages or defects.
Additionally, make sure that your brake cable isn’t frayed or damaged, as this can affect the effectiveness of your brakes.
It’s important to take the time to test your brakes thoroughly and make any final adjustments before riding to ensure your safety and the safety of others around you.
Frequently Asked Questions
How often should I adjust my bicycle brakes?
As a cyclist, I prioritize brake maintenance for my safety. I check the wear of brake pads regularly and adjust them accordingly. Signs of worn out brake pads are squeaking and reduced stopping power.
Can I use any type of brake pad on my bike?
I can’t use any brake pad on my bike. Choosing brake pads depends on the type of brake system and the material used. Brake pad materials include organic, metallic, and ceramic, each with their own advantages and disadvantages.
How do I know if my brake cables need to be replaced?
Like a car’s brake pads, bicycle brake cables wear out over time. Signs of wear include fraying, rust, and stiffness. Regular lubrication can extend their lifespan, but if they’re beyond repair, replace them.
What should I do if my brakes still don’t feel right after adjusting them?
If my brakes still don’t feel right after adjusting them, I may need to check the brake pad material. If that’s not the issue, I may need to seek professional help to ensure proper alignment and adjustment.
Is it necessary to adjust the front and rear brakes separately?
Yes, it is necessary to adjust the front and rear brakes separately for optimal performance. This ensures equal stopping power and prevents skidding. Proper technique for adjusting brake tension varies depending on the type of brakes, with benefits of disc brakes being their increased stopping power.
Conclusion
In conclusion, adjusting your bicycle brakes can be a daunting task, but it can be done with the right tools and a little bit of patience. Remember to inspect your brakes thoroughly before making any adjustments to ensure they’re in good condition.
Adjusting the brake pads is a simple process that can make a big difference in how well your brakes perform. Make sure the pads are properly aligned with the rim and adjust the tension as needed.
Finally, test your brakes to make sure they’re working correctly and make any final adjustments necessary. Don’t forget to take your bike for a spin to make sure everything is working as it should.
With these tips and a little bit of practice, you’ll be a pro at adjusting your bike brakes in no time!