
If you’re passionate about mountain biking or have just started engaging in the activity, you might have come across the term ‘dropper post.’ But what is a dropper post, and how does it function?
A dropper post is a type of seat post that allows you to adjust the height of your saddle on the fly while riding your bike, making it easier to tackle steep descents and technical terrain. With a dropper post, you can lower your saddle height with the push of a button or lever on your handlebars, allowing you to shift your weight further back on the bike and maintain better control as you descend.
Then, when it’s time to climb or ride on flat terrain, you can raise the saddle back up to your preferred riding height for optimal pedaling efficiency. In this article, we’ll dive into the details of how dropper posts work, how to choose the right one for your riding style, and how to install and maintain it to get the most out of your mountain biking experience.
Key Takeaways
- A dropper post is a type of seat post that allows you to adjust the height of your saddle on the fly while riding your bike.
- Using a dropper post can provide several benefits such as improved maneuverability, better balance, increased speed, and reduced fatigue.
- Choosing the right dropper post depends on factors such as the travel length, diameter, brand, and price.
- Proper installation and maintenance are crucial to ensuring your dropper post functions properly.

Under Armour Squeeze Water Bottles, 32 oz Water Bottles, Sideline Sports Water Bottle with Quick-Shot Lid, Quick & Easy Hydration, Gym Water Bottles, Squeeze Bottle, 1 32oz Bottle
- Easy Hydration: Quick-shot lid and one-way valve
- On-the-Go Use: One-hand operation for active hydration
- Measurement Markings: Ounces and milliliters for tracking
As an affiliate, we earn on qualifying purchases.
What is a Dropper Post and How Does it Work?
You’re going to love the dropper post on your bike because it allows you to quickly and smoothly adjust your saddle height while riding, giving you more control and confidence on any terrain.
A dropper post is a mechanism that allows you to lower or raise your saddle height while riding, using a lever attached to your handlebar. The post is designed to move up and down inside the seat tube, with the help of a hydraulic or mechanical system.
There are several advantages to using a dropper post, including improved maneuverability, better balance, increased speed, and reduced fatigue. You can lower your saddle to get your center of gravity lower, which helps you to stay balanced and in control on steep descents, technical trails, and jumps. You can also raise your saddle to get more power and efficiency when climbing, which can help you to save energy and go faster.
However, there are also some disadvantages to using a dropper post, such as added weight, maintenance requirements, and cost.
When it comes to choosing the right dropper post for your riding style, there are several factors to consider, such as the travel length, the diameter, the brand, and the price. You want to make sure that you get a post that fits your bike frame, your body size, and your riding needs.
In the next section, we’ll explore some tips and tricks on how to choose the best dropper post for you.
How to Choose the Right Dropper Post for Your Riding Style
When figuring out which dropper post fits your style, it’s important to consider the type of riding you’ll be doing. Your riding position and the terrain suitability are two important factors to keep in mind. For example, if you are an aggressive rider who likes to tackle technical terrain, then you’ll want a dropper post that has a longer travel range. On the other hand, if you are a cross-country rider who likes to cover a lot of ground, then a shorter travel range may be more suitable.
To help you choose the right dropper post, here is a table that outlines the different travel ranges and their recommended riding styles:
| Travel Range | Riding Style |
|---|---|
| 100mm or less | Cross-country |
| 125-150mm | Trail |
| 150mm or more | Enduro |
Keep in mind that this is just a general guide and your personal preferences may vary. It’s always best to test out different dropper posts and see which one feels most comfortable for your riding style. Once you’ve chosen the right dropper post, the next step is to install and maintain it properly.
Transitioning into the next section, proper installation and maintenance are crucial to ensuring your dropper post functions properly.
Installing and Maintaining Your Dropper Post
Proper installation and upkeep are essential for ensuring your ride remains smooth and safe, so let’s dive into how to install and maintain your new dropper post.
First, start by making sure all the necessary tools are on hand, including a torque wrench and a cable cutter. Follow the manufacturer’s instructions carefully, beginning with the removal of the old seat post and saddle.
Next, insert the dropper post into the seat tube, ensuring it is securely fastened with the appropriate torque. Then, attach the saddle and adjust it to your preferred height, ensuring the dropper post’s remote lever is easily accessible.
Proper lubrication is key to maintaining the longevity and performance of your dropper post. Be sure to apply a small amount of grease to the stanchion and seals regularly, and wipe down any excess.
In the event of any issues, such as slow return or excessive play, refer to the manufacturer’s troubleshooting guide or contact a professional for assistance.
With your dropper post installed and maintained, you’ll be ready to hit the trails with confidence and ease.
Transitioning into the subsequent section about tips for using your dropper post on the trail, remember to test your dropper post before heading out to ensure it’s functioning properly.
Now that you’ve installed and maintained your dropper post, let’s explore how to make the most of it on the trail.
Tips for Using Your Dropper Post on the Trail
When using your dropper post on the trail, there are two key points to keep in mind. Adjusting your saddle height can greatly improve your comfort and control on the bike, so take the time to find the right height for your body and riding style. Also, knowing when to use your dropper post can help you ride with more confidence and efficiency. Whether it’s for technical descents or switchbacks, make sure to use your dropper post at the right time.
Keep these tips in mind to get the most out of your dropper post on the trail.
Adjusting Your Saddle Height
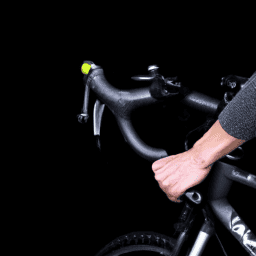
To adjust your saddle height on a dropper post, simply press the lever on your handlebars to lower or raise the seat. This allows for quick and easy adjustments to find the perfect saddle height for your riding style and terrain. Proper saddle height adjustment is crucial for maintaining proper posture and preventing injury on the trail.
When your saddle is too low, you may experience knee pain and limited power output. Conversely, when your saddle is too high, you may experience hip pain and difficulty reaching the ground. With a dropper post, you can easily adjust your saddle height on the fly to ensure optimal comfort and performance.
Knowing when to use your dropper post is just as important as knowing how to adjust it. While it’s tempting to keep your saddle low for more technical sections, it’s important to raise it back up for long climbs and flat sections. Using your dropper post effectively can help you maintain proper posture and conserve energy on the trail.
Practice adjusting your saddle height on the fly and experiment with different settings to find the perfect setup for your riding style. With a little practice, you’ll be able to use your dropper post to take your riding to the next level.
Knowing When to Use Your Dropper Post
If you’ve just adjusted your saddle height, you might be wondering what to do next. That’s where knowing when to use your dropper post comes in.
A dropper post is a mechanism on your bike that allows you to adjust the height of your seat while riding. It’s particularly useful for when you need to quickly switch from a climb to a descent.
One of the benefits of using a dropper post is that it allows you to maintain better control over your bike. When you’re descending, a lower saddle height gives you more room to move your body weight around, which can help you avoid obstacles and maintain your balance.
Techniques for using a dropper post effectively include practicing using it on different types of terrain, and adjusting it before you start descending so you have more time to react. By mastering the use of your dropper post, you’ll be able to ride more confidently and safely on any trail.
Despite its usefulness, there are still some common myths and misconceptions about dropper posts that you should be aware of.
Common Myths and Misconceptions About Dropper Posts
You may have heard some common myths and misconceptions about dropper posts that can make you hesitant to invest in one for your bike.
One of the most common myths is that a dropper post is only necessary for extreme downhill riding. However, the truth is that a dropper post can be useful in a variety of terrain and riding styles. It allows you to lower your center of gravity and maintain control over your bike, especially on technical descents and steep climbs.
Another common misconception is that using a dropper post is difficult and requires a lot of skill. While there may be a learning curve, using a dropper post is actually quite simple. The key is to make sure that your saddle height is adjusted properly and to use the dropper post at the appropriate times.
Some common mistakes when using a dropper post include not lowering it enough, lowering it too much, or forgetting to raise it back up before a climb. By understanding the benefits of using a dropper post and avoiding these common mistakes, you can take your riding to the next level.
Frequently Asked Questions
Can a dropper post be installed on any type of bike?
Installing a dropper post on any bike depends on the compatibility limitations of the frame and seat tube diameter. The installation process involves removing the old seat post and installing the new dropper post with appropriate tools.
Is it possible to adjust the height of a dropper post while riding?
Yes, it is possible to adjust the height of a dropper post while riding to ensure maximum riding comfort. You can use a remote control to adjust the position of the saddle without stopping the bike.
How does a dropper post affect the overall weight of a bike?
A dropper post affects weight distribution by lowering the center of gravity, improving handling and control. The added weight is negligible compared to the performance benefits, making it a worthwhile addition to any bike.
What is the average lifespan of a dropper post?
Like all mechanical parts, the dropper post has a finite lifespan. With proper maintenance, the average lifespan is around 2-3 years. Pros and cons of various brands and maintenance tips can help extend the post’s life.
Are there any safety concerns to be aware of when using a dropper post?
To ensure safety when using a dropper post, follow proper maintenance and recommended weight limits. Advantages vary for different riding styles, and common misconceptions exist. Explore the benefits of dropper post technology with these safety considerations in mind.
Conclusion
Congratulations on learning all about dropper posts for your bicycle! With this newfound knowledge, you’ll be able to tackle even the toughest trails with ease.
But before you hit the dirt, let me leave you with one last thought. Think of your dropper post as a superhero cape for your bike. Just as a cape allows a superhero to fly through the air and conquer any obstacle, a dropper post gives you the freedom to effortlessly navigate any terrain.
So go ahead and channel your inner superhero as you ride with confidence and ease thanks to your trusty dropper post. And remember, always choose the right dropper post for your riding style, install and maintain it properly, and use it wisely on the trail.
Happy riding!