Being a bike rider means you gotta have brakes that work like a charm, not just for you but for everyone sharing the road. Tweaking your bike’s front stoppers can be a breeze and boy, does it make a world of difference in how you halt!
In this article, I will guide you through the steps to adjust your front bicycle brakes in a technical, precise, and detailed manner, using a first-person singular point of view and active voice to help you understand the process better.
The first step in adjusting your front bicycle brakes is to inspect your brake pads. Over time, brake pads wear down, reducing their effectiveness and putting you at risk of accidents. To check your brake pads, you need to remove the wheel and examine the pads for signs of wear.
If you find that the pads are worn, you need to replace them. Once you have checked the brake pads, the next step is to loosen the brake cable. This will allow you to adjust the brake calipers easily and ensure that they are positioned correctly.
With these initial steps in mind, let’s dive into the process of adjusting your front bicycle brakes.
Key Takeaways
- Properly functioning brakes are essential for cyclist safety.
- Adjusting front bicycle brakes can improve overall braking performance.
- Loosen brake cable to adjust brake calipers and check cable and housing for wear or damage.
- Adjust brake caliper for proper alignment and clearance, and test brakes for proper tension, contact, sounds, and responsiveness.
Inspect Your Brake Pads
Don’t neglect your safety – check those brake pads!
One of the most significant factors in ensuring your brakes work correctly is checking the brake pads for wear and proper alignment. Brake pad wear is something that happens naturally over time, and it’s essential to keep an eye on it. A worn brake pad will not be able to grip the wheel effectively, reducing the stopping power of your brakes. This can be dangerous, especially when you need to brake suddenly.
Proper alignment is also critical for effective braking. If the brake pads are not aligned correctly, they may only make partial contact with the wheel, reducing their effectiveness. To check for alignment, look at the brake pads and make sure they are squarely positioned on the rim. If they are not, adjust them until they are.
Once you have inspected your brake pads and ensured proper alignment, it’s time to move on to loosening the brake cable.
Loosen the Brake Cable
Gently release the tension on the cable by loosening the bolt that holds the cable in place, allowing the brake pads to move away from the rim of the wheel. Before doing this, check the type of brake you have. For example, if you have V-brakes, you’ll need to loosen the cable using the barrel adjuster instead of the bolt.
Additionally, make sure to inspect the cable and housing for any signs of wear or damage. Common brake issues include stretched or frayed cables, worn brake pads, or misaligned calipers.
Once the tension is released, you can adjust the brake cable to the desired tension. To do this, follow these steps:
1) Pull the cable taut and tighten the bolt or barrel adjuster.
2) Test the brake lever to make sure it engages the brake before the lever reaches the handlebar.
3) If necessary, adjust the cable tension further until you achieve the desired brake response.
With the cable properly adjusted, you can now move on to adjusting the brake caliper.
Adjust the Brake Caliper
Now it’s time to fine-tune the stopping power of your ride by tweaking the caliper. The first step is to ensure proper alignment of the brake caliper.
This can be done by loosening the mounting bolts on the caliper and then squeezing the brake lever. As you hold the lever, tighten the bolts back up and then release the lever. This should leave the caliper in a properly aligned position.
Next, check the brake pad clearance. With the brake lever released, there should be a small gap between the brake pad and the rim of the wheel.
If the gap is too large, adjust the cable tension by turning the barrel adjuster on the brake lever. If the gap is too small or non-existent, loosen the mounting bolts on the caliper and adjust the position of the brake pad until the proper clearance is achieved.
Once these adjustments have been made, move on to testing your brakes to ensure they’re functioning properly.
Test Your Brakes
To make sure you can stop on a dime, hop on your bike and give those brakes a good squeeze while imagining coming to a sudden stop at an intersection. Here are some things to keep in mind while testing your brakes:
- Make sure the brake lever has enough tension to engage the brake pads.
- Check that the brake pads make even contact with the rim or rotor.
- Listen for any unusual sounds such as squeaking or rubbing.
- Observe the brake cable and housing for any signs of fraying or damage.
- Pay attention to the stopping power and responsiveness of the brakes.
Common issues that may arise during the brake testing process include poor braking power, uneven brake pad wear, rubbing or squeaking sounds, or a loose brake lever. Troubleshooting these issues may involve adjusting the brake cable tension, realigning the brake pads, or replacing worn brake components.
To maintain your brakes and ensure safe stopping power, it’s important to perform regular inspections and make necessary adjustments or replacements.
Maintain Your Brakes
As a cyclist, it’s essential that I maintain my brakes to ensure my safety on the road.
To keep my brakes functioning properly, I make sure to regularly check and replace my brake pads.
I also keep my brakes clean and lubricated to prevent any buildup or friction that could impede their effectiveness.
Regularly Check and Replace Brake Pads
Checking and replacing brake pads is crucial to ensure that your front bicycle brakes are working efficiently and safely. On average, brake pads should be replaced every 1,000 to 3,000 miles of riding. Here are some things to consider when choosing proper brake pads:
-
Different types of brake pads are available, including organic, semi-metallic, and ceramic. Each type has its own pros and cons, such as durability, stopping power, and noise level.
-
If you frequently ride in wet conditions, ceramic brake pads may be a better choice as they offer better stopping power in the rain. Consider the type of riding you will be doing.
-
It’s important to check compatibility before making a purchase. Look for brake pads that are compatible with your bicycle’s braking system. Not all brake pads are suitable for all bikes.
-
Always follow the manufacturer’s instructions when installing new brake pads to ensure they are properly aligned and adjusted.
Regularly checking and replacing your brake pads is just one aspect of maintaining your bicycle’s brakes. In the next section, we’ll discuss how to keep your brakes clean and lubricated to ensure optimal performance.
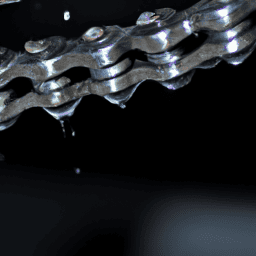
Keep Your Brakes Clean and Lubricated
Make sure you clean and lubricate your brakes regularly to keep them performing at their best. The importance of lubrication cannot be overstated when it comes to bicycle brakes. Without proper lubrication, the brakes will not function properly and could even cause damage to other components of the bike.
When it comes to choosing the best lubricants for bicycle brakes, it is important to select a product that is specifically designed for this purpose. Avoid using household lubricants, such as WD-40, as these can actually damage the brake system. Instead, look for a lubricant that is specifically designed for bicycle brakes, such as Finish Line’s Ceramic Wax or Tri-Flow Superior Lubricant. Regularly lubricating your brakes will help to prevent corrosion and ensure that the brake system works smoothly and effectively, allowing you to enjoy a safer and more efficient ride.
| Type of Lubricant | Pros | Cons |
|---|---|---|
| Ceramic Wax | Provides long-lasting lubrication | Can be expensive |
| Tri-Flow Superior Lubricant | Penetrates deeply to displace moisture and prevent corrosion | May attract dirt and debris |
| White Lithium Grease | Provides heavy-duty lubrication | Can be messy and difficult to apply |
Frequently Asked Questions
How often should I adjust my front bicycle brakes?
I adjust my front bicycle brakes whenever I notice signs of worn brake pads or decreased stopping power. Regular brake adjustments benefit my safety and bike performance. It’s important to keep my brakes in optimal condition.
Can I use any type of brake pads for my bike?
Choosing compatible brake pads for your bike is crucial for optimal performance and safety. Using specific brake pads designed for your bike model provides better stopping power, longer lifespan, and less wear on the rims.
Is it normal for my brakes to squeak or make noise?
Yes, it is normal for brakes to squeak or make noise. Causes of brake noise include dirty or contaminated brake pads, worn brake pads, and glazed rotors. Tips to reduce brake noise include cleaning the brake pads and rotors, replacing worn pads, and using proper braking technique.
What should I do if my brakes are not working even after adjusting them?
I had to troubleshoot my brakes once when adjusting them didn’t work. I found that my emergency brake needed repair. It’s important to check all components if your brakes are not working properly.
How do I know if my brake cable needs to be replaced?
To determine if my brake cable needs to be replaced, I inspect it for signs of wear, such as frayed cable or rust. If either is present, I replace the cable to ensure safe and effective braking.
Conclusion
To sum up, adjusting the front brakes of your bicycle is a crucial task that ensures your safety and enhances your riding experience. By following the steps mentioned above, you can easily adjust your front brake pads and calipers.
Remember to inspect your brake pads for wear and tear. Loosen the brake cable, adjust the brake caliper, and test your brakes before heading out on your ride. It’s important to maintain your brakes regularly to keep them in optimal condition.
You can clean your brake pads and calipers with rubbing alcohol and a clean cloth to prevent any buildup of dirt or debris. Additionally, you can lubricate the brake cables and pivot points to ensure smooth operation.
By taking care of your brakes, you can confidently cruise down the road without any concerns or complications. So, get your tools and start adjusting those brakes today!