
If you’re passionate about cycling, you understand the importance of effective braking for your safety. Hydraulic brakes provide a strong and dependable braking mechanism, yet they demand consistent maintenance to guarantee optimal performance.
Adjusting your hydraulic bicycle brakes may seem like a daunting task, but with the right tools and knowledge, you can do it easily and efficiently. In this article, you’ll learn how to identify issues with your brakes, check fluid levels, adjust brake pads, adjust brake levers, and test your brakes.
By following these steps, you’ll have the peace of mind that your brakes are in top-notch condition, allowing you to enjoy your ride with confidence and safety. So, grab your tools and let’s get started on adjusting your hydraulic bicycle brakes.
Key Takeaways
- Regular maintenance is crucial for optimal performance of hydraulic brakes.
- Properly aligned brake pads and reach adjustment can improve braking power.
- Fluid maintenance is important for hydraulic brake upkeep and correct fluid type should be used.
- Testing brakes before riding and seeking professional help if unsure about any aspect of bike’s performance is essential for safety.
Identify Issues with Your Brakes
If you’re experiencing any squeaking or decreased stopping power, it’s time to identify the issues with your brakes. Troubleshooting techniques for hydraulic bicycle brakes involve checking the brake pads, calipers, and rotors.
Signs of worn brake pads include a decrease in stopping power, a high-pitched noise when braking, and visible wear on the pads themselves. To check your brake pads, first remove the wheel and inspect the pads for wear. If the pads are less than 1mm thick, they need to be replaced.
Additionally, check the calipers and rotors for any signs of damage or wear. If there is any damage or wear, it’s best to replace those parts as well. Once you’ve identified any issues with your brakes, you can move on to checking the fluid levels.
Check Fluid Levels
Make sure the levels of the fluid in your brake system are sufficient before riding. Fluid maintenance is an important part of hydraulic brake upkeep. Here are some steps to check the fluid levels in your hydraulic brake system:
-
Locate the brake fluid reservoir on your bike. It’s usually on the handlebars or on the frame near the brakes.
-
Remove the cover of the reservoir and check the fluid level. The fluid should be at or near the top of the reservoir. If the level is low, add more brake fluid until it reaches the appropriate level.
-
Make sure to use the correct type of brake fluid for your bike. Refer to the owner’s manual or consult a mechanic to determine the appropriate type of fluid to use.
-
Check the fluid color. If the fluid appears dark or dirty, it may be time to bleed the brakes.
By following these steps, you can ensure that your hydraulic brakes are properly maintained and ready for your next ride.
Now, let’s move on to adjusting your brake pads.
Adjust Brake Pads
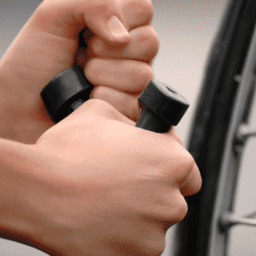
When you press your brake lever, the pads should grip the rim of your wheel like a hawk snatching its prey. If your brake pads aren’t properly aligned with the rim, they may not achieve the necessary grip.
To adjust the alignment, loosen the bolts that hold the brake pads in place. Use your fingers to adjust the position of the pads so that they’re parallel to the rim. Once you’ve achieved the desired alignment, tighten the bolts back up and test the brakes to ensure they’re working correctly.
If your brake pads are worn or damaged, you may need to replace them entirely. To do this, remove the retaining clip that holds the pads in place. Slide the old pad out and replace it with a new one. Make sure the new pad is properly aligned with the rim before replacing the retaining clip.
Once you’ve completed this step, test the brakes to ensure that the new pads are working correctly. With properly aligned and functioning brake pads, you can now move on to adjusting your brake levers.
Adjust Brake Levers
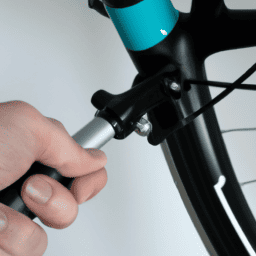
To adjust your brake levers, start by identifying the reach adjuster on your brake lever. This adjuster allows you to change the distance between the lever and the handlebar, which can make a big difference in how comfortable your brake system feels.
Once you’ve located the adjuster, use an Allen key to make small adjustments to the reach until you find the perfect position. Finally, test the levers by squeezing them and make sure they engage the brakes smoothly and easily.
Identify the Reach Adjuster
First, locate the reach adjuster on your hydraulic bicycle brakes. It’s typically located on the lever body and may be labeled as ‘reach’ or ‘distance’. The reach adjuster controls the distance between the brake lever and the handlebar grip, allowing you to adjust the brake lever to fit your hand size and reach.
Common mistakes when adjusting the reach include setting the lever too close or too far from the handlebar grip. If the lever is too close, it may be difficult to engage the brakes quickly. If it’s too far, it may be difficult to reach the lever in an emergency.
If you’re having trouble adjusting the reach, try troubleshooting the reach adjuster by checking for any loose parts or dirt buildup. Once you’ve adjusted the reach to your liking, you can move on to the next step of adjusting the hydraulic bicycle brakes.
Now that you’ve identified the reach adjuster and made any necessary adjustments, it’s time to adjust the reach itself.
Adjust the Reach
Now that you’ve located the reach adjuster and understand its importance, it’s fascinating to note that a study found that proper reach adjustment can improve braking power by up to 30%.
Fine tuning ergonomics is crucial for ensuring your bike’s brakes work efficiently and effectively. Adjusting the reach can help you achieve this by optimizing the distance between the brake lever and your fingers.
This adjustment is especially important for riders with smaller hands or those who prefer a more comfortable grip. To adjust the reach, simply loosen the reach adjuster and move the brake lever closer or further away from the handlebar.
When adjusting, make sure the lever is still within easy reach while maintaining a comfortable grip. Improving braking efficiency is not only about achieving maximum stopping power but also about preventing hand fatigue and discomfort during long rides.
Once you have fine-tuned the ergonomics by adjusting the reach, it’s time to test the levers to ensure they are working correctly.
Test the Levers
Once you’ve fine-tuned the ergonomics of your brake levers, it’s crucial to test them to ensure they’re working properly and effectively for your riding needs. Start by squeezing the brake levers and checking for any unusual noises or resistance. If you notice any, it could be an indication of a problem with your brake pads or cables.
Another common mistake is overlooking the position of the brake pads. They should be positioned correctly, with the flat surface resting against the rim of the wheel. If they’re misaligned or worn down, they won’t be able to grip the rim properly, resulting in poor braking performance.
If you encounter any issues during testing, try troubleshooting by adjusting the cable tension or replacing the brake pads. With these simple steps, you can ensure your hydraulic bicycle brakes are working as they should before hitting the road.
As you move onto testing your brakes, keep in mind that it’s important to be thorough in your checks. This will help you avoid any potential issues while riding, and keep you safer on the road.
Test Your Brakes
To ensure your safety while riding, make sure to give your brakes a thorough test before hitting the road. Checking your brake performance is crucial to avoiding any potential accidents or issues while out on a ride. To test your hydraulic bicycle brakes, follow these steps:
| Step | Action |
|---|---|
| 1 | Squeeze the brake lever slowly to test the brake’s initial bite. |
| 2 | Apply more pressure to the lever to determine the brake’s maximum stopping power. |
| 3 | If the bike doesn’t stop as quickly as you’d like, troubleshoot braking issues by checking the brake pads, rotor, and brake fluid levels. |
| 4 | If the brakes still aren’t working properly, it’s best to visit a bike mechanic for further inspection and repairs. |
| 5 | Remember to test your brakes regularly and maintain them properly to ensure your safety on the road. |
By following these steps and using the table provided, you can easily test your hydraulic bicycle brakes and troubleshoot any issues that may arise. It’s important to stay vigilant and prioritize your safety while riding, and properly functioning brakes are a crucial component of that. Don’t hesitate to seek professional help if you’re unsure about any aspect of your bike’s performance. With proper maintenance and care, you can enjoy a safe and enjoyable ride every time.
Frequently Asked Questions
What type of fluid should I use for my hydraulic brakes?
When choosing fluid type for your hydraulic brakes, always check compatibility concerns with your bike’s manufacturer. Best practices for hydraulic brake maintenance include bleeding brakes every 6 months or after 100 hours of use.
Can I adjust the brake pads without removing the wheel?
Yes, you can adjust the brake pads without removing the wheel using the Adjusting Technique. Loosen the brake caliper bolts, align the pads with the rotor, and tighten the bolts. Repeat for the other side to ensure proper Brake Pad Alignment.
How often should I replace my brake fluid?
You should replace your brake fluid every 1-2 years, depending on usage and manufacturer recommendations. Signs of degraded brake fluid include a spongy brake lever, decreased braking power, and a darker color.
Should I adjust both the front and rear brakes equally?
To ensure brake balance, adjust the front and rear brakes equally. Regular maintenance is crucial to prevent issues. For example, if the front brake is too tight, it can cause the rear wheel to lift, leading to a potential accident.
What should I do if my brakes still feel spongy after adjusting them?
If your hydraulic bicycle brakes still feel spongy after adjusting them, bleeding techniques may help. Troubleshooting tips include checking for air in the system, inspecting brake pads and rotors, and ensuring proper fluid level and pressure.
Conclusion
Congratulations! You’ve successfully adjusted your hydraulic bicycle brakes.
You can now confidently hit the roads and conquer those steep hills without worrying about your brakes failing you.
But wait, did you really think you could do it on your own? Of course not! You were just following a simple set of instructions.
Now, imagine if you had to do it without any guidance. Your bike would probably end up looking like a tangled mess of wires and tubes.
So, next time you think you can do it all on your own, think again. Remember that there are experts out there who can guide you through even the most complex tasks.
And who knows, with their help, you might just learn a thing or two about your bike that you never knew before.
So, keep on pedaling and happy riding!