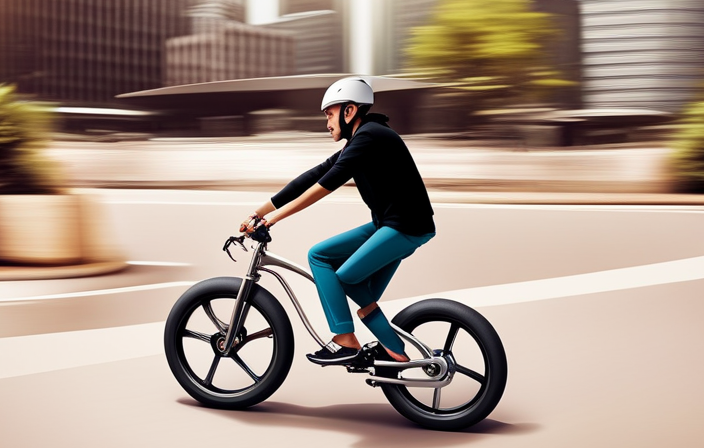
I love riding my Dynacraft Cityscape 700c 36v electric bike, but recently I noticed the brakes were not performing as well as they used to. That’s when I realized it was time to adjust them.
In this article, I will guide you through the process of adjusting the brakes on your electric bike. With a few simple steps and the right tools, you’ll be able to enjoy a safe and smooth ride once again.
Let’s dive in and get those brakes working perfectly!
Key Takeaways
- Familiarize yourself with the brake system components such as brake levers, cables, calipers, and brake pads.
- Gather necessary tools like adjustable wrench, Allen wrenches, and cable cutter for brake adjustment.
- Adjust the brake system by locating the brake adjusting barrel and making small adjustments to the brake pads for proper alignment.
- Regularly inspect and maintain the brake system by checking brake pads, cleaning the braking surface, checking brake cables, lubricating brake pivots, and testing brakes periodically.

50 Strong | Bulk Water Bottles, 24-Pack, 22 oz, Sports Squeeze, Red
- Durable BPA-Free Material: Made from easy-squeeze polyethylene
- Ideal for Teams & Events: Perfect for sports, parties, and gifts
- Dishwasher Safe & Lightweight: Made from HDPE plastic with pull-top lid
As an affiliate, we earn on qualifying purchases.
Understand the Brake System of Your Electric Bike
To understand the brake system of your electric bike, you’ll need to familiarize yourself with the different components. The brake system of an electric bike consists of several important parts, including the brake levers, cables, calipers, and brake pads.
The brake levers are the controls that you squeeze to engage the brakes. They are usually located on the handlebars, within easy reach of your hands.
The brake cables are responsible for transmitting the force from the levers to the calipers, which are the devices that actually apply pressure to the brake pads.
The brake pads are the components that make contact with the bike’s wheels, creating friction and ultimately stopping the bike.
Common brake issues that you may encounter include squeaking or squealing brakes, reduced stopping power, or brake drag.
Squeaking or squealing brakes can be caused by a variety of factors, such as dirty or worn brake pads, misalignment of the brake pads, or loose brake calipers.
Reduced stopping power can be a result of worn brake pads or contaminated brake surfaces.
Brake drag, where the brakes remain partially engaged even when the levers are released, can occur due to misalignment or tightness of the brake cables.
To adjust the brakes on your electric bike, you will need a few tools. These tools include an adjustable wrench, a set of Allen wrenches, and a cable cutter. These tools will allow you to make the necessary adjustments to the brake system and ensure optimal performance.
Gather the Necessary Tools for Brake Adjustment
First, make sure you have all the tools you need for adjusting the brakes on your electric bike. Proper bike maintenance is essential for optimal performance and safety. When it comes to brake troubleshooting, having the right tools is crucial.
You will need a few basic items to get started. Firstly, make sure you have a set of Allen wrenches in various sizes. These will be used to loosen and tighten bolts on your brake system. Additionally, you will need a pair of pliers to manipulate cables and housing. A cable cutter is also necessary for trimming any excess cable length. A small adjustable wrench may be required to adjust brake pad position. Finally, don’t forget a clean rag and some lubricant to clean and lubricate your brake components.
With these tools in hand, you’ll be well-prepared to tackle any brake adjustments on your electric bike.
Now that you have all the necessary tools, let’s move on to preparing your bike for brake adjustment.
Prepare Your Bike for Brake Adjustment
Now that you’ve gathered all the necessary tools, it’s time to get your bike ready for brake adjustment. Proper bike maintenance is crucial to ensure safe and efficient riding. To prepare your bike for brake adjustment, follow these steps:
-
Inspect the brake pads: Check for any signs of wear or damage on the brake pads. If they are worn down or cracked, replace them immediately to maintain optimal braking performance.
-
Clean the braking surface: Use a clean cloth or paper towel to wipe away any dirt or debris on the braking surface. A clean surface will prevent any interference with the brake pads and improve their effectiveness.
-
Check the brake cables: Examine the brake cables for any signs of fraying or kinks. If you notice any issues, it’s important to replace them to ensure smooth and accurate braking.
-
Lubricate the brake pivots: Apply a small amount of lubricant to the brake pivots to reduce friction and improve the overall performance of the brakes.
By following these steps, you will ensure that your bike is in optimal condition for brake adjustment.
Now, let’s move on to locating the brake adjusting barrel, an essential component for fine-tuning your brakes without the need for any additional tools.
Locate the Brake Adjusting Barrel
Once you’ve located the brake adjusting barrel, it’s important to understand its function and how it can impact the performance of your bike’s braking system. The brake adjusting barrel is a crucial component that allows you to fine-tune the tension of your brake cable. By adjusting the barrel, you can ensure that your brake pads are properly aligned with the rim of your wheel, providing optimal stopping power and control.
To adjust the brake adjusting barrel, you will need to use a 5mm Allen wrench. Start by loosening the lock nut on the barrel. This will allow you to turn the barrel either clockwise or counterclockwise to increase or decrease the tension of the brake cable. Keep in mind that small adjustments can have a big impact on the feel and effectiveness of your brakes, so take your time and make incremental changes until you achieve the desired result.
Here is a table that outlines some tips for adjusting the brake adjusting barrel:
| Tips for adjusting the brake adjusting barrel |
|---|
| 1. Start with the barrel in the middle position |
| 2. Make small adjustments and test the brakes |
| 3. Ensure the brake pads are properly aligned |
Loosen the Brake Cable
To loosen the brake cable, you’ll need to use a 5mm Allen wrench to loosen the lock nut on the barrel. The lock nut is located on the brake adjusting barrel, which is typically near the brake lever. Once you’ve located the lock nut, insert the Allen wrench into the nut and turn it counterclockwise to loosen it. This will allow you to adjust the tension on the brake cable.
To adjust the brake tension, you’ll need to turn the brake adjusting barrel clockwise to tighten the cable or counterclockwise to loosen it. Start by making small adjustments and then test the brakes to see if they engage properly. If the brakes feel too loose or too tight, continue to make small adjustments until you achieve the desired tension.
Now that you’ve loosened the brake cable and adjusted the tension, you can move on to making small adjustments to the brake pads. By adjusting the brake pads, you can ensure that they align properly with the rim of the wheel, allowing for optimal braking performance.
Make Small Adjustments to the Brake Pads
To ensure optimal braking performance, you should first align the brake pads with the rim of the wheel by making small adjustments. Properly aligned brake pads ensure that they make full contact with the rim when engaged, allowing for efficient braking and preventing unnecessary wear. Here are some adjustment techniques and troubleshooting tips to help you achieve this.
One way to adjust the brake pads is by loosening the bolts that hold them in place. This will allow you to move the pads closer or farther from the rim. Start by loosening the bolts slightly, then use your fingers to position the pads so that they are parallel to the rim. Make sure there is a small gap between the pads and the rim, about the thickness of a business card. Once you have aligned the pads, tighten the bolts securely.
To further assist you in understanding the adjustment process, refer to the table below:
| Action | Adjustment |
|---|---|
| Loosen bolts | Rotate pads |
| Position pads | Align with rim |
| Tighten bolts | Securely |
Test the Brakes and Assess the Stopping Power
After aligning the brake pads and tightening the bolts securely, it is important to test the brakes and assess their stopping power. This step is crucial in ensuring the safety and effectiveness of your brakes.
Here is a four-step process to assess the brake performance and troubleshoot any issues:
- Find an open area free from obstacles where you can safely test the brakes.
- Begin by slowly riding the bike and gradually applying the brakes. Pay attention to any unusual noises or vibrations.
- Test the brakes at different speeds and pressures to evaluate their performance in various scenarios.
- Observe the stopping distance and how quickly the bike comes to a complete halt. This will give you an idea of the stopping power of the brakes.
Assessing brake performance is essential to identify any potential issues and make necessary adjustments. It allows you to diagnose problems such as weak braking, excessive noise, or uneven braking force. By carefully evaluating the stopping power, you can fine-tune the brake adjustment to ensure optimal performance and a safe riding experience.
Fine-tune the Brake Adjustment
Make sure you carefully evaluate the stopping power of the brake adjustment to ensure optimal performance and a safe riding experience. Adjusting brake sensitivity is crucial for maintaining control and preventing accidents. If your brakes are too sensitive, they may engage too quickly and cause abrupt stops, making it difficult to maintain balance. On the other hand, if the brakes are not sensitive enough, it may take longer to stop, increasing the risk of collision.
To troubleshoot common brake issues, start by checking the brake lever tension. This can be adjusted using the barrel adjuster located near the lever. Turning it clockwise will increase tension, while turning it counterclockwise will decrease tension. Additionally, check the brake pad wear. Worn brake pads can reduce stopping power and require replacement. Look for any signs of uneven wear or glazing on the brake pads. Finally, ensure that the brake calipers are properly aligned with the brake rotors. Misalignment can cause decreased brake performance.
Transitioning to the next section, it is important to check for proper brake pad alignment in order to further optimize the brake adjustment.
Check for Proper Brake Pad Alignment
Checking for proper brake pad alignment is essential to ensure optimal performance and safe riding on your electric bike. Here are some important steps to follow:
-
Inspect the brake pads for signs of wear and tear. Look for thinning or uneven surfaces, as these indicate the need for brake pad replacement.
-
Check the brake pad wear indicators. These small metal clips will make a distinct noise when the brake pads have worn down to a certain level.
-
Ensure that the brake pads are centered on the rim. They should make even contact with both sides of the rim when the brakes are applied.
-
Adjust the position of the brake pads if necessary. Loosen the mounting bolts, align the pads with the rim, and tighten the bolts securely.
-
Test the brake pad alignment by squeezing the brake lever. The pads should engage smoothly and stop the wheel without any rubbing or squeaking.
By following these steps, you can ensure that your brake pads are aligned properly and functioning at their best.
Now, let’s move on to adjusting the brake lever reach for a more comfortable riding experience.
Adjust the Brake Lever Reach
To achieve a more comfortable riding experience, you’ll want to ensure the brake lever reach is adjusted correctly on your Dynacraft Cityscape 700c 36v electric bike. Adjusting the brake lever position is crucial for optimal control and safety while riding.
To find the optimal brake lever reach, follow these steps.
Start by sitting on your bike and gripping the brake levers. Pay attention to whether your fingers can comfortably reach the levers without stretching or straining. If the reach feels too short or too long, you’ll need to make adjustments.
To adjust the brake lever position, locate the reach adjustment screw on the lever assembly. This screw allows you to fine-tune the distance between the lever and the handlebar grip. Use a Phillips head screwdriver to turn the adjustment screw clockwise to bring the lever closer, or counterclockwise to move it farther away.
Make small adjustments, testing the reach after each turn of the screw. Aim for a position where your fingers can easily reach the lever when gripping the handlebar. Once you find the optimal brake lever reach, tighten the adjustment screw securely.
Now, with the brake lever reach adjusted correctly, you can transition into verifying the brake cable tension. This step ensures that your brakes engage properly when you squeeze the levers.
Verify the Brake Cable Tension
Once the brake lever reach is adjusted correctly, you’ll want to ensure the tension in the brake cable is verified for optimal braking performance on your Dynacraft Cityscape 700c 36v electric bike. The brake cable tension is crucial in determining how quickly and effectively your brakes respond when you squeeze the brake lever. To verify the brake cable tension, follow these steps:
| Step | Procedure |
|---|---|
| 1 | Locate the brake cable on your bike. It connects the brake lever to the brake caliper. |
| 2 | Check for any signs of fraying or damage in the cable. If you notice any, it’s important to replace the cable before adjusting the tension. |
| 3 | If the cable is in good condition, use a 5mm Allen wrench to loosen the pinch bolt that secures the cable to the brake caliper. This will allow you to adjust the tension. |
Recheck the Brake Pad Clearance
Make sure that the clearance between the brake pads and the rim is rechecked to ensure proper alignment and optimal braking performance on your Dynacraft Cityscape 700c 36v electric bike. This step is crucial in maintaining the safety and efficiency of your brakes. Here are some important things to consider when rechecking the brake pad clearance:
-
Inspect brake pad wear: Carefully examine the brake pads for any signs of excessive wear or damage. If the pads are worn down beyond the recommended thickness, they should be replaced immediately to maintain effective braking.
-
Ensure even spacing: Check that the brake pads are evenly spaced on both sides of the rim. Uneven spacing can cause the brakes to function improperly and reduce braking performance.
-
Adjust as necessary: If the clearance between the brake pads and the rim is not within the recommended range, you will need to make adjustments. This can usually be done by loosening the mounting bolt, repositioning the brake pad, and then tightening the bolt securely.
-
Double-check alignment: After making any adjustments, double-check the alignment of the brake pads with the rim. They should be parallel to the rim surface and make even contact when the brakes are engaged.
Test the Brakes Again for Smooth Operation
After rechecking the clearance and making any necessary adjustments, it’s important to test the brakes again for smooth operation. This step is crucial in ensuring that the brakes are functioning optimally and that any issues have been resolved. By conducting repeated brake testing, we can troubleshoot any brake issues that may arise and take the necessary steps to address them.
To test the brakes, follow these simple steps:
| Step | Action |
|---|---|
| 1 | Mount the bike securely on a stand or have someone hold it steady. |
| 2 | Squeeze the brake lever firmly and observe the brake pads as they make contact with the rim. |
| 3 | The brake pads should engage smoothly and evenly on both sides of the rim without any rubbing or excessive noise. |
| 4 | Repeat the test for both the front and rear brakes. |
By performing these tests, we can identify any remaining issues and determine if further adjustments are required. If the brakes are not engaging smoothly or if there is any rubbing or noise, it may indicate a need for further adjustment or potential brake pad replacement.
In the next section, we will make final adjustments if necessary to ensure the brakes are properly adjusted and functioning smoothly.
Make Final Adjustments if Necessary
After testing the brakes and ensuring their smooth operation, it’s time to make final adjustments if necessary. Common brake issues may include poor braking power, squeaking or rubbing noises, or uneven brake pad wear. Troubleshooting brake problems is essential to guaranteeing optimal performance and safety on your dynacraft cityscape 700c 36v electric bike.
To begin, check the brake pads for wear. If they appear significantly worn or have uneven wear patterns, they may need to be replaced. Additionally, if the brake pads are not properly aligned with the rim, they may cause rubbing or squeaking noises. Adjusting the pad position by loosening the caliper mounting bolt and aligning the pads with the rim can solve this issue.
Next, check the brake cable tension. If the brakes feel spongy or require excessive lever travel, the cable may need adjustment. To do this, locate the barrel adjuster on the brake lever or caliper and turn it clockwise to increase tension or counterclockwise to decrease tension.
Finally, double-check all the bolts and connections to ensure they are tightened securely. Loose bolts can affect brake performance and safety.
Enjoy a Safe and Smooth Ride on Your Dynacraft Cityscape 700c 36v Electric Bike!
To ensure your ride on the Dynacraft Cityscape 700c 36v electric bike is safe and smooth, it’s important to address any common brake issues and troubleshoot any problems. Proper brake maintenance is essential for the overall performance of your electric bike.
Here are some key steps to follow for effective brake maintenance and troubleshooting:
-
Check brake pads: Inspect the brake pads regularly for wear and tear. If they are worn down or damaged, replace them immediately. Worn brake pads can compromise your ability to stop quickly and safely.
-
Adjust brake tension: Ensure that the brake tension is properly adjusted. If the brakes feel too loose or too tight, adjust the tension using the barrel adjuster located near the brake lever. A properly adjusted brake provides optimal stopping power.
-
Test brake responsiveness: Take your bike for a test ride and apply the brakes. Observe how quickly and smoothly the bike comes to a stop. If the brakes feel sluggish or unresponsive, they may need further adjustment or repair.
Frequently Asked Questions
How often should I adjust the brakes on my Dynacraft Cityscape 700c 36v electric bike?
I should adjust the brakes on my Dynacraft Cityscape 700c 36v electric bike whenever I notice a decrease in braking power or if the brake pads are misaligned. Regular adjustments ensure proper brake cable tension and optimal brake pad alignment for safe and efficient braking.
Can I adjust the brakes on my electric bike without any special tools?
Yes, the brakes on your electric bike can be adjusted without any special tools. However, it is important to familiarize yourself with the specific brake system on your bike and follow proper procedures to ensure safe and effective brake adjustment.
How do I know if my brake pads need to be replaced?
When it comes to brake pads, signs of wear are crucial. Look for a decrease in braking power, squealing or grinding noises, and thinning of the pads. To replace them, follow these steps.
What should I do if my brakes feel spongy or unresponsive after adjusting them?
If my brakes feel spongy or unresponsive after adjusting them, I would first check the brake lever adjustment. If that doesn’t solve the issue, I might need to bleed the brakes to remove any air in the system.
Are there any specific safety precautions I should take when adjusting the brakes on my electric bike?
Before adjusting the brakes on your electric bike, it is crucial to take proper safety precautions. Failing to adjust brake tension correctly can lead to serious risks, such as decreased stopping power and potential accidents.
Conclusion
As I tighten the last bolt on my Dynacraft Cityscape 700c 36v electric bike, I can’t help but feel a sense of accomplishment. Adjusting the brakes was no easy task, but now they are perfectly aligned and ready for action.
Symbolically, it’s like I’ve given my bike a new lease on life, ensuring not only its safety but also mine. With every smooth ride, I’ll be reminded of the meticulous work I put into this adjustment, and it brings me great joy.
Now, it’s time to hit the road and enjoy the freedom this electric bike brings.