Putting together a bike might feel overwhelming, especially for first-timers. However, equipped with the proper tools and a dose of patience, the task becomes both doable and fulfilling.
In this article, I’ll walk you through the steps of assembling a bicycle from scratch, covering everything from attaching the handlebars to adjusting the gears.
Before you get started, it’s important to gather all the necessary tools and materials. You’ll need a set of hex wrenches, a screwdriver, a pair of pliers, and a bike pump, as well as the parts of the bike itself.
Make sure you have a clean, well-lit workspace and enough time to complete the job without rushing. With these preparations in place, you’ll be ready to start putting together your very own bicycle.
Key Takeaways
- Inspect each component for damage before starting the assembly process.
- Proper grip positioning and handlebar height are important for comfort and efficiency.
- Adjusting the brakes and gears is necessary for optimal performance.
- Regular testing and fine-tuning can help prevent issues before they become major problems.
Gather Your Tools and Materials
You’ll wanna grab all the tools and materials you need before starting to assemble your bike. Choosing the right tools is important to ensure that you don’t damage your bike’s components.
Essential bicycle components include a set of Allen wrenches, a torque wrench, a pedal wrench, a chain tool, a spoke wrench, and a screwdriver. Make sure to check the manufacturer’s instructions for specific tools needed for your bike model.
Once you have gathered all the necessary tools, it’s time to focus on the essential bicycle components. These include the frame, wheels, pedals, brakes, and chain. Make sure to inspect each component for any damage before starting the assembly process.
With all the tools and materials ready, it’s time to move on to the next step of attaching the handlebars and stem.
Attach the Handlebars and Stem
First, make sure the stem is securely attached to the fork steerer tube before tightening the bolts on the handlebars, remembering the adage ‘measure twice, cut once.’
Proper grip positioning is crucial for comfort and safety. To achieve this, place the handlebars in the stem with the grips facing upward and adjust the angle of the stem so that the handlebars are parallel to the ground.
Next, sit on the saddle and hold the handlebars in a natural position to determine the correct height. Adjust the stem accordingly and tighten the bolts evenly on both sides.
Selecting the right handlebar height is important for comfort and efficiency. A handlebar that is too low can cause strain on the back and neck, while one that is too high can make it difficult to apply enough force to the pedals.
Once you have adjusted the stem to the correct height, double-check the tightness of the bolts and ensure that the handlebars are straight.
With the handlebars securely attached, it’s time to move on to installing the wheels.
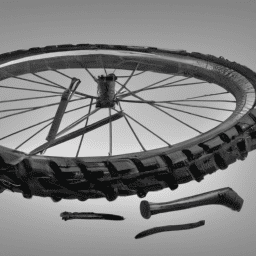
Install the Wheels
Now it’s time to install the wheels. I’ll begin by attaching the quick release skewers to secure the wheels to the frame.
It’s important to check the alignment of the wheels to ensure a smooth and safe ride.
Attaching the Quick Release Skewers
To attach the quick release skewers, simply flip the lever to loosen the nut and slide the skewer through the hub. Make sure the skewers are in their proper positioning, with the quick-release lever on the left side of the bike. Then, tighten the nut by flipping the lever back to its original position and applying the proper tightening torque.
This will ensure that the wheels are securely attached to the bike frame, preventing any accidents or mishaps during your ride. As you attach the skewers, it’s important to take a moment to appreciate the small but significant role they play in your biking experience. These seemingly insignificant metal bars are the key to keeping your wheels in place, allowing you to effortlessly glide down the road.
By taking the time to properly attach the skewers, you’re investing in both your safety and your enjoyment of the ride. Once you’ve completed this step, it’s time to move on to the next phase: checking the alignment of the wheels to ensure a smooth ride.
Checking the Alignment
Before hitting the road, it’s crucial to ensure that your wheels are aligned for a smooth and enjoyable ride experience. Checking alignment involves frame inspection and wheel alignment.
Firstly, inspect the frame to ensure it’s straight. Any bends or dents can cause wheel misalignment. Look along the frame from the front and rear to ensure it’s straight, and check the fork and rear dropouts are parallel to each other. If any misalignment is detected, take the bike to a professional bike shop for repair.
Once the frame is checked, it’s time to focus on wheel alignment. Spin the wheels and check for any wobbling or rubbing against the frame or brake pads. If there is any misalignment, adjust the spokes accordingly until the wheel runs true. It’s also important to check the axle nuts or quick release skewers are tight and secure.
After making any necessary adjustments, spin the wheels again to ensure they’re running smoothly. After checking alignment, it’s time to adjust the brakes and gears for optimal performance on your ride.
Adjust the Brakes and Gears
Fine-tune the brakes and gears to ensure your bike runs like a well-oiled machine. Start with the brake cable tension and make sure it’s adjusted properly so that the brakes engage smoothly when you pull the levers. If the cable is too loose, the brakes won’t work well and if it’s too tight, they’ll be hard to release.
Adjust the cable tension by turning the barrel adjuster on the brake lever until the brake pads are positioned correctly. Test the brakes by squeezing the levers and checking that the pads engage the rims evenly.
Next, adjust the gear shifters to ensure smooth shifting. Check that the cables are properly tensioned and that the gears shift smoothly up and down the cassette. If the gears are not shifting smoothly, adjust the derailleur by turning the barrel adjuster until it shifts smoothly.
Make sure the chain is not rubbing against the derailleur when it’s in the highest and lowest gears. Once you’ve fine-tuned the brakes and gears, you’re ready to test and fine-tune your bike to make sure it’s ready for the road.
Test and Fine-Tune Your Bike
Now that you’ve adjusted your bike’s brakes and gears, it’s time to take it for a test ride and fine-tune it to ensure optimal performance.
Start by taking your bike for a spin around your block, paying close attention to how it handles. If you notice any issues with the brakes, gears, or overall ride quality, take note of them and make adjustments accordingly.
Maintaining performance is crucial for any bike rider, and regular testing and fine-tuning can help prevent issues before they become major problems.
If you notice any issues while riding, troubleshoot them by checking the brakes, gears, and tire pressure. If you’re still having issues, consult a bike mechanic or do further research on how to fix the problem.
By regularly testing and fine-tuning your bike, you can ensure that it performs at its best and provides a smooth, enjoyable ride every time.
Frequently Asked Questions
How do I know if the bike frame is the right size for me?
Choosing the right bike frame is like finding the perfect pair of shoes. Use measuring techniques to ensure a comfortable fit. Adjusting bike handlebars can also improve comfort. Test ride before buying.
What should I do if the chain keeps slipping off the gears?
If my bike chain keeps slipping off the gears, I first check if it’s properly lubricated and adjusted. If not, I clean and lubricate it, and adjust the derailleur. I also regularly maintain it to prevent future issues.
How do I properly adjust the seat height?
First things first, it’s crucial to get the proper seat height to avoid discomfort or injury. Common mistakes include setting it too high or low. Use a tape measure and adjust to hip height for optimal performance.
What is the recommended tire pressure for my bike?
Maintaining proper tire pressure is crucial for optimal performance, safety, and longevity of your bike. To measure accurately, use a pressure gauge. Adjust pressure as needed based on manufacturer’s recommendations.
Can I ride my bike right after assembly or should I wait for a certain period of time?
Before taking a quick ride, it’s crucial to ensure your safety. Check tire pressure, brakes, and all bolts. Wait a few minutes to make sure everything is secure, then go for it!
Conclusion
Phew, after following all the steps in assembling my bicycle, I finally have a working bike! It was definitely a challenging process, but with the right tools and materials, it was more than doable.
Attaching the handlebars and stem was a bit tricky, but I made sure to tighten all bolts and screws to ensure stability. Installing the wheels was easier than I thought it would be, and adjusting the brakes and gears was a breeze with the help of a few online tutorials.
After testing out my bike, I noticed a few areas that needed fine-tuning, but overall, I’m satisfied with the end result. I never realized how many small details went into building a bike, but it was definitely worth the effort.
Now, I can’t wait to take my new bicycle out for a spin and explore the world around me. Who knows where my bike will take me next?