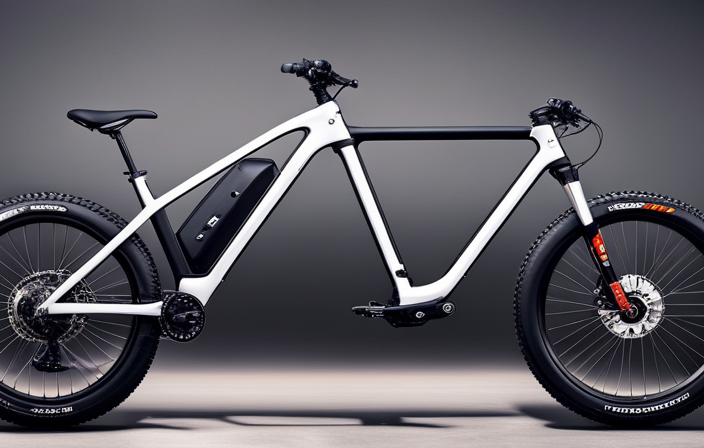
As I eagerly unbox my new Onway 26 inch 21 speed electric mountain bike, I can’t help but feel a sense of excitement and anticipation. The thrill of assembling this cutting-edge piece of machinery is about to begin.
With each step, I will guide you through the process, ensuring that you have all the necessary information to successfully put together your own electric mountain bike.
From attaching the front wheel to connecting the battery, get ready to embark on an adventure of mechanical mastery.
Key Takeaways
- Carefully inspect the bike frame for any damages or scratches before starting the assembly process.
- Ensure all components such as handlebars, pedals, seat, and wheels are present before proceeding with the assembly.
- Pay attention to proper installation of the front wheel, handlebars, pedals, and brakes to ensure a safe and functional bike.
- Connect and test the electric system, including the battery, to ensure proper functionality and troubleshoot any issues that may arise.

Under Armour Squeeze Water Bottles, 32 oz Water Bottles, Sideline Sports Water Bottle with Quick-Shot Lid, Quick & Easy Hydration, Gym Water Bottles, Squeeze Bottle, 1 32oz Bottle
- Easy Hydration: Quick-shot lid and one-way valve
- On-the-Go Use: One-hand operation for active hydration
- Measurement Markings: Ounces and milliliters for tracking
As an affiliate, we earn on qualifying purchases.
Unboxing and Checking for Parts
Start by unboxing the Onway 26 inch 21 speed electric mountain bike and check for all the necessary parts. Carefully remove the bike from its packaging, ensuring not to damage any components in the process.
Begin by inspecting the frame for any scratches, dents, or other damages that may have occurred during shipping. Next, check for the presence of the handlebars, pedals, seat, and wheels. Make sure all bolts and screws are securely fastened.
Examine the battery and ensure it is securely attached to the frame. Look for any loose wires or connections. Carefully inspect the tires for any signs of wear or punctures.
Finally, confirm that all accessories, such as the charger and user manual, are included. By thoroughly unpacking and checking for any damages, you can ensure a smooth assembly process and a safe riding experience.
Attaching the Front Wheel
Attach the front wheel by sliding it onto the fork, making sure that the axle slots into the dropouts. This step is crucial for front wheel alignment.
Begin by lining up the wheel with the fork, ensuring that the rotor is on the correct side. Once aligned, gently push the wheel into the fork until the axle is fully inserted into the dropouts. It should fit snugly and securely in place.
If you encounter any difficulties during installation, troubleshooting front wheel installation may be necessary. Check that the axle is properly aligned with the dropouts and that there are no obstructions preventing proper insertion. Additionally, ensure that the quick release lever is tightened adequately to hold the wheel in place.
Once the front wheel is securely attached, you are ready to move on to the next step of assembling your Onway 26 inch 21 speed electric mountain bike.
Installing the Handlebars
To install the handlebars, carefully position them onto the stem, making sure they are aligned with the front wheel. Start by loosening the bolt on the stem using an Allen wrench. Once the bolt is loose, slide the handlebars onto the stem and align them with the front wheel. Tighten the bolt securely to ensure the handlebars are held in place.
Next, adjust the handlebar position to your desired height and angle by loosening the stem’s bolt and adjusting accordingly. Once you have found the perfect position, tighten the bolt to secure the handlebars in place.
Lastly, select the right handlebar grips that provide a comfortable and secure grip. Grips with ergonomic designs and cushioning can help reduce hand fatigue and improve control. Slide the grips onto the handlebars and make sure they are snugly fitted.
Now you are ready to enjoy a comfortable and controlled ride with your Onway 26 inch 21 speed electric mountain bike.
Adjusting the Seat Height
You can easily adjust the seat height on your Onway 26-inch 21-speed electric mountain bike. Follow these steps to ensure a comfortable and efficient riding experience:
- Start by loosening the seat clamp located underneath the seat using an Allen wrench.
- Once the clamp is loose, adjust the seat height by raising or lowering it to your desired position.
Make sure the seat is level by adjusting the seat angle. Use a level or visually align it with the ground.
- Tighten the seat clamp securely to prevent any movement during your ride.
Choosing the right seat height is crucial for maximizing your pedaling efficiency and preventing injuries. To determine the correct height, sit on the bike and position one pedal at the lowest point. Your leg should be almost fully extended with a slight bend in the knee.
Remember to consider your riding style and personal preference when finding the perfect seat height for your Onway electric mountain bike.
Attaching the Pedals
After adjusting the seat height, it’s important to securely fasten the pedals to ensure a smooth and safe ride. Proper pedal installation is crucial for optimal performance and longevity of your electric mountain bike. Here are some pedal installation tips to follow:
| Step | Procedure |
|---|---|
| 1 | Start by identifying the left and right pedals. The left pedal has a reverse thread, so it screws in counterclockwise, while the right pedal screws in clockwise. |
| 2 | Apply a small amount of grease to the pedal threads to prevent rust and make installation easier. |
| 3 | Use a pedal wrench or a 15mm wrench to tighten the pedals securely. Ensure they are tightened to the recommended torque specifications provided by the manufacturer. |
Proper pedal maintenance is also essential to ensure their longevity and functionality. Regularly inspect the pedals for any signs of damage or wear, such as loose bearings or worn-out grips. Clean and lubricate the pedals periodically to prevent dirt and debris buildup. By following these pedal installation tips and practicing proper maintenance, you can enjoy a safe and enjoyable riding experience on your Onway 26 inch 21 speed electric mountain bike.
Installing the Brakes
Installing the brakes is an important step in ensuring the safety and functionality of your electric mountain bike. To begin, you will need a set of brakes and the necessary tools.
Start by attaching the brake calipers to the designated mounting points on the front and rear forks. Make sure they are securely fastened.
Next, align the brake pads with the braking surface of the bike’s wheels. This is crucial for optimal braking performance. Adjust the position of the brake pads using the provided Allen wrench until they are properly aligned.
Once the brake pads are aligned, it is time to bleed the brakes. This process removes any air bubbles that may have entered the brake system. Follow the manufacturer’s instructions to properly bleed the brakes and ensure they are functioning correctly.
Connecting the Battery
Now that the brakes are properly installed, it’s time to move on to the next step: connecting the battery. This crucial step ensures that your electric mountain bike is ready to hit the trails with full power.
To connect the battery, follow these steps:
- Locate the battery compartment on the frame of the bike.
- Open the compartment and carefully insert the battery, ensuring it is securely connected to the wiring.
- Close the battery compartment and make sure it is tightly sealed.
- Turn on the bike’s power switch, usually located near the handlebars.
- Check the battery indicator on the bike’s display to ensure it is fully charged before your ride.
If you encounter any issues with the battery, such as it not charging or draining too quickly, here are some troubleshooting tips:
| Common Battery Issues | Tips for Maximizing Battery Life |
|---|---|
| Battery not charging | Check the connection and try a different charger. |
| Battery draining quickly | Avoid excessive use of power modes and maintain a consistent speed. |
| Uneven battery performance | Calibrate the battery by fully charging and fully discharging it a few times. |
By following these steps and troubleshooting tips, you’ll ensure that your electric mountain bike’s battery is properly connected and ready for a long-lasting, powerful ride.
Testing the Electric System
To test the electric system, make sure the power switch is turned on and check the bike’s display for any error messages.
Start by turning the power switch located near the battery to the ‘on’ position. Once the power is on, the bike’s display will light up, showing important information such as speed, battery level, and mode selection.
Take a close look at the display for any error messages, which could indicate a problem with the electric system. If you see an error message, consult the user manual for troubleshooting steps or contact customer support.
Additionally, it’s important to follow battery charging tips to ensure optimal performance. Always use the charger provided and make sure the battery is fully charged before each ride. Avoid overcharging the battery, as it can reduce its lifespan.
Regularly inspect the battery for any signs of damage or wear and replace if necessary.
By properly testing the electric system and following battery charging tips, you can ensure a smooth and enjoyable ride on your Onway 26-inch 21-speed electric mountain bike.
Checking Tire Pressure and Suspension
Checking the tire pressure and suspension is essential for maintaining optimal performance and comfort while riding.
To begin, locate the valve stem on each tire and use a pressure gauge to check the tire pressure. Adjust the pressure as needed, referring to the recommended range specified by the manufacturer. Proper tire pressure is crucial as it affects both traction and rolling resistance.
Next, turn your attention to the suspension system. Start by adjusting the suspension settings according to your weight and riding style. This can usually be done by turning the knobs on the fork and rear shock. Proper suspension setup ensures a smooth and controlled ride, minimizing fatigue and improving overall handling. Remember to refer to the bike’s manual for specific instructions on adjusting suspension settings.
By regularly checking tire pressure and adjusting suspension settings, you can enjoy a safe and comfortable ride on your Onway 26 inch 21-speed electric mountain bike.
Final Safety Checks and Maintenance Tips
Make sure you perform final safety checks and maintenance tips to ensure a safe and smooth ride on your electric mountain bike. Here are some important steps to follow:
-
Inspect the brakes: Check the brake pads to ensure they are not worn out and adjust the brake levers for optimal performance.
-
Verify the chain tension: Make sure the chain is properly tensioned and lubricated. A loose chain can cause shifting issues and a tight chain can damage the drivetrain.
-
Check the battery: Ensure the battery is securely attached and fully charged. It is also a good practice to follow a maintenance schedule for battery upkeep.
In addition to these maintenance tips, it is crucial to wear the appropriate safety gear when riding an electric mountain bike. I recommend wearing a helmet, knee pads, and elbow pads to protect yourself in case of any accidents.
Remember, prioritizing safety and following a maintenance schedule will help you enjoy your electric mountain bike to the fullest while minimizing the risk of any mishaps.
Frequently Asked Questions
How long does it take to fully charge the battery of the onway 26 inch 21 speed electric mountain bike?
It typically takes around 4-6 hours to fully charge the battery of the onway 26 inch 21 speed electric mountain bike. It’s important to note that the charging time may vary depending on the battery capacity and charger specifications. Regular charging ensures a longer battery lifespan.
Are there any specific tools required for assembling the bike?
Before diving into the assembly process, it’s worth noting that "having the right tools for the job" is crucial. To assemble the bike, you’ll need a set of basic hand tools such as wrenches, screwdrivers, and pliers.
Can the electric system be turned off while riding the bike?
Yes, the electric system can be easily turned off while riding the bike. This allows for a more traditional biking experience and conserves battery life. Additionally, it is important to properly maintain the electric system during winter months to ensure optimal performance.
Is it possible to adjust the suspension on the onway 26 inch 21 speed electric mountain bike?
To adjust the suspension on the Onway 26 inch 21 speed electric mountain bike, follow these steps for proper suspension maintenance. First, locate the suspension fork and adjust the air pressure or preload according to your weight and riding style. Then, fine-tune the compression and rebound settings to optimize your bike’s performance.
Are there any weight limitations for riders of the bike?
Riding the onway 26 inch 21 speed electric mountain bike is a breeze, but it’s important to consider weight limitations. To ensure optimal performance, riders should adhere to the specified weight limits and perform regular maintenance on the bike.
Conclusion
In conclusion, assembling the Onway 26 inch 21 speed electric mountain bike was a thrilling experience.
From unboxing and checking for parts to testing the electric system, every step was filled with excitement.
The feeling of attaching the front wheel and installing the handlebars was like a burst of energy coursing through my veins.
Adjusting the seat height and attaching the pedals brought a sense of accomplishment.
And finally, connecting the battery and testing the electric system was like witnessing pure magic.
With a final check of tire pressure and suspension, the bike was ready to conquer any terrain.
It was a truly exhilarating journey, and now I can confidently hit the trails on my powerful and versatile electric mountain bike.