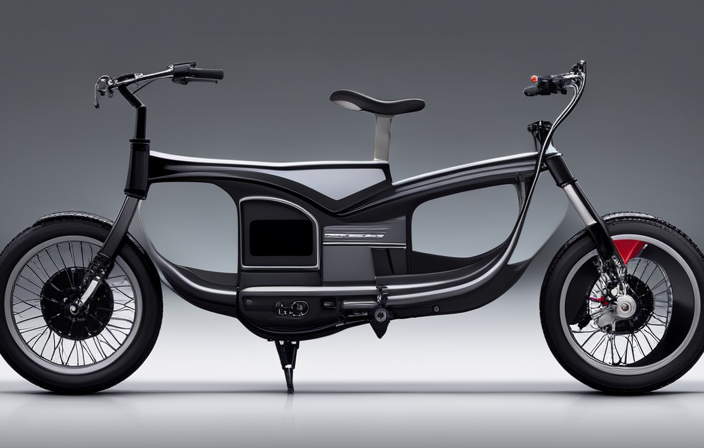
As I eagerly unpacked the box, I couldn’t help but feel a surge of excitement. It was time to assemble my new electric bike, straight out of the box.
With a clear set of instructions and a few basic tools, this task was well within my reach. From attaching the handlebars to installing the pedals, I was about to embark on a journey of technical prowess and mechanical accomplishment.
So, let’s dive in and discover the steps to bring this electric wonder to life.
Key Takeaways
- Perform pre-ride checks and adjustments to ensure safety and optimal performance.
- Select the right electric bike based on frame size, motor power, battery capacity, brake type, and suspension.
- Take a test ride to experience the bike’s capabilities and assess if it meets expectations.
- Evaluate the test ride, considering comfort, performance, and any adjustments needed, before making a decision about the electric bike.
Unpack and inspect the contents of the box
You should first unpack the box and inspect its contents to ensure everything is in good condition. This step is crucial as it allows you to identify any damages that may have occurred during the shipping process. Carefully remove the bike and lay it on a clean surface.
Begin by examining the bike frame for any scratches, dents, or cracks. Inspect the wheels, spokes, and rims for any signs of damage. Next, check the handlebars, stem, and seat post for any defects. It is also important to inspect the brakes, gears, and chain to ensure they are functioning properly. Take note of any issues or damages and contact the manufacturer immediately if necessary.
Once you have thoroughly inspected the bike, you can move on to attaching the handlebars to the bike frame.
Attach the handlebars to the bike frame
To attach the handlebars, simply align them with the bike frame and tighten the bolts.
Handlebar alignment is crucial for proper bike handling and control. Start by loosening the bolts on the stem, which connects the handlebars to the bike frame.
Position the handlebars so they are parallel to the front wheel and facing forward. Make sure the handlebars are centered, with an equal amount of space on either side. Once aligned, tighten the bolts securely, but be careful not to overtighten and damage the frame or handlebars.
With the handlebars attached, it’s important to maintain a proper handlebar grip while riding. This involves placing your hands on the handlebars with a relaxed grip, ensuring that your fingers can reach the brakes and shifters comfortably.
Now, let’s move on to installing the front wheel.
Install the front wheel
Once the handlebars are securely attached, it’s time to install the front wheel. Proper installation of the front wheel is crucial for the overall stability and performance of your electric bike. Here are some assembling tips to ensure a smooth and successful installation:
-
Align the fork dropouts with the wheel axle: Make sure the fork dropouts, which are the slots on the front fork, are aligned with the wheel axle. This ensures that the wheel is properly seated and aligned with the frame.
-
Tighten the axle nuts or quick-release skewer: Use a wrench or your hands to tighten the axle nuts or quick-release skewer. Make sure they are securely fastened to prevent any wobbling or loosening during rides.
-
Check for proper wheel alignment: Stand in front of the bike and look down the centerline of the front wheel. It should be straight and aligned with the frame. If not, adjust the axle nuts or quick-release skewer until the wheel is properly aligned.
With the front wheel securely installed, the next step is to attach the seat to the seat post.
Attach the seat to the seat post
Now that the front wheel is securely installed, it’s time to attach the seat to the seat post.
Before doing so, it’s important to ensure that the seat post is in good condition and properly maintained. Check for any signs of rust or damage, and if necessary, clean or replace the seat post to ensure a secure attachment.
Next, consider choosing the right seat for your electric bike. Look for a seat that provides comfort and support during long rides. Consider factors such as cushioning, width, and shape to find the perfect fit for your body type and riding style.
Once you have selected the appropriate seat, attach it to the seat post using the provided hardware. Make sure the seat is aligned and tightened securely.
Now that the seat is installed, it’s time to move on to the next step of the assembly process: installing the pedals.
Install the pedals
Before attaching the pedals, make sure you have the appropriate tools on hand for the installation. Here are some key points to consider when installing the pedals on your new electric bike:
-
Proper technique for pedal installation: Start by identifying the left and right pedals. The left pedal has a reverse thread, so remember to turn it clockwise to tighten. Use a pedal wrench or a 15mm wrench to secure the pedals onto the crank arms. Make sure they are tightened securely to prevent any accidents while riding.
-
Different types of pedals and their benefits: There are various types of pedals available, such as platform pedals, clipless pedals, and toe clip pedals. Each has its advantages, so choose the one that suits your riding style and preferences. Platform pedals provide a stable platform for any type of shoe, while clipless pedals offer better power transfer and control. Toe clip pedals combine the benefits of both.
To ensure a smooth transition into the next section about adjusting the brakes and gears, it is important to have the pedals properly installed. This will allow you to test the bike’s functionality and make any necessary adjustments to the brakes and gears for optimal performance.
Adjust the brakes and gears
Make sure to check the brakes and gears for proper adjustment before taking the bike for a test ride. Proper maintenance for electric bike brakes and gears is crucial to ensure optimal performance and safety. Here are some steps to follow:
| Brakes | Gears |
|---|---|
| Check brake pads for wear and replace if necessary. | Inspect derailleur alignment and adjust if needed. |
| Ensure brake cables are properly tensioned. | Lubricate gear cables to prevent rust and improve shifting. |
| Test the brakes for responsiveness and adjust as needed. | Check for any loose bolts or screws on the derailleur. |
| Troubleshoot common issues like squeaking or weak braking. | Troubleshoot gear skipping or difficulty shifting. |
Charge the battery
Once you’ve properly adjusted the brakes and gears, it’s important to charge the battery before taking your electric bike for a ride. Battery charging is a vital part of the maintenance process to ensure optimal performance and longevity of your electric bike.
To start, locate the charging port on your bike and connect the charger securely. Make sure the battery is not completely drained before charging, as it may affect its overall capacity. It is also recommended to charge the battery at room temperature to prevent overheating.
Avoid overcharging the battery, as it can lead to reduced battery life. Once the battery is fully charged, disconnect the charger and securely close the charging port. Now, you are ready to move on to the next step and test the bike’s functionality.
Test the bike’s functionality
After charging the battery, it’s time to test the functionality of the electric bike. This step is crucial to ensure that all components are in proper working order before taking it for a ride. Here’s what you need to do:
-
Check the battery life: Turn on the bike and check the battery indicator to ensure it’s fully charged.
-
Inspect the brakes: Squeeze the brake levers to ensure they engage smoothly and bring the bike to a stop.
-
Test the gears: Shift through each gear to make sure the chain moves smoothly and the gears engage properly.
-
Perform a speed test: Take the bike for a short ride and gradually increase the speed to test its performance.
-
Check the lights and horn: Ensure that the headlights, taillights, and horn are functioning correctly.
Now that you’ve tested the bike’s functionality, let’s move on to adjusting the seat height and handlebar position for comfort.
Adjust the seat height and handlebar position for comfort
Now that you’ve tested the bike’s functionality, it’s time to adjust the seat height and handlebar position for a more comfortable riding experience.
To begin, find the seat height that allows your legs to fully extend when pedaling, but still allows a slight bend in the knee. This will prevent strain and potential injuries.
Next, adjust the handlebar position for optimal riding posture. The handlebars should be positioned at a height that allows your arms to bend slightly, ensuring a relaxed and comfortable position.
Additionally, finding the right saddle and handlebar grips is crucial for comfort and support. Choose a saddle that suits your body type and preferences, and ensure the handlebar grips provide a secure and cushioned grip.
Once these adjustments are made, you’re ready to take a test ride and enjoy your new electric bike!
Take a test ride and enjoy your new electric bike!
To fully enjoy your new electric bike, hop on and take it for a test ride to experience the thrill of effortless speed and smooth maneuverability. It’s important to choose the right electric bike that suits your needs and preferences.
Here are some key factors to consider when selecting your electric bike:
-
Frame Size: Ensure that the bike’s frame size is appropriate for your height, allowing for a comfortable riding position.
-
Motor Power: Different electric bikes come with varying motor powers. Consider your intended use and terrain to determine the adequate motor power for your needs.
-
Battery Capacity: Evaluate the battery capacity to ensure it can provide sufficient range for your desired ride duration and distance.
-
Brake Type: Choose between mechanical or hydraulic disc brakes, both offering reliable stopping power and control.
-
Suspension: Determine if you need front suspension, rear suspension, or both, depending on the terrain you plan to ride on.
Once you’ve chosen the right electric bike, take it for a test ride to fully appreciate its capabilities and determine if it meets your expectations. Enjoy the freedom of effortless pedaling and the exhilaration of a smooth ride.
Frequently Asked Questions
How long does it take to charge the battery of the electric bike?
The battery of the electric bike can take anywhere from 4 to 6 hours to fully charge, depending on its capacity. It’s important to check the battery capacity and use a compatible charger for optimal charging time.
Are there any specific tools required for assembling the bike?
Tools needed for assembly include a wrench, screwdriver, and Allen key. Step by step assembly instructions are provided in the manual. The process involves attaching the handlebars, pedals, and wheels, among other components.
How do I know if all the necessary parts are included in the box?
To ensure all necessary parts are included, carefully inspect the contents of the box. Check for the main frame, wheels, pedals, battery, charger, and any additional accessories. Refer to the assembly manual for troubleshooting, maintenance tips, and proper care instructions.
How do I adjust the brakes and gears of the electric bike?
To adjust the brakes of an electric bike, first locate the brake calipers and loosen the bolts. Then, squeeze the brake lever and tighten the bolts while holding the lever. To adjust the gears, use the barrel adjuster to fine-tune the shifting.
Is there a warranty included with the purchase of the electric bike?
Oh, the joy of warranties! Let’s dive into the world of electric bike warranties, shall we? There are various types available, and coverage can differ for different components. It’s all about protecting your investment. Now, back to assembling that bike!
Conclusion
In conclusion, assembling a new electric bike right out of the box is an exciting and rewarding experience. By following the step-by-step instructions, one can quickly and easily put together their new ride.
Remember, ‘Rome wasn’t built in a day,’ and neither was your electric bike. But with a little patience and attention to detail, you’ll be cruising around in no time.
So go ahead, hop on your new electric bike and let the adventures begin!
