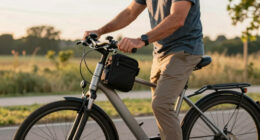
Are you tired of your Arrow 7 electric bike’s brakes feeling less responsive than a sloth on a Sunday stroll?
Well, fear not, my fellow biking enthusiasts! In this guide, I’ll show you the precise and technical process of bleeding the brakes on your Arrow 7 electric bike.
By following these steps, you’ll be able to ensure optimal brake performance and restore that much-needed stopping power.
So grab your tools and let’s dive into the world of brake maintenance like a seasoned pro!
Key Takeaways
- Bleeding the brakes of an Arrow 7 electric bike is an important maintenance task to ensure optimal brake performance and safety.
- Proper storage and maintenance of the bleed kit is crucial to prevent damage and ensure its functionality for future use.
- Regularly testing the brakes before each ride and addressing any issues promptly is essential for rider safety.
- Following the manufacturer’s guidelines and prioritizing brake maintenance not only extends the lifespan of brake components but also saves money on repairs and ensures a smooth and secure ride.

Powvine Electric Bike Horn 130db Loud Bicycle Horn,Bicycle Horns for 22.2-32mm Handlebars Bike Horn for Adults with 3V Battery,Easy Installation Bike Bells for Adults Kids Mountain Bike/Scooter/Ebike
Loud Bicycle Horn: Our bike horn has a volume of 130db, which can effectively expand the sound transmission...
As an affiliate, we earn on qualifying purchases.
Understanding the Importance of Brake Maintenance
You need to understand the importance of brake maintenance on your Arrow 7 electric bike. Proper brake maintenance is crucial for ensuring your safety and the optimal performance of your bike. Regularly checking and maintaining your brakes can prevent potential accidents and ensure a smooth riding experience.
Here are some brake maintenance tips to keep in mind. Firstly, inspect your brake pads for wear and tear regularly. If they are worn down beyond a certain point, they should be replaced immediately.
Secondly, pay attention to any signs of brake issues such as squeaking or grinding noises, reduced braking power, or a spongy brake lever. These signs indicate that your brakes need attention and should be addressed promptly.
By prioritizing brake maintenance, you can enjoy a safe and enjoyable ride on your Arrow 7 electric bike.

Laibgvhdt Electric for Bicycle Lights,Bicycle Remote Control Warning Taillights with Horn Sound, Left and Right Turn Signals, Type-c Charging Taillights, Night Riding Lights (Black)
Remote control turn signal tail light, turn signal sound 120 decibels
As an affiliate, we earn on qualifying purchases.
Gathering the Necessary Tools and Materials
To prepare, gather all the required tools and materials. Here are three essential items you will need:
-
Bleed kit alternatives: If you don’t have a specific bleed kit for your Arrow 7 electric bike, there are alternative options available. For example, you can use a syringe, clear plastic tubing, and a container to catch the brake fluid. These alternatives can work effectively if used correctly.
-
Common mistakes: When bleeding the brakes on your Arrow 7 electric bike, it’s crucial to avoid common mistakes. One common mistake is not properly tightening the bleed screw, which can lead to air getting into the brake system. Another mistake is using the wrong type of brake fluid, as it can damage the seals and components.
By gathering the necessary tools and materials and being aware of common mistakes, you’ll be well-prepared to bleed the brakes on your Arrow 7 electric bike. Remember to follow the instructions carefully to ensure a successful brake maintenance process.

amzluv Bike Phone Holder Mount, Secure Handlebar Phone Mount Holder for Bike and Motorcycle, Suitable for iPhone and 4.5-6.8" Smartphones, Black
Universal Fit for 4.5-6.8 Inch Phones (Fits up to 3.19" Wide, 0.47" Thick): This motorcycle phone mount and...
As an affiliate, we earn on qualifying purchases.
Preparing the Bike for Bleeding
To prepare for bleeding the brakes on your Arrow 7 electric bike, start by making sure the bike is securely positioned and the wheels are stable. This is crucial to ensure safety during the bleeding process.
Next, locate the brake bleeding ports on the brake calipers. These ports are usually found near the brake handle or on the caliper itself. Once you have located the ports, attach the brake bleeding kit to them. The kit usually consists of a syringe, tubing, and a collection container. This will allow you to remove any air bubbles or contaminants from the brake system.
It is important to follow the manufacturer’s instructions carefully to avoid any damage to the brake system. If you encounter any issues during the bleeding process, refer to the troubleshooting tips provided in the bike’s manual or contact the manufacturer for assistance.

Learniture Structure Series 12-Device Charging Station for Laptops and Tablets, Wall-Mount Lockable Charging Cabinet for 12 Tablets/Chromebooks, Black
LAPTOP CHARGING STATION: Designed with a large storage area and interior steel dividers that ensure a proper fit...
As an affiliate, we earn on qualifying purchases.
Removing the Brake Pads and Calipers
Before removing the brake pads and calipers, ensure that the bike is securely positioned and the wheels are stable. This is crucial to prevent any accidents or damages. Once the bike is properly secured, you can proceed with the removal process.
Here are five steps to follow when removing the brake pads and calipers:
- Locate the brake caliper bolts and use an appropriate tool to loosen them.
- Carefully remove the caliper bolts and set them aside.
- Gently slide the caliper off the brake rotor, taking care not to damage the rotor or the brake lines.
- Inspect the brake pads for any signs of wear or damage. If necessary, replace them with new ones.
- Clean the caliper and brake pads using brake cleaner to remove any dirt or debris.
By following these steps, you can effectively remove the brake pads and calipers for maintenance or replacement. Remember to always handle the brake components with care to ensure proper functioning of your Arrow 7 electric bike.
Attaching the Bleed Kit and Opening the Bleed Valve
Once the brake pads and calipers have been removed, I can now attach the bleed kit and open the bleed valve to initiate the bleeding process. This step is crucial in maintaining the optimal performance of my Arrow 7 electric bike.
The bleed kit consists of a syringe, tubing, and a bleed block. I carefully connect the tubing to the bleed valve and secure it tightly to prevent any leaks. Then, I attach the syringe to the other end of the tubing.
Ensuring that all connections are secure, I slowly open the bleed valve to allow the old brake fluid to flow out. It is important to watch for any air bubbles that may indicate a need for further bleeding.
Troubleshooting common bleeding issues, such as air trapped in the system or a lack of pressure, is essential for a successful bleed.
Pumping and Releasing the Brake Lever
When pumping and releasing the brake lever, I make sure to maintain a steady rhythm to effectively remove any air bubbles from the system. This is crucial for improving braking technique and ensuring optimal performance of the Arrow 7 electric bike.
By following this technique, I can achieve a firm and responsive brake feel, allowing for better control and stopping power. It is important to note that improper bleeding or air in the brake system can lead to soft or spongy brakes, reduced braking power, and even brake failure.
By regularly bleeding the brakes and removing any air bubbles, I can prevent these common brake problems and ensure a safe and enjoyable riding experience.
Additionally, it is essential to use the correct brake fluid and follow the manufacturer’s instructions for bleeding the brake system.
Checking for Air Bubbles and Repeating the Process
To ensure optimal braking performance, it is crucial to check for any air bubbles and repeat the process if necessary. Bleeding techniques are essential to remove air from the brake system and maintain consistent stopping power. Here are three important steps to follow when checking for air bubbles and troubleshooting common issues:
-
Inspect the brake lines: Carefully examine the brake lines for any signs of leakage or damage. Ensure that they are properly connected and free from any blockages.
-
Use a bleed kit: A bleed kit is a handy tool that helps in removing air bubbles from the brake system. Attach the bleed kit to the brake lever and caliper, following the manufacturer’s instructions.
-
Repeat the bleeding process: After bleeding the brakes once, it is important to check for any remaining air bubbles. If you notice any, repeat the bleeding process until no more air bubbles are present.
By following these steps and using proper bleeding techniques, you can troubleshoot common issues and ensure your Arrow 7 electric bike’s brakes are in top-notch condition.
Reinstalling the Brake Pads and Calipers
After checking for air bubbles and troubleshooting common issues, the next step is to reinstall the brake pads and calipers. This is an important step to ensure the proper functioning of the Arrow 7 electric bike’s braking system.
To start, I carefully align the brake rotor with the caliper, ensuring that it is centered and straight. This is crucial for optimal braking performance.
Next, I slide the brake pads into place, making sure they are seated correctly and securely. I then tighten the caliper bolts to the manufacturer’s specifications, ensuring a firm and stable connection.
Once everything is properly installed, I test the brakes to ensure they are functioning smoothly. If I encounter any issues such as brake squealing, I troubleshoot by adjusting the position of the brake pads and ensuring they are properly aligned with the rotor.
Testing the Brakes and Adjusting as Needed
After successfully reinstalling the brake pads and calipers on my Arrow 7 electric bike, it was time to move on to the next crucial step: testing the brakes and making any necessary adjustments.
This is a vital part of the process to ensure optimal performance and safety while riding. To begin, I applied gradual pressure to the brake levers and observed the response of the brakes. I paid close attention to any abnormal noises, excessive squeaking, or uneven braking.
If any of these issues were present, I would troubleshoot by checking the alignment of the brake pads, ensuring they are making proper contact with the rotor. Additionally, I would inspect the brake cables for any signs of wear or damage.
By using these testing techniques and troubleshooting common brake issues, I can confidently ensure that my Arrow 7 electric bike’s brakes are in top-notch condition for a smooth and secure ride.
Properly Storing the Bleed Kit and Tools for Future Use
Make sure you store the bleed kit and tools properly for future use so that they are easily accessible when needed.
Properly storing the bleed kit is essential to maintain its functionality and prevent any damage. Start by cleaning all the tools and components thoroughly before storing them. This helps remove any dirt or debris that may have accumulated during the bleeding process.
Next, organize the tools in a designated container or toolbox to keep them in one place. Make sure to label the container or toolbox for easy identification.
Additionally, it is crucial to store the bleed kit in a cool, dry place to prevent any moisture or humidity from affecting the tools.
By following these steps, you can ensure that your bleed kit and tools are in optimal condition for future use.
Frequently Asked Questions
How often should I bleed the brakes on my Arrow 7 electric bike?
I recommend bleeding the brakes on your Arrow 7 electric bike every 6-12 months, depending on your usage. To properly bleed the brakes, follow these steps: [provide step-by-step instructions on how to bleed the brakes].
Can I use any type of brake fluid for bleeding the brakes?
No, it is important to select the correct type of brake fluid for bleeding the brakes. Using the wrong fluid can damage the system. Common brake bleeding mistakes include not following the manufacturer’s recommendations and introducing air bubbles into the system.
What are the signs that indicate my brakes need to be bled?
Signs that indicate brakes needing to be bled include a spongy feel, reduced braking power, or a brake lever that reaches the handlebar. Proper bleeding process steps and avoiding common brake bleeding mistakes are crucial to maintaining optimal brake performance.
Is it necessary to remove the brake pads and calipers during the bleeding process?
Removing brake pads and calipers during the bleeding process has both pros and cons. While it allows for a thorough bleed, it can be time-consuming and require additional tools. Alternatively, there are other methods for bleeding electric bike brakes that may be quicker and easier.
Are there any specific safety precautions I should take while bleeding the brakes?
When performing brake bleeding, it is important to take certain safety precautions. First, ensure the bike is secure and on a level surface. Use protective gloves to prevent any contact with brake fluid, and follow the proper brake bleeding technique to avoid common mistakes.
Conclusion
In conclusion, maintaining the brakes of your Arrow 7 electric bike is crucial for ensuring optimal performance and safety. By following the step-by-step process outlined in this article, you can effectively bleed your bike’s brakes and keep them in top condition.
Did you know that proper brake maintenance can reduce the stopping distance of a bike by up to 25%? So, by regularly bleeding your brakes, you can enhance your bike’s stopping power and have a more enjoyable and safe riding experience.