
Constructing a friction drive bike presents a rewarding challenge that necessitates a solid grasp of the involved mechanics. Having constructed one myself, I can vouch for the joy that comes from riding a bicycle you’ve assembled on your own.
In this article, I will guide you through the process of building a friction drive bicycle from scratch, step-by-step.
Before we dive into the nitty-gritty details, let me explain what a friction drive system is. Essentially, it’s a type of propulsion system that uses friction to transfer power from the motor to the wheel. The motor is mounted on the bike’s frame, and a friction roller is pressed against the rear tire, which drives the bike forward.
The beauty of this system is that it’s relatively simple and doesn’t require any modifications to the bike’s frame. However, it does require some engineering finesse to get it working correctly.
So, let’s get started!
Key Takeaways
- Building a friction drive bicycle is a simple system that requires understanding of mechanics and selecting durable and compatible components.
- Regular maintenance is important, including cleaning and lubricating the chain and gears, checking tire pressure before every ride, and fine-tuning the system for maximum efficiency.
- Proper riding techniques should also be practiced, such as anticipating terrain and shifting gears accordingly, wearing appropriate safety gear, and being mindful of traffic and pedestrians.
- The advantages of a friction drive system include no complex or expensive parts needed, and it is easy to install and maintain. However, common issues include periodic replacement of the rubber roller and the importance of adjusting tension and lubrication for efficient power transfer.

Under Armour Squeeze Water Bottles, 32 oz Water Bottles, Sideline Sports Water Bottle with Quick-Shot Lid, Quick & Easy Hydration, Gym Water Bottles, Squeeze Bottle, 1 32oz Bottle
- Easy Hydration: Quick-shot lid and one-way valve
- On-the-Go Use: One-hand operation for active hydration
- Measurement Markings: Ounces and milliliters for tracking
As an affiliate, we earn on qualifying purchases.
Understanding the Friction Drive System
You’ll love how easy it is to understand the friction drive system once you see how it works! The system works by applying friction from a rotating motor to the rear tire of a bicycle. This makes the wheel turn and propels the bike forward.
The friction drive system is a popular choice among bicycle enthusiasts because it offers many advantages over other types of drive systems. One of the main advantages of the friction drive system is its simplicity. Unlike other drive systems, it doesn’t require complex and expensive parts. It’s also easy to install and maintain. However, like any other system, the friction drive system has its share of common issues.
For instance, the rubber roller that provides the friction needs to be replaced periodically. Additionally, the roller can slip on wet or uneven surfaces, causing a loss of power. Understanding the friction drive system is crucial before moving on to selecting the right components. With this knowledge, you can make informed decisions about the components that’ll work best for your specific needs.
Selecting the Right Components
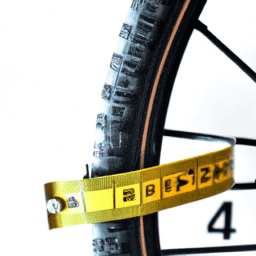
When picking out the proper components for a friction drive bicycle, it’s important to keep in mind the saying ‘measure twice, cut once.’ Here are three key considerations to keep in mind:
-
Durability: Select components that are built to last, such as sturdy metal brackets and high-quality bearings. These parts should be able to withstand the wear and tear of regular use.
-
Compatibility: Make sure all components are compatible with each other and with your particular bicycle frame. A lack of compatibility can lead to safety issues and can cause damage to your bike.
-
Weight: While a friction drive system should be lightweight, it’s important not to compromise on durability for the sake of weight. Choose materials that are both strong and lightweight, like carbon fiber or aluminum.
When choosing your components, it’s important to think about the long-term use of your friction drive system. By selecting quality materials and compatible components, you’ll ensure that your bike will last for years to come.
Preparing your bicycle for the installation of a friction drive system requires careful attention to detail.
Preparing Your Bicycle
Before starting, make sure your bike is in good condition and ready for the next step in the process. Begin by cleaning the bike thoroughly, especially the rear wheel where the friction drive will be installed. Use a degreaser to remove any dirt, grime, or oil from the wheel. This will ensure maximum friction between the wheel and the drive roller.
Once the bike is clean, you can begin preparing the necessary tools for the installation. You’ll need a wrench, pliers, screwdriver, and a torque wrench. It’s important to have the correct sizes for each tool to avoid damaging any parts during installation.
With your tools ready, move on to the next step of installing the friction drive system.
Installing the Friction Drive System
Get ready to add some serious speed to your ride with this slick little system! Installing the friction drive system on your bicycle may seem intimidating, but with the right preparation, it can be a straightforward process.
Here are some key tips for installing the friction drive system:
-
Adjusting tension: Once you’ve mounted the friction drive roller to your bicycle’s rear wheel, it’s important to adjust the tension of the drive belt. This will ensure that the roller is in contact with the wheel at the correct pressure, allowing for efficient power transfer. To adjust the tension, use the provided tension adjustment screws or nuts to increase or decrease the distance between the roller and the wheel. Be sure to test the tension by turning the wheel by hand before riding.
-
Lubrication techniques: To keep your friction drive system running smoothly, it’s important to lubricate the roller and drive belt periodically. Use a dry lubricant such as graphite or silicone spray to avoid attracting dirt and debris to the system. Apply the lubricant sparingly to the roller and belt, being careful not to oversaturate or drip onto other parts of the bicycle.
With these tips in mind, installing the friction drive system on your bicycle should be a breeze. Once you’ve completed the installation, it’s important to test and adjust the system before taking it for a spin. We’ll cover this in more detail in the next section.
Testing and Adjusting Your Friction Drive Bicycle
Now that I’ve installed the friction drive system on my bicycle, it’s time to test and adjust it to ensure safety and optimal performance.
It’s crucial to follow safety precautions, such as wearing a helmet and avoiding busy streets during the initial testing phase.
Fine-tuning the system involves adjusting the tension of the drive roller and ensuring proper alignment with the tire.
Once everything is adjusted correctly, I can enjoy my new, efficient ride!
Safety Precautions
Ensuring your well-being is paramount, so it’s crucial to keep in mind a few safety precautions while building a friction drive bicycle. Firstly, always wear appropriate safety gear such as a helmet, gloves, and sturdy shoes. This will help protect you from potential hazards such as accidents, falls, or scrapes.
Additionally, make sure the bicycle you’re using as a base is in good condition and properly maintained. Check the brakes, wheels, and tires to prevent any unexpected mishaps.
It’s also important to be aware of your surroundings while riding your friction drive bicycle. Always ride in designated bike lanes or on the side of the road, and be mindful of traffic and pedestrians. Avoid riding at high speeds in crowded areas, and always signal your intentions before turning or changing lanes.
By taking these precautions, you’ll be able to enjoy a safe and comfortable ride. Now, let’s move on to fine-tuning the system for optimal performance.
Fine-Tuning the System
To achieve the best ride possible with your friction drive bicycle, you’ll want to make a few adjustments to your system. Optimizing performance involves fine-tuning the system to ensure maximum efficiency. This includes adjusting the tension of the drive roller against the tire, checking the alignment of the drive roller and idler roller, and ensuring that the drive roller is centered on the tire.
One way to troubleshoot issues with your friction drive bicycle is to use a table to keep track of any problems you encounter and the solutions you implement. For example, if you notice that the drive roller is slipping on the tire, you may need to increase the tension of the drive roller or replace the tire. By keeping track of these issues and solutions, you can quickly and easily identify any recurring problems and find the most effective solutions. With these adjustments and troubleshooting techniques, you can optimize the performance of your friction drive bicycle and enjoy a smooth, efficient ride.
Enjoying Your New Ride!
You’re finally ready to hit the road and experience the thrill of your newly optimized ride! Now that you’ve fine-tuned your friction drive bicycle, it’s important to maintain it regularly to ensure that it continues to perform at its best.
Regular cleaning and lubrication of the chain and gears is essential to prevent rust and wear. It’s also important to check the tire pressure before every ride to ensure a smooth and safe ride.
In addition to maintaining your bicycle, it’s important to practice proper riding techniques to improve your overall experience. Keep your body relaxed and centered, and maintain a steady cadence while pedaling. When shifting gears, anticipate the terrain and shift accordingly to maintain a consistent speed.
With these tips in mind, you’ll be able to enjoy the full capabilities of your friction drive bicycle and experience the freedom of the open road.
Frequently Asked Questions
How long does a friction drive system last before it needs to be replaced?
In my experience, the durability of a friction drive system depends on several factors, including the quality of the materials used and the frequency of use. Common causes of failure include worn-out bearings and damaged drive belts. Regular maintenance can help extend the lifespan of the system.
Can a friction drive system be installed on any type of bicycle?
When it comes to installing a friction drive system on a bicycle, compatibility factors are crucial. However, the advantages of this system, including easy installation and minimal maintenance, make it a great choice for many types of bikes.
Is it safe to use a friction drive system in wet or snowy conditions?
Using a friction drive system in wet or snowy conditions can reduce its efficiency and increase the risk of slipping. However, the advantages of the system, such as easy maintenance and simplicity, still make it a viable option in these conditions.
How much maintenance is required for a friction drive system?
Maintaining a friction drive system requires attention to detail and regular upkeep. Pros include simplicity and low cost, but cons include wear and tear on tires and belts. Maintenance tips include checking for wear, keeping the system clean, and lubricating moving parts.
Can a friction drive system be used on steep hills or inclines?
Yes, a friction drive system can work on steep hills or inclines, but its efficiency may be impacted. Compared to a chain drive, a friction drive may require more maintenance and may not be as efficient on hills.
Conclusion
In conclusion, building a friction drive bicycle requires attention to detail and careful selection of components. But with the right tools and a little patience, anyone can create a unique and efficient mode of transportation.
So, are you ready to take on the challenge of building your own friction drive bicycle? With the knowledge and skills learned from this project, you’ll not only have a one-of-a-kind ride, but you’ll also have a deeper understanding of how mechanical systems work.
So go ahead, start researching and gathering materials, and get ready to hit the road on your newly built friction drive bicycle.