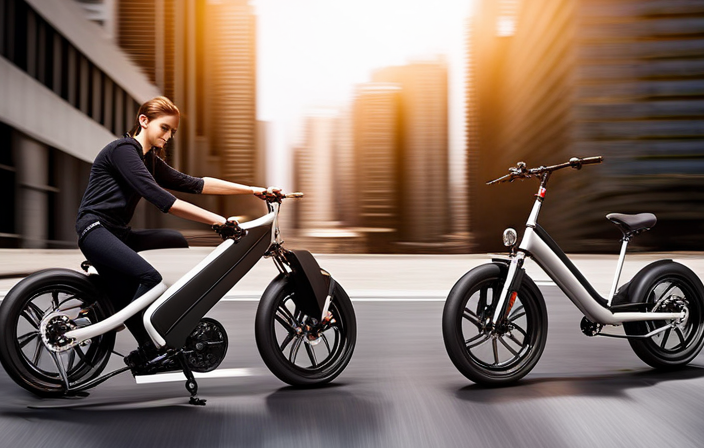
As an avid cyclist, I’ve always dreamt of effortlessly gliding through the streets on my very own electric bike. Well, dream no more!
In this article, I’ll show you how to build a simple electric bike that will make your two-wheeled adventures electrifying.
With the right tools and materials, the perfect bike frame, and a carefully selected electric motor, you’ll be zipping around town in no time.
So let’s get started and turn that dream into a reality!
Key Takeaways
- Motor power, battery capacity, and compatibility with the bike’s frame are important factors to consider when selecting an electric bike kit.
- The installation process involves removing the front wheel, attaching the motor wheel, and connecting the battery pack and controller to the frame.
- Testing and adjusting the electric bike includes inspecting wiring connections, customizing settings for speed and power, and optimizing the riding experience.
- Checking the motor and battery function is crucial, including inspecting for damage, testing performance, troubleshooting, and replacing faulty batteries if necessary.
Gather the Necessary Tools and Materials
Before you start building your electric bike, make sure you’ve gathered all the necessary tools and materials.
The first step is to find a reliable source for affordable bike frames. You can search online for reputable bike shops that offer good deals on frames. Another option is to check local classified ads or visit bike swap meets where you may find used frames at a lower cost.
Once you have the frame, it’s important to avoid common mistakes when installing an electric motor. Make sure to follow the manufacturer’s instructions carefully and double-check all the connections. Avoid overtightening the motor mounts, as it can cause damage to the frame.
With the right tools and materials in hand, you can now move on to choosing the right bike frame for your electric bike project.
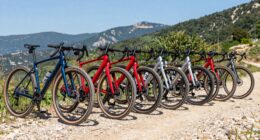
Choose the Right Bike Frame
When choosing the right frame for your bike, make sure you consider factors like size, material, and weight. The frame is the backbone of your bike, providing stability and support. There are various materials to choose from, each with its own benefits and considerations. Here is a table outlining the different frame materials and their characteristics:
| Frame Material | Benefits | Considerations |
|---|---|---|
| Steel | Durable, absorbs vibrations | Heavier, may rust over time |
| Aluminum | Lightweight, corrosion-resistant | Less comfortable on rough terrains |
| Carbon Fiber | Lightweight, shock-absorbent | Expensive, may be prone to damage |
Considering these factors will help you make an informed decision about the right frame material for your electric bike. Now that you have chosen the frame, it’s time to select and install the electric motor.
Select and Install the Electric Motor
To select and install the electric motor, you’ll need to consider factors such as power output, compatibility, and installation method. Here are some tips to guide you through the process:
-
Power output: Determine the power you need based on the terrain and your desired speed. Consider factors like torque and RPM to ensure optimal performance.
-
Compatibility: Ensure that the motor is compatible with your bike’s frame and wheel size. Check the motor’s mounting requirements and make any necessary modifications.
-
Installation method: Decide whether you want a hub motor or a mid-drive motor. Hub motors are easier to install, while mid-drive motors offer better weight distribution and climbing ability.
-
Wiring and connections: Pay attention to the wiring and connections to ensure a secure and reliable setup. Neatly organize the wires and use proper connectors to minimize the risk of electrical issues.
By following these electric motor selection and installation tips, you’ll be one step closer to building your electric bike.
Next, we’ll discuss how to install the battery and controller seamlessly into your setup.
Install the Battery and Controller
Installing the battery and controller is an essential step in creating your electric bike setup. To begin, locate the battery and controller compartments on your bike frame. Connect the battery to the controller by attaching the corresponding wires. Ensure that the connections are secure to prevent any loose connections or power loss.
Once connected, double-check the battery and controller for any visible damage or defects. Troubleshooting common battery and controller issues may involve checking the voltage levels, inspecting the wiring for any signs of wear or fraying, and ensuring that the connections are tight. Remember to follow the manufacturer’s instructions for your specific battery and controller model.
Now that the battery and controller are properly installed, we can move on to adding the throttle and pedal assist system.
Add the Throttle and Pedal Assist System
To complete the installation of the throttle and pedal assist system on my electric bike, I need to first choose between a twist throttle or thumb throttle. Once I’ve made my selection, I’ll proceed to install it securely onto the handlebars.
Next, I’ll connect the pedal assist sensor to the controller, ensuring that the wiring is properly aligned and securely fastened.
Install the Twist Throttle or Thumb Throttle
Once you’ve got the throttle in place, it’s time to connect the wires. Installing the twist throttle or thumb throttle is a crucial step in building an electric bike.
Here are the benefits of using a throttle on an electric bike:
- Enhanced control: With a throttle, you have complete control over the speed and acceleration of your electric bike.
- Easy maneuverability: The twist throttle or thumb throttle allows for quick and effortless control, making it easier to navigate through traffic or challenging terrains.
- Instant power delivery: By simply twisting the throttle or pressing the thumb throttle, you can instantly access the full power of your electric bike. This provides a thrilling and exhilarating riding experience.
- Accessibility: Throttles are especially beneficial for individuals with limited mobility or physical disabilities, allowing them to enjoy the freedom and joy of riding an electric bike.
Now that the throttle is installed, let’s move on to connecting the pedal assist sensor to the controller.
Connect the Pedal Assist Sensor to the Controller
Now that the throttle is securely in place, it’s time to move on to connecting the pedal assist sensor to the controller. This sensor is crucial as it allows the electric bike to detect when the rider is pedaling and provide assistance accordingly.
To ensure proper installation, start by locating the designated sensor mount on the frame. Align the sensor with the magnet ring on the crank arm, making sure there is a small gap between them. Use zip ties or clamps to secure the sensor in place, ensuring it doesn’t interfere with the chain or other moving parts.
Once installed correctly, test the sensor by pedaling and observing if the motor engages. Troubleshoot common sensor issues such as loose connections or misalignment to ensure optimal performance.
With the pedal assist sensor properly installed, we can now move on to the next section: installing the electric bike conversion kit.
Install the Electric Bike Conversion Kit
Installing the electric bike conversion kit is a straightforward process that can be completed in just a few simple steps.
The first step is choosing the right conversion kit for your bike. Make sure to consider factors such as motor power, battery capacity, and compatibility with your bike’s frame.
Once you have selected the right kit, you can begin the installation process. Start by removing the front wheel of your bike and replacing it with the motor wheel included in the kit.
Next, attach the battery pack and controller to the frame using the provided mounting brackets. Connect the motor, throttle, and brake sensors to the controller according to the manufacturer’s instructions.
Test and Adjust the Electric Bike
First, I’ll check the proper functioning of the motor and battery to ensure a smooth and efficient ride. This involves inspecting the wiring connections, testing the motor’s responsiveness, and verifying the battery’s charge level.
Once the motor and battery are confirmed to be working correctly, I’ll proceed to adjust the settings for speed and power, fine-tuning them to my desired preferences. This involves accessing the bike’s control panel or app, where I can customize parameters such as top speed, acceleration, and pedal assist levels to optimize my riding experience.
Check for Proper Functioning of Motor and Battery
To ensure everything is working correctly, you should test the motor and battery for proper functioning.
Checking the motor efficiency is crucial to ensure optimal performance of your electric bike. Start by inspecting the motor for any visible damage or loose connections. Next, connect the motor to a power source and observe its performance. Look for any unusual noises, vibrations, or overheating. If any issues arise, consult the manufacturer’s manual for troubleshooting tips.
Additionally, troubleshooting battery issues is essential to ensure a smooth ride. Test the battery voltage using a multimeter and compare it to the manufacturer’s specifications. If the voltage is significantly lower, the battery may be faulty and should be replaced.
Transitioning to the next section, adjusting settings for speed and power can further optimize your electric bike’s performance.
Adjust Settings for Speed and Power
After ensuring the proper functioning of the motor and battery, it’s time to fine-tune the performance of your electric bike.
Adjusting the settings for speed and power can greatly enhance your riding experience. To achieve optimal performance, start by adjusting the throttle sensitivity. This setting determines how quickly the motor responds to your input. Increase the sensitivity for a more immediate and powerful acceleration or decrease it for a smoother and more controlled ride.
Additionally, you can adjust the maximum speed limit to match your preferences and local regulations. Some electric bike controllers allow you to adjust the power output as well, enabling you to strike a balance between performance and battery life.
By mastering these adjustment techniques, you can unlock the full potential of your electric bike and enjoy significant performance improvements.
Now, let’s delve into the next section and explore how to customize your electric bike to truly make it your own.
Customize Your Electric Bike
You can easily customize your electric bike to suit your personal preferences. One way to do this is by giving it a custom paint job. Whether you want a sleek black finish or a vibrant color that stands out, you can make your electric bike truly unique.
Additionally, you can add accessories to enhance your riding experience. Consider installing a front basket or rear rack for carrying items, or attach a phone mount for easy navigation. Other accessories like fenders, lights, and mirrors can also be useful for safety and convenience.
By customizing your electric bike with paint and accessories, you can create a bike that reflects your style and meets your specific needs.
Now, let’s learn how to ride and maintain your electric bike.
Learn How to Ride and Maintain Your Electric Bike
When it comes to riding an electric bike, it’s important to practice and get comfortable with the electric assist feature. This includes understanding how the assist works, adjusting the level of assistance, and getting used to the feeling of the motor kicking in.
Additionally, performing regular maintenance and check-ups on your electric bike is crucial for its longevity and optimal performance. This involves inspecting the tires, brakes, chain, and battery, as well as cleaning and lubricating the bike regularly.
Practice Riding and Getting Comfortable with the Electric Assist
Once you’ve assembled your electric bike, start practicing riding and getting comfortable with the electric assist. This is an essential step to ensure a safe and enjoyable riding experience. To help you get started, here are three practice techniques along with some important safety precautions to keep in mind:
-
Gradual Speed Increase: Begin by riding at a slow and steady pace, gradually increasing your speed as you become more confident. This will help you familiarize yourself with the electric assist and how it affects your balance and control.
-
Practice Braking: Get accustomed to the electric bike’s braking system by practicing controlled stops and emergency braking. This will allow you to develop muscle memory and react quickly in case of unexpected situations.
-
Maneuverability Exercises: Set up a small obstacle course with cones or markers in an open space. Practice weaving through them, making tight turns, and balancing at low speeds. This will improve your overall bike handling skills and increase your confidence on the road.
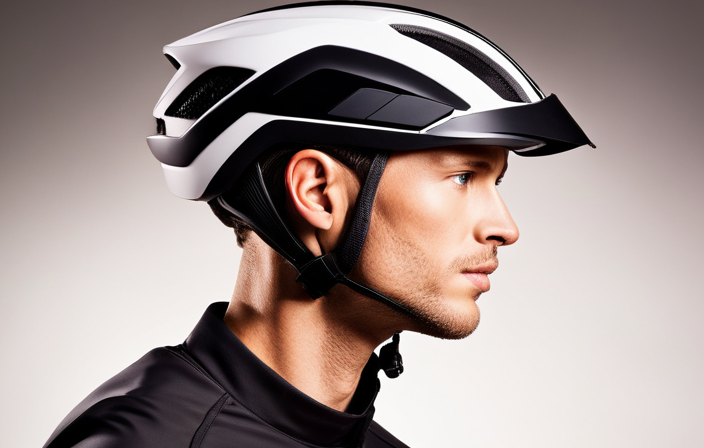
Remember to always wear a helmet and other protective gear, follow traffic rules, and be aware of your surroundings.
Once you have mastered these practice techniques and feel comfortable with the electric assist, you can move on to the next section, where we will discuss the importance of performing regular maintenance and check-ups on your electric bike.
Perform Regular Maintenance and Check-ups
To ensure optimal performance, it’s important to regularly maintain and check up on your electric bike. Regular maintenance is crucial for the longevity of your bike and to avoid any potential issues.
Start by inspecting the battery regularly to ensure it is properly charged and functioning. Check for any loose connections or signs of damage. Troubleshooting and repair should be done promptly if any issues arise.
Additionally, optimizing battery life is essential. Avoid overcharging and always use the appropriate charger.
Safety precautions should not be overlooked, such as wearing a helmet, using proper lighting, and following traffic rules.
Enjoy Your DIY Electric Bike
You’ll love riding your DIY electric bike. It’s a thrilling experience that combines the convenience of a traditional bike with the power of an electric motor. Not only is it fun, but it also comes with a range of benefits.
Here are some reasons why you should consider building your own electric bike:
- Cost-effective: Building your own electric bike is often cheaper than buying a pre-built one.
- Customization: You have the freedom to choose the components that suit your needs and preferences.
- Sustainability: Electric bikes are eco-friendly and promote green transportation.
- Health and fitness: Riding an electric bike can provide a low-impact workout while still enjoying the outdoors.
- Commuting made easy: Electric bikes make commuting faster and more enjoyable, especially in crowded cities.
To enhance your DIY electric bike experience, consider investing in some of the best electric bike accessories. These can include:
- High-capacity batteries for longer rides.
- LED lights for improved visibility and safety.
- Panniers or baskets for carrying groceries or personal belongings.
- Adjustable suspension forks for a smoother ride.
- Smartphone mounts for easy navigation and tracking.
Frequently Asked Questions
How long does it typically take to build a simple electric bike?
On average, it takes about 8-10 hours to build a simple electric bike. The required tools include a wrench, screwdriver, pliers, and wire cutters. The time may vary depending on the individual’s experience and familiarity with bike assembly.
What is the average cost of building a DIY electric bike?
The average cost of building a DIY electric bike varies depending on the components used. On average, it can range from $500 to $2000. Factors such as battery capacity, motor power, and frame quality contribute to the final cost.
Are there any legal requirements or regulations for riding an electric bike?
Navigating the realm of electric bike regulations can be tricky, but understanding the legal requirements for e-bikes is essential. From maximum speed limits to age restrictions, being well-informed ensures a smooth and compliant riding experience.
Can I use any type of bike frame for my electric bike conversion?
Yes, you can use any type of bike frame for your electric bike conversion. However, using a frame specifically designed for electric bikes has advantages such as better weight distribution, improved stability, and stronger support for the battery and motor.
What is the expected range or battery life of a DIY electric bike?
The expected range or battery life of a DIY electric bike can vary depending on factors such as battery capacity, terrain, and rider weight. It’s like predicting how far a car can go on a full tank, but with the added benefit of eco-friendly transportation.
Conclusion
In conclusion, building a simple electric bike is a rewarding and achievable project for any DIY enthusiast. By following the steps outlined in this article, you can create your own eco-friendly mode of transportation.
It is estimated that the global electric bike market is expected to reach a value of $38.6 billion by 2025, indicating the growing popularity and demand for electric bikes. So why not join the trend and start building your own electric bike today?
It’s a fun and practical way to reduce your carbon footprint and enjoy the benefits of electric transportation.