Electric Bike
How To Build An Electric Power Generator With A Bike?
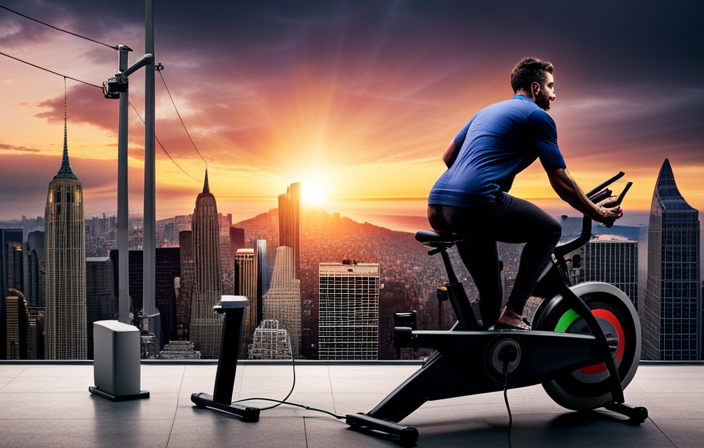
I’ve always been fascinated by the idea of harnessing my own energy to power everyday appliances.
So, I set out on a mission to build an electric power generator using just my trusty bike.
In this article, I’ll guide you through the step-by-step process of gathering materials, preparing your bike, installing the generator bracket, and connecting it all together.
Get ready to pedal your way to sustainable energy and enjoy the benefits of your very own electric power generator.
Let’s dive in!
Key Takeaways
- Choose the right generator type based on efficiency and power capabilities
- Calculate power requirements and determine the size and capacity of the generator needed
- Ensure compatibility with the bike frame and install the generator securely
- Connect the generator to the bike’s battery, utilizing it as an energy storage option.
Gather the Necessary Materials
To build an electric power generator with a bike, you’ll need to gather the necessary materials. First, you’ll need to choose the right generator type. There are various options available, such as a permanent magnet generator or an alternator. Consider the power output you require and the type of bike you have, as different generators may have different efficiencies and power capabilities.
Once you’ve chosen the generator type, the next step is to calculate your power requirements. This involves determining how much electricity you need to generate to meet your needs. Consider the devices you plan to power and their power ratings, which are typically measured in watts. Add up the power requirements of all the devices to get a total power requirement. This will help you determine the size and capacity of the generator you’ll need to build.
With the necessary materials gathered and your power requirements calculated, you can now move on to preparing your bike for the generator installation. By modifying the bike’s frame and attaching the generator, you’ll be able to convert mechanical energy from pedaling into electrical energy. This will allow you to generate power while riding your bike.
Transitioning into the next section, let’s now explore how to prepare your bike for the generator installation.
Prepare Your Bike
Make sure your bicycle is in good working condition before starting. It is essential to ensure that all the components of your bike are functioning properly to guarantee a smooth and efficient power generation process. Here are some important steps to prepare your bike for the modification:
-
Check the tires: Inspect the tires for any signs of wear and tear. Replace them if necessary to ensure proper traction and stability during the power generation process.
-
Test the brakes: Ensure that the brakes are working effectively. This is crucial for your safety and to control the speed of the bike while generating power.
-
Lubricate the chain: Apply lubricant to the chain to reduce friction and ensure smooth movement. A well-lubricated chain will help optimize power generation.
-
Adjust the gears: Make sure the gears are properly adjusted to allow for efficient pedaling. Proper gear alignment will maximize power output.
Install the Generator Bracket
Once you have prepared your bicycle, you can easily install the generator bracket. The generator bracket is a crucial component that securely holds the generator in place while allowing it to rotate freely. When choosing a generator bracket, there are a few tips to keep in mind.
Firstly, ensure that it is compatible with the size and type of your bicycle frame. Look for brackets that have adjustable clamps or mounting options to accommodate different frame sizes. Additionally, opt for brackets made from durable materials like steel or aluminum to ensure longevity and stability.
Now, let’s discuss common mistakes to avoid when installing the generator bracket. One mistake is not tightening the bracket securely enough. This can lead to vibrations and wobbling, which can affect the efficiency and performance of the generator. Make sure to use the appropriate tools and follow the manufacturer’s instructions for tightening the bracket. Another mistake is not aligning the bracket properly with the bike frame. This can cause the generator to rub against the tire or other components, leading to unnecessary friction and potential damage.
With the generator bracket securely in place, it’s time to connect the generator to the bike.
Connect the Generator to the Bike
Now that you have the generator bracket securely installed, it’s time to connect it to your bicycle. Follow these steps to ensure a successful connection:
-
Locate the generator’s wiring harness and identify the wires labeled for power output. These wires will typically be color-coded, with red indicating positive and black indicating negative.
-
Connect the positive wire to the positive terminal of the bike’s battery. This will allow the generated power to flow into the battery for storage. Ensure a secure connection using crimp connectors or soldering, and protect the connection with heat shrink tubing.
-
Connect the negative wire to the negative terminal of the battery. This completes the circuit and allows the current to flow from the generator to the battery.
By connecting the generator to your bike’s battery, you can effectively harness the power generated by pedaling. This setup not only increases the power generation efficiency but also provides energy storage options. With the battery acting as a reservoir, you can store excess power generated during high-output periods and utilize it later when needed.
Now that you have successfully connected the generator to your bike, it’s time to attach the battery and start reaping the benefits of your electric power generator.
Attach the Battery
To attach the battery, you’ll want to locate the appropriate terminals for connection. Before installing the battery, it is important to follow safety measures to ensure a secure attachment. Here are the steps to safely install the battery:
| Terminal | Description |
|---|---|
| Positive (+) | This terminal is usually marked with a "+" symbol and is connected to the positive side of the battery. |
| Negative (-) | This terminal is usually marked with a "-" symbol and is connected to the negative side of the battery. |
- Begin by identifying the positive and negative terminals on the battery.
- Make sure the generator is turned off and disconnected from any power source.
- Connect the positive terminal of the battery to the positive wire of the generator using a suitable connector or terminal clamp.
- Connect the negative terminal of the battery to the negative wire of the generator using a suitable connector or terminal clamp.
- Ensure that the connections are tight and secure to avoid any loose connections or accidental disconnections.
Connect the Battery to the Generator
Start by ensuring that the positive and negative terminals on the battery are correctly identified. This is crucial for connecting the battery to the generator. Once you have identified the terminals, you need to choose the appropriate charging option for your battery.
There are different options available, such as using a solar panel or a conventional charger. Consider the battery capacity when making this decision. If you have a high-capacity battery, you may need a more powerful charging option to ensure efficient charging.
To connect the battery to the generator, you will need to use appropriate cables or wires. Make sure to use cables that are compatible with the battery and generator connections. Connect the positive terminal of the battery to the positive terminal of the generator and the negative terminal of the battery to the negative terminal of the generator. This will establish the electrical connection between the two components.
Now that the battery is connected to the generator, it’s time to test the generator and see if it is working properly. This step will ensure that the generator is generating electricity and charging the battery effectively. By testing the generator, you can identify any issues or malfunctions that need to be addressed before using it for powering devices or appliances.
Test the Generator
After connecting the battery to the generator, it’s important to test its functionality to ensure it’s working properly. Monitoring the power output is crucial during this step.
To begin, turn on the generator and observe the power meter. It should display the current power output in watts. If the meter shows a reading, it indicates that the generator is producing electricity. However, if there is no reading or the reading is too low, it signifies a problem.
Troubleshooting common issues can help resolve this. First, check the battery connection to ensure it is secure and properly connected. Next, inspect the wiring for any loose or damaged connections. Additionally, examine the generator’s components for any signs of wear or malfunction. If the issue persists, consult the user manual or seek assistance from a professional.
Once you have tested the generator’s functionality and addressed any problems, you can move on to determining the power output in the next section.
Determine the Power Output
Check the wattage meter to determine the power output of your generator. This is an important step in calculating the efficiency of your generator and measuring power consumption. Here are three key things to consider:
-
Voltage: The wattage meter will display the voltage output of your generator. This is crucial in determining the power output, as power is calculated by multiplying the voltage by the current. Make sure the voltage is within the desired range for your specific application.
-
Current: The wattage meter will also provide information about the current flowing through your generator. This, along with the voltage, is essential in calculating the power output. It is important to measure the current accurately to get an accurate power reading.
-
Power Factor: The wattage meter may also display the power factor, which indicates how efficiently the generator converts input power into output power. A power factor of 1 indicates maximum efficiency, while a lower power factor indicates power losses.
By checking the wattage meter and considering these factors, you can determine the power output of your generator. This information is crucial for understanding the performance of your generator and ensuring it meets your power requirements.
Once you have determined the power output, you can move on to the next step of using a voltage regulator to maintain a stable voltage output.
Use a Voltage Regulator
To ensure a stable voltage output, you’ll need a voltage regulator for your generator. A voltage regulator is a device that controls the voltage level and ensures a consistent output for your electrical devices. It plays a crucial role in improving power output and protecting your devices from voltage fluctuations.
Using a voltage regulator can greatly enhance the performance of your generator by regulating the voltage and preventing overvoltage or undervoltage situations. It acts as a buffer between the generator and your devices, ensuring that they receive a constant and reliable power supply.
Troubleshooting common issues with voltage regulators is essential to maintain their functionality. Some common issues include overheating, voltage spikes, and failure to regulate voltage properly. To address these problems, it is important to regularly inspect and clean the voltage regulator, ensure proper ventilation, and check for any loose connections. Additionally, monitoring the voltage output and conducting regular tests can help identify any potential issues.
Connect Your Devices
Make sure you properly connect your devices to the voltage regulator to ensure a stable and reliable power supply. Here are some important things to consider when connecting your devices:
-
Use appropriate cables and connectors: Select cables and connectors that match the charging options and power requirements of your devices. This will ensure efficient power transfer and prevent any damage to your devices.
-
Check the power consumption: Before connecting your devices, it’s crucial to know their power consumption. This information can help you determine if your generator and voltage regulator can handle the load. Exceeding the capacity can lead to overheating or even failure of the system.
-
Connect in parallel or series: Depending on the nature of your devices, you can connect them in parallel or series. Parallel connection allows each device to receive the same voltage and share the current, while series connection divides the voltage among the devices. Consider the compatibility and power distribution requirements of your devices when making this decision.
-
Proper grounding: Ensure proper grounding of your generator and voltage regulator to prevent electrical shocks and ensure the safety of your devices.
By following these guidelines, you can effectively connect your devices to the voltage regulator and optimize the power supply.
Now, let’s move on to the next section and learn how to monitor the power generated without interrupting the system.
Monitor the Power Generated
Ensure you have a reliable method for monitoring the amount of power being generated. Monitoring power usage is crucial to understanding the efficiency of your electric power generator and maximizing power output. By keeping track of the power being generated, you can make adjustments to optimize performance and prevent any potential issues.
To effectively monitor the power generated, you can use a watt meter or power monitor. These devices provide real-time information about the amount of power being produced by your generator. By connecting the watt meter or power monitor between your generator and the load, you can easily measure the power output.
Here is a simple example of a table showcasing the power usage and output:
| Load (Watts) | Generator Output (Watts) | Efficiency (%) |
|---|---|---|
| 100 | 120 | 83.33 |
| 200 | 240 | 83.33 |
| 300 | 360 | 83.33 |
| 400 | 480 | 83.33 |
| 500 | 600 | 83.33 |
By regularly monitoring the power output and efficiency, you can identify any fluctuations or inefficiencies in your generator. This will allow you to make adjustments and fine-tune your setup to maximize power output.
Now that you have a reliable method for monitoring the power generated, let’s move on to the next section on how to maintain your electric power generator.
Maintain Your Electric Power Generator
Regular maintenance is essential for keeping your electric power generator in optimal condition. By performing routine maintenance, you can ensure that your generator operates efficiently and effectively.
One important aspect of maintenance is troubleshooting common issues that may arise. This includes checking for loose connections, inspecting the fuel and oil levels, and cleaning or replacing the air filter. By addressing these issues promptly, you can prevent further damage and maximize the lifespan of your generator.
Another crucial aspect of maintenance is maximizing energy efficiency. This can be achieved by regularly inspecting and adjusting the carburetor, as well as cleaning the fuel system. Additionally, maintaining proper oil levels and changing the oil regularly will help to minimize friction and ensure smooth operation.
Proper maintenance also involves regularly testing the generator to ensure it is functioning correctly and producing the desired amount of power. By following these maintenance procedures, you can keep your electric power generator running smoothly and efficiently.
Now, let’s explore how you can expand your system to meet your power needs even further.
Expand Your System
Expanding your system can provide you with the additional power capacity you need to meet your growing demands. When it comes to expanding power capacity, there are a few key considerations to keep in mind.
-
Upgrading your generator: By investing in a larger generator, you can increase the overall power capacity of your system. This will allow you to handle higher loads and meet the demands of your expanding needs.
-
Adding more solar panels: Incorporating additional solar panels into your system can help maximize energy efficiency. By capturing more sunlight and converting it into electricity, you can generate more power to meet your increased demands.
-
Installing a battery storage system: A battery storage system allows you to store excess electricity generated by your system for later use. This ensures that you have a reliable power supply even during periods of low sunlight or high demand.
Expanding your system not only boosts your power capacity but also enhances the overall efficiency of your setup. However, before proceeding with any expansion, it is crucial to consider safety precautions to ensure the protection of both yourself and your equipment.
Consider Safety Precautions
Before proceeding with any expansion, it’s important to take safety precautions into account to protect yourself and your equipment. When working with electricity, there are certain risks involved that must be mitigated. To ensure proper ventilation, make sure your workspace is well-ventilated, as generators produce exhaust fumes that can be harmful if inhaled. Additionally, it is crucial to use appropriate safety gear such as gloves, goggles, and a face mask to protect yourself from any potential electrical hazards or debris.
To further emphasize the importance of safety, let’s take a look at the following table:
| Safety Precautions | Description | Importance |
|---|---|---|
| Proper Ventilation | Ensures removal of harmful fumes | Prevents health risks |
| Safety Gear | Protects against electrical hazards and debris | Minimizes potential injuries |
Enjoy the Benefits of Your Electric Power Generator
Now that we have covered the safety precautions necessary for building an electric power generator with a bike, let’s move on to the exciting part: enjoying the benefits of your creation.
By following the steps outlined in the previous subtopics, you have successfully converted mechanical energy from pedaling into electrical energy. Now, it’s time to maximize the efficiency of your generator and troubleshoot any common issues that may arise.
To maximize the efficiency of your electric power generator, there are a few things to consider. First, ensure that your bike is properly maintained and in good working condition. A well-oiled chain and properly inflated tires will reduce friction and increase the efficiency of power transfer. Additionally, make sure the generator is positioned close to the rear wheel to minimize power loss through the transmission system.
Troubleshooting common issues is an important skill to have when using an electric power generator. One common issue is a drop in power output. This can be caused by loose connections or worn-out components. Check all the connections and replace any damaged or worn-out parts. Another issue could be excessive noise or vibrations. In this case, check for loose bolts and tighten them as necessary.
Frequently Asked Questions
How much power can an electric power generator built with a bike produce?
An electric power generator built with a bike can produce a significant amount of power, depending on various factors. The efficiency of the generator is determined by the quality of the components used and the design of the system.
It is essential to consider factors like resistance, gear ratios, and the cyclist’s power output. These factors can greatly affect the overall performance and output of the generator.
The potential applications of such a generator are diverse. It can be used to power small electronic devices, such as smartphones or laptops, making it a convenient and eco-friendly option for charging on the go. Additionally, it can be used to charge batteries, providing a sustainable energy source for portable power needs.
In certain scenarios, a bike generator can even contribute to the grid. By connecting the generator to an inverter, the generated power can be fed back into the electrical grid, offsetting energy consumption and reducing reliance on traditional power sources.
Overall, building a bike generator offers a range of possibilities for generating power in a sustainable and efficient way. It not only provides a practical solution for personal power needs but also contributes to a greener and more sustainable energy future.
What are some common safety precautions to consider when building an electric power generator with a bike?
When building an electric power generator with a bike, it is crucial to prioritize safety precautions.
One important aspect is grounding, which ensures the safe dissipation of excess electrical energy. Without proper grounding, there is a risk of electric shocks and damage to the system.
Additionally, overloading the system can lead to overheating and potential fire hazards. It is essential to carefully calculate and monitor the power load to prevent these risks and ensure a safe operation.
Can I connect multiple batteries to the generator for increased power storage?
Using multiple batteries for increased power storage in an electric power generator has both pros and cons.
On the positive side, it allows for storing more energy, providing longer power supply during outages. However, it also increases the weight and cost of the system.
To properly connect and manage multiple batteries, it is crucial to use a battery management system to ensure balanced charging and discharging. Additionally, proper wiring and sizing of the cables are essential to minimize power losses.
How long does it take to gather all the necessary materials for building an electric power generator with a bike?
Gathering all the necessary materials for building an electric power generator with a bike can be quite a task. One alternative method to find these materials is by checking online marketplaces like eBay or Amazon.
Additionally, local hardware stores or recycling centers may have some of the required components. Remember to look for items such as a bicycle, a DC motor, a battery, and an inverter.
With some patience and resourcefulness, you can find everything you need to start building your generator.
Can I use any type of bike for this project or are there specific requirements?
For this project, it’s important to select a bike that meets certain requirements.
While any bike can technically be used, there are advantages to using a specific type of bike. A mountain bike, for example, is ideal due to its sturdy construction and ability to handle rough terrains.
Additionally, a bike with multiple gears allows for greater control and efficiency when generating power.
Considering these alternative bike options will ensure the success of your electric power generator project.
Conclusion
In conclusion, building an electric power generator with a bike is a rewarding and practical project. By following the steps outlined in this article, you can harness the power of your own physical effort to generate electricity.
This ingenious system not only provides a sustainable energy solution, but also promotes a healthier lifestyle. So, hop on your bike, pedal your way to a greener future, and witness the transformation of your energy output.
The journey to self-sufficiency begins with a few simple steps and a world of possibilities awaits.
Electric Bike
When Was The First Electric Bike Publicly Available

I’ve always been intrigued by how transportation has evolved, with the electric bike being no exception. When was the first electric bike made available to the public? This question has captivated enthusiasts and historians alike.
In this article, we’ll delve into the early innovations, patents, and technological advancements that paved the way for the electric bicycle. From the debut of the electric tricycle to the introduction of pedal-assist technology, we’ll explore the journey of electric bikes from their humble beginnings to the modern era.
So, fasten your seatbelts, because it’s time to embark on a thrilling ride through the history of electric bikes.
Key Takeaways
- Electric bikes have seen advancements in design and technology, including improved motors, lighter and more powerful motors, easier navigation on challenging terrains, longer riding distances, and quicker charging lithium-ion batteries.
- Electric bicycles offer numerous benefits such as assistance in navigating hills and long distances, lower environmental impact compared to cars, zero emissions, less energy consumption, affordability in the long run, and reduced maintenance costs without the need for expensive gasoline.
- The future of electric bike technology holds potential for advancements in efficiency, battery life, and design, with a focus on charging infrastructure for longer rides and integration with smart devices for enhanced connectivity and convenience for riders.
- Efficiency and battery life in electric bike technology can be improved through enhanced motor technology, longer-lasting batteries, lightweight materials, power management systems, aerodynamic enhancements, intelligent battery management, swappable battery systems, and integration with smart devices.
Early Innovations in Electric Bicycle Technology
The first electric bike was publicly available in the early 1990s. Before this, there were early electric bike prototypes that were being developed and tested. These prototypes were created to explore the possibility of using electric motors to power bicycles.
The early electric bike motors were not as efficient or powerful as the ones we have today, but they laid the foundation for further advancements in the technology. These early innovations paved the way for the development of more reliable and practical electric bikes that we see today.
With the growing interest in sustainable transportation, the demand for electric bikes has increased, leading to continuous improvements in their design and performance.
Now, let’s transition into the next section about the first electric bike patent.
The First Electric Bike Patent
You can find the patent for the initial e-bike that was made accessible to the public.
In 1895, Ogden Bolton Jr. filed a patent for an electric bicycle design, which marked a significant milestone in the history of electric bikes. This patent laid the foundation for the evolution of electric bike technology.
The patent described a bicycle with an electric motor attached to the front wheel, powered by a battery. The patent also included a 2 column and 4 row table that detailed the specifications and components of the electric bicycle.
This invention paved the way for further advancements in electric bike technology, leading to the debut of the electric tricycle. With the patent in place, the stage was set for the next chapter in the development of electric mobility.
The Debut of the Electric Tricycle
Take a moment to imagine the excitement and curiosity that surrounded the introduction of the electric tricycle. With its innovative design and eco-friendly features, the electric tricycle quickly gained popularity and opened up a whole new world of possibilities.
Electric tricycles have found applications in various industries, including transportation, delivery services, and recreational activities. They offer a cost-effective and sustainable alternative to traditional vehicles, reducing carbon emissions and promoting environmental conservation.
As the demand for electric tricycles continues to grow, so does the electric tricycle market. Companies are investing in research and development to improve their performance, efficiency, and battery life. This increasing market growth emphasizes the need for advancements in electric tricycle technology, particularly in the development of electric bicycle batteries, which will be discussed further in the subsequent section.
Development of Electric Bicycle Batteries
Advancements in battery technology for electric bicycles are revolutionizing transportation. Innovations have greatly improved the range and efficiency of electric bicycles, making them a viable alternative. These advancements have had a profound impact, offering a sustainable and cost-effective solution for commuting. Longer lasting batteries and faster charging times eliminate range anxiety and increase convenience. Lightweight and compact batteries make electric bicycles more practical and accessible. Let’s explore the introduction of pedal-assist technology and its impact on the riding experience.
The Introduction of Pedal-Assist Technology
The introduction of pedal-assist technology has greatly enhanced the overall riding experience of electric bicycles. With pedal-assist, riders can now enjoy the benefits of both motor power and physical exertion, resulting in a more efficient and enjoyable cycling experience.
This technology works by providing electric assistance to the rider’s pedaling, making it easier to climb hills, ride longer distances, and maintain higher speeds. Pedal-assist technology has undergone significant improvements over the years, with advancements in motor power, battery life, and integration with other cycling components.
These improvements have had a profound impact on the cycling industry, as electric bikes are becoming increasingly popular among commuters, recreational riders, and even professional athletes. The rise of electric bike popularity can be attributed to the many advantages offered by pedal-assist technology, including increased accessibility, improved performance, and a more sustainable transportation option.
The Rise of Electric Bike Popularity
If you’re considering a new mode of transportation, you’ll be pleased to know that electric bicycles have gained significant popularity in recent years. Here are some reasons why:
-
Electric bikes have a lower environmental impact compared to traditional vehicles. They produce zero emissions and reduce air pollution, making them a greener transportation option.
-
Electric biking offers numerous health benefits. It provides an opportunity for exercise, helping to improve cardiovascular health and strengthen muscles. It also promotes mental well-being and reduces stress.
-
Electric bicycles are cost-effective. They are more affordable than cars and motorcycles, and they require less maintenance and fuel. This makes them a practical choice for both short and long-distance commuting.
-
Electric bikes offer convenience and versatility. They can be used on various terrains and are suitable for different age groups. They also allow for faster travel compared to regular bicycles.
With these advantages in mind, let’s delve into the fascinating world of electric bikes in the modern era.
Electric Bikes in the Modern Era
As technology advances, more people are opting for electric bicycles as their primary mode of transportation. With the increasing concern for environmental sustainability, electric bikes have gained popularity due to their lower carbon emissions compared to traditional vehicles.
Governments around the world have recognized the potential of electric bikes in reducing pollution and congestion, leading to the implementation of electric bike regulations. These regulations often cover aspects such as speed limits, licensing requirements, and safety standards.
Additionally, studies have shown that electric bikes have a significantly lower environmental impact compared to cars, contributing to reduced air pollution and carbon dioxide emissions. The growing awareness of these environmental benefits has further fueled the demand for electric bikes.
As we delve into advancements in electric bike design, it is clear that the industry is continuously evolving to meet the needs of riders seeking a sustainable and efficient mode of transportation.
Advancements in Electric Bike Design
With advancements in electric bike design, riders now have access to a wide range of features and technologies that enhance their overall riding experience.
Electric bike motors have significantly improved over the years, providing riders with more power and efficiency. These motors are now smaller, lighter, and more powerful, making it easier to navigate challenging terrains and ride longer distances.
In addition to improved motors, there have been significant improvements in battery technology. Lithium-ion batteries, for example, provide longer-lasting power and quicker charging times, allowing riders to spend more time on the road and less time waiting for their bikes to charge.
These advancements in electric bike design have revolutionized the way people commute and explore their surroundings. They offer a convenient and eco-friendly alternative to traditional bicycles and cars, providing riders with a smoother, more enjoyable ride.
Benefits of Electric Bicycles
Electric bicycles offer a more cost-effective and environmentally-friendly mode of transportation. They have several advantages over traditional bicycles and cars.
Firstly, electric bikes provide assistance to riders, making it easier to navigate hills and long distances. This makes them a great option for commuters who don’t want to arrive at work sweaty and tired.
Additionally, electric bikes have a lower environmental impact compared to cars. They produce zero emissions and require less energy to operate. This helps reduce air pollution and dependence on fossil fuels.
Furthermore, electric bikes are more affordable in the long run. They require less maintenance and don’t require expensive gasoline.
As we look into the future of electric bike technology, there is a lot of potential for further advancements in efficiency, battery life, and design.
The Future of Electric Bike Technology
There’s a lot of potential for further advancements in efficiency, battery life, and design as we explore the future of electric bike technology. With the increasing popularity of electric bikes, manufacturers are constantly working on improving their features and capabilities. One area of focus is the charging infrastructure, as having easily accessible charging stations will make electric bikes more convenient and practical for longer rides. Additionally, integration with smart devices is another aspect that holds promise. Imagine being able to track your bike’s performance, adjust settings, and even receive notifications through your smartphone. This level of connectivity would greatly enhance the overall riding experience. As the demand for electric bikes continues to grow, we can expect to see even more exciting developments in these areas, making electric bikes an even more attractive mode of transportation.
| Advancements in Electric Bike Technology | ||
|---|---|---|
| Efficiency | Battery Life | Design |
| – Improved motor technology | – Longer-lasting batteries | – Sleek and stylish designs |
| – Lightweight materials | – Faster charging options | – Ergonomic and comfortable features |
| – Enhanced power management systems | – Intelligent battery management | – Customizable options |
| – Aerodynamic enhancements | – Swappable battery systems | – Integration with smart devices |
Frequently Asked Questions
Are electric bikes more expensive than regular bicycles?
Yes, electric bikes are generally more expensive than regular bicycles. However, their popularity has led to significant growth in the electric bike market, with many models offering features comparable to scooters.
How far can an electric bike travel on a single charge?
Electric bike battery life varies depending on factors like terrain, rider weight, and speed. On average, an electric bike can travel 20-50 miles on a single charge.
Can electric bikes be used in rainy weather?
Yes, electric bikes can be used in rainy weather. To ride safely, it’s important to adjust your riding techniques, such as braking earlier and taking turns slower. Regular maintenance, like lubricating the chain and checking brakes, will also help ensure smooth performance.
Are there any health benefits to riding an electric bike?
Riding an electric bike can greatly improve physical fitness and mental well-being. It provides a gentle form of exercise that can boost cardiovascular health and reduce stress, making it a great option for overall wellness.
Are electric bikes environmentally friendly?
Electric bikes are environmentally friendly as they produce zero emissions. They have a smaller carbon footprint compared to public transportation and can alleviate urban congestion by reducing the number of cars on the road.
Conclusion
In conclusion, the first electric bike became publicly available in the late 1800s.
While some may argue that electric bikes are simply a lazy alternative to traditional bicycles, it is important to recognize the numerous benefits they offer.
Electric bikes provide an eco-friendly mode of transportation, promote physical activity, and make cycling more accessible to individuals of all fitness levels.
With advancements in technology, electric bikes continue to evolve and improve, promising an exciting future for this sustainable mode of transportation.
Olivia’s writing is not only informative but also inspiring. She has a knack for telling stories that capture the essence of cycling and the joy it brings to people’s lives. Her writing has been praised by readers and industry experts alike for its clarity, depth, and authenticity.
In addition to her writing, Olivia is also an avid cyclist. She enjoys exploring new trails and routes and has participated in several cycling events and races. Her first-hand experience with cycling gives her a unique perspective on the sport, reflected in her writing.
Overall, Olivia is a talented writer passionate about cycling and dedicated to producing high-quality content for FlatironBike. Her contributions to the magazine have helped make it a go-to source for cycling enthusiasts worldwide.
Electric Bike
When Do You Replace A Electric Bike Battery
Do you feel like you’re moving in slow motion? It might be a sign that your electric bike battery needs to be replaced.
In this article, we’ll dive into the world of battery capacity degradation, charging habits, and determining the overall lifespan of your battery.
We’ll also explore the signs that indicate the need for a replacement, as well as the cost and benefits of upgrading.
So, hop on and let’s find out when it’s time to give your electric bike a power boost.
Key Takeaways
- Battery capacity gradually decreases over time due to factors such as charge cycles, temperature variations, usage, and maintenance.
- Monitoring battery capacity, voltage, and current output is important to evaluate battery performance. Sudden drops in capacity, consistently low voltage and current, and increased charging time may indicate the need for battery replacement.
- Signs indicating the need for battery replacement include decreased range and power, reduction in distance traveled and power output, and inconsistencies in battery performance.
- To extend the lifespan of an electric bike battery, proper storage and maintenance are crucial. This includes storing the battery in a cool, dry place, avoiding extreme temperatures, regular cleaning and inspection for damage or corrosion, and preserving performance and capacity.
Understanding Battery Capacity Degradation
You should know that over time, your electric bike battery will gradually lose its capacity. This is a natural process known as battery capacity degradation. It occurs due to several factors, such as the number of charge cycles, temperature variations, and how the battery is used and maintained.
The capacity of a battery is measured in ampere-hours (Ah), and it indicates how much energy the battery can store. As your battery ages, it will not be able to hold as much charge as it did when it was new. This means that over time, you will notice a decrease in the range and performance of your electric bike.
Understanding this capacity degradation is important because it helps you determine when it is time to replace your battery. Now, let’s explore the impact of charging habits on battery lifespan.
Charging Habits and Their Impact on Battery Lifespan
Charging habits can significantly impact the lifespan of an e-bike battery. To ensure optimal performance and longevity, it is crucial to understand the dos and don’ts of charging your electric bike.
Firstly, avoid overcharging your battery. Leaving it connected to the charger beyond the recommended charging time can lead to premature degradation.
Secondly, avoid deep discharges. Frequent deep discharges can strain the battery and reduce its overall lifespan. Instead, aim for shallow discharges and regular recharges.
Additionally, temperature plays a vital role. Extreme heat or cold can negatively affect the battery’s capacity and performance.
Finally, it is important to use the appropriate charger provided by the manufacturer. Using an incompatible charger can result in damage to the battery.
By following these charging habits, you can maximize the lifespan of your e-bike battery.
Understanding the impact of charging habits on battery lifespan is just one aspect of determining the overall lifespan of an electric bike battery.
Determining the Overall Lifespan of an Electric Bike Battery
Understanding the impact of charging habits on battery lifespan is just one aspect of determining how long an e-bike battery will last. Several factors come into play when evaluating the overall lifespan of an electric bike battery. These factors include the battery’s chemistry, capacity, and usage patterns. To better understand these factors, let’s take a look at the following table:
| Factors | Description | Impact |
|---|---|---|
| Chemistry | The type of battery chemistry used in the e-bike battery. | Different chemistries have varying lifespans. |
| Capacity | The energy storage capacity of the battery. | Higher capacity batteries tend to have longer lifespans. |
| Usage Patterns | How the battery is used, including frequency of charging and depth of discharge. | Improper usage patterns can significantly reduce battery lifespan. |
Evaluating Battery Performance and Efficiency
Evaluating battery performance and efficiency is crucial for maximizing the lifespan of an e-bike battery. By monitoring these factors, you can ensure that your battery is functioning optimally and delivering the power you need for a smooth ride.
Start by examining the battery’s capacity, which indicates how much energy it can store. A decrease in capacity over time is normal, but a sudden drop may indicate an issue.
Additionally, consider the battery’s voltage and current output. If these values are consistently low, it could be a sign that the battery is nearing the end of its lifespan.
Pay attention to the charging time as well. If it takes significantly longer than usual to charge the battery, it may be time to consider a replacement.
Signs that Indicate the Need for Battery Replacement
When it comes to evaluating the performance of your electric bike battery, there are two key points to consider: decreased range and power, as well as inconsistencies in battery performance.
Firstly, over time, you may notice that your electric bike is not able to travel as far or maintain the same level of power as it used to, indicating a decrease in battery performance.
Additionally, you may experience inconsistencies in how your battery performs, such as sudden drops in power or unpredictable levels of charge.
These signs suggest that it may be time to consider replacing your battery to ensure optimal performance and a reliable riding experience.
Decreased range and power
If you notice a decrease in range and power, it might be time to replace your electric bike battery. As batteries age, their capacity to hold and deliver energy diminishes. This can result in a noticeable reduction in the distance you can travel on a single charge and the overall power output of your electric bike.
Factors such as the battery’s chemistry, usage patterns, and environmental conditions can all contribute to this decline. The lithium-ion batteries commonly used in electric bikes have a limited lifespan, typically ranging from 2 to 5 years depending on various factors.
When your battery starts to show signs of decreased range and power, it is a strong indicator that it needs to be replaced. However, inconsistencies in battery performance can also be attributed to other factors, which we will discuss in the next section.
Inconsistencies in battery performance
As you continue to rely on your electric bike for daily commutes or leisurely rides, you may start to notice inconsistencies in battery performance. These variations can manifest in several ways, such as sudden drops in power output or unexpected fluctuations in range.
Inconsistencies in battery performance are often indicative of underlying issues that may require attention or maintenance. One possible cause of these inconsistencies is the degradation of battery cells over time. As your electric bike battery ages, the cells may experience a reduction in their capacity to hold a charge, resulting in decreased performance.
Additionally, extreme temperature fluctuations or improper charging habits can also contribute to these inconsistencies. Understanding the factors that impact battery performance is crucial in extending the lifespan of your electric bike battery.
Extending the Lifespan of Your Electric Bike Battery
To ensure the longevity of your electric bike battery, it’s crucial to understand the importance of proper storage and maintenance.
By storing your battery in a cool, dry place and avoiding extreme temperatures, you can help preserve its overall performance and capacity.
Taking the time to regularly clean and inspect your battery for any signs of damage or corrosion will aid in maintaining its optimal functionality.
Proper storage and maintenance
For proper storage and maintenance of your electric bike battery, make sure to keep it in a cool and dry place. Extreme temperatures can negatively affect the performance and lifespan of the battery. Find a location that is not exposed to direct sunlight or excessive heat, as this can cause the battery to overheat and degrade faster.
Additionally, avoid storing the battery in a humid environment, as moisture can lead to corrosion and other damage. It is recommended to store the battery at room temperature, ideally between 20-25 degrees Celsius.
By keeping your electric bike battery in a cool and dry place, you can ensure its longevity and optimal performance.
Now, let’s move on to the next section about avoiding extreme temperatures and conditions.
Avoiding extreme temperatures and conditions
Storing the battery in a location that is not exposed to extreme temperatures will help maintain its performance and lifespan. Electric bike batteries are sensitive to temperature fluctuations, and exposing them to extreme heat or cold can cause damage and reduce their overall capacity. It is important to store the battery in a dry and cool place, ideally between 50°F and 70°F (10°C and 21°C). Extreme temperatures, whether hot or cold, can lead to premature aging and degradation of the battery cells. To emphasize this point, consider the following table:
| Extreme Temperature | Consequences |
|---|---|
| High heat | Reduced battery lifespan |
| Freezing temperatures | Decreased battery performance |
Considering the Cost and Benefits of Battery Replacement
When it comes to considering the cost and benefits of battery replacement for your electric bike, it’s important to compare the price of a new battery to that of a new e-bike altogether.
While a new battery may seem expensive, it can be a more cost-effective solution in the long run, especially if your e-bike is still in good condition.
Additionally, upgrading your battery can offer significant benefits such as increased range, improved performance, and enhanced overall riding experience.
Comparing the cost of a new battery to a new e-bike
Comparing the cost of a new battery to a new e-bike can help you determine the most cost-effective option. When considering whether to replace your electric bike battery or purchase a new e-bike altogether, there are several factors to take into account:
-
Battery Price: Check the cost of a new battery for your specific e-bike model. Compare it to the price of a new e-bike with similar specifications.
-
Battery Lifespan: Consider the remaining lifespan of your current battery. If it is nearing the end of its life, replacing it may be a better option than investing in a new e-bike.
-
Upgradability: Evaluate whether your current e-bike can accommodate a higher capacity or more advanced battery. Upgrading the battery may enhance your riding experience without the need for a completely new bike.
-
Maintenance Costs: Take into account the maintenance costs associated with your current e-bike and compare them to the potential costs of a new bike. This will help you determine the long-term financial implications of each option.
Weighing the benefits of an upgraded battery
Upgrading to a higher capacity or more advanced battery can greatly enhance your e-bike riding experience. Not only will you be able to ride for longer distances, but you’ll also enjoy improved power and performance. Here’s a comparison table that will help you understand the benefits of upgrading your e-bike battery:
| Aspect | Standard Battery | Upgraded Battery |
|---|---|---|
| Capacity | 10Ah | 15Ah |
| Range | 30 miles | 45 miles |
| Power | 250W | 350W |
| Charging Time | 4-6 hours | 3-4 hours |
| Weight | 5 lbs | 7 lbs |
As you can see, upgrading your battery will give you a higher capacity, longer range, increased power, and faster charging time. This means you’ll have more time to enjoy your rides without worrying about running out of battery power. With these benefits in mind, it’s important to consider seeking professional assistance for battery replacement, to ensure that the installation is done correctly and safely.
Seeking Professional Assistance for Battery Replacement
If you’re not comfortable doing it yourself, you can always seek professional assistance for electric bike battery replacement. A professional technician will have the necessary expertise to safely install a new battery in your electric bike. They will ensure that all the connections are secure and the battery is properly calibrated for optimal performance. Additionally, they can guide you in choosing the right battery that suits your specific needs and preferences.
By relying on professional assistance, you can have peace of mind knowing that the battery replacement process is being handled by someone with the knowledge and experience to get the job done right.
Now, let’s move on to the next topic of recycling and disposing of old electric bike batteries.
Recycling and Disposing of Old Electric Bike Batteries
When it comes to recycling and disposing of old electric bike batteries, it’s important to be aware of the proper procedures to ensure environmental sustainability. Here are four reasons why it’s crucial to handle this task responsibly:
-
Protecting the environment – By recycling your old electric bike batteries, you can prevent harmful chemicals and metals from leaching into the soil and water, reducing pollution and preserving the ecosystem.
-
Conserving resources – Recycling batteries allows valuable materials, such as lithium, cobalt, and nickel, to be recovered and reused, reducing the need for new mining and minimizing resource depletion.
-
Preventing landfill waste – Properly disposing of old batteries keeps them out of landfills, where they can release toxic substances and contribute to the growing problem of electronic waste.
-
Promoting a sustainable future – By participating in responsible recycling practices, you are supporting the development of a circular economy that prioritizes resource conservation and minimizes environmental impact.
Now that you understand the importance of recycling electric bike batteries, let’s explore battery upgrade options.
Exploring Battery Upgrade Options
If you’re looking to enhance the performance and range of your electric bike, upgrading to a higher capacity battery is a wise consideration.
With a higher capacity battery, you can expect increased power output and longer riding distances before needing to recharge.
Additionally, it’s worth exploring alternative battery technologies, such as lithium-ion or lithium polymer, which offer improved energy density and longer lifespan compared to traditional lead-acid batteries.
Upgrading to a higher capacity battery
To upgrade to a higher capacity battery, you’ll need to determine if it’s compatible with your electric bike model. Here are some key points to consider before making your decision:
-
Compatibility with your electric bike model:
-
Check the specifications of your bike to ensure that the higher capacity battery is compatible with the voltage and power requirements of your electric bike.
-
Consult the manufacturer’s guidelines or contact customer support to confirm if the battery upgrade is recommended for your specific model.
-
Performance benefits:
-
A higher capacity battery can provide you with increased range, allowing you to go on longer rides without worrying about running out of power.
-
It can also enhance the overall power output of your electric bike, giving you a boost in speed and acceleration.
Considering these factors will help you make an informed decision about upgrading to a higher capacity battery. Now, let’s explore alternative battery technologies that you should consider for your electric bike.
Considering alternative battery technologies
Consider exploring alternative battery technologies that may offer improved performance and longevity for your electric bike.
Lithium-ion batteries are commonly used in electric bikes due to their high energy density and long cycle life. However, there are other options worth considering.
One alternative is the Lithium Iron Phosphate (LiFePO4) battery, which is known for its enhanced safety features and longer lifespan.
Another option is the Nickel-Metal Hydride (NiMH) battery, which provides good energy density and is more environmentally friendly than lithium-ion batteries.
Additionally, there are emerging technologies such as solid-state batteries, which offer even higher energy density and improved safety.
These alternative battery technologies have the potential to greatly enhance the performance and longevity of your electric bike, providing you with a more reliable and efficient ride.
Conclusion
Congratulations! You’ve reached the end of this informative journey on when to replace your electric bike battery. Now armed with a wealth of knowledge, you can confidently assess your battery’s capacity degradation, charging habits, and overall lifespan.
Remember to evaluate performance and efficiency, and be vigilant for signs that indicate replacement is needed. Consider the cost and benefits of battery replacement, and don’t hesitate to seek professional assistance.
And as a responsible electric bike owner, don’t forget to recycle or dispose of old batteries properly.
Keep exploring battery upgrade options and ride on!
Olivia’s writing is not only informative but also inspiring. She has a knack for telling stories that capture the essence of cycling and the joy it brings to people’s lives. Her writing has been praised by readers and industry experts alike for its clarity, depth, and authenticity.
In addition to her writing, Olivia is also an avid cyclist. She enjoys exploring new trails and routes and has participated in several cycling events and races. Her first-hand experience with cycling gives her a unique perspective on the sport, reflected in her writing.
Overall, Olivia is a talented writer passionate about cycling and dedicated to producing high-quality content for FlatironBike. Her contributions to the magazine have helped make it a go-to source for cycling enthusiasts worldwide.
Electric Bike
When Is And Electric Bike A Motorcycle

Considering purchasing an electric bike, are you? Well, hold on tight because things are about to get exciting.
You see, there’s a fine line between an electric bike and a motorcycle, and it’s not as clear-cut as you might think. In this article, I’ll be diving into the nitty-gritty details of what separates these two modes of transportation.
From design and structure to legal requirements and riding experience, we’ll explore it all.
So, sit back, relax, and let’s unravel the mysteries of when an electric bike becomes a motorcycle.
Key Takeaways
- Electric bikes are considered motorcycles when they exceed a certain speed limit and require a license to operate.
- Understanding electric bike classification is important to define whether it falls under motorcycle regulations or bicycle regulations.
- Design and structure differences, such as engine size and materials used, help differentiate electric bikes from motorcycles.
- Compliance with local authorities’ regulations, including licensing and registration, is necessary for legal riding on public roads.
Definition of an Electric Bike
An electric bike is considered a motorcycle when it exceeds a certain speed limit and requires a license to operate.
The classification of electric bikes varies depending on the country and their regulations. In some places, electric bikes are classified as bicycles as long as they have a maximum speed of 20 mph and a motor power of 750 watts or less. However, in other regions, the classification may differ, with stricter speed limits and wattage requirements.
These regulations aim to ensure the safety of riders and other road users. It is important to be aware of the specific regulations in your area to determine whether your electric bike falls under the classification of a motorcycle.
Understanding the classification of electric bikes is a crucial step in determining the definition of a motorcycle.
Definition of a Motorcycle
The definition of a motorcycle includes having an engine and two wheels. In terms of motorcycle licensing and regulations, it is important to distinguish between motorcycles and electric bikes.
While electric bikes may have two wheels, they do not necessarily have an engine in the traditional sense. Instead, they are powered by electric motors. This distinction becomes crucial when it comes to licensing and regulations.
In many jurisdictions, electric bikes are classified as bicycles rather than motorcycles, which means that they are subject to different rules and regulations. These regulations often involve restrictions on speed and power output.
Understanding the differences between motorcycles and electric bikes is essential for ensuring compliance with licensing requirements and regulations.
Transitioning into the subsequent section about key differences in design and structure, it is important to note that the distinction between motorcycles and electric bikes goes beyond just the presence of an engine.
Key Differences in Design and Structure
One major difference in design and structure is that motorcycles typically have larger engines than electric bikes. While electric bikes are powered by electric motors with lower wattage, motorcycles are equipped with combustion engines that provide greater power and speed.
Another key distinction is the frame materials used in electric bikes compared to scooters. Electric bikes often use lightweight materials such as aluminum alloys or carbon fiber to maximize efficiency and maneuverability. On the other hand, scooters typically have sturdier frames made from steel or other heavy-duty materials to support their larger engines and provide stability.
Understanding these differences in design and structure helps to differentiate between electric bikes and motorcycles. Moving forward, it is important to explore the legal requirements and regulations associated with electric bikes and motorcycles.
Legal Requirements and Regulations
When it comes to the legal requirements and regulations surrounding electric bikes, two key points that need to be addressed are licensing and registration, as well as the use of helmet and safety gear.
From a knowledgeable and analytical perspective, it is important to understand the specific laws and regulations in your jurisdiction regarding the licensing and registration of electric bikes.
Additionally, the use of proper helmet and safety gear is crucial for ensuring the safety of the rider, and it is essential to abide by any regulations or requirements set forth by local authorities.
Licensing and Registration
If you want to ride an electric bike that meets the classification of a motorcycle, you’ll need to consider licensing and registration.
Electric bike licensing requirements vary depending on the jurisdiction, but in most cases, you will need to obtain a motorcycle license or endorsement. This typically involves passing a written exam and a skills test.
As for registration, electric bikes that meet the criteria of a motorcycle are usually required to be registered with the Department of Motor Vehicles (DMV) or a similar governing body. This process involves providing proof of ownership, paying registration fees, and obtaining a license plate or tag for your electric bike.
Once you have completed the necessary licensing and registration procedures, you can legally ride your electric bike on public roads.
Now, let’s discuss the importance of wearing a helmet and safety gear.
Helmet and Safety Gear
After discussing the requirements for licensing and registration of electric bikes, it is crucial to emphasize the importance of wearing a helmet and appropriate safety gear when riding these vehicles.
Helmets serve as the first line of defense in protecting our heads from potential injuries. With the increasing popularity of electric bikes, it is essential to prioritize safety by investing in a high-quality helmet that meets safety standards.
In addition to helmets, riders should consider wearing elbow and knee pads, as well as protective clothing to minimize the risk of abrasions and fractures in case of accidents. It is recommended to choose safety gear that is specifically designed for electric bike riders, taking into account the unique features and potential hazards associated with these vehicles.
Transitioning into the subsequent section about electric bike classifications, it is important to understand how these categories are defined and regulated.
Electric Bike Classifications
To determine if an electric bike is classified as a motorcycle, you should consider factors such as speed and power. Electric bike speed can vary greatly depending on the model and motor capabilities. Some electric bikes can reach speeds of up to 28 miles per hour, while others may have a top speed of only 20 miles per hour.
Additionally, the electric bike range is an important factor to consider. The range refers to the distance the bike can travel on a single charge. Some electric bikes have a range of 40 miles or more, allowing for longer rides without needing to recharge.
Considering these factors will help determine if an electric bike falls into the motorcycle classification. Moving on to motorcycle classifications…
Motorcycle Classifications
Let’s dive into the different classifications for motorcycles.
When comparing electric bikes to scooters, there are some key distinctions to consider.
Electric bikes, also known as e-bikes, are bicycles with an integrated electric motor. They typically have pedal-assist features, meaning the motor provides assistance while you pedal.
On the other hand, scooters are powered by a motor and do not require pedaling.
One of the benefits of electric bikes is their ability to provide a more efficient and eco-friendly mode of transportation compared to scooters. They have a lower environmental impact and can also contribute to reducing traffic congestion.
Transitioning into the next section about electric bike and motorcycle features, it is important to understand the differences between these classifications.
Electric Bike and Motorcycle Features
When it comes to electric bikes and motorcycles, there are several key features to consider.
First, the use of pedals and human power is an important aspect to examine. Some electric bikes have pedals that can be used for additional power, while others rely solely on the motor.
Second, the engine type and fuel is another crucial factor to explore. Electric bikes are powered by batteries, while motorcycles can be either electric or fuel-powered.
Finally, the transmission and gearing of these vehicles also vary. Electric bikes typically have a single-speed transmission, while motorcycles can have multiple gears for different riding conditions.
Overall, understanding these features is essential for making an informed decision when choosing between an electric bike and a motorcycle.
Pedals and Human Power
The electric bike’s pedals allow for human power assistance. This feature not only makes electric bikes more efficient, but also promotes human-powered transportation. Here are five reasons why the combination of pedals and electric power is a game-changer for transportation:
-
Increased range: By pedaling along with the electric assist, riders can extend the range of their electric bikes, making them suitable for longer commutes or leisurely rides.
-
Health benefits: The ability to pedal means that riders can get exercise while enjoying the convenience of electric power, promoting a healthier lifestyle.
-
Reduced environmental impact: By combining human power with electric assistance, electric bikes become even more eco-friendly, reducing emissions and dependence on fossil fuels.
-
Cost savings: Pedaling allows riders to conserve battery power, resulting in longer battery life and ultimately, cost savings.
-
Flexibility: With the option to use the pedals, riders have the freedom to choose how much assistance they need, making electric bikes adaptable to different fitness levels and terrain.
With the efficiency and human-powered capabilities of electric bikes established, let’s now delve into the next section about engine type and fuel.
Engine Type and Fuel
One advantage of using a combustion engine instead of an electric motor is the availability of different fuel options. Combustion engines can run on gasoline, diesel, ethanol, or even natural gas, giving riders the flexibility to choose the fuel that suits their needs. This is particularly beneficial when it comes to engine power and fuel efficiency.
Combustion engines can generate higher levels of power, allowing motorcycles to achieve faster speeds and handle tougher terrains. Additionally, advancements in engine technology have resulted in improved fuel efficiency, meaning that motorcycles with combustion engines can travel longer distances on a single tank of fuel.
Transitioning into the subsequent section about transmission and gearing, the choice of engine type and fuel can greatly impact the performance and efficiency of a motorcycle’s transmission system.
Transmission and Gearing
You can optimize your riding experience by understanding how transmission and gearing work together. The transmission of a motorcycle is responsible for transferring power from the engine to the wheels. There are different types of transmissions, including manual, automatic, and semi-automatic. Each type has its own advantages and disadvantages, depending on the rider’s preference and skill level. Gearing, on the other hand, refers to the different gear ratios available in the transmission. By changing gears, you can adjust the power and torque delivery to the wheels, allowing for better acceleration or higher top speed. Understanding the gear ratios and how they interact with the transmission can greatly enhance your riding experience. In the table below, we can see a comparison of different transmission types and their gear ratios.
| Transmission Type | Gear Ratios |
|---|---|
| Manual | 1st: 3.50 |
| 2nd: 2.60 | |
| 3rd: 1.90 | |
| Automatic | 1st: 2.80 |
| 2nd: 1.80 | |
| 3rd: 1.20 | |
| Semi-Automatic | 1st: 3.20 |
| 2nd: 2.00 | |
| 3rd: 1.50 |
Understanding the different transmission types and gear ratios can help you make informed decisions when choosing a motorcycle. By selecting the right combination for your riding style and skill level, you can ensure a smoother and more enjoyable ride. In the next section, we will explore how your riding experience and skill level can further impact your choice of motorcycle.
Riding Experience and Skill Level
Riding an electric bike requires practice and skill to ensure a smooth and enjoyable experience. As with any new skill, there is a learning curve involved in mastering the riding techniques of an electric bike. Here are some key points to keep in mind:
-
Balance and Stability: Maintaining a proper balance is crucial when riding an electric bike. Practice maintaining your balance at different speeds and on different terrains.
-
Acceleration and Braking: Electric bikes have instant torque and responsive brakes. It’s important to learn how to smoothly accelerate and brake to avoid jerky movements.
-
Cornering and Turning: Mastering the art of cornering and turning is essential for navigating through traffic and tight spaces. Practice leaning into turns and maintaining control of your bike.
By honing these skills, you will enhance your riding experience and feel more confident on your electric bike.
Now, let’s transition into the next section about safety considerations.
Safety Considerations
Ensure your safety by wearing proper protective gear such as a helmet and reflective clothing. When it comes to electric bike accidents, safety should always be a top priority.
One way to enhance safety is through participation in safety training programs. These programs provide riders with valuable knowledge and skills necessary for navigating the roads safely. They cover topics such as defensive riding techniques, proper braking, and understanding traffic rules specific to electric bikes. By participating in these programs, riders can gain the confidence and expertise needed to handle various road conditions and potential hazards.
Additionally, these programs often emphasize the importance of regular maintenance and inspections to ensure the electric bike is in optimal working condition. Overall, safety training programs play a crucial role in reducing the risk of accidents and promoting safe riding practices.
Moving forward, let’s delve into the conclusion and final thoughts on electric bike safety.
Conclusion and Final Thoughts
To wrap up, it’s important to reflect on the overall significance of safety training programs in promoting responsible and cautious road behavior. Safety training programs play a crucial role in educating individuals about the rules and regulations of the road, as well as providing them with the necessary skills to navigate safely.
When it comes to electric bikes vs scooters, safety training becomes even more important. Electric bikes, with their higher speeds and greater power, require riders to be well-prepared and knowledgeable about handling these vehicles.
Here are three benefits of electric bikes:
-
Environmentally friendly: Electric bikes produce zero emissions, helping to reduce air pollution and combat climate change.
-
Cost-effective: Electric bikes are more affordable than cars, scooters, or motorcycles, making them a practical transportation option.
-
Health benefits: Riding an electric bike provides exercise, helping to improve cardiovascular health and overall fitness.
Frequently Asked Questions
Can I ride an electric bike on the highway?
Yes, you can ride an electric bike on the highway, but it depends on the legal requirements. Some states allow it, while others have specific regulations like speed limits and licensing requirements. It’s important to check your local laws before riding on the highway.
Are electric bikes more expensive than motorcycles?
Electric bikes can be more expensive than motorcycles, depending on the model and features. For example, a high-performance electric bike with advanced technology can cost more than a basic motorcycle. However, there are also affordable electric bikes and expensive motorcycles on the market. When comparing performance, electric bikes may have lower top speeds and shorter ranges than motorcycles, but they offer advantages like zero emissions and quieter operation.
Can I use an electric bike for off-roading?
Yes, you can use an electric bike for off-roading. However, it is important to ensure electric bike safety by wearing protective gear and maintaining the bike regularly to ensure its performance and longevity.
Are electric bikes more environmentally friendly than motorcycles?
Electric bikes are more environmentally friendly than motorcycles. They produce zero emissions, reducing air pollution. Additionally, they can help alleviate urban congestion by providing an alternative to cars and public transportation.
Can I modify an electric bike to make it faster?
To make an electric bike faster, there are various modifications and speed upgrades available. By installing a more powerful motor, upgrading the battery, or adjusting the controller, you can significantly increase the speed and performance of your electric bike.
Conclusion
As I bring this discussion on electric bikes and motorcycles to a close, the gears of my mind begin to whirr with thoughts.
Like the intertwining chains of a bicycle, the line between an electric bike and a motorcycle can be blurry at times. However, by exploring their definitions, design differences, legal requirements, and riding experiences, we can navigate through this winding road.
Remember, whether you choose the nimble electric bike or the powerful motorcycle, ride safely and enjoy the journey ahead.
Olivia’s writing is not only informative but also inspiring. She has a knack for telling stories that capture the essence of cycling and the joy it brings to people’s lives. Her writing has been praised by readers and industry experts alike for its clarity, depth, and authenticity.
In addition to her writing, Olivia is also an avid cyclist. She enjoys exploring new trails and routes and has participated in several cycling events and races. Her first-hand experience with cycling gives her a unique perspective on the sport, reflected in her writing.
Overall, Olivia is a talented writer passionate about cycling and dedicated to producing high-quality content for FlatironBike. Her contributions to the magazine have helped make it a go-to source for cycling enthusiasts worldwide.
-

 Vetted5 months ago
12 Best Men's Cycling Bib Shorts for Comfort and Performance – Reviewed & Rated
-
 Electric Bike3 weeks ago
How To Turn Your Bike Into An Electric Generator
-

 Vetted4 months ago
15 Best Fixed Gear Bikes for Urban Commuting and Stylish Riding
-

 Bike4 months ago
Advantages and Disadvantages of a Carbon Fiber Bike Frame
-

 Vetted5 months ago
15 Best Cycling Jerseys for Men to Elevate Your Riding Game
-

 Vetted5 months ago
15 Best Cycling Gloves for Comfort and Performance – Ultimate Guide for Cyclists
-
 Vetted4 months ago
15 Best Cruiser Bikes to Hit the Road in Style
-
 Vetted4 months ago
15 Best Comfort Bikes for a Smooth and Enjoyable Ride


