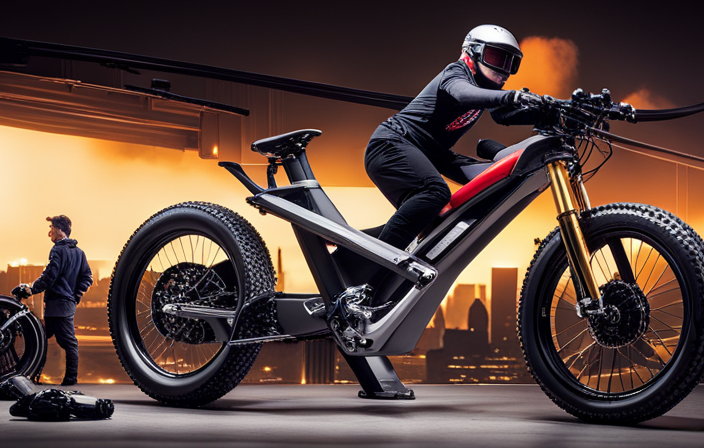

Hey there! So, you’re interested in building an electric downhill bike, huh? Well, you’ve come to the right place.
In this article, I’m going to take you through all the steps, from assessing your riding needs to fine-tuning your bike for optimal performance.
We’ll cover everything, from choosing the perfect frame to installing the electric motor and battery system.
So, buckle up and get ready to dive into the exciting world of building your very own electric downhill bike. Let’s get started!
Key Takeaways
- Assess riding needs and goals, considering terrain type and necessary skills.
- Research and gather components and tools, ensuring compatibility and proper maintenance.
- Choose a suitable frame and suspension system based on riding style and terrain.
- Install the electric motor and battery system, ensuring secure installation and proper connections.

Mongoose Men's Elroy Adventure Bike 700C Wheel Bicycle, Blue, 54cm frame size
Versatile adventure touring bike features capable adventure bike geometry, a sleek alloy frame and steel fork for the...
As an affiliate, we earn on qualifying purchases.
Assess Your Riding Needs and Goals
Before you start building your electric downhill bike, it’s important to assess your riding needs and goals. Understanding your riding techniques and the level of safety precautions required will help you make informed decisions throughout the building process.
When it comes to riding techniques, consider the type of terrain you will be tackling. Downhill biking requires a different set of skills compared to other disciplines. Familiarize yourself with proper body positioning, braking techniques, and cornering skills. This will ensure that your bike is built to cater to your specific riding style and needs.
Safety precautions should be a top priority when building your electric downhill bike. Make sure to invest in high-quality safety gear such as a helmet, knee and elbow pads, and body armor. Additionally, consider incorporating safety features into your bike, such as reliable brakes and suspension systems.
Transitioning into the next section about researching and gathering the necessary components and tools, it’s essential to have a clear understanding of your riding needs and goals. This will guide you in selecting the appropriate components and tools required for your electric downhill bike build.

WEIZE 700C Hybrid Bike for Adults, 14 Speed Road Bike, City Commuter Bicycle with Caliper Brakes, High-Carbon Steel Racing Adult Bike, Urban Adult Bicycle for Men and Women, White
Caliper brake system: The hybrid bike adopts a dual caliper brake design, making daily maintenance more convenient and...
As an affiliate, we earn on qualifying purchases.
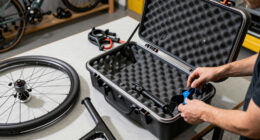
Research and Gather the Necessary Components and Tools
Once you’ve researched and gathered all the necessary components and tools, it’s time to start putting everything together. Here’s a step-by-step guide on how to build your electric downhill bike:
-
Component compatibility: Before you begin assembling your bike, it’s crucial to ensure that all the components you’ve gathered are compatible with each other. Check the specifications of each part, such as the motor, battery, and controller, to make sure they will work seamlessly together. This will prevent any issues or inefficiencies down the line.
-
Troubleshooting techniques: Building an electric downhill bike can be challenging, and you may encounter problems along the way. It’s essential to have troubleshooting techniques in your arsenal to address any issues that may arise. Familiarize yourself with common problems and their solutions, such as diagnosing electrical faults or resolving mechanical issues. This will save you time and frustration during the build process.
-
Proper tools: Having the right tools is crucial for a successful build. Make sure you have a comprehensive set of tools, including wrenches, screwdrivers, wire cutters, and a torque wrench. These tools will enable you to assemble and adjust the components accurately, ensuring a safe and reliable bike.
-
Organization and labeling: As you gather various components and tools, it’s essential to stay organized. Keep all the parts in labeled containers or bags, so you can easily find what you need during the assembly process. This will help you maintain efficiency and prevent any confusion or mix-ups.
Once you have researched and gathered all the necessary components and tools, it’s time to move on to the next step: choosing a suitable frame and suspension system for your electric downhill bike.

AVASTA 700C Road Adult Step-Over Hybrid Bike Bicycle for Men Woman Male Female,Lightweight Aluminum Alloy Frame with 21-Speed Gearing for City Commuting,Dual Disc Brakes,19 inch Frame,Chameleon Grey
🚴♂️【Durable Aluminum Alloy Frame】This lightweight yet strong frame is built to last, offering a perfect balance of durability...
As an affiliate, we earn on qualifying purchases.
Choose a Suitable Frame and Suspension System
Now that you’ve gathered all the necessary components and tools, it’s time to select a frame and suspension system that suits your needs.
When it comes to choosing a suitable frame for your electric downhill bike, there are several factors to consider. One of the most important considerations is the material of the frame.
Aluminum is a popular choice for its lightweight and durable properties. It offers a good balance between strength and weight, making it well-suited for downhill riding.
Another suitable frame material is carbon fiber, which is even lighter than aluminum and offers excellent stiffness. However, it tends to be more expensive.
As for the suspension system, you have a few options to choose from. The most common types are the full suspension and hardtail.
A full suspension system utilizes both front and rear suspension, providing better control and comfort on rough terrains. On the other hand, a hardtail has only front suspension, making it lighter and more efficient for climbing.
Ultimately, your choice will depend on your riding style and the type of terrain you plan to tackle.
With the frame and suspension system selected, we can now move on to the next step of the process: selecting and installing the electric motor and battery system.

Schwinn Wayfarer Hybrid Bike, 700c Mens and Womens Bike, 7-Speed Hybrid Bicycle, Retro Steel Frame, Front and Rear Linear Pull Brakes, Fenders, Cargo Space, Adult Bicycle
HYBRID BICYCLE: Ride in comfort and vintage style with the Wayfarer by Schwinn. With 700c wheels, this mens...
As an affiliate, we earn on qualifying purchases.
Select and Install the Electric Motor and Battery System
To select and install the electric motor and battery system, you’ll need to consider the power output and battery capacity that align with your desired speed and range. When it comes to electric motor selection, there are a few factors to keep in mind.
First, consider the power output you require. This will depend on the type of terrain you’ll be riding on and the level of assistance you desire. Higher power output motors are better suited for steep inclines and rough terrains. Additionally, consider the motor’s efficiency and durability. Look for motors that have a good torque-to-weight ratio and are designed to withstand the demands of downhill biking.
Once you’ve chosen the electric motor, it’s time to install the battery system. Start by determining the battery capacity you need. This will depend on the range you want to achieve. If you plan on longer rides, you’ll need a battery with a higher capacity. Consider the weight of the battery as well, as it can affect the overall performance and handling of the bike.
To install the battery system, begin by finding a suitable location on the bike frame. Ensure that it is securely mounted and that the wiring is properly connected. Follow the manufacturer’s instructions for installation and make sure to double-check all connections before testing the system.
Now that the electric motor and battery system are in place, it’s time to move on to the next step: installing the braking system and ensuring safety measures are in place.
Install the Braking System and Ensure Safety Measures
For the installation of the braking system and ensuring safety measures, make sure you check that the brakes are properly aligned and functioning before taking your bike out for a ride.
The braking system is a critical component of any bike, especially when it comes to downhill performance.
To install the braking system, start by mounting the brake calipers onto the frame or fork. Make sure they are securely fastened and aligned with the brake rotors.
Next, connect the brake levers to the brake calipers using the appropriate cables. Adjust the tension of the cables to ensure a responsive braking experience.
It is essential to test the brakes before hitting the slopes. Squeeze the brake levers and make sure the brake pads engage the rotors smoothly and stop the wheel effectively. Additionally, check that the brake pads are in good condition and replace them if necessary.
Lastly, adjust the brake lever reach to ensure comfortable braking.
With the braking system properly installed and functioning, you can now focus on choosing and installing the wheels and tires for optimal downhill performance.
Choose and Install the Wheels and Tires for Downhill Performance
To enhance your riding experience and maximize downhill performance, it’s important that you carefully select and install the appropriate wheels and tires. Wheel selection and tire installation are crucial aspects of building an electric downhill bike. Here are some key points to consider:
-
Wheel selection:
-
Choose wheels specifically designed for downhill riding, as they are built to withstand the high speeds and intense forces involved.
-
Opt for wheels with a wider rim width to provide better stability and support for wider tires.
-
Consider the material of the wheels. Carbon fiber wheels are lightweight and offer excellent strength, while aluminum wheels strike a balance between weight and durability.
-
Tire installation:
-
Select tires with aggressive tread patterns to ensure maximum grip on the challenging terrain often encountered during downhill rides.
-
Check the tire size compatibility with your bike frame and wheelset to avoid any clearance issues.
-
Properly inflate the tires to the recommended pressure to optimize performance and prevent flats.
By carefully considering wheel selection and ensuring correct tire installation, you can significantly enhance your electric downhill bike’s performance and safety.
Now, let’s move on to assemble the handlebars, grips, and controls, which will allow you to have full control over your bike’s maneuvers.
Assemble the Handlebars, Grips, and Controls
Now it’s time to assemble your handlebars, grips, and controls so you can have complete control over your bike’s maneuvers.
When it comes to handlebars, it’s crucial to find the right height that suits your riding style. A lower handlebar height will provide a more aggressive and aerodynamic position, ideal for downhill riding. On the other hand, a higher handlebar height offers more comfort and control, suitable for trail or all-mountain riding. Adjust the handlebar height by loosening the stem bolts, positioning the handlebars, and tightening the bolts securely.
Next, let’s talk about grip material. The grip material you choose plays a significant role in comfort and control. Look for grips that offer a good balance between grip and vibration damping. Silicone grips are popular for their excellent shock absorption and tacky feel, providing a secure hold even in wet conditions. Lock-on grips are another great option as they securely clamp onto the handlebars, preventing them from rotating or slipping during intense rides.
Now that you have assembled your handlebars and grips, it’s time to move on to the next step: installing the drivetrain and gear system. This essential component will determine the bike’s speed and efficiency, allowing you to power through any terrain with ease.
Install the Drivetrain and Gear System
Once you’ve chosen the right drivetrain and gear system, it’s important to follow the manufacturer’s instructions for proper installation. This ensures that your electric downhill bike performs at its best and maintains optimal efficiency.
Here are three key steps to installing the drivetrain and gear system:
-
Prepare the frame: Before installing the drivetrain components, make sure your bike frame is clean and free from any dirt or debris. This will ensure a smooth installation process and prevent any damage to the components.
-
Install the drivetrain components: Begin by attaching the derailleur to the derailleur hanger on the frame. Then, thread the chain through the derailleur and onto the chainring and cassette. Ensure that the chain is properly tensioned and aligned with the gears for smooth shifting.
-
Adjust and fine-tune the gear system: Once the drivetrain is installed, it’s important to adjust the derailleurs to ensure precise shifting. Use the barrel adjusters to fine-tune the shifting performance, making sure the chain moves smoothly between the gears.
Adjust and Fine-tune the Suspension for Optimal Performance
Make sure you properly adjust and fine-tune the suspension for optimal performance.
The suspension is a crucial component of any downhill bike, as it helps to absorb shocks and impacts, ensuring a smooth and controlled ride.
To optimize the suspension settings, start by adjusting the sag, which is the amount the suspension compresses under the rider’s weight. This can be done by adjusting the air pressure or adding/removing spacers in the suspension forks and shock.
Next, fine-tune the rebound damping, which controls how quickly the suspension extends after being compressed. This can be adjusted using the rebound knob on the suspension forks and shock. Increasing the rebound damping will slow down the extension, while decreasing it will speed up the extension.
By finding the right balance of sag and rebound damping, you can greatly improve shock absorption and the overall performance of the suspension.
Once the suspension is dialed in, it’s time to test and adjust the electric assistance settings, which will be discussed in the next section.
Test and Adjust the Electric Assistance Settings
Before fine-tuning the electric assistance settings, it is important to test and evaluate the current settings. This ensures that the adjustments made will actually improve the performance of the electric downhill bike. To properly test the electric assistance settings, I recommend conducting a series of controlled rides on different terrains and at varying speeds. This will allow you to assess how the current settings affect the bike’s handling, power delivery, and overall performance.
To help you keep track of the test results, I have created a table below that outlines the key parameters to consider when evaluating the electric assistance settings:
| Parameter | Setting 1 | Setting 2 | Setting 3 |
|---|---|---|---|
| Power Delivery | High | Medium | Low |
| Torque | High | Medium | Low |
| Speed Limit | 25 mph | 20 mph | 15 mph |
| Battery Consumption | High | Medium | Low |
By systematically testing each setting and recording your observations, you can compare the differences in performance and determine which combination of electric assistance settings works best for your riding style and preferences.
Once you have completed the testing phase and identified the optimal electric assistance settings, the next step is to ensure proper wiring and electrical connections to guarantee reliable performance.
Ensure Proper Wiring and Electrical Connections
To guarantee reliable performance, it’s important to ensure that the wiring and electrical connections are properly set up. When it comes to electrical wiring safety, there are several key factors to consider:
-
Inspect the wiring: Carefully examine all the wiring components, including cables, connectors, and terminals, for any signs of damage or wear. Replace any faulty or frayed wires to prevent potential electrical issues.
-
Secure the connections: Make sure that all electrical connections are tightly secured to avoid loose connections that can lead to power loss or short circuits. Use appropriate connectors and fasteners to ensure a reliable and safe connection.
-
Check for proper grounding: Proper grounding is crucial for electrical safety. Verify that all the electrical components, such as the battery and motor, are properly grounded to prevent electrical shocks or damage to the system.
-
Perform regular maintenance: Regularly inspect and maintain the electrical system to prevent any potential issues. This includes cleaning the connections, checking for loose wires, and ensuring that all components are functioning correctly.
-
Troubleshoot electrical issues: In case of any electrical issues, it’s essential to troubleshoot the problem systematically. Start by checking the connections, fuses, and relays, and consider consulting an electrician if needed.
By following these electrical wiring safety guidelines and troubleshooting electrical issues effectively, you can ensure the smooth and reliable performance of your electric downhill bike.
Now, let’s transition into the subsequent section, where we will discuss how to fine-tune the bike’s weight distribution for balance and stability.
Fine-tune the Bike’s Weight Distribution for Balance and Stability
After ensuring proper wiring and electrical connections in my electric downhill bike, the next crucial step is to fine-tune the weight distribution for optimal balance and stability. Weight distribution techniques play a vital role in achieving the desired performance and handling characteristics of the bike.
To begin with, I focus on the placement of the battery pack, which is typically the heaviest component. Placing it low and centered on the frame helps to lower the center of gravity, enhancing stability and reducing the risk of tipping over during high-speed descents. Additionally, positioning the motor and controller in a way that balances the weight distribution further contributes to the bike’s overall stability.
Another technique I employ is adjusting the suspension setup. By setting the suspension sag correctly, I ensure that the weight is evenly distributed between the front and rear wheels, allowing for better traction and control. Furthermore, tweaking the suspension settings to match my riding style and the terrain I plan to tackle enhances the bike’s stability and responsiveness.
In conclusion, by fine-tuning the weight distribution and optimizing stability, I can greatly enhance the performance of my electric downhill bike. With the weight properly balanced, the bike will handle better, provide improved stability, and offer a more enjoyable riding experience.
Now, it’s time to take the bike for a test ride and make any necessary adjustments for optimum comfort and performance.
Test Ride and Make Necessary Adjustments for Comfort and Performance
Now it’s time for you to hop on the saddle and take your newly fine-tuned ride for a test spin to make any necessary adjustments for optimum comfort and performance. The test ride evaluation is crucial in ensuring that the modifications you made to your electric downhill bike have enhanced its overall performance. During the test ride, you should pay close attention to various factors such as the bike’s handling, acceleration, and braking capabilities.
To assist you in evaluating the performance of your bike, I have prepared a table below showcasing the key areas you need to focus on and potential modifications you may consider:
| Performance Aspect | Evaluation | Potential Modifications |
|---|---|---|
| Handling | How easily does the bike navigate corners and obstacles? | Adjust suspension settings, change handlebar width or shape |
| Acceleration | How quickly does the bike reach top speed? | Upgrade motor or battery for more power |
| Braking | How efficiently and smoothly does the bike come to a stop? | Upgrade brakes, consider adding regenerative braking |
Regular Maintenance and Upkeep for Longevity and Safety
Make sure you regularly check and maintain your ride to ensure its longevity and safety. Proper maintenance is crucial for keeping your electric downhill bike in top condition. Here are some maintenance tips and safety precautions to follow.
First, always keep your bike clean and free from dirt and debris. Use a gentle detergent and water to wash the frame, components, and tires. Make sure to dry it thoroughly to prevent rust and corrosion.
Next, inspect your bike before every ride. Check the brakes for wear and tear, ensuring they are in proper working condition. Examine the tires for any signs of damage or punctures. Inspect the chain, gears, and drivetrain for any signs of wear or misalignment.
Regularly lubricate the chain and other moving parts to reduce friction and extend their lifespan. Use a high-quality bicycle lubricant and apply it sparingly, wiping off any excess.
Additionally, check the battery and electrical components regularly. Ensure that all connections are secure and that the battery is charged properly. Keep an eye out for any warning signs or abnormalities.
By following these maintenance tips and safety precautions, you can ensure the longevity and safety of your electric downhill bike.
Join the electric mountain biking community for support and inspiration, as they can provide valuable insights and recommendations for maintaining your ride.
Join the Electric Mountain Biking Community for Support and Inspiration
To connect with other electric mountain biking enthusiasts and gain support and inspiration, consider joining the electric mountain biking community. This community is a hub of knowledge and resources, where riders can come together to share their experiences, participate in electric mountain biking events, and exchange tips for maintaining electric downhill bikes.
One of the major advantages of joining the electric mountain biking community is the access to various electric mountain biking events. These events provide an opportunity to connect with fellow riders, test your skills, and explore new trails. From local meetups to large-scale competitions, these events offer a chance to immerse yourself in the electric mountain biking culture and learn from experienced riders.
Additionally, being part of the community allows you to tap into a wealth of knowledge when it comes to maintaining your electric downhill bike. Fellow riders can provide valuable tips and tricks for keeping your bike in optimal condition. From battery maintenance to motor care, the community can guide you on how to extend the lifespan of your electric bike and ensure its performance on the trails.
Furthermore, joining the electric mountain biking community provides a constant source of inspiration. By connecting with other enthusiasts, you can discover new trail recommendations, learn about innovative bike modifications, and stay updated on the latest advancements in electric mountain biking technology. This community fosters a sense of camaraderie and encourages riders to push their limits and explore new horizons.
Frequently Asked Questions
Can I convert any bike into an electric downhill bike?
Yes, any road bike can be converted into an electric downhill bike.
Converting a road bike into an electric downhill bike offers numerous benefits.
Firstly, it allows for easier uphill climbs, as the electric motor provides additional power.
Secondly, it enhances overall speed and efficiency, enabling riders to cover longer distances effortlessly.
Lastly, it offers a thrilling downhill experience with improved control and stability.
Converting a road bike into an electric downhill bike is a great way to enhance your biking adventures.
How do I choose the right size frame for my electric downhill bike?
When choosing the right size frame for an electric downhill bike, it is crucial to consider the frame material and the benefits of a larger frame size.
Think of the frame as the foundation of your bike, much like the foundation of a building. It provides stability and support, especially when tackling challenging terrains.
Opting for a larger frame size enhances the bike’s stability, control, and responsiveness, ensuring a safer and more enjoyable downhill riding experience.
What safety gear should I wear while riding an electric downhill bike?
When riding an electric downhill bike, it’s crucial to prioritize safety by wearing essential safety gear.
This includes a properly fitting helmet to protect the head from potential injuries. Full-face helmets are highly recommended due to the higher speeds involved in downhill riding.
Additionally, wearing knee and elbow pads can prevent abrasions and fractures in case of a fall.
Lastly, sturdy gloves and protective eyewear are necessary to ensure a secure grip on the handlebars and shield the eyes from debris.
How often should I charge the battery of my electric downhill bike?
To maximize the longevity of the battery on my electric downhill bike, it is crucial to consider the charging frequency.
I recommend charging the battery after each ride, as it ensures optimal performance and extends the battery lifespan. Regular charging prevents deep discharges that can harm the battery.
Are there any legal restrictions or regulations for riding an electric downhill bike on public trails?
There are legal implications and regulations that need to be considered when riding an electric downhill bike on public trails. It is important to check local laws and regulations as they may vary.
Some areas may have restrictions on where electric bikes are allowed or may require specific permits. Additionally, it is crucial to be mindful of the environmental impact of riding an electric bike, such as minimizing trail erosion and respecting wildlife habitats.
Conclusion
In conclusion, building an electric downhill bike has been an exhilarating journey. From assessing my riding needs to fine-tuning the bike’s weight distribution, every step has been crucial in creating a machine that is both powerful and reliable.
With the support and inspiration from the electric mountain biking community, I have been able to push the boundaries of what is possible.
So, if you’re ready to embark on this technical adventure, strap in and prepare to experience the thrill of a lifetime. Your electrifying ride awaits!