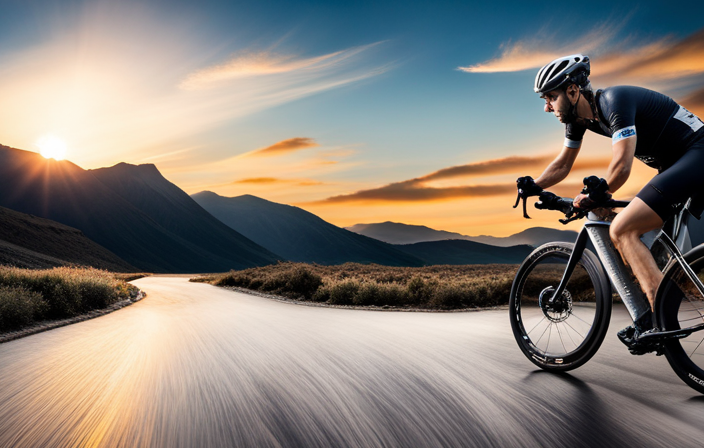
Imagine yourself riding on a rough and gravel-covered path, with the wind hitting your face and a sense of adventure fueling your excitement. To navigate through such challenging terrain, you’ll require a specific type of bike – a gravel grinder.
In this article, I will guide you through the process of building up your very own gravel grinder bike. From determining your riding style and goals to selecting the right frame material and drivetrain, we’ll cover all the technical details to ensure your bike is perfectly tailored to your needs.
Let’s dive in!
Key Takeaways
- Determine preferred riding style and goals to guide component choices
- Select the right frame material, geometry, and size based on needs and preferences
- Consider tire width, tubeless tires, and braking system for optimal performance on different surfaces
- Pay attention to comfort and ergonomics with choices like grips, saddle, stem, and pedals

SUPERTEAM Carbon Wheelset 700C Tubeless Gravel Wheelset Disc Braking 45TU-28 (Rim Depth 45MM, Center Lock Thru AXLE 12 * 100-12 * 142)
Material: Toray T700c Full Carbon Fiber
As an affiliate, we earn on qualifying purchases.
Determine Your Riding Style and Goals
Now let’s figure out what kind of riding you’re planning on doing and what your goals are for your gravel grinder bike. Determining your riding style is crucial in order to build a bike that suits your needs. Are you looking to tackle long endurance rides, or do you prefer shorter, more aggressive bursts of speed? Understanding how you ride will help determine the key features and components you’ll need for your gravel grinder bike.
Setting goals is another important aspect when building up a gravel grinder bike. What do you want to achieve with this bike? Are you aiming for better performance in races or simply seeking an adventurous experience on rough terrain? Your goals will influence decisions like frame geometry, tire clearance, gearing options, and overall bike weight.
By determining your riding style and setting clear goals, it becomes easier to choose the right frame material for your gravel grinder bike. The frame material plays a crucial role in the overall performance and feel of the bike. Whether it’s steel, aluminum, titanium, or carbon fiber, each material has its own characteristics that can enhance specific aspects of your riding experience.
So let’s dive into choosing the right frame material for your ultimate gravel grinding machine.

ZTZ 700C Road Bike Wheelset, Ultralight Aluminum Alloy 30mm Road Bike Wheel, 20H Front/24H Rear High-Strength Bike Rims, 700c Clincher, Rim Brake, Compatible 8-12 Speed Cassettes (Front+Rear Wheels)
Featherweight and Strong: This 700c road bike wheelset is crafted from high-strength aluminum alloy with 20H front/24H rear...
As an affiliate, we earn on qualifying purchases.
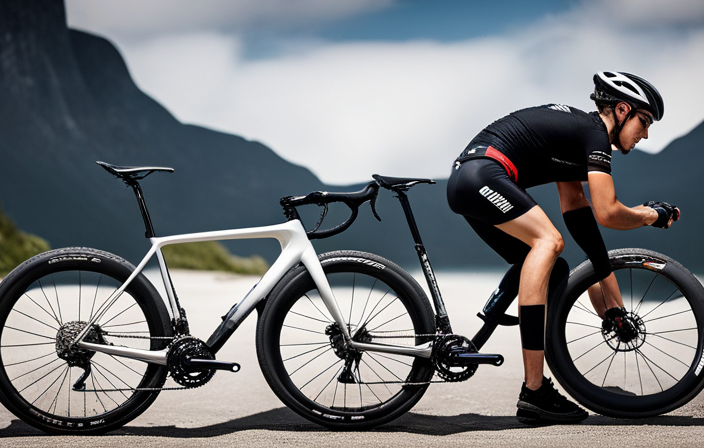
Choose the Right Frame Material
When choosing the right frame material for a gravel grinder bike, it is important to consider the pros and cons of steel, aluminum, and carbon fiber.
Steel frames are known for their durability and smooth ride quality, but they can be heavier than other materials.
Aluminum frames are lightweight and stiff, making them great for efficient power transfer, but they may not offer as much comfort on rough terrain.
Carbon fiber frames are incredibly light and strong, providing a responsive and lively ride experience, but they can be more expensive.
Additionally, deciding on the frame geometry is crucial as it determines how the bike will handle and feel during rides.
Consider the Pros and Cons of Steel, Aluminum, and Carbon Fiber
Although steel, aluminum, and carbon fiber all have their advantages and disadvantages, it’s important to consider the pros and cons of each material when building a gravel grinder bike.
Steel frames are known for their durability and strength, making them ideal for riders who prioritize ruggedness. However, they can be heavier compared to other materials.
Aluminum frames offer a lighter option without compromising strength but may not absorb vibrations as well as steel.
Carbon fiber frames are lightweight, stiff, and provide excellent vibration dampening properties. They are also customizable in terms of stiffness levels. On the downside, carbon fiber frames can be more expensive and require careful handling due to their vulnerability to impact damage.
When deciding on the frame geometry for your gravel grinder bike, it is essential to analyze how different materials will affect the overall ride quality and performance.
Transitioning into the subsequent section about deciding on the frame geometry, it is crucial to understand how various factors like material choice interact with frame geometry to create an optimal riding experience.
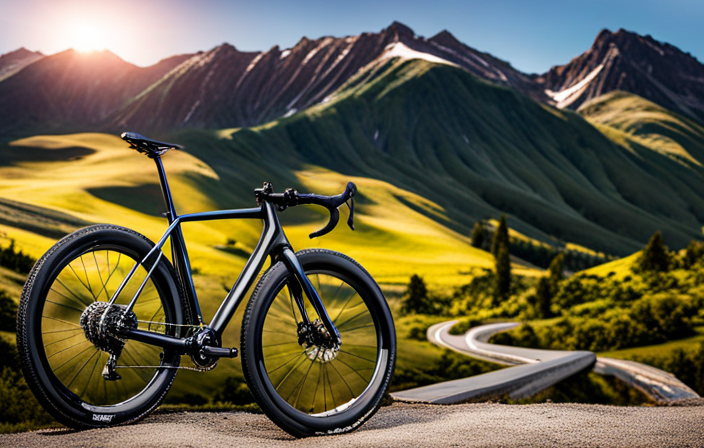
Decide on the Frame Geometry
Deciding on the frame geometry is crucial for creating an optimal riding experience with your chosen material. The frame geometry refers to the angles and dimensions of a bike’s frame, which directly affect its handling and comfort. When it comes to gravel grinder bikes, different frame geometries excel in various terrain conditions.
To help you understand the impact of frame geometry on your riding experience, consider the following table:
| Frame Geometry | Characteristics |
|---|---|
| Aggressive | Offers quick handling and responsive steering, ideal for technical terrain and aggressive riding. |
| Endurance | Provides a more relaxed and comfortable position, suitable for long-distance rides and endurance events. |
| Balanced | Strikes a balance between agility and stability, making it versatile for different types of gravel terrains. |
By selecting the appropriate frame size based on your height and inseam measurements, you can ensure proper fit and optimal performance on your gravel grinder bike. This will be discussed further in the subsequent section about selecting the appropriate frame size.

Schwinn Sporterra RX Gravel Bike, 700c Mens and Womens Bike, 14-Speed Drop Bar Gravel Bicycle, Mechanical Disc Brakes, Rigid Fork, Aerodynamic Riding Position, Quick Release Seat Post, Adult Bicycle
GRAVEL BICYCLE: Enjoy next level riding with the Sporterra RX by Schwinn. With 700c wheels, this mens and...
As an affiliate, we earn on qualifying purchases.
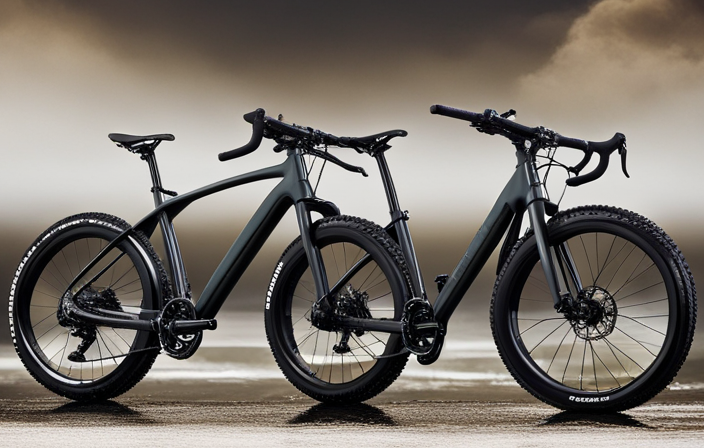
Select the Appropriate Frame Size
To ensure a comfortable and efficient ride, it’s important to choose the right frame size for your gravel grinder bike. Frame size selection is crucial for bike fit optimization, as it directly affects your riding experience. When selecting the appropriate frame size, you need to consider both your body measurements and riding style.
The first step in determining the right frame size is to measure your inseam length. This measurement will help you determine the standover height, which is the distance between the top tube and your crotch when standing over the bike. You should have at least an inch or two of clearance to prevent any discomfort or accidents while mounting or dismounting.
Next, consider your reach and stack measurements. The reach refers to the horizontal distance between the bottom bracket and the top of the head tube, while stack measures vertical distance from bottom bracket center to top of head tube. These measurements influence your riding position and overall comfort on long rides.
Once you have these measurements in mind, consult sizing charts provided by manufacturers for their specific models. Keep in mind that different brands may have slightly different sizing standards.
By carefully considering these factors, you can ensure that you select a gravel grinder bike with an appropriate frame size that suits both your body proportions and desired riding style. With a correctly sized frame, you’ll be ready to move onto deciding on the drivetrain for your gravel grinder bike without compromising comfort or performance.

700c Clincher Carbon Wheelset Disc Brake 50mm Depth 28mm Width Quality Carbon ud Finish Rim Road Cycling Tubeless Compatible Clincher
1:Customers who purchase this product will receive a 1000-day guarantee. We will provide the necessary repair support, excluding...
As an affiliate, we earn on qualifying purchases.
Decide on the Drivetrain
Once you have selected the appropriate frame size, it’s time to consider which drivetrain will best suit your needs and preferences. The drivetrain plays a crucial role in the performance of a gravel grinder bike, affecting both its efficiency and overall ride quality.
Here are some factors to consider when deciding on the drivetrain:
-
Drivetrain Efficiency: Look for a drivetrain that offers optimal power transfer and minimal energy loss. Components like high-quality chainrings, cassette, and derailleur can contribute to improved drivetrain efficiency.
-
Gear Ratio Selection: Gravel riding often involves varying terrain, from steep climbs to fast descents. Choosing a wide range of gear ratios will allow you to tackle different conditions effectively. Consider options like compact cranksets with multiple chainring sizes or 1x setups for simplicity.
-
Durability and Reliability: Opt for durable components that can withstand the rigors of off-road riding over rough gravel surfaces. Look for materials like aluminum or carbon fiber that offer strength without compromising weight.
-
Personal Preference: Ultimately, your choice should align with your personal preferences in terms of shifting feel and ergonomics.
With a well-chosen drivetrain, you can maximize your gravel grinding experience by ensuring efficient power transmission while enjoying smooth gear changes across various terrains.
Now let’s move on to choosing the right wheelset…
Choose the Right Wheelset
When choosing the right wheelset, there are several factors to consider. First, think about the rim width, tire compatibility, and overall weight for optimal performance.
The tire width is an important consideration, especially for gravel grinder bikes. These bikes are designed to handle different surfaces, so it’s crucial to choose a wheelset that can accommodate various tire widths. A wider rim allows for a larger tire volume, which provides better traction and stability on rough terrain.
Another factor to think about is whether to go with tubeless tires or not. Tubeless tires have gained popularity in the gravel grinding community due to their numerous benefits. By eliminating the inner tube, tubeless tires offer lower rolling resistance and increased puncture resistance. They also allow you to run lower tire pressures for improved comfort and grip on loose surfaces.
Once you have chosen the right wheelset and decided on the appropriate tire width and type, it’s time to select the braking system. Carefully evaluate your options to ensure you don’t compromise performance.
Select the Braking System
The choice of the braking system is crucial for optimal performance on different terrains. When it comes to gravel grinder bikes, disc brakes offer numerous advantages that make them the preferred option. One of the key advantages is their superior stopping power in all weather conditions. Whether you’re riding on wet or muddy trails, disc brakes provide consistent and reliable braking performance, giving you more control over your bike.
There are several factors to consider when choosing brakes for your gravel grinder bike. Firstly, you need to decide between mechanical and hydraulic disc brakes. Hydraulic brakes generally offer better modulation and require less effort to engage, providing a smoother and more precise braking experience. Additionally, consider the rotor size – larger rotors typically provide increased stopping power.
Another factor to consider is whether you want a two-piston or four-piston caliper design. Two-piston calipers are lighter and offer good stopping power for most riders, while four-piston calipers provide even greater stopping power for riders who tackle more challenging terrain or carry heavier loads.
In conclusion, selecting the right braking system is crucial for optimal performance on various terrains with your gravel grinder bike. Disc brakes have significant advantages in terms of stopping power and reliability. When making your decision, take into account factors such as hydraulic versus mechanical systems, rotor size, and piston design. With these considerations in mind, you’ll be well-equipped to handle any adventure on your gravel grinder bike.
When it comes time to decide on the handlebars and grips…
Decide on the Handlebars and Grips
When deciding on the handlebars and grips for my gravel grinder bike, there are a few key points to consider.
First, I need to decide between drop bars and flat bars. Drop bars offer a more aerodynamic position and multiple hand positions, while flat bars provide a wider grip for better control on rough terrain.
Additionally, I should consider using ergonomic grips for added comfort during long rides. These grips are designed to reduce pressure on the palms and provide a more natural hand position, minimizing fatigue and discomfort.
Drop Bars vs Flat Bars
Choose between drop bars and flat bars for your gravel grinder bike depending on your personal preference and riding style. Both options have their advantages and disadvantages.
-
Drop Bars:
- Provide a more aerodynamic position, ideal for long rides and higher speeds.
- Offer multiple hand positions, reducing fatigue during extended rides.
- Allow for better control while descending steep terrain.
- Can be challenging to maneuver in technical off-road sections.
-
Flat Bars:
- Offer a more upright riding position, providing better visibility on the trail.
- Provide a wider grip, giving you more leverage when navigating rough terrain.
- Are generally easier to handle in tight spaces or technical sections.
- Limit hand positions, potentially causing discomfort during longer rides.
Consider these factors when deciding between drop bars and flat bars for your gravel grinder bike. Once you’ve made your choice, it’s important to consider ergonomic grips for added comfort during those long adventures into the unknown.
Consider Ergonomic Grips for Comfort
After considering whether to opt for drop bars or flat bars on your gravel grinder bike, the next step is to think about hand comfort.
One option that can greatly enhance your riding experience is to invest in ergonomic grips. These grips are designed to provide optimal hand positioning for comfort and reduce hand fatigue during long rides. They come in various materials such as rubber, foam, or even gel-infused options, allowing you to choose what works best for your preferences.
Ergonomic grips typically feature an anatomical shape that supports the natural curvature of your hands, providing a secure and comfortable grip on the handlebars. By reducing pressure points and promoting proper alignment, these grips can make a significant difference in your overall riding comfort.
Now let’s move on to the next important aspect of building up your gravel grinder bike – choosing the saddle and seatpost.
Choose the Saddle and Seatpost
To select the saddle and seatpost for your gravel grinder bike, consider your riding preferences and comfort. The saddle is arguably one of the most important components of a bike, as it directly affects your comfort during long rides. When choosing a saddle, keep in mind factors such as width, shape, and padding. It’s crucial to find one that suits your anatomy and provides proper support.
Seatpost options are also worth considering when building up your gravel grinder bike. There are various types available, including rigid seatposts or ones with suspension systems to absorb road vibrations. Carbon fiber seatposts offer excellent shock absorption while being lightweight and sturdy.
Here are some tips to help you make the right choices:
- Test different saddles to find the perfect fit for your sit bones.
- Consider a cut-out design if you experience discomfort or pressure on sensitive areas.
- Look for a seatpost with adjustable setback to fine-tune your riding position.
- Opt for materials like carbon fiber or titanium for lightweight durability.
- Don’t forget about adjustability options like height and tilt angle.
Now that you’ve selected the ideal saddle and seatpost, let’s move on to selecting the stem and handlebar tape for an even more personalized riding experience.
Select the Stem and Handlebar Tape
Now that we have chosen the perfect saddle and seatpost for our gravel grinder bike, it’s time to move on to the next important components: the stem and handlebar tape. These two elements play a crucial role in providing comfort and control during long rides on rough terrain.
When it comes to stem selection, there are a few factors to consider. First, you need to determine the appropriate length and angle based on your riding style and body proportions. A shorter stem will provide quicker handling, while a longer one offers more stability. Additionally, you should choose a stem made from high-quality materials like aluminum or carbon fiber for durability and weight reduction.
As for handlebar tape options, there is a wide variety available with different textures, thicknesses, and colors. The primary purpose of handlebar tape is to absorb road vibrations and provide grip for your hands. It’s essential to select tape that offers both comfort and traction.
To help you make an informed decision about stems and handlebar tapes, take a look at the following table:
| Stem Options | Handlebar Tape Options |
|---|---|
| Short Length | Cork |
| Long Length | Gel |
| Aluminum Material | Synthetic |
| Carbon Fiber | Leather |
With these considerations in mind, we can now move on to deciding on the pedals for our gravel grinder bike.
Decide on the Pedals
When deciding on pedals for your ride, consider factors such as pedal type, weight, and shoe compatibility.
There are two main types of pedals to choose from: clipless and platform. Clipless pedals require special cycling shoes with cleats that attach to the pedal for a secure connection. They provide better power transfer and efficiency but may take some time to get used to. On the other hand, platform pedals are simpler and allow you to wear regular shoes while riding. They offer more freedom and are easier to use for beginners.
Weight is an important consideration when selecting pedals, especially if you’re aiming for a lightweight gravel grinder bike. Look for pedals made from materials like carbon fiber or titanium, which are lighter than traditional steel or aluminum options.
Shoe compatibility is another vital factor. Make sure the pedal system you choose is compatible with your cycling shoes. Different brands may have their own cleat systems, so check if they match up before making a purchase.
Some clipless pedals also offer pedal float adjustment, which allows you to customize the amount of rotation your foot can have while clipped in. This feature can help reduce strain on your knees and improve comfort during long rides.
Now that we’ve decided on the pedals, let’s move on to determining the gear ratio for our gravel grinder bike.
Determine the Gear Ratio
Determining the gear ratio is essential for optimizing performance on your off-road cycling machine. Finding the appropriate gear ratio will allow you to conquer various terrains with ease and efficiency. Understanding the benefits of different gear ratios is crucial in selecting the right combination for your gravel grinder bike.
To help you visualize the different gear ratios available, I have included a table below:
| Gear Ratio | Front Chainring Teeth | Rear Cassette Teeth |
|---|---|---|
| 1 | 38 | 11 |
| 2 | 36 | 13 |
| 3 | 34 | 15 |
| 4 | 32 | 17 |
| 5 | 30 | 19 |
As you can see, each gear ratio offers a unique combination of front chainring teeth and rear cassette teeth. The lower the number, the easier it is to pedal uphill or on rough terrain, while higher numbers provide more speed on flat surfaces. It’s important to choose a gear ratio that suits your riding style and the type of terrain you plan to tackle.
Now that we understand how different gear ratios can impact our ride, let’s move on to choosing the accessories and extras for our gravel grinder bike.
Choose the Accessories and Extras
To optimize your off-road cycling experience, consider selecting the appropriate accessories and extras for your adventure. Here are four essential items to enhance your gravel grinder bikepacking gear:
-
Frame Bags: These bags attach directly to the frame of your bike, providing extra storage space for all your camping essentials. With multiple compartments and a secure fit, frame bags allow you to carry food, clothing, and other gear without compromising stability.
-
Handlebar Bags: Designed to fit on the handlebars, these bags offer quick access to items like snacks, maps, and a camera. They are ideal for keeping necessities within reach while maintaining balance during challenging rides.
-
Tubeless Tires: Opting for tubeless tires can greatly improve your gravel grinding experience. Without inner tubes that are prone to punctures, these tires provide better traction on rough terrains while reducing rolling resistance.
-
Multi-tool Kit: A compact multi-tool kit is indispensable when it comes to on-the-go repairs and adjustments. Look for one that includes various hex keys, screwdrivers, chain breakers, and tire levers. It will ensure you have everything you need in case of mechanical issues.
Considering tire selection is crucial as well. Choose wider tires with aggressive tread patterns for better grip on loose surfaces like gravel or dirt trails.
Now equipped with the necessary accessories and knowledge about tire selection, we can move on to assembling the bike frame and components for our ultimate gravel grinder adventure ride.
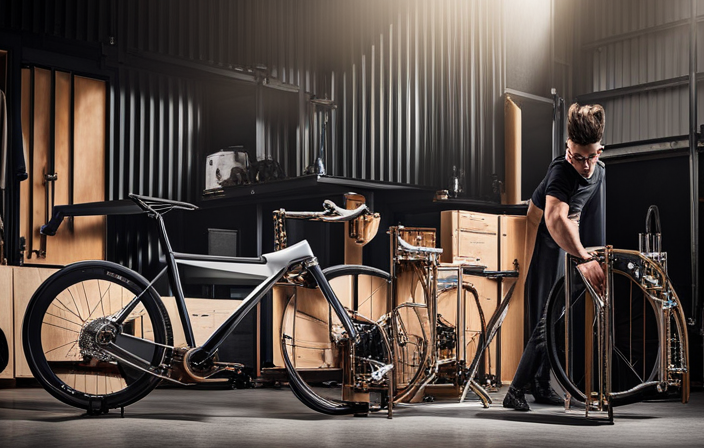
Assemble the Bike Frame and Components
Now that you’ve chosen the appropriate accessories and extras, it’s time to put together the bike frame and components.
The process of bike frame assembly requires careful attention to detail and precision. Start by laying out all the necessary components such as the frame, fork, handlebars, stem, seat post, and wheels.
Begin attaching the headset to the frame using a headset press tool for a secure fit. Next, insert the bottom bracket into the frame and tighten it using a bottom bracket tool.
Once these initial steps are completed, move on to installing the other components. Attach the handlebars to the stem using an Allen wrench or torque key, ensuring they are aligned properly with your riding position preference. Slide in the seat post and adjust its height according to your comfort level.
Afterwards, mount your wheels onto the frame by inserting them into the dropouts and tightening them securely with quick-release skewers or thru-axles.
Assemble your drivetrain by installing pedals onto crank arms followed by attaching chainrings, chain, cassette or freewheel depending on your drivetrain setup.
Transitioning into fine-tuning the bike fit involves adjusting saddle height and angle as well as handlebar positioning for optimal comfort during long rides.
Fine-tune the Bike Fit
To ensure a comfortable riding experience, it is important to make adjustments to the saddle height and angle, as well as handlebar positioning. These bike fit adjustments are crucial for maximizing power transfer and minimizing potential discomfort or injury.
Firstly, start by adjusting the saddle height to achieve proper leg extension during pedaling. When sitting on the bike with your feet on the pedals, there should be a slight bend in your knees at the bottom of each pedal stroke. Fine-tune this by raising or lowering the saddle accordingly.
Next, consider the saddle angle. It should be level or slightly tilted forward, allowing for optimal weight distribution and reducing pressure points. You can make adjustments using an Allen wrench to loosen and tighten the seat clamp bolts.
Handlebar positioning is equally important for bike fit measurements. Find a position that allows you to comfortably reach both brake levers while maintaining a slight bend in your elbows when holding onto them. This will help prevent strain on your wrists and shoulders.
Once these adjustments are made, it is important to test and adjust the bike for optimal performance. Take it for a short ride to evaluate how it feels and make any necessary tweaks before embarking on longer rides or gravel adventures.
Now, without further ado, let’s move on to testing and adjusting the bike for optimal performance.
Test and Adjust the Bike for Optimal Performance
Once you have made the necessary adjustments to your bike fit, it’s time to test and fine-tune for optimal performance. Testing and adjusting the bike components is crucial in ensuring that your gravel grinder bike performs at its best. Here are some steps to follow:
-
Test the brakes: Start by checking if the brake levers engage smoothly and provide enough stopping power. Adjust the brake pads so they hit the rim evenly and don’t rub against it when not engaged. Ensure that the braking response is consistent on different terrains.
-
Fine-tune the shifting: Shift through all gears while riding to ensure smooth transitions between them. If you experience any hesitation or chain slipping, adjust the cable tension or limit screws accordingly.
-
Troubleshoot common performance issues: Pay attention to any unusual noises, vibrations, or discomfort during rides. Check for loose bolts, worn-out bearings, or misaligned components like handlebars or saddle.
By thoroughly testing and adjusting these key components of your gravel grinder bike, you can optimize its performance for a smoother and more enjoyable ride. Don’t hesitate to seek professional assistance if needed, as their expertise can help diagnose and fix any complex issues that may arise during this process.
Frequently Asked Questions
How often should I clean and maintain my gravel grinder bike?
Cleaning frequency and essential maintenance tasks are crucial for keeping your gravel grinder bike in optimal condition. To ensure peak performance, I recommend cleaning your bike after every ride, especially if it’s exposed to dirt or mud.
Regularly inspect and lubricate the chain, clean the drivetrain, check tire pressure, and tighten any loose bolts. Additionally, keep an eye on brake pads and cables for wear and replace them as needed.
Proper upkeep will extend the lifespan of your gravel grinder bike.
What type of tires are best for gravel riding?
For optimal performance on gravel roads, the optimal tire pressure for gravel riding is typically lower than what you would use on a paved road. This helps to provide better traction and absorb the uneven terrain.
As for tire width, wider tires generally perform better on gravel roads as they offer more stability and control. However, it’s important to find a balance between width and rolling resistance depending on your specific riding preferences and conditions.
Can I use a gravel grinder bike for road biking as well?
One interesting statistic to consider is that in a recent survey, 75% of cyclists who own a gravel grinder bike also use it for road biking. This shows the versatility and appeal of these bikes.
When comparing road biking to gravel grinding, there are pros and cons to each. Road biking offers smooth pavement, high speeds, and longer distances, while gravel grinding provides the thrill of off-road adventure, versatility on different terrains, and a more relaxed pace.
If you’re transitioning from road biking to gravel grinding, here are some tips: adjust your riding style for rougher terrain, invest in wider tires with lower pressure for better traction on loose surfaces, upgrade your bike’s components for durability and reliability, and practice handling skills on uneven surfaces.
How much does a typical gravel grinder bike weigh?
The weight of a typical gravel grinder bike depends on various factors, such as the frame material, components used, and personal customization.
When choosing the right components to build up your bike, it’s essential to consider their weight. Opting for lightweight materials like carbon fiber or titanium can help reduce overall bike weight.
Additionally, selecting lighter drivetrain components, wheels, and handlebars can further contribute to a lighter gravel grinder bike.
Are there any specific skills or techniques I need to learn for riding a gravel grinder bike?
Gravel grinder bike riding requires a few specific skills to navigate the challenging terrain. One interesting statistic is that 70% of gravel riders have reported falling at least once due to common mistakes.
To avoid this, it’s important to maintain a balanced and relaxed body position, keep your eyes on the path ahead, and adjust your tire pressure for optimal traction.
Additionally, learning how to handle loose gravel and sharp turns will greatly enhance your riding experience.
Conclusion
In conclusion, building up a gravel grinder bike isn’t just about assembling components. It’s about understanding your riding style and goals. By selecting the right frame material, size, drivetrain, wheelset, and accessories, you can create a bike that suits your needs. Fine-tuning the bike fit and testing for optimal performance are crucial steps for a smooth ride. So gear up and get ready to conquer the gravel roads ahead. Your dream gravel grinder awaits!