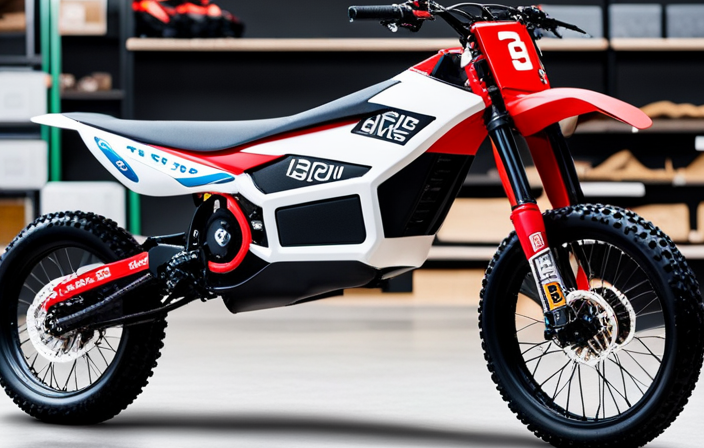
Alright, let’s get down to business and build ourselves a top-notch 500w 24v electric dirt bike.
In this guide, I’ll walk you through the step-by-step process to bring your two-wheeled dream to life.
We’ll start by gathering all the tools and materials necessary for the job.
Then, we’ll carefully select a frame that suits our needs.
From there, we’ll choose the perfect motor and battery to power our beast.
With precision and attention to detail, we’ll install everything onto the frame, ensuring proper electrical connections.
Finally, we’ll fine-tune the bike’s performance, add some accessories for convenience and style, and perform regular maintenance to keep it in top shape.
Get ready to ride in style and conquer any terrain with your custom-built electric dirt bike!
Key Takeaways
- Collect all necessary tools and materials before starting the build
- Select a frame that is compatible with the chosen motor and battery
- Properly wire and connect the electrical system, ensuring all connections are secure
- Install and test the controller and throttle for proper functionality

2026 Upgrade 9800Lumen Bike Light for Night Riding,Super Bright 6 LED Headlight,Aluminum 10 Mode Rechargeable Bicycle Light Front and Rear,360°Rotatable Brackt,Waterproof,Runtime 72 hr,Road Shockproof
【700DAYS Support] 】:If your bike light have any problem, please to pass us on through Amazon for the...
As an affiliate, we earn on qualifying purchases.
Gather the Necessary Tools and Materials
Gather all the necessary tools and materials before starting the project.
To build a 500w 24v electric dirt bike, it is crucial to choose the right battery and motor for optimal performance. The battery and motor are the heart of your electric bike, providing the necessary power to run it smoothly.
When selecting a battery, consider its voltage and capacity. A 24v battery is recommended for this specific project. Additionally, ensure that the battery has enough capacity to provide sufficient power for your desired riding distance.
As for the motor, choose one that is compatible with your battery and can deliver the desired power output.
It is essential to prioritize safety when riding an electric dirt bike. Therefore, gather essential safety gear such as a helmet, gloves, knee pads, and elbow pads. These protective items will minimize the risk of injury and ensure a safe riding experience.
With all the necessary tools, materials, battery, motor, and safety gear in hand, you are ready to move on to the next step of choosing a suitable frame for your electric dirt bike.
DARKBEAM 6000LM Bike Headlight USB-C Rechargeable, High Lumen Super Bright Bike Light Set for Night Riding, 12+5 Modes Waterproof Bicycle Lights for Road, Mountain, Cycling
SUPER BRIGHT HEADLIGHT & WARNING TAILLIGHT: Bike headlight using new upgraded 2 LED beads with high lumens. Easily...
As an affiliate, we earn on qualifying purchases.
Choose a Suitable Frame for Your Electric Dirt Bike
When choosing a suitable frame for your e-bike, consider factors such as weight, durability, and compatibility. Choosing the right frame is essential for building an electric dirt bike that meets your needs and preferences. It determines the bike’s overall size, weight, and durability, as well as its handling and performance capabilities. Here are two discussion ideas about choosing a suitable frame for your electric dirt bike:
| Frame Materials | Pros | Cons |
|---|---|---|
| Steel | – Strong and durable – Affordable |
– Heavier than other materials – Can rust if not properly treated |
| Aluminum | – Lightweight – Corrosion-resistant |
– Less durable than steel – More expensive |
| Carbon Fiber | – Extremely lightweight – Excellent strength-to-weight ratio |
– Expensive – More prone to damage |
Frame geometry also plays a crucial role in the overall feel and performance of your electric dirt bike. It affects rider position, stability, and maneuverability. Different frame designs can offer varying levels of comfort and control. It’s important to consider your riding style and preferences when choosing the frame geometry.
Now that you have chosen a suitable frame, it’s time to select the right motor and battery for your bike’s power needs.

Bike Lights for Night Riding with Bell, Super Bright Bicycle Reflectors, USB Rechargeable Bike Lights Front and Back, Water-Resistant, 4+5 Modes Headlight Taillight Set for Safety, Men, Women & Kids
Is the Gator 320 bright enough for everyday night riding? Yes. The Gator 320 includes a bright white...
As an affiliate, we earn on qualifying purchases.
Select the Right Motor and Battery for Your Bike’s Power Needs
Once you have chosen a suitable frame, it’s important to select the right motor and battery for your bike’s power needs. This crucial step will determine the performance and efficiency of your electric dirt bike. To ensure you make the right choices, consider the following:
-
Choosing the right battery capacity: The battery is the heart of your electric bike, providing the necessary power to the motor. It’s essential to select a battery with sufficient capacity to meet your riding requirements. Factors to consider include the distance you plan to cover, the terrain you’ll be riding on, and the weight of the bike and rider. Opt for a battery with a higher capacity for longer rides or challenging terrains.
-
Understanding the motor power requirements: The motor is responsible for converting electrical energy from the battery into mechanical power to propel your bike. It’s crucial to understand the power requirements of your motor to ensure compatibility with the battery. Consider factors such as the motor’s voltage and current rating, as well as its power output in watts. Choose a battery that can deliver the necessary power to match your motor’s requirements.

EVAPLUS 54.6V 1.5A Smart Charger for 48V Lithium Batteries - UL Certified, Fast Charging with Multi-Safety Protection, Compatible with Electric Bikes/Scooters, DC 5.5 * 2.5/2.1mm Connector
Universal Fast Charging Performance: Designed specifically for 48V lithium-ion batteries (13S configuration), this 54.6V 1.5A smart charger delivers...
As an affiliate, we earn on qualifying purchases.
Install the Motor and Battery onto the Frame
To start the installation process, it’s crucial to ensure the motor and battery are securely attached to the frame. Proper motor installation is vital for the optimal performance and safety of your electric dirt bike. Here are some motor installation tips to guide you through the process:
-
Choose the right motor size and power rating for your bike’s needs. Refer to the manufacturer’s specifications for guidance.
-
Position the motor on the frame in a way that ensures proper weight distribution for better balance and stability.
-
Securely fasten the motor to the frame using appropriate mounting brackets and bolts. Double-check for any loose connections before proceeding.
Battery positioning techniques:
-
Determine the best location on the frame to mount the battery. Consider factors such as weight distribution and accessibility for maintenance.
-
Use suitable battery mounting brackets or straps to secure the battery to the frame. Ensure a snug fit to prevent any movement during rides.
-
Insulate the battery from any metal components on the frame using rubber or foam padding. This will prevent potential electrical shorts and damage.
Now that the motor and battery are securely attached to the frame, we can move on to the next step: connecting the wiring and ensuring proper electrical connections.
Connect the Wiring and Ensure Proper Electrical Connections
Make sure you have all the necessary wiring components and follow these steps to connect the wiring and ensure proper electrical connections. Proper wiring techniques are crucial to the safe and efficient operation of your electric dirt bike.
Start by identifying the wire colors and their corresponding functions. This will help you match the correct wires during the installation process. Use wire connectors or soldering techniques to securely join the wires together. It is important to ensure a tight connection to prevent any loose or exposed wires, which could lead to electrical shorts or malfunctions.
Once you have connected all the wires, it is essential to test the electrical system and troubleshoot any potential issues. Check for any loose connections, frayed wires, or signs of overheating. Inspect each connection point and ensure that all wires are properly insulated. If you encounter any electrical issues, use a multimeter to measure voltage and continuity. This will help you identify any faulty connections or components that may require further attention.
Install the Controller and Throttle for Controlling the Bike’s Speed
After connecting the wiring and ensuring proper electrical connections, it’s time to install the controller and throttle to control the speed of the bike. The controller is a crucial component that regulates the flow of electricity from the battery to the motor.
Here are some tips for successful controller installation:
-
Positioning the Controller:
-
Find a suitable location on the bike frame where the controller can be securely mounted. Make sure it’s away from any moving parts and protected from water and dust.
-
Use zip ties or mounting brackets to firmly attach the controller to the frame, ensuring it remains stable during off-road riding.
-
Wiring the Controller:
-
Follow the manufacturer’s instructions to connect the wires from the battery, motor, and throttle to the appropriate terminals on the controller.
-
Double-check all connections to ensure they are secure and insulated properly to prevent any short circuits.
Now let’s move on to the throttle, which allows you to control the speed of your electric bike. There are different options available for electric bike throttles:
-
Twist Throttle:
-
This type of throttle resembles a motorcycle throttle. You twist it in the desired direction to increase or decrease the speed of the bike. It provides precise control and is commonly used in off-road electric bikes.
-
Thumb Throttle:
-
As the name suggests, this throttle is operated by your thumb. It’s ergonomically designed for easy access and control. Some models even come with integrated LCD screens to display speed and battery information.
By installing the controller and choosing the appropriate throttle, you’ll have full control over the speed of your electric dirt bike.
Now, let’s move on to the next section and select and install wheels and tires suitable for off-road riding.
Choose and Install Wheels and Tires Suitable for Off-Road Riding
Now that you have installed the controller and throttle, it’s time to select and install wheels and tires suitable for off-road riding. When it comes to off-road riding, having the right wheels and tires is crucial for a smooth and safe experience. Off-road tires are designed to provide better traction and stability on uneven terrain, allowing you to navigate through dirt, mud, and rocks with ease.
To help you make an informed decision, I have created a table comparing three popular off-road tire options:
| Tire Brand | Tread Pattern | Tire Size |
|---|---|---|
| Brand A | Aggressive | 18×9.5-8 |
| Brand B | All-Terrain | 20×10-9 |
| Brand C | Mud-terrain | 21×7-10 |
Each tire brand offers unique features and performance characteristics, so it’s important to consider your specific riding needs and preferences. Additionally, don’t forget to adjust the tire pressure according to the terrain you will be riding on. Lowering the tire pressure can improve traction on soft surfaces like sand or mud, while increasing it can enhance stability on hard-packed trails.
With your new off-road tires installed, you’re one step closer to an exhilarating ride. But before we hit the trails, let’s move onto the next section and install suspension components for a smooth ride.
Install Suspension Components for a Smooth Ride
To achieve a smooth ride, you’ll want to install suspension components that absorb the impact of uneven terrain and provide better control over your off-road adventures. Proper suspension is crucial for off-road bikes as it helps to maintain traction, stability, and rider comfort.
There are several types of suspension systems available in the market, including telescopic forks, twin shocks, and single shock setups. Telescopic forks are the most common type and offer a good balance between performance and cost. Twin shocks provide a classic look and are suitable for lighter bikes, while single shock setups are commonly found on motocross and enduro bikes for increased adjustability.
However, even with the best suspension components, issues can still arise. Common suspension problems include leaking seals, excessive bouncing, and bottoming out. If you notice any oil leaks or excessive bouncing, it’s important to inspect the seals and replace them if necessary. Adjusting the suspension settings, such as increasing the preload or damping, can also help to reduce bouncing and bottoming out. Additionally, regularly maintaining the suspension components by cleaning and lubricating them will prolong their lifespan and ensure optimal performance.
By installing the right suspension components and addressing any suspension issues that may arise, you can enjoy a smoother and more comfortable ride.
Now, let’s explore the next step: adding a braking system to ensure safety and control.
Add Braking System to Ensure Safety and Control
Make sure you install a reliable braking system that provides the necessary stopping power for your off-road adventures. Having a dependable braking system is crucial for maintaining control and ensuring safety when it comes to off-road biking. There are various braking techniques that you can employ to enhance your stopping power and maneuverability on rugged terrains. One such technique is modulating the brakes by applying gradual pressure instead of abruptly squeezing them. This allows for better control and prevents skidding.
Additionally, it is important to equip yourself with the right safety gear, such as a helmet, knee pads, and elbow pads, to protect yourself in case of any unforeseen accidents. These safety measures, along with a reliable braking system, will provide you with the confidence and control you need to tackle challenging off-road trails.
Now that you have installed the braking system, it is time to connect and test the bike’s lighting and electrical systems.
Connect and Test the Bike’s Lighting and Electrical Systems
After connecting the lighting and electrical systems, be sure to test them to ensure they are functioning properly. Testing electrical connections is crucial to identify any potential issues and troubleshoot lighting problems.
Begin by turning on the bike’s power switch to activate the electrical system. Check if the headlight, taillight, and turn signals are working correctly. Inspect all the wiring connections for any loose or damaged wires. Use a multimeter to measure the voltage at various points in the circuit to verify that the electrical flow is consistent and within the acceptable range.
If any lights are not functioning, check the bulbs and replace them if necessary. Additionally, test the horn and indicators to ensure they are working as intended. If there are any issues, carefully examine the wiring connections, fuses, and switches for any faults.
Troubleshooting lighting issues may require tracing the wiring diagram and using a continuity tester to identify any breaks in the circuit. Once all the electrical connections are tested and functioning properly, you can move on to securely attaching the seat and handlebars for comfortable riding.
Securely Attach the Seat and Handlebars for Comfortable Riding
Once the lighting and electrical systems are connected and tested, you can now securely attach the seat and handlebars for a comfortable riding experience. Here’s what you need to do:
-
Adjusting the seat height: Begin by loosening the seat clamp located under the seat using a wrench. Once the clamp is loose, adjust the seat height to your desired position. Make sure the seat is level and aligned with the bike frame. Tighten the clamp securely to hold the seat in place.
-
Attaching the seat: Place the seat onto the seat post, ensuring that the mounting brackets align with the holes on the bike frame. Insert the bolts provided through the brackets and frame holes, and tighten them using a suitable wrench. Double-check that the seat is firmly attached and does not move.
-
Attaching the handlebars: Position the handlebars onto the stem, aligning the stem with the front wheel and making sure it is centered. Insert the bolts through the stem and tighten them securely. Ensure that the handlebars are straight and aligned with the front wheel.
-
Adjusting the handlebar height: If needed, adjust the handlebar height by loosening the stem bolts and raising or lowering the stem. Once adjusted, tighten the bolts to secure the handlebars in place.
Now that the seat and handlebars are securely attached, it’s time to test ride and fine-tune the bike’s performance, ensuring an optimal riding experience.
Test Ride and Fine-Tune the Bike’s Performance
Now that the seat and handlebars are securely attached, it’s time to hop on the bike and test its performance. With great anticipation, I straddle the electric dirt bike and grip the handlebars firmly. The powerful 500w 24v motor hums to life as I engage the throttle. The bike effortlessly accelerates, propelling me forward with exhilarating speed. The enhanced performance of this electric dirt bike is immediately evident.
As I navigate through various terrains, I can feel the improvements made during the building process. The suspension system absorbs bumps and uneven surfaces, providing a smooth and comfortable ride. The tires, carefully chosen for their grip and durability, offer excellent traction on both dirt and pavement. The brakes are responsive and reliable, allowing me to confidently stop when needed.
During the test ride, I pay close attention to any areas that may require further adjustment. I note the bike’s handling, stability, and overall comfort. I evaluate the battery life and range to ensure it meets my expectations. By fine-tuning these aspects, I can optimize the bike’s performance and tailor it to my specific needs.
Now that I have experienced the test ride and witnessed the performance improvements, I can confidently say that this electric dirt bike is a remarkable machine. However, to enhance convenience and style, consider adding additional accessories such as a storage compartment or custom graphics. These additions will further enhance your riding experience and make your bike uniquely yours.
Consider Adding Additional Accessories for Convenience and Style
To enhance convenience and style, you could consider adding extra accessories like a storage compartment or custom graphics to personalize your ride. Adding practical accessories not only increases the functionality of your electric dirt bike but also enhances its aesthetics. Here are three accessories that you might find useful:
-
Storage Compartment: A storage compartment allows you to carry essential items like tools, spare parts, or snacks during your rides. It keeps everything organized and easily accessible, ensuring you’re prepared for any situation.
-
Custom Graphics: Personalize your electric dirt bike with custom graphics that reflect your unique style and personality. Whether you prefer a sleek and minimalist design or a bold and eye-catching one, custom graphics can transform your bike’s appearance and make it stand out from the crowd.
-
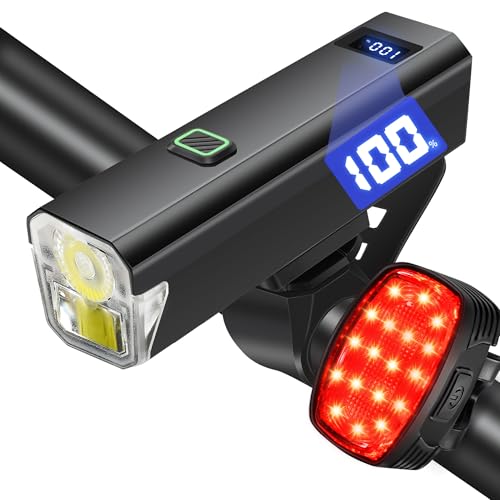
LED Lights: Enhance your visibility and safety by installing LED lights on your electric dirt bike. These energy-efficient lights provide bright illumination, making it easier for others to see you, especially during low-light conditions or night rides.
Perform Regular Maintenance and Inspections to Keep Your Bike in Top Shape
Make sure you regularly perform maintenance and inspections on your ride to keep it in top shape. Regular maintenance benefits your electric dirt bike in many ways. It helps prevent breakdowns, improves performance, and extends the lifespan of your bike. One of the most important aspects of maintenance is conducting regular inspections. Inspections allow you to identify any potential issues before they become major problems. By catching these issues early on, you can save yourself from costly repairs and ensure a safe riding experience.
To help you stay organized with your maintenance and inspections, here is a simple table outlining the key components to check and the recommended frequency:
| Component | Inspection Frequency | Maintenance Frequency |
|---|---|---|
| Battery | Monthly | Quarterly |
| Brakes | Monthly | Annually |
| Tires | Monthly | As needed |
| Chain | Monthly | Quarterly |
| Electricals | Monthly | Annually |
Enjoy Your Custom-Built 500w 24v Electric Dirt Bike!
You can now fully enjoy your personalized 500w 24v dirt bike that you’ve built to your specifications! With a range of customization options available, you can create a bike that perfectly suits your needs and preferences.
Here are the benefits of electric dirt bikes and why you should be excited about your custom-built machine:
-
Efficiency: Electric dirt bikes are highly efficient, converting a higher percentage of energy into forward motion compared to their gasoline counterparts.
-
Eco-friendly: Electric bikes produce zero emissions, making them a more environmentally friendly choice. You can ride with peace of mind, knowing that you are not contributing to air pollution.
-
Quiet operation: Electric motors operate silently, allowing for a more peaceful and enjoyable riding experience. Say goodbye to the loud noise associated with traditional dirt bikes.
-
Low maintenance: Electric bikes have fewer moving parts, reducing the need for regular maintenance and costly repairs. This means more time on the trail and less time in the garage.
-
Instant torque: Electric motors provide instant torque, delivering quick acceleration and a responsive ride. Experience the thrill of powerful acceleration as you conquer any terrain.
Now that your custom-built electric dirt bike is ready, get out there and enjoy the ride! Feel the thrill of the trail as you experience the benefits of electric power.
Frequently Asked Questions
How long does it typically take to build a 500w 24v electric dirt bike?
The average build time for a 500W 24V electric dirt bike is typically around 20-30 hours. Common challenges during the build process include sourcing the necessary parts, ensuring proper wiring and connections, and troubleshooting any technical issues that may arise.
Can I use any type of frame for my electric dirt bike or are there specific requirements?
When choosing a frame for an electric dirt bike, it is crucial to consider the different types available. Each frame offers unique benefits such as durability, weight distribution, and compatibility with electric components, ensuring optimal performance and safety.
What is the average lifespan of the motor and battery for a 500w 24v electric dirt bike?
The average lifespan of the motor and battery for a 500W 24V electric dirt bike can vary depending on usage and maintenance. With regular maintenance, such as proper charging and storage, they can last several years.
Are there any safety precautions I should take when connecting the wiring and ensuring proper electrical connections?
When connecting the wiring and ensuring proper electrical connections, it is crucial to follow safety precautions. This includes wearing insulated gloves, using a wire stripper to remove insulation, and securely fastening connections with electrical tape or heat shrink tubing.
What are some recommended additional accessories that can be added to the electric dirt bike for convenience and style?
When it comes to additional accessories for electric dirt bikes, I always prioritize safety. Consider adding a sturdy helmet, protective gear, and high visibility lights. As for customization, options like decals and colored grips can give your bike a stylish touch.
Conclusion
After hours of hard work and careful planning, I’ve successfully built my very own 500w 24v electric dirt bike.
The process was challenging but rewarding. First, I gathered the necessary tools and materials. Then, I selected a suitable frame and installed the motor and battery.
Ensuring proper electrical connections was crucial. I made sure everything was securely in place before moving on to the next step.
Performing test rides allowed me to fine-tune the bike’s performance to my liking. I made adjustments as needed, ensuring a smooth and enjoyable ride.
Regular maintenance and inspections are now necessary to keep my custom-built electric dirt bike in top shape. This ensures I can continue to enjoy the thrill of riding while balancing convenience and style.