Comparing the excitement of biking with the annoyance of a flat tire, this article will assist you in replacing a bicycle inner tube.
Armed with the necessary tools and a safe workspace, you’ll learn how to:
- Release the air
- Remove the wheel
- Use tire levers to swap out the tube
With a step-by-step approach, we’ll ensure you’re back on the road in no time, enjoying a smooth and uninterrupted ride.
Key Takeaways
- Proper tire seating and inflation is crucial for a smooth and safe ride.
- Checking for leaks and punctures is essential to maintain tire performance.
- Reattaching the wheel correctly ensures proper alignment and functionality.
- Testing the tire’s pressure, valve stem, and spinning it for wobbling helps ensure its condition.
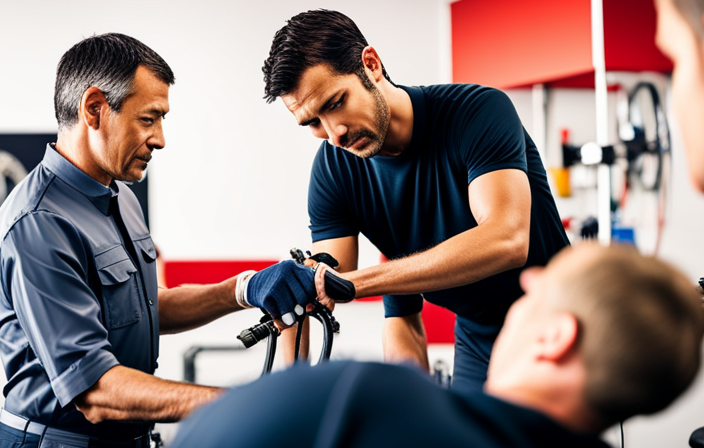
Gather the necessary tools and equipment
You’ll need a few tools and equipment to change a bicycle innertube. The first thing you’ll need is a set of tire levers. These handy tools help you remove the tire from the rim without damaging it.
You’ll also need a new innertube that matches the size of your tire. It’s important to check the size of your tire before purchasing a new innertube.
Additionally, you’ll need a bike pump to inflate the new tube once it’s installed.
Now that you have all the necessary tools and equipment, you can move on to the next section about finding a safe and flat area to work on. This is crucial to ensure stability and prevent accidents while changing the innertube.
Find a safe and flat area to work on
Before starting, make sure to locate a secure and level spot to work on. This will ensure stability and safety while changing the bicycle innertube. Here are some important steps to follow:
- Use a tire pressure gauge to check the current tire pressure. Finding the right tire pressure is crucial for optimal performance and preventing future flat tires.
- Look for any sharp objects or debris that may have caused the flat tire. Remove them carefully to prevent further damage.
- Place the bike upside down or use a bike stand to elevate it. This will make it easier to access the wheel and remove the innertube.
- Keep all the necessary tools and equipment within reach, such as tire levers, a new innertube, and a pump.
Now, let’s move on to the next step: releasing the air from the tire.
Release the air from the tire
To begin, deflate the tire by releasing the air. Start by locating the valve stem on the inner tube. Inspect the valve stem for any signs of damage or wear. If the valve stem is cracked or broken, it will need to be replaced.
Carefully press down on the valve stem to release the air. You can use a valve cap or your finger to press the valve stem down. Make sure to hold onto the valve stem firmly to prevent it from popping back up and releasing air.
Once all the air is released, inspect the tire for any punctures or damage. If the tire is severely damaged, it may need to be replaced.
Now, we can move on to the next step of removing the wheel from the bicycle.
Remove the wheel from the bicycle
First, deflate the tire by releasing the air from the valve stem. To remove the wheel from the bicycle, follow the proper technique to ensure a smooth process. Start by shifting the bicycle into a lower gear to relieve tension on the chain. Then, loosen the quick-release lever on the wheel axle or use a wrench to loosen the nuts holding the wheel in place. Carefully lift the bicycle frame off the wheel, making sure not to damage any components. Avoid common mistakes such as forgetting to release the brake or pulling on the derailleur. By removing the wheel properly, you can prevent damage to the bike and ensure a safe and efficient tire change. Now, let’s move on to the next step: using tire levers to remove the tire from the rim.
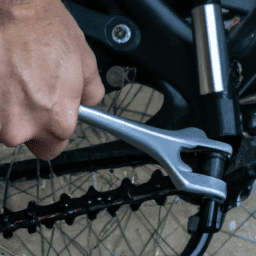
Use tire levers to remove the tire from the rim
Next, you can use tire levers to easily remove the tire from the rim. To begin, position one of the levers between the tire bead and the rim, making sure it is securely hooked onto a spoke. Then, using the lever as a fulcrum, pry the tire bead up and over the rim.
Repeat this process at a nearby point on the rim. It is important to use caution and avoid applying too much force, as this can damage the tire or rim. Additionally, it is crucial to avoid inserting the lever too far underneath the bead, as this can pinch and puncture the inner tube.
Lastly, gently work your way around the rim, using the levers to gradually separate the tire from the rim. This will allow for easy removal of the tire and transition into inspecting the inner tube for any damage or punctures.
Inspect the inner tube for any damage or punctures
Now, take a moment to carefully examine the inner tube for any signs of damage or punctures. Inspecting the inner tube is an essential step in the process of changing a bicycle innertube.
Here are five key things to look for:
- Check for any visible cuts, tears, or holes on the surface of the inner tube.
- Feel for any bulges or uneven areas, which could indicate a weak spot.
- Look for patches or previous repairs that may need to be addressed.
- Make sure the valve is intact and not bent or damaged.
- Inflate the inner tube slightly to check for any air leaks.
By thoroughly inspecting the inner tube, you can identify any potential issues before installing the new one.
Once the inspection is complete, it’s time to move on to the next step: inflating the new inner tube slightly to give it shape.
Inflate the new inner tube slightly to give it shape
To give the new inner tube shape, you can start by gently inflating it. Make sure to attach the pump securely to the valve stem before starting.
Begin by pumping air into the tube slowly, using short bursts to avoid over-inflating it. Keep a close eye on the tube as it inflates, checking for any bulges or unevenness that could indicate a problem. If you notice any issues, release the air and inspect the tube for damage or twists.
Troubleshooting common issues during inflation includes checking for proper valve alignment and ensuring a tight seal between the pump and valve stem.
Once the tube is inflated to a shape that closely matches the tire, you can move on to the next step of inserting it into the tire.
Insert the new inner tube into the tire
After inflating it slightly, you can insert the new inner tube into the tire. Start by locating the valve stem on the inner tube and align it with the hole on the rim. Carefully insert the valve stem into the hole, making sure it goes through smoothly.
Now, gradually work your way around the tire, tucking the inner tube into the tire. Be cautious not to pinch or twist the inner tube during this process. Once the inner tube is fully inserted, move on to securing the tire. Begin at the valve stem and push the tire bead onto the rim, working your way around in both directions. Ensure that the tire sits evenly on the rim and is not twisted.
Finally, you can carefully put the tire back onto the rim to complete the installation process.
Carefully put the tire back onto the rim
Gently place the tire back onto the rim, ensuring it is aligned properly.
When reassembling the tire, it is important to use proper tire reinstallation techniques to avoid any damage.
Start by pushing one side of the tire onto the rim, making sure that the inner tube is not pinched or twisted.
Move your hands around the rim, gradually working the tire back into place.
Be cautious not to use excessive force, as this can cause the inner tube to puncture or the tire to become misaligned.
If you encounter any resistance, stop and assess the situation before proceeding.
Once the tire is back on the rim, give it a thorough inspection to ensure it is seated evenly and properly.
This will lay the foundation for using tire levers to ensure the tire is properly seated without causing any damage.
Use tire levers to ensure the tire is properly seated
Now you can use tire levers to make sure the tire is securely in place.
Tire maintenance is crucial for a smooth and safe ride, and troubleshooting tire problems is an essential skill for any cyclist.
When putting the tire back onto the rim, it is important to ensure that it is properly seated. Start by inserting one tire lever between the tire and the rim, and then use another lever a few inches away.
Gently pry the tire upwards, working your way around the rim. Make sure that the tire bead is evenly seated on both sides of the rim. This will prevent any potential issues, such as the tire coming off while riding.
Once the tire is securely seated, you can move on to the next step: inflating the tire to the recommended pressure.
Inflate the tire to the recommended pressure
To ensure a smooth and safe ride, you should inflate the tire to the recommended pressure. Proper tire inflation techniques are crucial for maintaining optimal performance and longevity of your bicycle.
Under-inflated tires can result in increased rolling resistance, making it harder to pedal and decreasing overall efficiency. On the other hand, over-inflated tires can lead to a harsh ride, reduced traction, and an increased risk of punctures.
Therefore, it is important to follow the manufacturer’s guidelines for the recommended tire pressure, which can usually be found on the sidewall of the tire. Using a bicycle pump with a pressure gauge, slowly inflate the tire to the specified pressure. Once inflated, check for any leaks or abnormalities, ensuring that the tire is properly seated on the rim and ready for your next ride.
Check for any leaks or abnormalities
Make sure you inspect the tire for any leaks or abnormalities before your ride. Here are four important steps to follow when checking for punctures and using a patch kit:
-
Inflate the tire slightly: It helps to locate any punctures by causing the air to escape slowly, making it easier to spot bubbles or hissing sounds.
-
Submerge the tire in water: Immerse the inflated tire in a basin or bucket of water and rotate it slowly. Look for bubbles rising from the surface, indicating a leak.
-
Check the tire surface: Examine the tire thoroughly for any sharp objects, such as glass or thorns, that may have caused the puncture.
-
Apply a patch: If you find a puncture, use a patch kit to repair it. Follow the instructions provided with the kit to ensure proper application.
After checking for leaks and abnormalities, it’s time to reattach the wheel to the bicycle and continue your ride seamlessly.
Reattach the wheel to the bicycle
Once you have inspected the tire for leaks or abnormalities, it’s time to reattach the wheel to your bike. Start by lining up the axle with the dropouts on the frame, ensuring that the brake pads are properly aligned.
Slide the axle into the dropouts and tighten the nuts or quick release lever to secure the bicycle. Make sure the wheel is centered and straight before tightening the nuts or closing the quick release lever completely. Use a wrench or the appropriate tool to tighten the nuts securely.
Once the wheel is securely attached, give it a spin to make sure it rotates freely without any wobbling or rubbing against the brake pads. This will ensure that the wheel is properly aligned and functioning correctly.
Test the tire to ensure it is secure and functioning properly
Check if the tire is securely attached and functioning properly by giving it a spin.
First, test the tire pressure by pressing your thumb against the tire. It should feel firm but with a slight give. If it feels too soft, use a tire pump to add air until it reaches the recommended pressure.
Next, check the valve stem condition. Ensure it is straight, not bent or damaged, and securely attached to the inner tube. If it appears damaged, replace the valve stem before proceeding.
Once you have confirmed the tire pressure and valve stem condition, give the tire a spin to check for any wobbling or unevenness. If everything looks and feels secure, you are ready to enjoy your ride with a new inner tube!
Enjoy your ride with a new inner tube!
Now that the tire is secure and functioning properly, it’s time to enjoy your ride with a new inner tube!
Changing bike tires can be a bit of a hassle, but it’s a necessary skill to have as a cyclist. Not only can it save you money on repairs, but it also ensures that you’re always ready to hit the road.
One of the most common inner tube problems is a flat tire. Whether it’s due to a puncture, a pinch flat, or simply wear and tear, knowing how to change an inner tube will come in handy.
By following the steps outlined in this guide, you’ll be able to confidently tackle any inner tube issue that comes your way.
So, hop on your bike and enjoy a smooth and worry-free ride!
Frequently Asked Questions
How do I know if my inner tube is damaged or punctured?
To determine if my inner tube is damaged or punctured, I inspect it for signs of wear and tear. I also check for any visible holes or leaks by inflating the tube and listening for escaping air. If necessary, I can patch the punctured inner tube using appropriate materials and techniques.
What tools do I need to remove the tire from the rim?
To remove the tire from the rim and install a new inner tube, you will need a set of tire levers, a pump or air compressor, and a valve wrench. These tools will make the process easier and ensure a successful repair.
How much air should I inflate the new inner tube before inserting it into the tire?
I usually inflate the new inner tube just enough to give it shape, but not fully. This makes it easier to install without pinching or damaging it. After properly installing the tube, I then fully inflate it to the recommended pressure. To learn how to patch a bicycle inner tube, refer to the appropriate guide.
What is the recommended tire pressure?
The recommended tire pressure for a bicycle depends on factors such as weight and tire size, but a common range is 80-130 psi. Proper tire inflation provides benefits like improved traction, reduced rolling resistance, and increased stability.
How do I test the tire to ensure it is secure and functioning properly?
To test the tire for security and functionality, use a tire pressure gauge to check the pressure. Look for any visible damage or punctures on the inner tube. If a puncture is found, refer to the instructions on how to patch it.
Conclusion
After successfully changing the bicycle innertube, I felt like I had unlocked a hidden power within myself.
As I tightened the wheel back onto the bicycle, I realized that life is all about navigating the bumps and obstacles that come our way.
Just like changing an innertube, we must gather the necessary tools and face challenges head-on.
And when we overcome those challenges, we can ride through life with a newfound confidence and resilience.
So, embrace the journey, conquer your fears, and enjoy the ride!