Facing the challenge of changing a tire might seem daunting to numerous cyclists, however, there’s no need to worry! Equipped with the right tools and a bit of knowledge, swapping out a bicycle tire can become an easy endeavor.
In this article, I will guide you through the steps to successfully change a bicycle tire on your own.
First things first, gather your tools. You will need a tire lever, a new inner tube, a pump, and a wrench to remove the wheel. Once you have these items, it’s time to get started.
Don’t let a flat tire ruin your ride, let’s dive in and learn how to change a bicycle tire.
Key Takeaways
- There are two main types of bike tires: clincher and tubeless.
- Proper tools, such as tire levers, are needed to remove and replace a tire.
- It is important to properly deflate the tire and decide whether to patch or replace the inner tube.
- When choosing a new tire, consider inflation, tread based on riding type, and whether to go tubeless or tubed.

Under Armour Squeeze Water Bottles, 32 oz Water Bottles, Sideline Sports Water Bottle with Quick-Shot Lid, Quick & Easy Hydration, Gym Water Bottles, Squeeze Bottle, 1 32oz Bottle
- Easy Hydration: Quick-shot lid and one-way valve
- On-the-Go Use: One-hand operation for active hydration
- Measurement Markings: Ounces and milliliters for tracking
As an affiliate, we earn on qualifying purchases.
Gather Your Tools
Gather your tools.
You’ll want to grab your tools so you can get back to pedaling in no time! First, let’s talk about the types of bicycle tires.
There are two main types of tires: clincher and tubeless. Clincher tires are the most common and have an inner tube that holds the air. Tubeless tires, on the other hand, don’t have an inner tube and instead use sealant to keep the air in. It’s important to know which type of tire you have before starting.
Next, you’ll need tire levers to remove the tire. There are different types of tire levers, but the most common ones are plastic or metal. Plastic levers are usually cheaper and easier to use, but they may not be as durable as metal ones. Metal levers are more durable but can be harder to use.
Regardless of the type of tire levers you choose, make sure you have two of them. It’s important to have two so you can use them to pry the tire off evenly. With your tools in hand, it’s time to move on to removing the flat tire.
Remove the Flat Tire
First, I need to release the brake to allow the tire to move freely.
Next, I’ll use tire levers to remove the tire from the rim.
I’ll gently pry the tire off the rim, being careful not to damage the inner tube.
Once the tire is off, I’ll remove the inner tube from inside the tire.
Release the Brake
Now that the wheel is off, it’s time to release the brake. Before doing so, it’s important to note that if you have disc brakes, you do not need to release the brake. Simply remove the wheel and skip ahead to the next subtopic. For those with rim brakes, follow these steps to release the brake:
| Tools needed | Parts Involved |
|---|---|
| Allen wrench | Brake caliper |
| Pliers | Brake cable |
| Open-end wrench | Brake pads |
| Cable cutters | Brake lever |
First, locate the brake caliper and use the Allen wrench to loosen the bolt that holds the brake cable in place. Once the cable is loose, use the pliers to unhook the cable from the brake arm. Be careful not to lose the small metal piece that holds the cable in place. With the cable released, the brake pads should now be far enough apart to allow the tire to pass through. If not, use the open-end wrench to adjust the brake pads. This is also a good time to check the brake pads for wear and replace them if necessary.
Now that the brake is released and the wheel is removed, it’s time to use tire levers to remove the tire.
Use Tire Levers to Remove Tire
To expertly remove the tire from the rim, slide a tire lever between the tire and rim. Then, use your other hand to hook the lever onto a spoke. Make sure that the lever is placed at a 90-degree angle to the rim, and not parallel to it. This will help to loosen the tire from the rim and make it easier to remove.
Proper technique is crucial when using tire levers, as common mistakes can cause damage to the tire or rim. One mistake to avoid is using too much force, which can result in a bent or damaged rim. Another mistake is not using enough force, which can make it difficult to remove the tire.
Once the first lever is hooked onto a spoke, use a second lever to loosen the tire further around the rim. Then, slide both levers along the rim to completely remove the tire.
With the tire removed, the next step is to remove the inner tube.
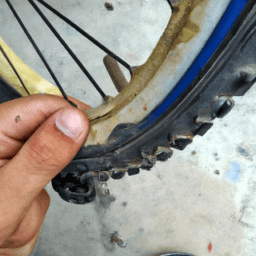
Remove Inner Tube
Ready to get your hands dirty? It’s time to take out the inner tube! Removing the inner tube is a crucial step in changing a bicycle tire. It’s important to be careful when handling the inner tube to avoid damaging it.
Here are some things to keep in mind:
-
Proper inflation: Before removing the inner tube, it’s important to deflate it completely. This will make it easier to remove and reduce the risk of puncturing it in the process.
-
Patching options: If the inner tube is damaged, you’ll need to decide whether to patch it or replace it entirely. Patching is often a cheaper option, but it’s important to make sure the patch is applied correctly to avoid any future issues.
-
Handle with care: When removing the inner tube, be careful not to twist or stretch it. This can cause unnecessary damage and make it more difficult to reinstall.
Now that the inner tube is out, it’s time to move on to the next step: installing the new tire.
Install the New Tire
First, you’ll want to place one side of the new tire onto the rim, making sure the tire is centered and the valve stem is aligned with the hole in the rim. Once the first side of the tire is in place, use your hands to tuck the inner tube into the tire, making sure not to twist or pinch it. After that, start to work the second side of the tire onto the rim, starting at the opposite side of the valve stem and working around the rim in both directions, making sure the tire is centered as you go. It may help to use tire levers to get the last bit of tire onto the rim, but be careful not to pinch the inner tube while doing so.
When choosing a new tire, consider factors such as proper inflation, choosing the right tread, and whether to go with tubeless or tubed tires. Proper inflation is key to getting the most out of your tires. Check the recommended pressure for your specific tire, as it may vary depending on the model and size. Choosing the right tread will depend on the type of riding you plan to do. If you’ll be riding mostly on paved roads, a smoother tread will suffice. If you plan to hit the trails, a more aggressive tread will be necessary. Finally, consider whether to go with tubeless or tubed tires. Tubeless tires eliminate the need for an inner tube, reducing the risk of punctures. However, they may be more difficult to install and require a special rim. Tubed tires, on the other hand, are the more traditional option and are generally easier to install.
Now that the new tire is in place, it’s time to reattach the wheel.
Reattach the Wheel
Once the wheel is properly aligned, you can secure it in place with the axle nuts or quick release. To achieve proper alignment, make sure that the wheel is centered between the chainstays or fork blades. You can also check for alignment by spinning the wheel and observing the distance between the rim and the brake pads. If the wheel wobbles or rubs against the brake pads, you’ll need to adjust the alignment until it spins smoothly and evenly.
Once you’re satisfied with the alignment, you can tighten the axle nuts or quick release mechanism to keep the wheel in place. When reattaching the bicycle wheel, it’s important to use the proper tightening technique. Over-tightening can damage the bearings, while under-tightening can lead to a loose wheel that can cause accidents. Use a torque wrench to tighten the axle nuts or quick release mechanism to the manufacturer’s recommended torque specification. This will ensure that the wheel is properly secured without damaging the bearings or other components.
Finally, to prevent future flat tires, make sure that the tire is inflated to the proper pressure and that the rim tape is in good condition before reinstalling the wheel.
After reattaching the wheel, it’s time to test and adjust the brakes and gears to ensure that everything is working smoothly.
Test and Adjust
Now it’s time to check if the brakes and gears are functioning properly and adjust them if necessary. Before testing them, make sure that the tire is properly inflated according to the manufacturer’s recommended PSI. Proper inflation is important not only for the function of the brakes and gears, but also for extending the life of the tire. Overinflated and underinflated tires can lead to premature wear and failure of the tire. It is recommended to check the tire pressure at least once a month and before every ride.
To test the brakes, spin the wheel and apply the brakes. The wheel should stop smoothly and without any wobbling. If the wheel wobbles or stops unevenly, the brake pads may need to be adjusted. To adjust the brake pads, locate the brake caliper and loosen the bolt that holds the brake pad in place. Align the brake pad with the rim and tighten the bolt. Repeat the process for the other brake pad.
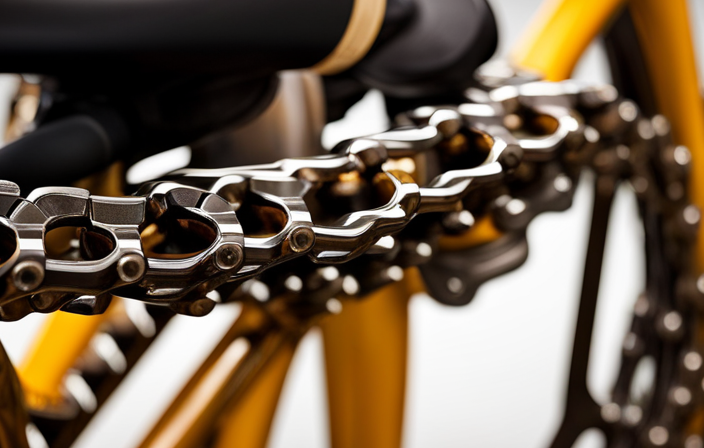
To test the gears, shift through all the gears while pedaling the bike. The chain should move smoothly between the gears without any skipping or jumping. If the chain skips or jumps, the gears may need to be adjusted. To adjust the gears, locate the barrel adjuster on the derailleur and turn it until the chain runs smoothly through all the gears. Proper tire maintenance, brake and gear adjustments are essential for a safe and enjoyable ride.
Frequently Asked Questions
Should I always replace my inner tube when changing a bicycle tire?
I’ve found that replacing the inner tube every time I change a bike tire isn’t necessary. Pros include cost savings and less waste, while cons include the risk of a patch job failing. It’s important to assess the damage and make an informed decision about patching vs. replacing.
Can I use any size tire on my bicycle wheel?
When selecting a tire for my bicycle wheel, it’s important to consider compatibility issues. Using the wrong size tire can cause handling problems and affect performance. Pros and cons of different tire sizes should be researched before making a decision.
How often should I check my tire pressure?
I check my tire pressure at least once a week, as it’s crucial for safe and efficient cycling. The importance of inflation can’t be overstated, so investing in one of the best tire pressure gauges is a smart move.
What should I do if my tire keeps going flat after changing it?
After changing my tire, if it keeps going flat, I’ll check for tire repair or replacement. Common causes of repeated flat tires include improper installation, punctures, or worn out tires. It’s crucial to address these issues promptly for a safe ride.
Is it necessary to use a tire lever when removing or installing a tire?
Using tire levers for changing a tire can make it easier, especially for tight tires. However, bare hands can also work. Pros and cons depend on the situation. Tubeless tires can often be installed without a lever.
Conclusion
Phew, changing a bicycle tire can be daunting, but with the right tools and a little know-how, it can be done in no time! Remember to gather all the necessary tools before starting, such as a tire lever, new tire, and a pump.
First, remove the flat tire by releasing the brakes and loosening the nuts holding the wheel in place. Then, use the tire lever to pry the tire off the rim and remove the inner tube.
Install the new tire by placing one side of the tire onto the rim and then inserting the new inner tube. Use the tire lever to carefully work the other side of the tire onto the rim, taking care not to pinch the inner tube.
Once the tire is securely in place, reattach the wheel and adjust the brakes. Finally, give the bike a test ride and adjust the tire pressure as needed.
Remember, practice makes perfect, so don’t be discouraged if it takes a few tries to get the hang of it. As the saying goes, "Rome wasn’t built in a day,"and neither was your biking expertise!