Fed up with dealing with old pedals on your bike? Want to enhance your riding experience by getting new pedals? Swapping out bicycle pedals is an easy job that anyone can accomplish with the proper tools and a little know-how.
In this article, we will guide you through the process of changing your bicycle pedals step by step.
First, you need to understand the different types of pedals available in the market, such as platform pedals, clipless pedals, and hybrid pedals. Each type of pedal has its own advantages and disadvantages, so you need to choose the one that suits your needs and preferences.
Once you have decided on the type of pedal you want to install, you need to gather the necessary tools, including a pedal wrench, a hex key, and grease. With these tools in hand, you are ready to start the process of changing your bicycle pedals.
Key Takeaways
- Understanding the different types of pedals (platform, clipless, hybrid) is important for selecting the right pedal for your needs.
- Proper technique should be used when changing pedals to avoid damage, including applying lubricant before installation, aligning the pedals correctly, and avoiding over-tightening.
- Regular maintenance of pedals is crucial for bike performance and preventing issues such as wobbling or difficulty clipping in/out. This involves cleaning threads and applying grease.
- If troubleshooting is needed, using penetrating lubricant or seeking professional help can be useful. Changing pedals can also upgrade your cycling experience.
Understand the Different Types of Pedals
Before you start changing your bicycle pedals, it’s important to understand the different types of pedals that are available on the market.
The two main types of pedals are clipless pedals and platform pedals. Clipless pedals have a cleat system that attaches to the bottom of your cycling shoes, providing a secure connection between your foot and the pedal. Platform pedals, on the other hand, have a flat surface that your foot rests on and can be used with any type of shoe.
There are pros and cons to both types of pedals. Clipless pedals provide a more efficient transfer of power between your foot and the pedal, resulting in better performance and less fatigue. However, they do require special cycling shoes and can take some getting used to.
Platform pedals are great for casual riders or those who prefer to wear regular shoes, but they don’t offer the same level of power transfer as clipless pedals. When choosing the right pedal for your riding style, consider your level of experience, type of riding you’ll be doing, and whether you’re willing to invest in special cycling shoes for clipless pedals.
With that in mind, let’s move on to gathering the necessary tools for changing your pedals.
Gather the Necessary Tools
To begin removing your bicycle pedals, you’ll need a few key tools. Firstly, you’ll need a set of wrenches to loosen the pedals from the crank arms.
Secondly, you should have some grease on hand to apply to the threads of the new pedals before installation.
Finally, it’s recommended to use a pedal removal tool to aid in the process of loosening the pedals.
With these tools in hand, you’ll be ready to tackle the task of changing your bike pedals with ease.
Wrenches
Now, grab your trusty wrench and get ready to loosen those pedals like a pro.
When it comes to removing bicycle pedals, the most important tool you’ll need is a wrench. The size of the wrench you need will depend on the type of pedals you have, so make sure to check before you start.
When using your wrench, it’s important to use the proper adjusting technique to avoid damaging the pedal or the crank arm. The most common method is to turn the wrench counterclockwise to loosen the pedals. If your pedals are particularly stubborn, you may need to use a little extra force, but be careful not to overdo it.
Once the pedals are loose, you can remove them completely and start with the next step: adding grease to the threads.
Grease
As you apply the grease to the threads, you’ll feel the smooth and slippery texture coating the metal, ensuring a tight and secure fit for your pedals.
Applying lubricant to your pedals before installation is essential to prevent future difficulties in removing them. But before you do, it’s crucial to clean the threads thoroughly. Using cleaning techniques such as a wire brush or rag dipped in solvent, clean the areas where you’ll apply the lubricant, removing any dirt, rust, or debris that could hinder a tight fit.
To apply the lubricant, follow these steps:
- Apply a small amount of grease to the threads of the pedals.
- Spread the lubricant evenly across all the threads.
- Wipe off any excess grease using a clean rag.
Now that you have applied the lubricant, it’s time to remove the pedals. But to do that, you’ll need a pedal removal tool.
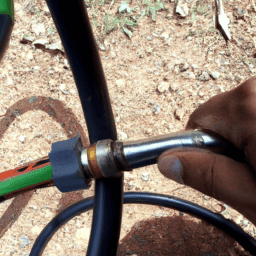
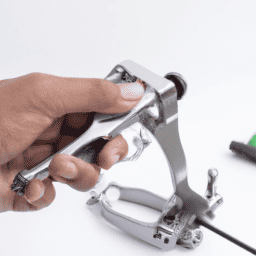
Pedal Removal Tool
You’ll find that the pedal removal tool is a handy little gadget that coincidentally fits perfectly onto the pedal’s spindle. This tool is essential for removing pedals from the crank arm without damaging them, as it provides a secure grip and prevents slippage.
To use the pedal removal tool, first, locate the flat surface on the pedal spindle and insert the tool onto it. Then, use a wrench to turn the tool counterclockwise until the pedal comes loose. Remember to remove both pedals, as they may have different threading.
Pedal maintenance is crucial to ensure that your bike performs at its best. Keeping pedals clean is a simple but effective way to prolong their lifespan and prevent damage. After every ride, wipe down the pedals with a damp cloth to remove dirt and grime. You can also use a soft-bristled brush or toothbrush to clean the crevices between the pedals’ body and spindle.
By doing so, you can prevent dirt and debris from accumulating and causing damage to your pedals. Now that you know how to maintain your pedals, let’s move on to the next step: removing the old pedals.
Remove the Old Pedals
Now that you’ve gathered the necessary tools, it’s time to remove the old pedals from your bicycle.
Removing the left pedal requires turning it counterclockwise, while the right pedal requires turning it clockwise.
To ensure you don’t accidentally damage your bike, make sure to use the correct wrench size and apply enough force to loosen the pedals.
Left Pedal Removal
To begin removing the left pedal, first locate the pedal wrench and position it onto the pedal axle. Make sure that the wrench is firmly attached to the pedal before you start turning it counterclockwise to loosen the pedal. You may need to use some force to break the pedal loose, especially if it has been on the bike for a long time or if it has been subjected to harsh weather conditions. Once you have successfully loosened the pedal, you can remove it from the bike.
Before you proceed to the right pedal removal, it’s important to note that pedal maintenance is crucial to avoid common issues such as pedal wobbling, uneven rotation, and difficulty in clipping in and out. Always make sure that your pedals are clean and well-lubricated to prevent rust and corrosion. With that said, you can now move on to the right pedal removal by following the same steps you used for the left pedal.
Right Pedal Removal
When removing the right pedal, position the pedal wrench onto the axle and firmly attach it before turning counterclockwise to loosen the pedal, just as you did with the left pedal.
Once the pedal is loosened, simply unscrew it by hand until it can be removed from the crank arm.
Pedal maintenance is an important aspect of bicycle upkeep, and it’s important to troubleshoot any issues you may encounter before attempting to remove the pedal.
To troubleshoot a stubborn pedal, try using a penetrating lubricant such as WD-40 or PB Blaster to loosen any rust or corrosion that may be causing the pedal to stick.
Additionally, make sure that you’re using the correct size wrench and applying enough force to the pedal to loosen it.
If all else fails, take your bike to a professional for assistance with removing the pedal.
Now that both pedals have been removed, it’s time to install the new pedals and get back to riding.
Install the New Pedals
Once you’ve removed the old pedals, it’s time to install the new ones. First, make sure that you have the right pedal for the right side and the left pedal for the left side. Proper alignment is essential to ensure that the pedals function correctly.
Start by threading the new pedal into the crank arm by turning it counter-clockwise. Use your fingers to tighten it as much as you can before using a wrench to tighten it the rest of the way. Be careful not to over-tighten the pedal, as this can cause damage to the crank arm.
When installing the left pedal, remember that it is threaded in the opposite direction. Turn it clockwise to thread it into the crank arm. Again, use your fingers to tighten it as much as possible before using a wrench to finish tightening it. Avoid cross threading by making sure that the threads on the pedal and the crank arm are lined up correctly.
Once both pedals are securely in place, give them a final check to make sure they are tight enough. This is an excellent time to do some maintenance on your pedals to prevent damage. Clean the threads and apply a small amount of grease to keep them functioning smoothly.
Now that you’ve installed your new pedals, it’s time to test them out and enjoy your ride!
Test Your New Pedals and Enjoy Your Ride!
As you take your first pedal stroke on your newly installed foot companions, you’ll feel a surge of joy and freedom wash over you, as if a weight has been lifted off your shoulders.
But don’t let that feeling be the end of your bike maintenance journey. Regular bike maintenance is crucial to ensure your pedals, and other bike components, continue to perform at their best. Regular maintenance can prolong the life of your pedals, prevent accidents, and improve your overall riding experience.
Choosing the right pedals for your riding style is also crucial to ensure the best possible experience. Clipless pedals are perfect for road cyclists who want to increase their efficiency and power transfer. Flat pedals are ideal for mountain bikers who need more freedom of movement and a larger platform to support their feet.
Whatever your preference, make sure to choose pedals that suit your needs, and don’t hesitate to seek advice from a professional. With the right pedals and maintenance, you’ll enjoy a smoother, more comfortable, and safer ride.
Frequently Asked Questions
Do I need to use any special lubricant when installing new pedals?
When installing new pedals, it’s important to use a special lubricant on the threads to prevent seizing and ensure proper torque. Neglecting pedal maintenance or over-tightening are common pedal installation mistakes to avoid.
How often should I replace my bicycle pedals?
Your bicycle pedals are like a car’s tires – they wear down over time and need to be replaced. Pedal maintenance is crucial to prevent accidents. Signs of worn pedals include looseness, clicking noises, and difficulty pedaling. Replace them every 2-3 years or when they show signs of wear.
Can I use any type of pedal on my bike or do I need to purchase a specific type?
When choosing pedals, ensure compatibility with your specific bike model. Different types of bikes may require different types of pedals. It’s important to research and select the appropriate pedal for optimal performance and safety.
Is it necessary to use a torque wrench when tightening the pedals?
Using a torque wrench to tighten pedals provides precision and reduces the likelihood of stripping threads. However, it’s not necessary and alternatives such as using a pedal wrench and applying enough force can be effective. Pros and cons should be considered.
What should I do if the pedals are difficult to remove?
If pedals are difficult to remove, use a pedal wrench for easier removal. If they’re still stubborn, apply heat to the crank arm or pedal spindle. This will expand the metal, making it easier to unscrew.
Conclusion
Congratulations! You’ve successfully changed your bicycle pedals. By following the steps outlined in this article, you’ve gained a new skill that’ll come in handy in the future.
Did you know that an average cyclist pedals around 5,000 to 8,000 revolutions per hour? That’s a lot of work for your pedals, and it’s essential to maintain them properly.
Remember, understanding the different types of pedals and gathering the necessary tools are crucial steps in changing your bicycle pedals. Removing the old pedals and installing the new ones require careful attention to detail and precise techniques.
Make sure to test your new pedals before hitting the road to ensure they’re securely fastened and functioning correctly.
Now that you’ve successfully changed your pedals, you can enjoy a smoother, more efficient ride. Proper maintenance of your bicycle pedals will increase their lifespan, save you money, and prevent potential accidents.
Keep in mind that changing pedals is just one of many essential bike maintenance tasks you should do regularly. By taking care of your bicycle, you’ll have a safer and more enjoyable cycling experience.