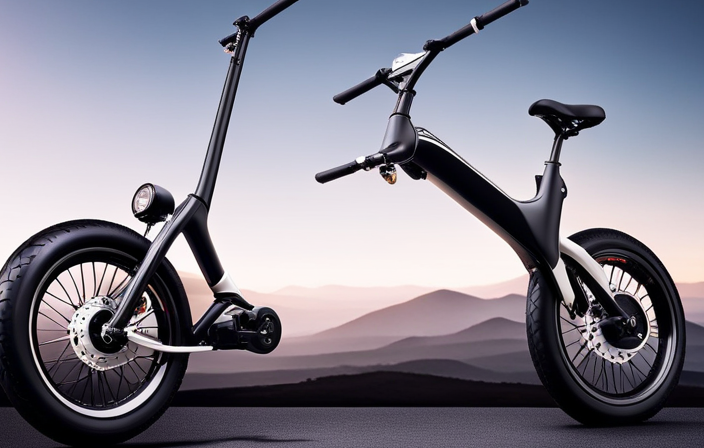

Are you tired of being stuck with a flat tire on your electric bike, feeling deflated and unable to ride? Fear not, for we have the solution that will have you back on the road in no time!
In this article, we will guide you through the step-by-step process of changing your electric bike tire. With the right tools and a little know-how, you’ll be able to tackle this task with ease and confidence.
So let’s roll up our sleeves and get ready to pump up that ride!
Key Takeaways
- Gather the necessary tools and materials: tire levers, pump, new tire, wrench, and gloves.
- Choose the right tire based on the terrain, weather conditions, and type of riding.
- Remove the wheel and deflate the tire by releasing the brakes, loosening brake lever and axle nuts or quick-release skewer, lifting the wheel off the frame, and using tire levers to remove the tire from the rim.
- Inspect and replace the inner tube if necessary, checking for tire tread wear, and inflate the new tube slightly before inserting the valve stem into the rim hole.

Varstrom 48V 1000W 1500W Rear & Front Hub Motor Kit - Ebike Conversion Kit for 26"/27.5"/28"/29"/700C Front Rear Wheel,Electric Bike Conversion Set with Display & Ebike Battery (Optional)
【POWERFUL 48V 1000W Front Hub Motor Kit】: 48V 1000W front wheel motor kit is designed for a variety...
As an affiliate, we earn on qualifying purchases.
Gather the necessary tools and materials
First, you’ll need to gather the necessary tools and materials. To change the electric bike tire, you’ll require a few tools and equipment. Grab a pair of tire levers, a pump, and a new tire that matches the size of your electric bike. Additionally, have a wrench handy, as you might need it to remove the wheel.
Before diving into the task, it’s important to observe some safety precautions. Make sure you wear gloves to protect your hands from any possible injury. It’s also advisable to have eye protection on to shield your eyes from any debris.
Once you have gathered all the tools and taken the necessary safety measures, you can move on to the next step, which is finding a safe and flat surface to work on. This will ensure stability and ease during the tire changing process.

Schwinn High Timber ALX Mountain Bike for Adult Men Women, 27.5-Inch Wheels, 21-Speeds, Front Suspension, Aluminum Frame, Mechanical Disc Brakes, Yellow
Lightweight 17 inch aluminum mountain frame is the perfect bike for rides around your neighborhood or trails with...
As an affiliate, we earn on qualifying purchases.
Find a safe and flat surface to work on
To ensure safety, it is important to locate a level area to perform the task of changing your electric bike tire. Working on uneven surfaces can make the process more difficult and potentially dangerous. Therefore, it is crucial to find a flat surface where you can comfortably work without any obstructions or hazards.
Before proceeding with the tire change, it is important to choose the right tire for your electric bike. Factors such as the terrain you will be riding on, the weather conditions, and the type of riding you will be doing should be taken into consideration. By selecting the appropriate tire, you can ensure optimal performance and safety during your rides.
Now that you have found a safe and flat surface and chosen the right tire, you can proceed to the next step of releasing the brakes and removing the wheel.

EVAPLUS 54.6V 1.5A Smart Charger for 48V Lithium Batteries - UL Certified, Fast Charging with Multi-Safety Protection, Compatible with Electric Bikes/Scooters, DC 5.5 * 2.5/2.1mm Connector
Universal Fast Charging Performance: Designed specifically for 48V lithium-ion batteries (13S configuration), this 54.6V 1.5A smart charger delivers...
As an affiliate, we earn on qualifying purchases.
Release the brakes and remove the wheel
Before proceeding, make sure to release the brakes and remove the wheel from your electric bike. This step is crucial to ensure a smooth and hassle-free tire change.
To release the brakes, locate the brake lever on the handlebars and squeeze it towards the handle. This will loosen the brake pads from the wheel.
Next, use a wrench or an Allen key to loosen the axle nuts or quick-release skewer that secures the wheel to the bike frame. Once the nuts are loosened, gently lift the wheel off the frame and set it aside.
Now that you have successfully released the brakes and removed the wheel, it’s time to move on to the next step: deflating the tire and removing it from the rim.

PEXMOR Electric Bike Conversion Kit, 20"/24" Front Wheel Ebike Conversion Kit, 36V 750W Electric Bike Hub Motor Kit w/3 Mode Controller/PAS/LCD Display/Twist Throttle Electric Bicycle Ebike Kit
【POWERFUL BRUSHLESS MOTOR】-The 36V 750W ebike front wheel conversion motor kit features a powerful brushless hub motor.It runs...
As an affiliate, we earn on qualifying purchases.
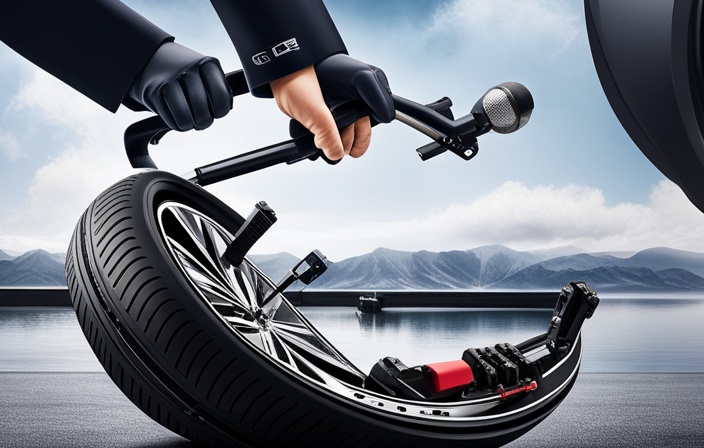
Deflate the tire and remove it from the rim
Once the wheel is removed, you can deflate the tire and easily remove it from the rim.
To begin, locate the valve stem on the inner tube and press down on the valve core to release the air. You can use a valve tool or simply press down with your finger.
Once the tire is fully deflated, use a tire lever to pry one side of the tire away from the rim. Work your way around the entire circumference, gradually loosening the tire from the rim.
Once the tire is loose, carefully pull it off the rim, making sure not to damage the inner tube.
Now that you have successfully removed the tire, you can proceed to inspect the inner tube and replace it if necessary, ensuring a smooth and safe ride.
Inspect the inner tube and replace if necessary
Make sure you carefully inspect the inner tube and if it is damaged, replace it to ensure a smooth and safe ride.
Start by removing the damaged tube from the tire.
Inflate the new inner tube slightly, just enough to give it shape.
Next, insert the valve stem into the hole in the rim and tuck the tube inside the tire, making sure it is evenly distributed.
Before fully inflating the tube, check the tire tread wear.
Look for any signs of excessive wear, such as bald spots or cracks.
If the tread is worn down, it’s a good idea to replace the tire as well.
Once you have inspected the inner tube and checked the tire tread, you can proceed to install the new tire onto the rim, ensuring a secure fit.
Install the new tire onto the rim
To install the new tire onto the rim, you’ll need to ensure a secure fit. Start by aligning the tire properly with the rim. Place one side of the tire onto the rim, making sure that it sits evenly all the way around. Then, use your hands to push the other side of the tire onto the rim, working your way around until it is fully seated.
To help you visualize the process, refer to the table below:
| Step | Action |
|---|---|
| 1 | Align the tire with the rim |
| 2 | Place one side of the tire onto the rim |
| 3 | Push the other side of the tire onto the rim, working your way around |
| 4 | Ensure the tire is fully seated |
Once the tire is securely installed, you can move on to the next step of inflating the tire to the recommended pressure. This will ensure optimal performance and safety while riding.
Inflate the tire to the recommended pressure
You should inflate the tire to the recommended pressure for optimal performance and safety while riding. Proper tire inflation provides several benefits, including improved traction, better handling, and increased durability.
Here are some common mistakes to avoid when inflating your electric bike tire:
- Over-inflating the tire can lead to a harsh and uncomfortable ride, as well as increased risk of punctures.
- Under-inflating the tire can cause it to wear out faster, decrease your bike’s efficiency, and make it more susceptible to pinch flats.
To inflate the tire, start by attaching a bike pump to the valve and securing it tightly. Then, pump air into the tire until it reaches the recommended pressure, which is usually indicated on the sidewall of the tire.
Once you have inflated the tire properly, you can proceed to reinstall the wheel and adjust the brakes for a smooth and safe ride.
Reinstall the wheel and adjust the brakes
After properly inflating the tire, it’s important to reinstall the wheel and make any necessary adjustments to the brakes.
Start by placing the wheel back into the frame, ensuring that it is aligned properly with the fork. Tighten the axle nuts or quick-release lever securely to hold the wheel in place.
Next, check the brakes and adjust them if needed. To do this, loosen the brake caliper mounting bolts and position the brake pads so they are centered on the rim. Tighten the mounting bolts back up, making sure the brake pads are still aligned with the rim.
Give the wheel a spin and squeeze the brake lever to ensure the pads make contact with the rim and stop the wheel smoothly.
Once you are satisfied with the brake adjustments, you can move on to the next step of testing the tire to ensure proper installation.
Test the tire to ensure proper installation
Once the wheel is securely in place, give it a spin and make sure the tire is properly installed. Testing the tire is an essential part of the installation process to ensure a safe and smooth ride on your electric bike. To assist you in this testing process, here are some troubleshooting tips to consider. First, check for any visible bulges or deformities on the tire, as this could indicate improper installation. Next, inspect the tire pressure and make sure it matches the manufacturer’s recommended PSI. Additionally, listen for any unusual sounds or vibrations while spinning the wheel, as this could indicate an alignment issue. Lastly, take a short test ride to assess the overall performance and stability of the new tire. Once you have completed this testing process, you can move on to the subsequent section about properly disposing of the old tire.
Properly dispose of the old tire
To properly dispose of the old tire, make sure to follow local regulations and guidelines.
When it comes to recycling old tires, there are several eco-friendly disposal methods you can consider.
One option is to check with your local recycling center or waste management facility to see if they accept tires for recycling. Many places have specific drop-off locations or collection events for tire recycling.
Another option is to contact tire retailers or automotive shops in your area, as they may offer tire recycling services.
Additionally, some tire manufacturers have their own recycling programs in place. These programs often involve repurposing the old tires into new products, such as rubberized asphalt or playground surfaces.
By recycling your old tire, you are not only preventing it from going to a landfill, but also contributing to a more sustainable future.
Frequently Asked Questions
What are the necessary tools and materials needed to change an electric bike tire?
To change an electric bike tire, you’ll need a suitable workspace, tools like tire levers, a pump, and a new tire. Follow these steps: remove the old tire using the levers, install the new tire, and inflate it with the pump.
How can I find a safe and flat surface to work on when changing the tire?
Look for a level ground, like a calm lake reflecting the sky, to change your electric bike tire. Ensure your workspace is free from obstacles and hazards, allowing you to work safely and with peace of mind.
How do I release the brakes and remove the wheel?
To remove the wheel of an electric bike, start by properly releasing the brakes. Locate the brake lever and squeeze it to loosen the brake pads. Once the brakes are released, you can proceed to remove the wheel.
What is the recommended pressure to inflate the tire to?
Inflate your electric bike tire to the recommended pressure for optimal performance and safety. Regular tire maintenance is crucial to ensure a smooth ride. Keep your tire properly inflated to avoid punctures and improve overall efficiency.
What is the proper way to dispose of the old tire?
To dispose of your old tire properly, consider recycling it at a local tire recycling facility. This ensures that it won’t end up in a landfill, reducing the environmental impact. Check with your local waste management for the nearest recycling options.
Conclusion
Congratulations! You’ve successfully navigated the treacherous journey of changing an electric bike tire. With the right tools and a flat surface, you conquered the deflation and removal of the tire like a true tire-changing champion.
You carefully inspected the inner tube and replaced it if needed, ensuring a smooth ride ahead. Reinstalling the wheel and adjusting the brakes was a piece of cake for someone as skilled as you.
Now, go forth and conquer the roads, knowing that you have mastered the art of changing an electric bike tire. Happy biking!