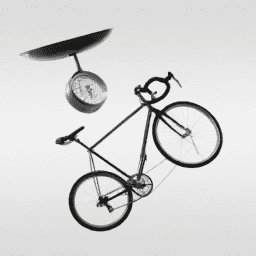
Replacing the back sprocket on a bike might appear to be a challenging endeavor, yet with the appropriate equipment and a bit of expertise, it can become an easy and satisfying task.
As a cycling enthusiast, I know the importance of maintaining my bike’s components to ensure a smooth and efficient ride. The rear sprocket is a critical component that helps transfer power from the pedals to the rear wheel, and over time, it can become worn and damaged, affecting the bike’s overall performance.
If you notice your bike is not shifting smoothly or there is excessive noise coming from the rear wheel, it may be time to replace the rear sprocket. While it may seem like a daunting task, changing the rear sprocket is a manageable task that can be completed in just a few hours, depending on your level of experience.
In this article, I will guide you through the necessary steps to change the rear sprocket on your bicycle. So, grab your tools, and let’s get started!
Key Takeaways
- Proper maintenance of the rear sprocket is crucial for smooth operation and prolonging the lifespan of other drivetrain components.
- The process of changing the rear sprocket involves removing the old sprocket with a chain whip tool and cassette locking tool, and installing the new sprocket with proper alignment and tooth direction.
- Proper chain alignment is crucial for smooth operation and drivetrain lifespan, and troubleshooting and adjustments may be needed for persistent issues.
- Safety precautions such as wearing gloves and eyewear, and using a wheel alignment tool to ensure proper alignment, should be taken when changing the rear sprocket.

Under Armour Squeeze Water Bottles, 32 oz Water Bottles, Sideline Sports Water Bottle with Quick-Shot Lid, Quick & Easy Hydration, Gym Water Bottles, Squeeze Bottle, 1 32oz Bottle
- Easy Hydration: Quick-shot lid and one-way valve
- On-the-Go Use: One-hand operation for active hydration
- Measurement Markings: Ounces and milliliters for tracking
As an affiliate, we earn on qualifying purchases.
Gather the Necessary Tools and Supplies
Before you can start changing the rear sprocket on your bike, you gotta make sure you have all the tools and supplies you need. The necessary tools include a chain whip tool, a cassette locking tool, and a wrench. You can buy these tools at your local bike shop or online. It’s important to compare prices and make sure you’re getting a good deal. The cost of these tools can range from $20 to $50 depending on the quality and brand.
In addition to the tools, you’ll also need a new rear sprocket to replace the old one. You can buy a replacement sprocket at your local bike shop or online. Make sure to get the correct size and number of teeth to match your bike’s cassette.
Once you have all the necessary tools and supplies, you’re ready to remove the old rear sprocket.
Remove the Old Rear Sprocket
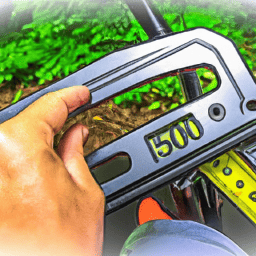
As I grip the worn down teeth of the rusted gear, I feel a sense of frustration and disappointment at the lack of power it has given me. It’s time to change the rear sprocket of my bicycle, and I know that this is an essential task that I cannot ignore. Before diving into the process, I make sure to gather the necessary tools and supplies, such as a wrench, chain whip, new rear sprocket, and lubricant. I also take some safety precautions, making sure to wear protective gloves and eyewear.
Removing the old rear sprocket is a delicate process that requires attention to detail. First, I remove the skewer from the axle and take off the wheel from the bicycle frame. I then use a chain whip to prevent the sprocket from turning as I loosen the lockring with a wrench. Once the lockring is removed, I can slide the old sprocket off the freehub body. It’s important to note that the process may differ depending on the type of rear hub and sprocket, so it’s always a good idea to consult the manufacturer’s instructions. With the old sprocket removed, I can now move onto the next step: installing the new rear sprocket.
Install the New Rear Sprocket
To install the new sprocket, you’ll need to align it properly with the freehub body and make sure the teeth are facing the right direction. Start by applying some proper lubing to the freehub body to ensure that the sprocket spins freely and smoothly. Once you’ve done this, follow these steps:
- Slide the new sprocket onto the freehub body, making sure it’s fully seated.
- Align the sprocket with the chain, and then tighten the lockring using a tightening technique that ensures it’s secure.
Check to make sure the sprocket spins freely and smoothly.
Test the shifting by running through all the gears to ensure proper engagement.
Double check the lockring to make sure it’s tight and secure.
Once you have installed the new sprocket and ensured that it’s working properly, it’s time to reattach the wheel.
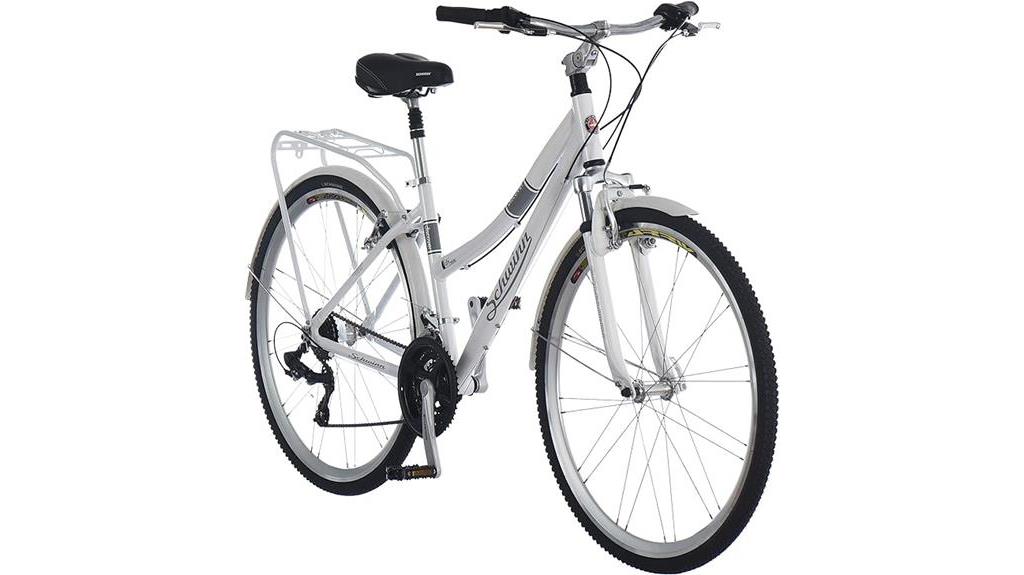
Reattach the Wheel
Now that the new rear sprocket is installed, it’s time to reattach the wheel.
First, I make sure to align the chain with the new sprocket.
Then, I carefully slide the wheel back into place and secure it with the quick-release skewer or nuts.
Finally, I test the gears to make sure everything is shifting smoothly.
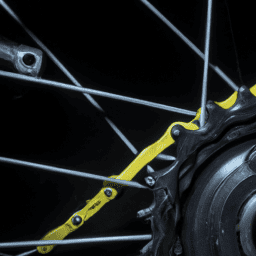
Align the Chain
First, make sure the chain is properly aligned with the new rear sprocket, as a misaligned chain can cause gear shifting issues and reduce the lifespan of the drivetrain.
Chain adjustment is crucial to ensure that the chain runs smoothly on the new sprocket. A misaligned chain can also cause the chain to rub against the derailleur or the frame, leading to wear and tear.
If you notice any issues with the chain alignment, it’s important to troubleshoot and correct the problem before proceeding. One common issue is the chain being too loose or too tight, which can affect how the chain runs on the new sprocket. Another issue can be the derailleur being out of alignment, which can cause the chain to rub against the frame or the derailleur.
Once you’ve ensured that the chain is properly aligned, you can move on to reattaching the wheel.
Reattach the Wheel
Once you’ve got the chain properly aligned, it’s time to reattach the wheel and get back on the road! Start by placing the wheel back into the dropouts of the frame, making sure that the axle is fully seated in the dropouts. Tighten the quick release lever or axle nuts to secure the wheel in place. As you tighten the nuts or lever, make sure that the wheel is centered between the chainstays. Check the alignment by looking at the space between the tire and the frame on both sides. If the space is not equal, adjust the position of the wheel until it is centered.
Next, it’s important to double check that the wheel is properly aligned with the rest of the bike. This will ensure that the chain runs smoothly and that the gears shift properly. One way to check wheel alignment is by using a wheel alignment tool, which can be purchased at most bike shops. Another method is to measure the distance between the rim and the chainstay on both sides of the wheel. If the distances are not equal, adjust the position of the wheel until they are. If you encounter any issues with wheel alignment, refer to the troubleshooting section in your bike’s owner manual. Once you’ve ensured that the wheel is properly aligned, it’s time to move on to testing the gears.
Test the Gears
After ensuring proper wheel alignment, it’s time to test out the gears and make any necessary adjustments.
It’s important to ensure that the new rear sprocket is working in conjunction with the rest of the drivetrain. Start by shifting through all the gears and pay close attention to any skipping or slipping. These are common issues that can arise when changing sprockets.
If you notice any issues, try adjusting the derailleur and cable tension. If that doesn’t work, it may be necessary to replace other components such as the chain or cassette.
Testing the gears may seem like an unnecessary step, but it can save you from future headaches. Properly working gears not only make for a smoother ride, but they can also prolong the life of your drivetrain components.
Taking the time to troubleshoot and make adjustments will ultimately benefit your bike in the long run. Once you’ve confirmed the gears are working properly, it’s time to move on to maintaining the rear sprocket.
Maintain the Rear Sprocket
To properly maintain the rear sprocket, it’s essential to regularly clean it with a degreaser and lubricate it with a bike-specific lubricant. Proper lubrication ensures smooth shifting and prolongs the lifespan of the sprocket.
Cleaning techniques for maintaining rear sprocket involve removing the chain from the sprocket, using a degreaser and a stiff-bristled brush to scrub the sprocket thoroughly, and then wiping it clean with a rag. It’s important to avoid using water to clean the sprocket, as it can lead to rust formation. After cleaning, the sprocket should be lubricated with a bike-specific lubricant, applied sparingly to avoid attracting dust and dirt.
Common issues with rear sprocket maintenance include excessive wear, damage caused by improper installation, and rust formation. In case of excessive wear, the sprocket needs to be replaced. Improper installation can cause damage to the sprocket’s teeth, leading to skipping or jumping gears. Rust formation can be prevented by ensuring that the sprocket is cleaned and lubricated regularly.
It’s important to keep in mind that a properly maintained sprocket not only ensures smooth shifting but also prolongs the lifespan of other components in the drivetrain.
Frequently Asked Questions
How do I know what size sprocket to buy for my bike?
To determine the correct size sprocket for my bike, I need to calculate the gear ratio. This involves dividing the number of teeth on the front chainring by the number of teeth on the rear sprocket. Additionally, I must ensure compatibility with different bike models.
Can I reuse the old chain with a new rear sprocket?
While it may be possible to reuse the old chain with a new rear sprocket, it’s not recommended. Chain compatibility is important and wear and tear on the chain can cause issues. It’s best to replace both at the same time.
How often should I replace my rear sprocket?
As a cyclist, I inspect my rear sprocket for wear and tear regularly. It’s best to replace preemptively to avoid chain skipping or wear. Pros include a smoother ride, while cons include cost and time.
Do I need to adjust the derailleur after installing a new rear sprocket?
It’s advisable to adjust the derailleur after installing a new rear sprocket to ensure smooth gear shifting. Also, it’s important to ensure rear sprocket compatibility with your bike’s drivetrain before making any changes.
Can I change the ratio of the rear sprocket to make pedaling easier or harder?
Yes, changing the rear sprocket’s teeth count can alter the gear ratio, making pedaling easier or harder. Adjusting bike chain tension is necessary, and different gear ratios offer benefits for different terrain, such as faster speeds on flat roads or easier climbs on hills.
Conclusion
In conclusion, changing the rear sprocket on a bicycle is a relatively simple task that can be done with the right tools and a bit of patience. It’s important to choose the correct size sprocket for your bike and to maintain it regularly to ensure optimal performance.
Did you know that the average lifespan of a rear sprocket is around 2,000 to 3,000 miles? This means that regular maintenance and replacement is crucial to ensure safe and efficient cycling.
Remember to always follow safety precautions when working on your bicycle, such as wearing protective gear and properly securing the bike during the process. With a little bit of practice, changing the rear sprocket can become a quick and easy task that can greatly improve your cycling experience.
So, don’t be afraid to give it a try and see the difference it can make in your ride.