Why should I bother cleaning and lubing my bicycle chain, you might be wondering?
Well, let me tell you, a clean and well-lubricated chain is essential for smooth and efficient cycling. Neglecting this crucial maintenance task can lead to increased friction, wear and tear, and poor performance.
In this article, I will guide you through the step-by-step process of cleaning and lubing your bicycle chain, ensuring optimal functionality and prolonging the lifespan of your beloved two-wheeler.
So let’s get started!
Key Takeaways
- Regular cleaning and lubrication extends chain lifespan
- Remove dirt and debris using a chain cleaning tool
- Apply lubricant to the chain while rotating pedals
- Regularly inspect chain for elongation or stretch

Topeak Ratchet Rocket Lite DX Bike Repair and Maintenance Tool, 16 Functions, Includes Nylon Bag, Black
Fine tooth ratchet mechanism with reverse lever and thumb wheel
As an affiliate, we earn on qualifying purchases.
Gather the necessary tools and materials
Gather all the tools and materials you’ll need for this bike chain cleaning and lubing session. First and foremost, it’s crucial to choose the right degreaser. Look for a high-quality degreaser specifically designed for bicycle chains. This will effectively remove dirt, grime, and old lubricant from the chain. Chain maintenance is essential to ensure smooth and efficient cycling performance, so don’t skimp on this step.
In addition to the degreaser, you’ll also need a chain cleaning tool, a clean rag or towel, and a lubricant suitable for bike chains. The chain cleaning tool helps to scrub away stubborn dirt particles from the chain, ensuring a thorough cleaning. The clean rag or towel is necessary for wiping off excess degreaser and drying the chain before applying lubricant.
With all the tools and materials ready, let’s move on to preparing your bike for chain cleaning.

Rehook Original - Black Get Your Chain Back on Your Bike in 3 Seconds. Without The Mess Present for Any Cyclist or Gadget Lover
AS SEEN ON DRAGONS' DEN (Shark Tank UK) – Featured on BBC Dragons' Den where Rehook received investment...
As an affiliate, we earn on qualifying purchases.
Prepare your bike for chain cleaning
First, make sure your bike is ready for the cleaning and lubrication process. To prepare your bike for chain cleaning, follow these tips for maintaining a clean bike chain:
- Shift the chain onto the smallest chainring and the smallest rear cog. This will relieve tension on the chain and make it easier to remove.
- Use a brush or rag to remove any dirt or debris from the chain and other drivetrain components.
- Inspect the chain for any signs of wear or damage, such as stretched links or rusted sections.
When cleaning your bike chain, it’s important to avoid common mistakes that can damage the chain or other parts of your bike. Now that your bike is prepared, let’s move on to the next section about removing the chain from the bike.

Lamicall Bike Phone Holder, Motorcycle Mount - Motorcycle Phone Holder, Handlebar Cell Phone Clamp, E-Bike Scooter Phone Clip for iPhone 17 Air Pro Max, 16 15 Plus, S20, 4.7 to 6.8" Smartphones
Sturdy and Safe: A special shape of this motorcycle & bike phone holder grips each corner of your...
As an affiliate, we earn on qualifying purchases.
Remove the chain from the bike
Once the bike is prepared, you can start removing the chain from the bike. This process is essential for proper chain maintenance. To remove the chain, follow these steps:
| Step | Description |
|---|---|
| 1 | Shift the chain onto the smallest chainring and the smallest rear cog. |
| 2 | Use a chain tool to break the chain. |
| 3 | Carefully remove the chain from the bike, taking note of any quick links or master links. |
| 4 | Clean the chainrings, jockey wheels, and derailleur using a degreaser and brush. |
| 5 | Store the removed chain in a clean, dry place to prevent contamination. |
Removing the chain allows for easier and thorough cleaning. Now that the chain is off the bike, we can move on to the next step of cleaning the chain with a degreaser and brush.

ROCKBROS 16 In 1 Multi-Function Bike Tool Kit - Portable Foldable Bike Multitool Cycling Tool Kit With Allen Wrench, Tire Levers
Package includes 1 pack bike repair tools.
As an affiliate, we earn on qualifying purchases.
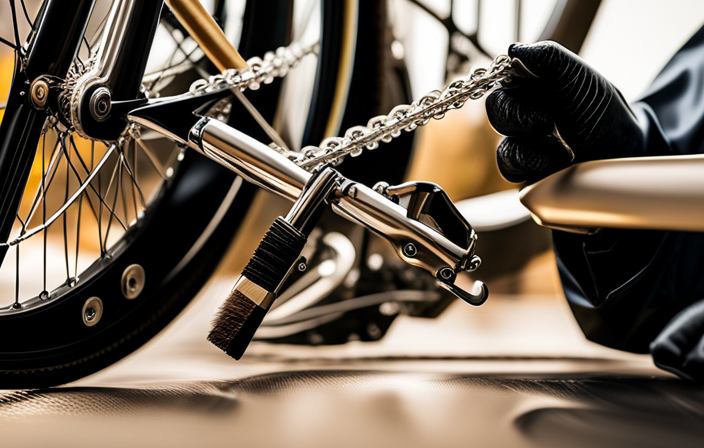
Clean the chain with a degreaser and brush
After removing the chain, you can easily clean it using a degreaser and brush. Start by applying the degreaser to the chain, making sure to cover every link. The degreaser helps to break down the built-up grime and oil on the chain.
Once the degreaser is applied, take a stiff-bristled brush and scrub the chain thoroughly. Make sure to get into all the nooks and crannies of the chain, as this is where dirt tends to accumulate the most. Use a back and forth motion to effectively clean each link. It is important to apply enough pressure to remove the dirt and grime, but not too much that it damages the chain.
Once the chain is thoroughly brushed, you can move on to the next step of rinsing and drying the chain thoroughly.
Rinse and dry the chain thoroughly
To ensure the chain is properly cleaned, it is essential to thoroughly rinse and dry it. Here is how you can do it:
- Use a hose or bucket of water to rinse the chain, making sure to remove any remaining degreaser and dirt.
- Gently scrub the chain with a brush to dislodge any stubborn grime and ensure a thorough clean.
- Once rinsed, use a clean cloth or towel to dry the chain completely. This is crucial to prevent rust and ensure proper functioning.
Using a chain cleaning tool is of utmost importance. It allows for a deeper cleaning by effectively removing dirt and grime from the chain’s hard-to-reach areas. Additionally, using a chain cleaning machine offers several benefits. It saves time and effort while providing a more consistent and efficient cleaning process.
Now that the chain is clean and dry, it’s time to move on to the next step: applying lubricant.
Apply lubricant to the chain
Now you can ensure smooth operation by applying lubricant to your chain. Regular chain lubrication is crucial for maintaining the performance and longevity of your bicycle. The use of different types of chain lubricants can provide various benefits depending on the conditions you ride in.
To help you choose the right lubricant, here is a comparison table:
| Lubricant Type | Benefits |
|---|---|
| Wet | Ideal for wet and muddy conditions, provides excellent protection against rust and corrosion. |
| Dry | Perfect for dry and dusty environments, minimizes dirt buildup and reduces friction. |
| Ceramic | Offers superior durability, reduces drivetrain wear, and provides smooth shifting performance. |
| Wax | Provides a clean and dry coating, repels dirt and grime, and extends the lifespan of your chain. |
| All-Purpose | Versatile option for general riding conditions, offers a balance between protection and cleanliness. |
By choosing the appropriate lubricant for your needs, you can optimize the performance and lifespan of your bicycle chain. Now, allow the lubricant to penetrate the chain for optimal results in the subsequent section.
Allow the lubricant to penetrate the chain
Once you’ve applied the lubricant, give it some time to fully penetrate the links of your chain. This step is crucial for optimal chain performance and longevity.
Regular chain maintenance is essential to prevent wear and tear, improve shifting performance, and reduce friction. By allowing the lubricant to penetrate the chain, you ensure that it reaches all the moving parts, creating a protective barrier against moisture, dirt, and corrosion.
There are various types of chain lubricants available, each offering specific benefits. Wet lubricants are ideal for wet riding conditions as they repel water and provide long-lasting protection. Dry lubricants, on the other hand, are better suited for dry conditions as they attract less dirt and dust.
After allowing the lubricant to penetrate, it’s time to wipe off any excess to prevent dirt buildup and ensure a clean and smooth ride.
Wipe off excess lubricant
After applying the lubricant, make sure to remove any excess. Wiping off the excess lubricant is an important step in the chain cleaning process. Here are three key points to consider when wiping off excess lubricant from a bicycle chain:
-
Proper technique: Use a clean rag or cloth to wipe the chain thoroughly. Start from the top and work your way down, ensuring that all sides of the chain are covered.
-
Different types of lubricants: There are various lubricants available, such as dry, wet, and wax-based options. Each type has its own effectiveness in reducing friction on the chain, so choose the one that suits your riding conditions and preferences.
-
Effectiveness in reducing friction: The type of lubricant you choose can impact the chain’s performance and durability. Some lubricants are better at repelling dirt and debris, while others provide long-lasting lubrication in wet conditions.
Now that the excess lubricant is wiped off, we can move on to the next step of reinstalling the chain onto the bike.
Reinstall the chain onto the bike
To put the chain back on the bike, make sure to follow these steps. First, locate the chainring and rear derailleur pulley. Align the chain with these components while keeping it taut. Then, thread the chain through the rear derailleur and around the chainring, making sure it rests on the teeth properly. Next, engage the chain onto the cassette by shifting gears. If you encounter any issues, such as a twisted chain or difficulty shifting, refer to the table below for reinstalling techniques and troubleshooting common problems.
| Issue | Reinstalling Technique | Troubleshooting |
|---|---|---|
| Twisted Chain | Rotate the pedals backward while holding the chain to untwist it. | Check for any damaged or bent links. Replace if necessary. |
| Difficulty Shifting | Adjust the tension of the rear derailleur by turning the barrel adjuster. | Inspect the derailleur hanger for alignment issues. |
Now that the chain is back on the bike, let’s move on to testing its smooth operation in the next section.
Test the chain for smooth operation
Make sure your bike’s chain operates smoothly by testing it after reinstalling. Here’s how to test the chain for smooth operation:
-
Check the chain tension: Start by placing your bike on a stand or lifting the rear wheel off the ground. With one hand, push the pedal forward while holding the rear derailleur. The chain should move smoothly without any skipping or jumping. If it feels loose or too tight, adjust the tension accordingly.
-
Listen for any unusual noises: As you rotate the pedals, listen for any strange sounds like grinding, clicking, or squeaking. These could indicate a problem with the chain’s alignment or a damaged link.
-
Inspect for any damage: Take a close look at the chain for any signs of wear, such as rust, stretch, or bent links. Damaged areas should be addressed promptly to prevent further issues and ensure a smooth ride.
-
Test the shifting: Shift through the gears while pedaling and pay attention to how smoothly the chain moves from one gear to another. If the shifting feels rough or the chain skips, it may need further adjustments or lubrication.
By following these steps, you can ensure that your bike’s chain is in optimal condition for a smooth and enjoyable ride.
Frequently Asked Questions
Can I use any type of degreaser to clean my bicycle chain?
Yes, you can use different types of degreasers to clean your bicycle chain. However, using a specific bicycle chain degreaser offers benefits such as effectively breaking down dirt and grime, extending chain life, and improving overall performance.
How often should I clean and lube my bicycle chain?
Cleaning and lubing your bicycle chain is a vital maintenance task. I recommend doing it every 100 miles or whenever your chain starts squeaking and shifting poorly. Using a chain cleaning tool has numerous benefits, including efficient grime removal and prolonging chain life.
Can I use water to rinse off the degreaser from the chain?
Using water to rinse off degreaser from the chain has pros and cons. The pros include easy removal of excess degreaser and dirt. However, the cons are that water can cause rust and wash away lubricant, so it’s not safe to use a hose for rinsing.
What type of lubricant should I use for my bicycle chain?
The best lubricant for a bike chain is a high-quality bicycle chain oil. It provides excellent lubrication and protection against rust and corrosion. Alternative lubricants, such as WD-40 or cooking oil, are not recommended as they can attract dirt and damage the chain.
Is it necessary to remove the chain from the bike in order to clean it properly?
Removing the chain for cleaning is not necessary, but it’s highly recommended for optimal results. The advantages include easier access to all parts of the chain, thorough cleaning, and preventing contamination. However, it requires extra time and effort compared to cleaning it on the bike.
Conclusion
Well, folks, that’s a wrap! We’ve reached the end of our journey on how to clean and lube a bicycle chain.
I hope you’ve gathered all the necessary tools and materials and followed each step diligently.
Remember, a clean and well-lubricated chain is essential for smooth and efficient operation.
So, don’t delay, grab your trusty degreaser and brush and give that chain the TLC it deserves.
And hey, if you encounter any hiccups along the way, just remember to keep calm and pedal on!
Happy cycling, my friends!