So you’ve got an electric bike and you’re ready to take it to the next level. Well, look no further because I’ve got the perfect upgrade for you – connecting a lipo battery to your electric bike.
In this article, I’ll guide you through the step-by-step process of how to make this connection. From determining the power requirements to testing the functionality, we’ll cover it all.
Get ready to rev up your electric bike and experience the thrill of a high-performance ride.
Key Takeaways
- Connect the lipo battery near the controller and ensure proper wiring and connections.
- Monitor the battery voltage regularly to prevent overdischarging and maintain optimal performance.
- Implement proper battery maintenance techniques such as storing it in a cool and dry place when not in use.
- Upgrading to a lipo battery can provide benefits like increased range, faster speeds, improved acceleration, and longer lifespan.

COOSPO Color Touchscreen GPS Bike Computer CS600, Wireless IPX7 Waterproof Cycling GPS Speedometer with Bluetooth/ANT+, Backlight Route Navigation, Support Bike Radar & 36H Battery Life
2.4" HIGH-RESOLUTION COLOR TOUCHSCREEN: Features auto-backlight technology that intelligently adjusts to ambient light, ensuring optimal visibility and effortless...
As an affiliate, we earn on qualifying purchases.
Determine the Power and Capacity Requirements of Your Electric Bike
You’ll need to determine the power and capacity requirements of your electric bike.
To do this, start by calculating the power requirements. Consider factors such as the weight of the bike, rider, and any additional load, as well as the desired speed and range. This will help you determine the amount of power needed to propel the bike efficiently.
Once you have the power requirements, you can determine the battery size. Look for a lithium polymer (LiPo) battery that matches the power requirements and offers sufficient capacity to meet your desired range. Keep in mind that higher capacity batteries will provide longer rides but may be heavier and more expensive.
With these calculations in hand, you can confidently move on to gathering the necessary tools and materials for the LiPo connection process.
iGPSPORT BSC300T Wireless Bike Computer GPS, Touchscreen Offline MAP Navigation Off Course Warning Compatible with Insta360, for Ebike Road Bike MTB (Touch Screen&Button)
【Large Screen】The BSC300T wireless bike computer equipped with a 2.4'' touch screen and 6 buttons, allowing you to...
As an affiliate, we earn on qualifying purchases.
Gather the Necessary Tools and Materials
To start, make sure you have all the tools and materials needed for the task.
First, you need to determine the power supply requirements of your electric bike. This will help you choose the appropriate wiring for connecting the LiPo battery. You will need a multimeter to measure the voltage and current of your bike’s electrical system. Additionally, you will need wire cutters, wire strippers, and crimping tools to properly connect the wiring. It is important to select wires that can handle the current and voltage levels of your electric bike.
Once you have gathered all the necessary tools and materials, you can proceed to remove the old battery and disconnect the wiring, which we will discuss in the next section.

Garmin Edge® 1050, Premium Cycling Computer, Vivid Color Touchscreen Display, Built-in Speaker, Advanced Training and Group Ride Features, Road Hazard Alerts
Premium GPS cycling computer with vivid color touchscreen display combines superior navigation, planning and performance tracking, cycling awareness...
As an affiliate, we earn on qualifying purchases.
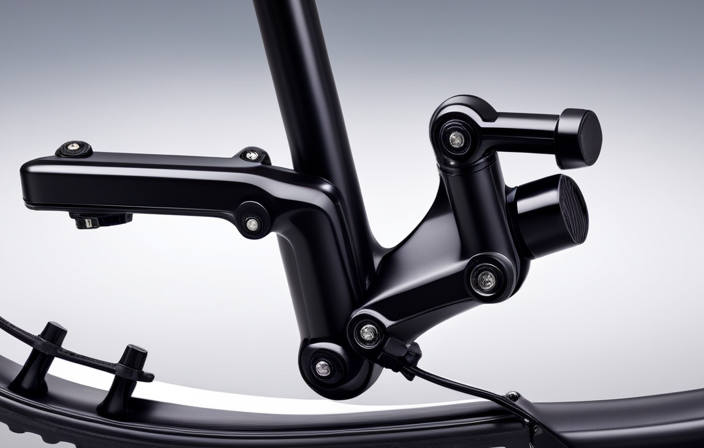
Remove the Old Battery and Disconnect the Wiring
Start by removing the old battery from its compartment and disconnecting the wiring to prepare for the installation of the new battery.
Begin by locating the battery compartment and opening it using the appropriate tools. Carefully detach any connectors or terminals connecting the old battery to the electric bike. Take note of the wiring configuration and label them if necessary to ensure proper reconnection later.
After removing the old battery, it is important to install a battery management system (BMS) to protect the new battery from overcharging or discharging. The BMS will regulate the voltage and current flow, ensuring the longevity and performance of the lipo battery.
Once the wiring is disconnected and the BMS is installed, we can proceed to preparing the lipo battery for connection, ensuring a secure and efficient power supply for the electric bike.

COROS DURA Solar GPS Bike Computer, 120-Hour GPS Battery Life, Solar Charging, 2.7" MIP Color Touchscreen, Fast Data Sync, Turn-by-Turn Navigation, Dual-Freq GPS, Strava, Ride with GPS, Komoot Routes
BEST-IN-CLASS BATTERY LIFE: With COROS DURA bike computer GPS, enjoy 120 hours of battery life in full GPS...
As an affiliate, we earn on qualifying purchases.
Prepare the Lipo Battery for Connection
Make sure to carefully handle the new battery and ensure it is ready for installation. Before connecting the lipo battery to the electric bike, it is important to follow proper lipo battery safety precautions.
Firstly, ensure that the battery is fully charged to avoid any issues during installation. Use a dedicated lipo battery charger and monitor the charging process closely. It is crucial to never leave the battery unattended while charging. Additionally, make sure to charge the battery in a well-ventilated area and away from any flammable materials.
Once the battery is fully charged, double-check that all the necessary wires and connectors are in good condition and free from any damage. This will help ensure a safe and reliable connection.
Now, we can move on to the next step of connecting the lipo battery to the electric bike.
Connect the Lipo Battery to the Electric Bike
Now you can attach the battery to your e-bike. To connect the lipo battery, it is crucial to follow some safety precautions.
Firstly, ensure that both the battery and the bike are turned off. This will prevent any accidental electrical discharge or short circuits.
Next, locate the battery connector on your e-bike and the corresponding connector on the lipo battery. Align the connectors and firmly press them together until they are securely connected. Take care to avoid any loose or dangling wires that could potentially get caught in the bike’s moving parts.
Finally, double-check the connection to ensure it is snug and secure. This step is important as it guarantees a reliable power supply to your electric bike.
Transitioning to the subsequent section, let’s now move on to securely mounting the lipo battery.
Securely Mount the Lipo Battery
To ensure the safe installation of your battery, you’ll want to securely mount it to your e-bike. There are several mounting options available, depending on the design of your bike and the size of your battery.
One common method is to use Velcro straps or zip ties to attach the battery to the frame. Make sure to position it in a way that doesn’t interfere with your pedaling or steering. Additionally, consider using foam padding or rubber grommets to minimize vibration and protect the battery from damage.
It’s crucial to follow safety precautions during the mounting process, such as ensuring the battery is tightly secured and the wiring is properly organized and protected.
Once the battery is securely mounted, you can proceed to test the connection and functionality, which will be discussed in the subsequent section.
Test the Connection and Functionality
To test the connection and functionality of the electric bike, I’ll first turn it on and ensure that all components are functioning properly. I’ll check for any error messages or abnormal behavior, such as flickering lights or unusual sounds.
Once the bike is powered on, I’ll test its performance by riding it at different speeds and on various terrains. I’ll observe its acceleration, braking, and overall stability.
Turn on the Electric Bike
First, make sure the battery is fully charged.
To turn on the electric bike, follow these steps:
- Locate the power switch on the bike’s control panel.
- Press the power switch to the ‘on’ position.
- Listen for any sounds or indicators that confirm the bike is powered on.
If the bike doesn’t turn on, troubleshoot common connection issues such as checking if the battery is securely connected or if there are any loose wires. Additionally, ensure that the battery terminals are clean and free from corrosion.
Once the electric bike is turned on, it’s time to check for proper operation and performance. This includes testing the brakes, throttle, and observing any abnormal sounds or vibrations.
Check for Proper Operation and Performance
Once you’ve turned on the electric bike, you’ll want to check for proper operation and performance. To ensure everything is functioning correctly, it’s important to check the battery voltage and monitor the battery temperature. The battery voltage can give you an indication of its overall health and capacity. You can use a multimeter to measure the voltage at the battery terminals. It should be within the specified range provided by the manufacturer. Additionally, monitoring the battery temperature is crucial to prevent overheating and potential damage. Keep an eye on the temperature gauge or use a thermal sensor to ensure it remains within the recommended operating range. Once you’ve checked these parameters and ensured everything is in order, you can proceed to adjust the electric bike’s settings (if necessary) to optimize your riding experience.
Adjust the Electric Bike’s Settings (if necessary)
To adjust the electric bike’s settings, I will first configure the controller settings to ensure optimal performance. This involves adjusting parameters such as throttle response, regenerative braking, and maximum speed limit.
Next, I will fine-tune the power and performance levels to suit my preferences and riding conditions. This includes adjusting the power assist levels, torque sensor sensitivity, and motor output.
By carefully configuring these settings, I can customize the electric bike’s performance to maximize efficiency and enhance the overall riding experience.
Configure the Controller Settings
You can easily configure the controller settings for your electric bike by following these steps.
First, locate the controller on your bike, which is usually mounted near the battery.
Use a small Phillips head screwdriver to access the controller’s settings.
Adjust the controller settings as needed, such as the maximum speed or acceleration.
If you are experiencing any issues with your controller, such as it not responding or behaving erratically, you can troubleshoot by checking the connections and wiring, ensuring they are secure and properly connected.
Additionally, check for any error codes or indicators on the controller display.
Once you have adjusted the controller settings and resolved any issues, you can proceed to fine-tune the power and performance levels of your electric bike.
Fine-tune the Power and Performance Levels
After adjusting the controller settings, it’s time to fine-tune the power and performance levels of your e-bike. To ensure efficient power management and battery safety, follow these steps:
-
Begin by gradually increasing the power level of your e-bike. Start at a lower setting and test the performance before moving to higher levels.
-
Monitor the battery voltage regularly to prevent overdischarging. Keep it within the safe operating range to prolong its lifespan.
-
Adjust the throttle response to match your riding style. A smoother throttle input can improve control and reduce strain on the battery.
-
Experiment with different power modes to find the optimal balance between performance and battery life.
-
Consider installing a battery management system (BMS) to safeguard against overcharging, overheating, and other potential risks.
After fine-tuning the power and performance levels, it’s crucial to regularly monitor and maintain the lipo battery to ensure its longevity and optimal performance.
Regularly Monitor and Maintain the Lipo Battery
Make sure to regularly check and maintain the lipo battery on your electric bike. Proper monitoring techniques and battery maintenance tips are crucial to ensure optimal performance and longevity of the battery.
Start by visually inspecting the battery for any signs of damage, such as leaks or bulges. Use a voltmeter to measure the voltage regularly and ensure it remains within the recommended range.
Additionally, keep an eye on the battery temperature during charging and discharging to prevent overheating. It is also important to store the battery in a cool and dry place when not in use.
By following these monitoring techniques and implementing proper battery maintenance, you can extend the lifespan of your lipo battery and enjoy a more reliable and efficient electric bike.
Enjoy Your Upgraded Electric Bike
Once you’ve upgraded, it’s time to savor the enhanced experience of riding your newly improved electric bike. With the new lipo battery connected, you can now enjoy a longer battery life, allowing you to go on longer rides without worrying about running out of power.
Not only that, but the upgraded battery also improves the speed and acceleration of your electric bike, giving you a thrilling ride every time. Here are five key benefits you’ll experience with the upgraded lipo battery:
- Increased range: The upgraded battery gives you a longer riding distance, allowing you to explore more places.
- Faster speeds: Experience a boost in your electric bike’s top speed, enabling you to reach your destination quicker.
- Improved acceleration: The upgraded battery provides quicker acceleration, making it easier to navigate through traffic or tackle challenging terrains.
- Enhanced performance: Enjoy a more powerful ride, especially when climbing hills or carrying heavier loads.
- Longer lifespan: The upgraded lipo battery is designed to have a longer lifespan, saving you money in the long run.
Upgrade your electric bike’s battery to unlock these benefits and elevate your riding experience.
Frequently Asked Questions
Can I use any type of lipo battery for my electric bike, or are there specific requirements?
I can use any type of lipo battery for my electric bike as long as it meets the specific requirements. Lipo battery compatibility ensures optimal performance, longer run time, and lighter weight, making it an ideal choice for electric bikes.
How do I determine the power and capacity requirements of my electric bike?
Determining the optimal power and capacity for an electric bike requires calculating its energy efficiency. This can be done by considering factors such as the weight of the bike, desired speed, terrain, and battery capacity.
What tools and materials do I need to gather in order to connect a lipo battery to my electric bike?
To connect a lipo battery to an electric bike, you will need a lipo battery with the desired capacity and voltage, a battery management system (BMS), appropriate wiring, connectors, and tools for installation. Follow a step-by-step connection guide for proper installation. Lipo battery advantages include high energy density and lightweight design.
Are there any safety precautions I should take when removing the old battery and disconnecting the wiring?
When removing the old battery and disconnecting the wiring, it is important to consider potential hazards and follow proper disconnection procedures. This ensures a safe and efficient process, minimizing the risk of accidents or damage.
How do I adjust the electric bike’s settings after connecting the lipo battery, and what settings may need to be adjusted?
To adjust the electric bike’s settings after connecting the lipo battery, I recommend accessing the bike’s control panel. From there, you can adjust settings for speed, power output, and voltage. Troubleshooting common issues may involve checking for firmware updates or calibrating sensors.
Conclusion
In conclusion, connecting a lipo battery to your electric bike is a straightforward process that can greatly enhance your riding experience. By carefully considering the power and capacity requirements, gathering the necessary tools, and following a methodical approach, you can successfully upgrade your bike.
Remember to regularly monitor and maintain the lipo battery to ensure optimal performance. So, don’t hesitate to take the leap and enjoy the electrifying ride that awaits you. As they say, ‘Out with the old, in with the new.’