Gear up and electrify your mountain biking experience with our ultimate guide on how to convert your trusty steed into an electric powerhouse. Like scaling a towering peak, this transformation requires careful planning and precise execution.
In this detailed article, we will navigate you through the rocky terrain of assessing compatibility, choosing the right conversion kit, gathering the necessary tools, and fine-tuning your electric mountain bike.
So saddle up, adventurer, and embark on an electrifying journey like never before!
Key Takeaways
- Assess the compatibility of the bike frame for the added weight and size of an electric motor and battery, including disc brake mounts for stronger braking systems.
- Choose the right conversion kit based on the motor type and power suitable for your biking needs and terrain, considering features like throttle control and pedal assist modes.
- Select a suitable battery pack with higher capacity for longer rides, paying attention to voltage requirements and choosing a pack with slightly higher voltage to account for drops.
- Evaluate the compatibility and quality of the controller and wiring, ensuring proper connections, insulation, and routing to avoid interference.

Wahoo KICKR V6 Smart Indoor Trainer
WiFi Connectivity - Offering a robust 2.4 GHz Wi-Fi connection, the new KICKR transfers ride data to your...
As an affiliate, we earn on qualifying purchases.
Assess Your Bike’s Compatibility
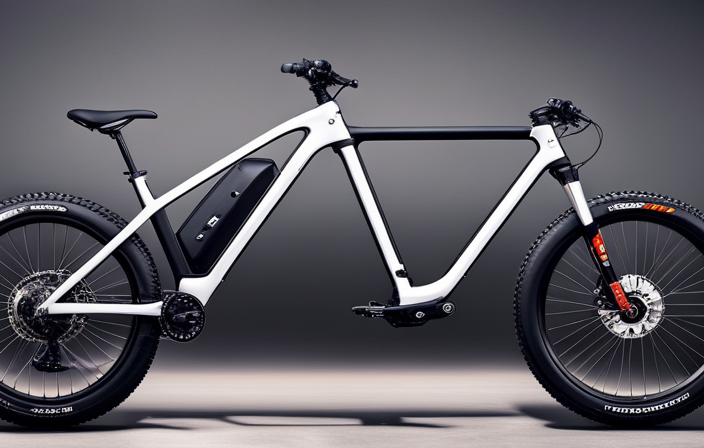
Assessing if your bike is compatible with electric conversion involves determining its power requirements. First, check if your bike has a frame that can accommodate the added weight and size of an electric motor and battery. Look for a sturdy frame with enough space near the bottom bracket for the motor and sufficient clearance for the battery.
Next, evaluate the bike’s drivetrain to ensure it can handle the increased torque and power demands. Consider the gear ratios, chain, and derailleur system. Additionally, check if your bike has disc brake mounts as electric bikes often require stronger braking systems.
Finally, assess if your bike has enough space for the battery and controller. If your bike meets these compatibility criteria, you can proceed with choosing the right electric conversion kit.

Garmin Tacx Neo 2T Smart Trainer
Material: metal, plastic
As an affiliate, we earn on qualifying purchases.
Choose the Right Electric Conversion Kit
When choosing the right electric conversion kit for your mountain bike, it is crucial to consider the motor type and power. Ensure that the motor is suitable for your biking needs and terrain, and make sure it has enough power to provide the desired speed and torque.
Additionally, selecting the suitable battery pack is essential for a smooth and long-lasting ride. Evaluate the capacity, weight, and charging time of the battery to ensure it meets your requirements.
Lastly, don’t forget to evaluate the controller and wiring of the conversion kit. Ensure that the controller is compatible with your bike and that the wiring is of good quality and properly installed for optimal performance and safety.
Consider the Motor Type and Power
Choose the motor type and power that best suits your needs when converting a mountain bike to electric. The motor type determines the efficiency and performance of your electric bike. Consider the following factors when selecting the motor type and power:
- Brushed Motors: These motors are simple and affordable but have lower motor efficiency and power output compared to brushless motors.
- Brushless Motors: These motors are more efficient and provide higher power output. They also require less maintenance.
- Geared Hub Motors: These motors provide high torque and are suitable for off-road or hilly terrains.
- Direct Drive Hub Motors: These motors offer a smooth ride and are ideal for flat terrains.
After choosing the motor type and power, it’s time to select the suitable battery pack. This will ensure optimal performance and range for your electric mountain bike.
Select the Suitable Battery Pack
To find the right battery pack for your electric mountain bike, consider the capacity and voltage requirements.
The battery pack selection is crucial as it will determine the range and power of your bike. Look for a battery pack with a higher capacity, measured in ampere-hours (Ah), to ensure longer rides without needing frequent recharges.
Additionally, pay attention to the voltage requirements of your motor and controller, as the battery pack needs to provide the necessary voltage to power them effectively. It’s recommended to choose a battery pack with a voltage slightly higher than the motor and controller require, to account for any voltage drops during operation.
Evaluating the controller and wiring will be the next step, ensuring a smooth and efficient conversion process for your electric mountain bike.
Evaluate the Controller and Wiring
Assessing the controller and wiring is essential for ensuring a smooth and efficient operation of your electric mountain bike. To begin, assess the compatibility of the controller with your bike’s electrical system. This involves checking the voltage and current ratings of both the controller and the battery pack to ensure they match.
Next, evaluate the controller’s features and functions, such as throttle control and pedal assist modes, to determine if it meets your requirements.
When troubleshooting wiring issues, start by inspecting all the connections to ensure they are secure and properly insulated. Look for any signs of frayed or damaged wires that may need replacement. Use a multimeter to test the continuity and voltage of the wiring.
Additionally, make sure the wiring is routed and secured properly to avoid interference with other components or moving parts of the bike.
Assessing the controller and troubleshooting any wiring issues are crucial steps in converting your mountain bike to electric. Once these tasks are complete, you can proceed to the next section about gathering the necessary tools and equipment.

Wahoo Fitness KICKR CORE 2 ZWIFT COG and Click - Orange Cog 3rd Generation
KICKR CORE Zwift is the smarter way to start riding indoors. The new KICKR CORE builds on the...
As an affiliate, we earn on qualifying purchases.
Gather the Necessary Tools and Equipment
First, you’ll need to gather all the necessary tools and equipment to convert your mountain bike to electric. Before diving into the conversion process, it’s crucial to assess the compatibility of your bike with an electric conversion kit.
Look for a kit that suits your bike’s frame size, wheel size, and fork type. Some kits may require specific frame or fork measurements, so it’s essential to choose one that fits your bike perfectly. Additionally, ensure that the kit includes all the necessary components such as a motor, battery, controller, throttle, and wiring.
Once you have gathered all the required tools and equipment, you can move on to preparing your bike for the conversion process.

Magicshine HORI1300S Bike Headlight, Compatible with Garmin/Wahoo, 1300 Lumens High & Low Beam Front Light, USB-C Rechargeable, IPX6 Waterproof for Night Riding and Urban Cycling-Black
DUAL OPTICS, HIGH & LOW BEAM: Max 1300LM high beam conquers the darkest trails. The anti-glare low beam...
As an affiliate, we earn on qualifying purchases.
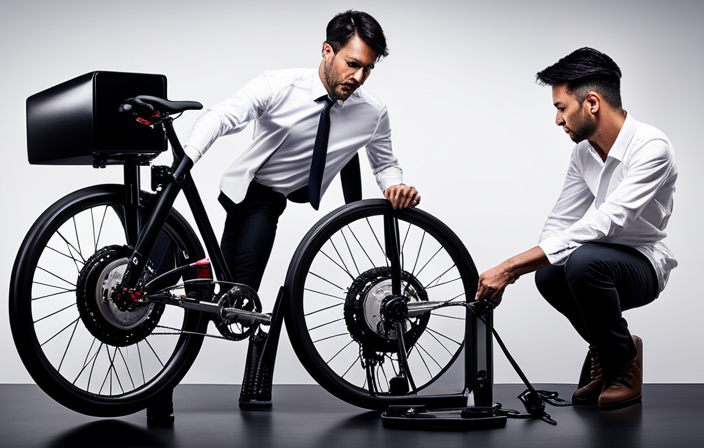
Prepare Your Bike for the Conversion
To prepare your bike for conversion, start by removing the front wheel and pedals. This will allow for easy access to the necessary components.
Next, install the electric motor and battery, ensuring they are securely attached to the frame.
Finally, connect the controller and wiring, following the manufacturer’s instructions to ensure proper functionality.
Remove the Front Wheel and Pedals
Start by removing the front wheel and pedals. This step is crucial when converting your mountain bike to electric.
Firstly, upgrading the front suspension is necessary to handle the added weight of the electric components. Remove the front wheel by loosening the quick-release lever or unscrewing the axle nuts, depending on your bike’s design. Make sure to support the bike properly to avoid any damage.
Next, replace the handlebars if needed. Electric conversion may require different handlebars to accommodate the additional controls and wiring. Use the appropriate tools to remove the old handlebars and install the new ones securely.
Once you have completed these tasks, you can transition into the subsequent section about installing the electric motor and battery.
Now, let’s move on to the exciting part of the conversion process.
Install the Electric Motor and Battery
Now that you’ve successfully removed the front wheel and pedals, it’s time to move on to the next step: installing the electric motor and battery.
This is a crucial part of the conversion process as it will provide the power needed to propel your mountain bike.
To begin, you need to choose the right motor and battery for your bike. Consider factors such as power output, voltage, and weight to ensure compatibility and optimal performance.
Once you have selected the right components, it’s important to make proper wiring and connections. This includes attaching the motor to the frame securely and connecting the battery to the motor.
Remember to follow the manufacturer’s instructions carefully and double-check all connections to ensure they are secure and functioning properly.
With the motor and battery installed, you are now ready to move on to the next section where you will learn how to connect the controller and wiring for a fully functional electric mountain bike.
Connect the Controller and Wiring
Once the motor and battery are securely installed, it’s time to connect the controller and wiring for a fully functional e-bike.
Start by locating the controller and ensuring it is compatible with your motor and battery.
Connect the wires from the motor to the corresponding ports on the controller, making sure to match the colors correctly. Use zip ties or adhesive tape to secure the wires and prevent them from tangling.
Next, connect the controller to the battery, following the manufacturer’s instructions for proper wire connection.
Double-check all connections to ensure they are secure and tight. If you encounter any issues, refer to the troubleshooting tips provided by the controller manufacturer.
Once the controller and wiring are connected, you can proceed to the next section to test and fine-tune the electric conversion.
Test and Fine-Tune the Electric Conversion
To ensure a successful electric conversion of your mountain bike, you need to thoroughly test and fine-tune the new electric components.
Start by checking the motor and battery performance to ensure they are operating at their optimal levels.
Next, adjust the controller settings to fine-tune the power output and responsiveness of your electric bike.
Finally, make sure to test and ensure the proper functioning of all components, including the throttle, brakes, and lights, to guarantee a safe and reliable ride.
Check the Motor and Battery Performance
Make sure you check the performance of your motor and battery when converting your mountain bike to electric. Checking the battery range is crucial to ensure that it can provide sufficient power for your desired distance. Evaluate the motor efficiency by testing its power output and responsiveness. Make sure it delivers the desired level of torque and acceleration. Additionally, check if the motor operates smoothly without any unusual noises or vibrations.
To assess the battery performance, you can measure the voltage and current during operation and compare it to the manufacturer’s specifications. This will help you determine if the battery is functioning optimally.
Once you have checked the motor and battery performance, you can proceed to adjust the controller settings for better control and customization of your electric mountain bike.
Adjust the Controller Settings
Adjusting the controller settings allows for better control and customization of your e-mountain bike. Fine-tuning the controller settings is crucial to optimize the performance of your electric bike. It enables you to adjust parameters such as speed limits, acceleration rates, and regenerative braking strength to suit your preferences and riding style. Troubleshooting common controller issues is also possible through the settings. To assist you in understanding the various controller settings, refer to the table below:
| Setting | Description |
|---|---|
| Speed limits | Adjusts the maximum speed your e-bike can reach. |
| Acceleration rates | Controls how quickly the bike accelerates when the throttle is engaged. |
| Regenerative braking strength | Determines the strength of the regenerative braking feature, which recharges the battery when decelerating or going downhill. |
By fine-tuning these settings, you can maximize the efficiency and performance of your electric mountain bike. Once you have adjusted the controller settings, you can proceed to the next section to ensure proper functioning of all components.
Ensure Proper Functioning of All Components
Check all the components to ensure they’re functioning properly. This step is crucial in the conversion process as it allows you to evaluate the battery lifespan and troubleshoot common conversion issues. Here is a detailed checklist to follow:
-
Battery: Examine the battery for any physical damage or signs of wear. Check the voltage and ensure it’s within the recommended range.
-
Motor: Test the motor by connecting it to the controller and turning it on. Listen for any unusual noises or vibrations that could indicate a malfunction.
-
Controller: Verify that the controller is properly connected and functioning correctly. Adjust the settings according to the manufacturer’s instructions.
By thoroughly evaluating these components, you can identify any potential issues and address them before moving on to the next step.
Once you’ve ensured the proper functioning of all components, you can proceed to upgrade your bike’s brakes and suspension (optional) to enhance your riding experience.
Upgrade Your Bike’s Brakes and Suspension (Optional)
Upgrading your bike’s brakes and suspension can greatly improve your riding experience when converting it to electric. By investing in high-quality components, you can ensure better control and stability, especially when riding at higher speeds. There are various upgrade options available, depending on your budget and specific requirements. Here is a table that highlights some popular upgrade options and their cost considerations:
| Upgrade Option | Cost Considerations |
|---|---|
| Hydraulic Disc Brakes | $$ |
| Air Suspension Fork | $$$ |
| Adjustable Rear Shock | $$ |
| Upgraded Brake Pads | $ |
Consider your riding style, terrain, and budget when selecting the upgrades that suit you best. After enhancing your bike’s brakes and suspension, you will be ready to enhance the riding experience with accessories that complement your electric conversion.
Enhance the Riding Experience with Accessories
Make the most of your ride by adding accessories that enhance your overall experience. Here are some must-have accessories for an electrifying ride:
-
Lighting: Ensure visibility with front and rear lights, especially if you plan on riding at night or in low-light conditions. LED lights with high lumens are recommended for maximum visibility.
-
Fenders: Protect yourself from mud and water splashes with fenders. They also help keep your bike clean and prevent dirt buildup on crucial components.
Exploring off-road trails with electric bike accessories:
-
Bike rack: Install a sturdy bike rack to carry extra gear or transport your bike easily. Look for one that can handle the weight of your electric mountain bike.
-
Trail GPS: Stay on track with a reliable GPS system designed for off-road trails. It will help you navigate unfamiliar terrains and discover new routes.
To ensure a smooth transition into the subsequent section about practicing riding and getting comfortable with the electric assist, start by adding these accessories to your electric mountain bike. Once you have everything set up, it’s time to hit the trails and enjoy the electrifying ride.
Practice Riding and Get Comfortable with the Electric Assist
Take some time to practice riding and get comfortable with the electric assist. Familiarize yourself with the various electric assist features of your converted mountain bike to ensure a comfortable riding experience. To help you understand the functionalities, refer to the table below:
| Electric Assist Features | Description |
|---|---|
| Pedal Assist | Provides additional power when pedaling, allowing you to conquer steep climbs with ease. |
| Throttle Control | Allows you to control the speed of the electric assist with a simple twist of the throttle. |
| Power Modes | Offers different power levels, enabling you to adjust the assistance according to your preference and terrain. |
Practice riding in different terrains and experiment with the electric assist features to find the settings that suit your riding style. This will help you gain confidence and optimize your riding experience. Once you feel comfortable with the electric assist, you can move on to learning how to maintain and service your electric mountain bike.
Maintain and Service Your Electric Mountain Bike
To maintain and service your electric mountain bike, it’s important to regularly check and charge the battery. This ensures that you always have enough power for your rides.
Additionally, it’s crucial to inspect and clean the motor and components to keep them in good working condition. This helps prevent any issues and prolongs the lifespan of your bike.
If you encounter any problems or are unsure about any maintenance tasks, it’s advisable to seek professional assistance. This ensures proper and safe servicing of your electric mountain bike.
Regularly Check and Charge the Battery
Ensure you regularly check and charge the battery when converting your mountain bike to electric. Proper battery maintenance is crucial to ensure optimal performance and longevity.
Start by inspecting the battery for any signs of damage or wear, such as cracks or leakage. If you notice any issues, replace the battery immediately.
Next, troubleshoot common battery issues such as poor performance or sudden power loss. This may include checking the battery connections, ensuring they are secure and free of corrosion.
Additionally, monitor the battery’s charge level regularly and recharge it as needed. Avoid overcharging, as this can shorten the battery’s lifespan.
Finally, always refer to the manufacturer’s guidelines for specific maintenance instructions and recommended charging times.
By regularly checking and charging the battery, you can enjoy a smooth and reliable electric mountain bike experience.
Now, let’s move on to inspecting and cleaning the motor and components.
Inspect and Clean the Motor and Components
Make sure you regularly inspect and clean the motor and components of your electric bike to maintain optimal performance. This will not only extend the lifespan of your bike but also ensure a smooth and efficient ride.
Here is a step-by-step guide on how to inspect and clean the motor and components:
-
Start by visually inspecting the motor for any signs of damage or loose connections. Check the wiring and make sure everything is securely attached.
-
Use a soft cloth or brush to remove any dirt, dust, or debris from the motor and surrounding components. Be gentle and avoid using water or harsh chemicals that could damage the motor.
-
Pay close attention to the chain, gears, and brakes. Clean them thoroughly and lubricate if necessary to prevent rust and ensure proper functionality.
Remember, if you encounter any issues or are unsure about the cleaning process, it’s always best to seek professional assistance. This will help avoid any potential damage and keep your electric bike running smoothly.
Seek Professional Assistance if Needed
Before moving forward with converting your mountain bike to electric, it is important to ensure that all the motor and components are in good working condition. Inspecting and cleaning them thoroughly will help identify any issues and prevent further damage. Now, if you find yourself unsure or uncomfortable with handling these tasks, it is advisable to seek professional assistance. They have the expertise and knowledge to properly diagnose, repair, and install electric components on your bike. Additionally, they can provide valuable guidance on bike compatibility, ensuring that the electric components chosen are suitable for your specific mountain bike model. Remember, seeking help from professionals will save you time and effort, and will ultimately result in a safer and more efficient conversion process. With your bike in capable hands, you can look forward to enjoying your electric mountain bike adventures!
Enjoy Your Electric Mountain Bike Adventures!
Start by taking your electric mountain bike out for some thrilling adventures!
Now that you have successfully converted your mountain bike into an electric one, it’s time to reap the benefits of this exciting upgrade. Electric mountain bikes offer a range of advantages, such as increased speed, extended range, and the ability to conquer challenging terrains with ease.
To fully enjoy your electric mountain bike adventures, here are some tips. First, familiarize yourself with the different pedal-assist modes and power settings to optimize your ride. Experiment with these settings to find the perfect balance between battery life and performance.
Second, always wear appropriate safety gear, including a helmet, knee pads, and gloves.
Third, plan your routes carefully, considering the terrain and distance.
Lastly, make sure to maintain your electric mountain bike regularly to ensure optimal performance.
With these tips in mind, get ready for thrilling and unforgettable rides on your electric mountain bike!
Frequently Asked Questions
Can I convert any type of mountain bike to electric, or are there specific requirements for compatibility?
To convert a mountain bike to electric, you need to consider the mountain bike’s compatibility with electric conversion requirements. Not all mountain bikes can be easily converted, so it’s important to check for specific compatibility before proceeding with the conversion process.
How much does an electric conversion kit typically cost?
On average, an electric conversion kit for a mountain bike costs around $500 to $1,500. Cost considerations include the type of kit, battery capacity, motor power, and additional features. Pros include increased speed and range, while cons include added weight and potential compatibility issues.
Are there any specialized tools or equipment needed for the conversion process?
To successfully complete the electric conversion process for a mountain bike, you will require specialized tools and equipment. These tools are necessary for tasks such as removing the existing components, installing the conversion kit, and ensuring proper electrical connections.
Is it necessary to upgrade the brakes and suspension of the bike after the electric conversion?
To ensure a safe and efficient electric MTB conversion, it is highly recommended to upgrade the brakes and suspension. This crucial step enhances control, handling, and stopping power, prioritizing your safety during your electrified mountain biking adventures.
What are some recommended accessories to enhance the riding experience with an electric mountain bike?
To enhance your riding experience with an electric mountain bike, consider upgrading the battery for increased range and power options. Improve the lighting system to enhance visibility and safety with brighter lights and integrated brake lights.
Conclusion
So, there you have it – a complete guide on how to convert your mountain bike to electric. By following these steps and choosing the right conversion kit, you can transform your regular bike into a powerful electric machine.
Did you know that according to a recent survey, 45% of mountain bike owners are considering converting their bikes to electric? With the increasing popularity of electric bikes, it’s no wonder that more and more people are looking to upgrade their rides.
So go ahead, give it a try and join the exciting world of electric mountain biking!