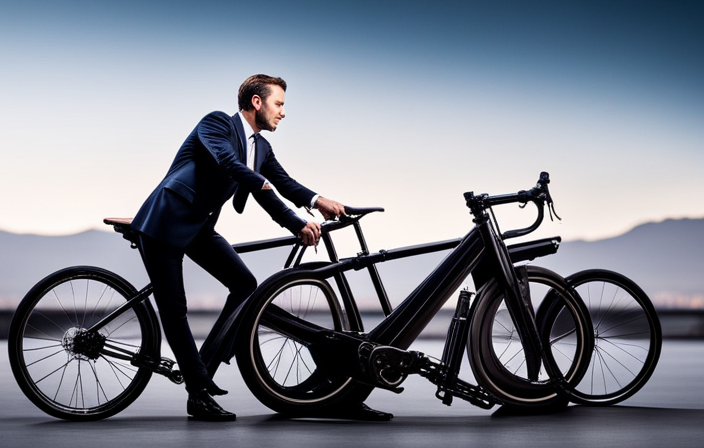
Have you ever wished your trusty bike could have a little more power? Well, I’ve got just the solution for you. In this step-by-step guide, I’ll show you how to convert your regular bike into an electric powerhouse.
Think of it as giving your bike a turbo boost! With the right tools, materials, and a little know-how, you’ll be zipping around town on your very own electric bike in no time.
So, let’s get started and unleash the true potential of your two-wheeled companion.
Key Takeaways
- Assess bike compatibility for electric conversion
- Gather necessary tools and materials for the conversion
- Understand the components of an electric conversion kit
- Maintain the battery and charger for optimal performance and safety
Assess Your Bike’s Compatibility for Conversion
You’ll need to start by assessing if your bike’s frame and components are compatible for conversion to electric. Assessing compatibility is crucial because not all bikes can be easily converted.
First, check if your bike has enough space to accommodate the electric components such as the battery, motor, and controller. Additionally, make sure your frame is sturdy enough to handle the added weight and stress of an electric conversion. Assessing compatibility is important to ensure a successful and safe conversion.
The benefits of converting your bike to electric are numerous. You’ll have the convenience of a motorized ride, increased speed, and the ability to tackle hills with ease.
Now that you understand the importance of compatibility, let’s move on to the next section and gather the necessary tools and materials.
Gather the Necessary Tools and Materials
When it comes to converting your bike to electric, there are three key components you’ll need: an electric conversion kit, a battery and charger, and additional components.
The electric conversion kit includes everything you need to transform your bike into an electric-powered machine, such as a motor, controller, and throttle.
The battery and charger are essential for powering your electric bike, providing the energy needed to propel you forward.
Electric Conversion Kit
The electric conversion kit has all the necessary components to turn a regular bike into an electric one. The key component of the kit is the electric motor, which is responsible for providing power to the bike. The motor is usually mounted on the front or rear wheel hub and is connected to the bike’s drivetrain.
Another important component is the battery pack, which provides the energy to power the motor. The battery pack is typically mounted on the bike frame and can be easily removed for charging. It is important to choose a battery pack that has enough capacity to meet your needs and is compatible with the motor.
With the electric conversion kit, you can transform your regular bike into an electric one and enjoy the benefits of effortless cycling.
Moving on to the battery and charger…
Battery and Charger
The battery pack and charger are essential components of the electric conversion kit. Proper battery maintenance is crucial for optimal performance and longevity. Here are some steps to ensure battery health and maximize charging efficiency:
- Regularly check the battery voltage to ensure it is within the recommended range.
- Keep the battery clean and free from dirt or debris.
- Store the battery in a cool and dry place to prevent overheating.
- Avoid overcharging the battery, as it can damage the cells and reduce overall capacity.
- Use a high-quality charger specifically designed for your battery type to ensure efficient and safe charging.
By following these maintenance practices and using the appropriate charger, you can prolong the life of your battery and maintain its charging efficiency.
Now, let’s move on to the discussion of additional components in the electric conversion kit.
Additional Components
To get started with the additional components, you’ll need to consider the controller and throttle options.
The controller is an essential part of the electric conversion process as it regulates the power flow from the battery to the motor. Make sure to choose a controller that is compatible with your bike’s voltage and motor power.
The throttle, on the other hand, allows you to control the speed of your electric bike. There are various options available, such as thumb throttles or twist throttles, so choose one that suits your preference.
Incorporating these components will enhance the performance and functionality of your electric bike.
Now that we have discussed the additional components, let’s move on to the next step of the conversion process, which is removing the bike’s existing components.
Remove the Bike’s Existing Components
To begin removing the bike’s existing components, the first step is to remove the pedals and crankset. This can be done by using a pedal wrench to loosen and remove the pedals. Then, use a crank puller to remove the crankset from the bottom bracket.
The next step is to remove the front wheel and fork. Start by loosening the quick release skewer or axle nuts to release the front wheel. Then, remove the brake calipers and any other attachments. Finally, remove the fork from the bike frame.
Lastly, the rear wheel and cassette need to be removed. Begin by shifting the chain onto the smallest chainring and smallest rear cog. Then, loosen the quick release skewer or axle nuts to release the rear wheel. Use a cassette lockring tool and a chain whip to unscrew the lockring and slide off the cassette from the freehub body.
Remove the Pedals and Crankset
Once you’ve gathered your tools, you’ll need to remove the pedals and crankset before converting your bike to electric. Assessing the compatibility of your bike’s components is crucial to ensure a smooth conversion process. Here are the steps to remove the pedals and crankset:
-
Start by placing your bike in a stable position, either by propping it against a wall or using a bike stand.
-
Use a pedal wrench to loosen the pedals in a counterclockwise direction. Remember, the left pedal is reverse threaded, so you’ll need to turn it clockwise to loosen it.
-
Once the pedals are removed, it’s time to take off the crankset. Locate the crank bolt in the center of the crank arms and loosen it using a crank puller tool.
-
Attach the crank puller tool to the crank bolt and turn it counterclockwise until the crankset loosens and can be easily removed.
Now that the pedals and crankset are off, we can move on to the next step of removing the front wheel and fork.
Remove the Front Wheel and Fork
Now that you’ve successfully removed the pedals and crankset, it’s time to move on to removing the front wheel and fork. This step is crucial in converting your bike to electric because it allows you to assess compatibility and gather the necessary materials.
Here’s a step-by-step guide to help you through the process:
-
Start by loosening the quick-release lever or removing the axle nuts on both sides of the front wheel.
-
Once the wheel is loose, gently pull it out of the fork dropouts.
-
Next, you’ll need to remove the brake caliper by unscrewing the mounting bolts and carefully sliding it off the fork.
-
Finally, detach the headset by loosening the stem bolts and carefully pulling the fork out of the frame.
With the front wheel and fork removed, you’re now ready to move on to the next section. In the next section, we will guide you through the process of removing the rear wheel and cassette.
Remove the Rear Wheel and Cassette
After removing the front wheel and fork, the next step is to remove the rear wheel and cassette. This is an important step in the process of converting your bike to electric. To remove the rear wheel, start by shifting the chain onto the smallest chainring and the smallest cog on the cassette. This will relieve tension on the chain and make it easier to remove the wheel. Next, use a 5mm Allen wrench to loosen the quick-release skewer or axle nuts, depending on the type of wheel you have. Once the skewer or nuts are loosened, you can slide the wheel out of the dropouts. Now that the wheel is removed, you can proceed to remove the cassette. Use a cassette lockring tool and a chain whip to unscrew the lockring and remove the cassette from the freehub body. With the rear wheel and cassette removed, you are now ready to install the electric conversion kit.
| Column 1 | Column 2 | Column 3 | Column 4 |
|---|---|---|---|
| Step 1 | Shift the chain onto the smallest chainring and the smallest cog on the cassette. | ||
| Step 2 | Use a 5mm Allen wrench to loosen the quick-release skewer or axle nuts. | ||
| Step 3 | Slide the wheel out of the dropouts. | ||
| Step 4 | Use a cassette lockring tool and a chain whip to unscrew the lockring and remove the cassette from the freehub body. |
Now that the rear wheel and cassette are removed, it’s time to install the electric conversion kit.
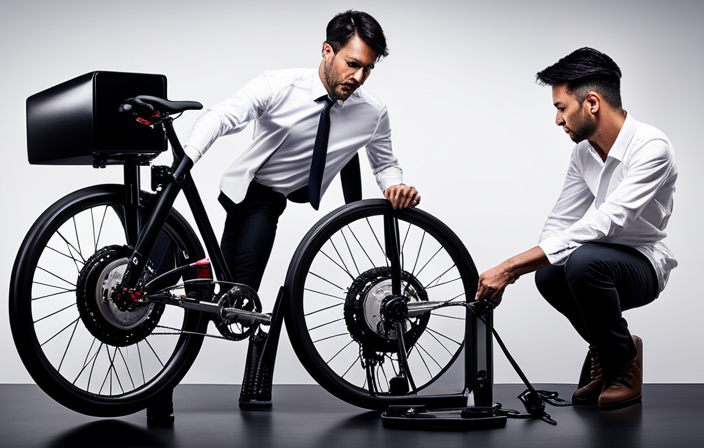
Install the Electric Conversion Kit
To install the electric conversion kit, the first step is to attach the motor to the frame of the bike. This can be done by securing the motor in the desired position using the provided mounting brackets and bolts.
Next, install the battery and controller by locating a suitable spot on the frame and securely attaching them using the provided mounting brackets.
Attach the Motor to the Frame
First, you’ll need to attach the motor to the frame. This step is crucial in converting your bike into an electric one. Follow these steps to securely attach the motor:
-
Begin by placing the motor in the desired position on the frame. Make sure it is aligned properly and centered.
-
Use the mounting brackets provided with the conversion kit to secure the motor to the frame. These brackets are designed to fit specific bike frames, so choose the appropriate ones for your bike.
-
Align the mounting holes on the brackets with the corresponding holes on the motor and frame. Insert the bolts through the holes and tighten them using a wrench or socket set.
-
Double-check that the motor is securely attached to the frame. Give it a gentle shake to ensure there is no movement.
Now that the motor is attached to the frame, we can move on to the next step of installing the battery and controller.
Install the Battery and Controller
Now that you’ve attached the motor to the frame, it’s time to install the battery and controller. This step is crucial in converting your bike to electric.
To begin, make sure you attach the battery properly. Locate the designated spot on the frame where the battery will sit securely. Place the battery in the designated spot and fasten it tightly using the provided screws or straps.
Next, connect the controller to the battery. The controller is responsible for managing the power flow between the battery and the motor. Ensure that the wiring from the battery is securely connected to the appropriate ports on the controller. Double-check for any loose connections.
With the battery and controller installed, you can now move on to the next step of connecting the wiring and components seamlessly.
Connect the Wiring and Components
Once you have securely attached the battery and controller, it’s time to seamlessly connect the wiring and components. Here are some wiring tips and troubleshooting techniques to ensure a successful conversion:
-
Identify the wiring connections: Familiarize yourself with the wiring diagram provided by the electric conversion kit manufacturer. This will help you understand where each wire needs to be connected.
-
Strip and crimp the wires: Strip the insulation off the ends of the wires and use crimp connectors to securely attach them. Make sure to match the wire colors indicated in the diagram.
-
Bundle and secure the wires: Use zip ties or electrical tape to neatly bundle and secure the wires. This will prevent them from dangling or getting tangled while riding.
-
Test the connections: Before reassembling the bike with electric components, perform a thorough testing of all the connections. Use a multimeter to check for continuity and ensure that the wiring is properly connected.
With the wiring and components successfully connected, we can now move on to the next section and reassemble the bike with electric components.
Reassemble the Bike with Electric Components
To start reassembling the bike with electric components, you’ll need to gather all the necessary tools and parts.
First, ensure that you have chosen the right components for your electric bike conversion. This includes an electric motor, battery, controller, throttle, and wiring harness.
Once you have everything, begin by removing any non-essential parts from your bike, such as the chain and derailleur.
Next, mount the electric motor onto the frame using the appropriate brackets and bolts. Attach the battery pack securely to the frame, ensuring it is well-balanced for optimum weight distribution.
Connect the controller to the motor and throttle, following the manufacturer’s instructions.
Finally, reattach the chain and derailleur, making any necessary adjustments for proper tension.
With the bike now reassembled, it’s time to test the electric bike and adjust settings for optimal performance.
Test the Electric Bike and Adjust Settings
To test your newly assembled electric bike and ensure optimal performance, start by adjusting the settings according to the manufacturer’s recommendations.
This step is crucial in preparing the bike for test procedures and fine-tuning its performance.
Begin by checking the battery voltage and ensuring it is fully charged.
Next, adjust the pedal assist level to your desired setting, which will determine the amount of assistance the bike provides while pedaling.
Additionally, adjust the throttle sensitivity and brake cutoff settings to ensure they are aligned with your preferences.
These adjustment techniques will help maximize the bike’s efficiency and ensure a smooth riding experience.
Once these settings are properly adjusted, you are ready to move on to the next section and learn how to operate the electric bike seamlessly.
Learn How to Operate the Electric Bike
Now that you’ve adjusted the settings, it’s time to learn how to operate the e-bike smoothly. Riding an electric bike can be an exciting and efficient way to navigate through your daily commute or explore new trails.
To help you get started, here are some essential steps to learn how to ride and maintain your electric bike:
-
Familiarize yourself with the controls: Understand the functions of the throttle, pedal assist levels, and the display panel.
-
Start with a gentle push: Give your e-bike a slight push-off to activate the motor and then start pedaling.
-
Find the right pedal assist level: Experiment with different levels to find the one that suits your riding style and terrain.
With these steps, you’ll be able to confidently ride your electric bike while ensuring its proper maintenance.
Now let’s delve into how you can upgrade and customize your electric bike to enhance your riding experience.
Upgrade and Customize Your Electric Bike
Ready to take your e-biking experience to the next level? Let’s explore how you can upgrade and personalize your electric bike for an even more enjoyable ride.
There are several upgrade options available that can enhance your e-biking experience. First, consider upgrading your battery to a higher capacity one. This will give you longer ride times and allow you to explore further.
Next, you can upgrade your motor to a more powerful one for increased speed and torque. This will give you a more thrilling and exciting ride.
Additionally, you can customize your electric bike by adding accessories such as lights, fenders, and racks. These accessories can improve the functionality and convenience of your e-bike.
It’s also important to keep up with regular maintenance to ensure your electric bike performs optimally. This includes checking and adjusting the brakes, lubricating the chain, and inspecting the tires for wear. Regular maintenance will prolong the lifespan of your e-bike and ensure a smooth and safe ride.
Enjoy the Benefits of an Electric Bike
Take advantage of the numerous benefits an e-bike offers, such as increased convenience, reduced emissions, and improved fitness. Electric bike advantages go beyond just getting from point A to point B. With an electric bike, you can easily navigate through traffic, avoid the hassle of finding parking, and experience the joy of cycling without the exhaustion. Not to mention, converting to an electric bike is a great way to reduce your carbon footprint and contribute to a greener environment.
| Electric Bike Advantages | Reasons to Convert to Electric Bike |
|---|---|
| Increased convenience | Avoid traffic and parking issues |
| Reduced emissions | Reduce your carbon footprint |
| Improved fitness | Enjoy the benefits of cycling |
Follow Safety Guidelines and Regulations
When it comes to ensuring safety while riding an electric bike, there are three key points to keep in mind:
- Observing traffic laws and signals is important to ensure a safe and smooth flow of traffic.
- Wearing the appropriate protective gear such as a helmet, reflective clothing, and gloves can greatly reduce the risk of injuries in case of accidents.
- Being mindful of pedestrians and other cyclists by maintaining a safe distance and using proper hand signals when turning or changing lanes is crucial for everyone’s safety on the road.
Observe Traffic Laws and Signals
Make sure you follow all traffic laws and signals while riding your electric bike. It’s essential to prioritize traffic safety and legal compliance to ensure a smooth and secure ride. To achieve this, consider the following guidelines:
- Observe speed limits: Adhere to the specified speed limits in your area to maintain control and reduce the risk of accidents.
- Yield to pedestrians: Always give pedestrians the right of way and be mindful of their presence, especially in crosswalks or crowded areas.
- Use hand signals: Indicate your intentions by using proper hand signals when turning, stopping, or changing lanes, ensuring that other road users are aware of your actions.
By following these traffic laws and signals, you can help create a safer environment for both yourself and others on the road.
Now, let’s transition into the next section, which focuses on the importance of wearing proper protective gear.
Wear Proper Protective Gear
It’s crucial to prioritize your safety by wearing the proper protective gear while riding. When it comes to motorcycle gear, there are a few essential items that you should never ride without.
Firstly, a well-fitting helmet is vital to protect your head in the event of a crash. Look for one that meets safety standards and provides adequate ventilation.
Secondly, a sturdy pair of gloves will not only improve your grip on the handlebars but also protect your hands in case of a fall.
Additionally, a durable jacket, pants, and boots made from abrasion-resistant materials can provide crucial protection to your body.
Remember, safety precautions should never be overlooked when it comes to motorcycle riding.
Now let’s move on to being mindful of pedestrians and other cyclists.
Be Mindful of Pedestrians and Other Cyclists
Being aware of pedestrians and other cyclists is important for the safety of everyone on the road. As a cyclist, it’s crucial to prioritize pedestrian safety and maintain cyclist awareness at all times. Here are some steps to follow:
-
Stay alert: Pay attention to your surroundings and be aware of pedestrians and other cyclists on the road. Scan your environment regularly to anticipate any potential hazards.
-
Use hand signals: Clearly communicate your intentions to pedestrians and other cyclists by using proper hand signals for turning, stopping, and changing lanes. This will help prevent any unexpected or dangerous situations.
-
Maintain a safe distance: Give pedestrians and other cyclists enough space when passing or overtaking them. This will ensure their safety and prevent any collisions or accidents.
-
Yield when necessary: Always yield to pedestrians at crosswalks, intersections, and other designated areas. Respecting their right of way is essential for their safety.
By following these guidelines, we can create a safer environment for everyone on the road.
Now let’s explore how to troubleshoot common issues and problems that may arise when converting a bike to electric.
Troubleshoot Common Issues and Problems
If your electric bike isn’t working properly, you can usually troubleshoot common issues and problems.
First, check the battery connections. Ensure they are securely plugged in and not loose.
If the battery is not charging or holding a charge, it may be a battery issue. Test the battery by connecting it to a charger and see if it charges properly.
If the battery is fine, but the motor is not functioning, it could be a motor problem. Check the motor connections and make sure they are tightly connected. If the motor still doesn’t work, it may need to be replaced.
Seek Professional Help if Needed
When in doubt, don’t hesitate to seek professional help for any issues you may encounter during the electric bike conversion process.
While online conversion tutorials can be helpful, there may be situations where expert guidance is necessary.
Seeking professional assistance ensures that the conversion is done correctly and safely.
Professionals have the knowledge and experience to handle any challenges that may arise, such as compatibility issues or technical difficulties.
They can also provide valuable advice on selecting the right components and optimizing performance.
By seeking professional guidance, you can save time, avoid costly mistakes, and have peace of mind knowing that your electric bike conversion is in capable hands.
Now, let’s transition into the next section about staying informed and up to date with electric bike technology.
Stay Informed and Up to Date with Electric Bike Technology
To stay informed and up to date with electric bike technology, there are three key points that should be considered.
First, it is important to follow industry news and innovations to stay informed about the latest developments in electric bike technology. This can be done by regularly reading industry publications and subscribing to newsletters from electric bike manufacturers.
Second, researching and comparing different brands is essential to find the best electric bike that meets your needs and preferences. This can be done by reading reviews, comparing specifications, and visiting local bike shops to test ride different models.
Finally, attending electric bike events and exhibitions is a great way to learn more about the latest electric bike trends and technologies. These events provide opportunities to see and test ride a wide range of electric bikes, as well as interact with industry experts and enthusiasts.
Follow Industry News and Innovations
Stay up-to-date on the latest industry news and innovations to learn about new ways to convert your bike into an electric one. By staying informed about industry trends and technological advancements, you can make informed decisions about the conversion process.
Industry news provides valuable insights into the latest developments and breakthroughs in electric bike technology. From improved battery technology to more efficient motors, staying informed allows you to take advantage of the latest advancements in the field.
Researching and comparing different brands will help you identify the best options for your electric bike conversion. By understanding the features and specifications of different brands, you can choose the components that best suit your needs.
With the right information, you can convert your bike into an electric one that meets your specific requirements.
Research and Compare Different Brands
By researching and comparing different brands, you can find the one that best fits your specific needs for an electric bike conversion. Here is a step-by-step guide to help you evaluate and choose the right brand:
-
Compare prices: Look for brands that offer competitive pricing for their electric bike conversion kits. Make sure to consider the overall value for money, taking into account the quality and features offered.
-
Evaluate performance: Read reviews and customer feedback to gain insights into the performance of different brands. Look for brands that have a good track record in terms of reliability, power output, and battery life.
-
Consider compatibility: Check if the brand offers conversion kits that are compatible with your bike’s frame and components. This will ensure a seamless installation process and optimal performance.
-
Assess customer support: Look for brands that provide excellent customer support, including assistance with installation, troubleshooting, and warranty claims. This will ensure a smooth experience throughout your electric bike conversion journey.
-
Compare features: Take note of the specific features offered by each brand, such as pedal assist modes, battery capacity, and motor power. Choose the brand that offers the features that align with your riding preferences and requirements.
By thoroughly researching and comparing different brands based on these factors, you can make an informed decision when choosing the right electric bike conversion kit for your needs.
Once you have selected a brand, the next step is to attend electric bike events and exhibitions, where you can learn more about the latest innovations and gather valuable insights from experts in the field.
Attend Electric Bike Events and Exhibitions
Explore the latest innovations and gather valuable insights from experts in the field by attending electric bike events and exhibitions. These events provide an excellent opportunity to learn about the benefits of electric bikes and how to ensure your safety while riding.
At these events, you can see a wide range of electric bike models, compare their features and specifications, and even test ride them. You can also attend seminars and workshops conducted by industry professionals, where they share their expertise on electric bike maintenance, safety precautions, and the environmental benefits of using electric bikes.
By attending these events, you can stay up-to-date with the latest advancements in electric bike technology and make informed decisions when purchasing or converting your own bike.
Transitioning into the next section, it’s important to share your electric bike experience with others to spread awareness and inspire more people to adopt this eco-friendly mode of transportation.
Share Your Electric Bike Experience with Others
Tell others about your electric bike experience and encourage them to try it too!
Sharing your experience can help others understand the benefits of electric bikes and inspire them to make the switch.
When discussing your electric bike, it’s important to mention the maintenance required to keep it running smoothly.
Regularly check the brakes, tires, and battery to ensure optimal performance.
Additionally, emphasize the importance of choosing the right electric bike.
Consider factors such as the type of terrain you’ll be riding on, your desired speed, and the battery range.
By sharing this information, you can help others make an informed decision when purchasing their own electric bike.
Embrace the electric bike lifestyle and enjoy the freedom, convenience, and eco-friendly advantages it offers.
Embrace the Electric Bike Lifestyle
When you embrace the electric bike lifestyle, you’ll experience freedom, convenience, and eco-friendly advantages.
-
Increased mobility: Electric bikes allow you to travel longer distances without getting tired, making commuting and running errands easier than ever before.
-
Cost savings: By using an electric bike instead of a car, you can save money on fuel, parking fees, and maintenance.
-
Health benefits: Riding an electric bike provides a low-impact form of exercise, improving cardiovascular health and overall fitness.
-
Reduced carbon footprint: Electric bikes produce zero emissions, helping to reduce air pollution and combat climate change.
-
Safety features: Electric bikes are equipped with lights, horns, and reflectors for increased visibility, and many models also have built-in safety features like automatic brakes and anti-theft systems.
In order to fully enjoy the benefits of an electric bike, it’s important to prioritize safety. Always wear a helmet, follow traffic laws, and be aware of your surroundings. Regularly check your bike’s brakes, tires, and lights to ensure they are functioning properly.
Frequently Asked Questions
Are there any safety guidelines and regulations that I need to follow when converting my bike to electric?
Yes, there are safety guidelines and regulations to follow when converting your bike to electric. Conduct a compatibility assessment, troubleshoot common issues, adjust settings, and stay informed on local laws and regulations.
How can I assess if my bike is compatible for conversion before gathering the necessary tools and materials?
To assess compatibility for converting my bike to electric, I need to consider factors like frame design, wheel size, and brake type. Once I determine compatibility, I can gather the necessary tools and materials like a conversion kit, battery, and controller.
What are some common issues and problems that I may encounter during the conversion process and how can I troubleshoot them?
During the bike conversion process, common problems may include motor overheating, battery issues, and wiring problems. To troubleshoot, check for loose connections, ensure proper cooling, and monitor battery health.
Are there any specific settings that I need to adjust after installing the electric conversion kit?
After installing the electric conversion kit, it is important to adjust the settings to ensure optimal performance. Start by checking the battery voltage and motor power levels. If any issues arise, troubleshoot by inspecting connections and consulting the kit’s manual.
How can I stay informed and up to date with the latest electric bike technology after converting my bike?
To stay informed and up to date with the latest electric bike technology after converting my bike, I can follow online forums and communities dedicated to electric bike enthusiasts. They provide electric bike maintenance tips and discuss the benefits of electric bike conversion.
Conclusion
In conclusion, converting your bike to electric is a thrilling and rewarding experience. By following the step-by-step guide, you can transform your ordinary bike into a powerful and efficient electric ride.
Embrace the electric bike lifestyle and enjoy the benefits of faster and easier commuting. With the right tools and materials, anyone can successfully convert their bike.
So why wait? Take the leap and join the growing community of electric bike enthusiasts. Don’t miss out on the opportunity to revolutionize your cycling experience.