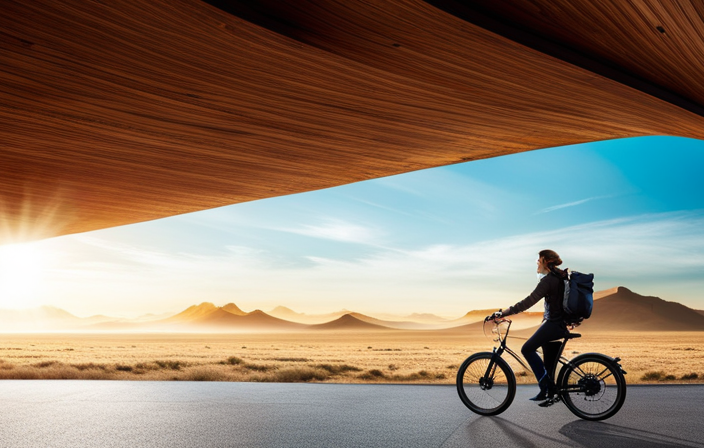
Did you know that converting your bike into an electric one can drastically increase your speed and range? With the right conversion kit and a few simple steps, you can transform your regular bike into a powerful and eco-friendly mode of transportation.
In this article, I will guide you through the process of converting your bike into an electric one, from assessing its suitability to installing the electric motor.
Get ready to elevate your biking experience and enjoy the benefits of electric bike conversion.
Key Takeaways
- Attaching electric brake sensors and fine-tuning the system
- Regularly inspecting and maintaining battery, motor, and electrical components
- Always wearing proper safety gear and obeying traffic laws
- Enjoying increased speed, reduced effort, and contributing to a greener environment

GPUTEK Mini Bike Tire Air Pump: Fast Inflate Portable Small Bicycle Electric Pump for Presta and Schrader Valves, 120 Psi High Pressure Pump with Digital Gauge for Road Bike, Mountain Bike, E-Bike
Portable and Lightweight Design: The GPUTEK bike electric pump measures a compact 2.81 x 1.77 x 1.25 inches...
As an affiliate, we earn on qualifying purchases.
Assess Your Bike’s Suitability for Conversion
You’ll need to assess if your bike is suitable for conversion. Determining compatibility is crucial before you start the conversion process.
First, consider the frame and fork of your bike. Ensure they are in good condition and can handle the additional weight of the electric components.
Next, check the wheel size and axle type. Most conversion kits are designed for standard 26-inch wheels, but options are available for other sizes.
Look at the brakes, as they may need upgrading to handle the increased speed and weight of the electric bike.
Additionally, consider the bike’s drivetrain and gearing system, as they may require necessary modifications.
Now that you’ve assessed your bike’s suitability for conversion, let’s move on to choosing the right conversion kit.

HOTO Mini Bike Tire Pump, 25s Fast Inflate Bicycle Pump with Guage, 150PSI Portable Electric Bike Air Pump with Presta and Schrader Valve for Road Bike, Motorcycle, Mountain Bike, BMX, Sports Ball
NOTICE: The Presta valve adapter is a separate accessory, always attach the Presta adapter securely to the tire...
As an affiliate, we earn on qualifying purchases.
Choose the Right Conversion Kit
Selecting the appropriate conversion kit for your bicycle is crucial. There are several benefits of electric bike conversion.
Firstly, it allows you to transform your regular bike into an eco-friendly and cost-effective mode of transportation.
Secondly, it provides you with the flexibility to switch between pedal power and electric power, depending on your needs.
Thirdly, it enables you to reach higher speeds and cover longer distances with less effort.
Lastly, it allows you to enjoy a smoother and more comfortable ride.
When choosing the right conversion kit, consider the following tips:
1) Determine the type of conversion kit you want – front wheel, rear wheel, or mid-drive.
2) Check the compatibility of the kit with your bike’s frame and components.
3) Consider the power and range of the motor.
4) Look for a reliable and reputable brand.
Once you have selected the kit, gather the necessary tools and equipment to start the conversion process smoothly.

CYCPLUS Electric Air Compressor Portable Bicycle Pump Car Tire Inflator, Max 150 PSI, Auto Shut-Off Air Pump with Presta and Schrader Valves for All Bicycles Motorcycles and Cars
【150PSI Fast Inflation】CYCPLUS Portable Air Compressor delivers 𝟏𝟓𝟎 𝐏𝐒𝐈/𝟏𝟎.𝟑 𝐁𝐚𝐫, allowing you to fully inflate a bike tire...
As an affiliate, we earn on qualifying purchases.
Gather the Necessary Tools and Equipment
To properly complete the conversion, make sure you have all the necessary tools and equipment.
The selection of tools and equipment is crucial for a successful conversion.
First, you will need a set of wrenches and screwdrivers in various sizes to remove and install different components.
Additionally, a torque wrench is essential to ensure proper tightening of bolts and nuts.
A wire cutter/stripper and a soldering iron are necessary for working with the electrical connections.
You may also need a chain breaker tool to adjust the length of the chain.
It is important to have a good quality multimeter to troubleshoot any electrical issues that may arise during the conversion process.
Lastly, don’t forget safety equipment such as gloves and safety glasses.
With all the necessary tools and equipment at hand, you will be prepared to remove the existing components and move on to the next step.

CYCPLUS AS2 PRO Tiny Bicycle Pump with Gauge, Max 120 PSI Electric Mini Pump, Auto Stop, with Presta and Schrader Valve for E-Bike, MTB, and Road Bike (2025 Updated Version)
【Pocket Size & Portable】: Weight: 𝟒.𝟐𝟑 𝐨𝐳 (𝟏𝟐𝟎𝐠); Size: 𝟐.𝟕𝟓 𝐱 𝟏.𝟏𝟎 𝐱 𝟏.𝟗𝟐 inches - mini and...
As an affiliate, we earn on qualifying purchases.
Remove the Existing Components
Start by gathering all the necessary tools and equipment for the conversion process. To remove the existing components from your bike, it is essential to have the right tools at hand. Here is a table that lists the tools and their purposes:
| Tool Name | Purpose |
|---|---|
| Wrench | Loosen and tighten bolts |
| Screwdriver | Remove screws |
| Pliers | Grip and manipulate components |
Once you have these tools, start by disconnecting the existing components such as the pedals, chain, and gears. This will create space for the electric motor and other components. While removing the existing parts, it is a good time to discuss alternative components that may enhance your electric bike’s performance. Additionally, exploring DIY conversion methods can give you a deeper understanding of the process. With the existing components removed, we can now move on to the next step and install the electric motor.
Transitioning into the subsequent section, let’s now explore how to install the electric motor onto your bike.
Install the Electric Motor
Once you have removed the existing components, it’s time to install the electric motor onto your bike.
To begin the electric motor installation, locate a suitable area on your bike’s frame to mount the motor. Ensure that the motor is securely attached using appropriate mounting brackets or clamps.
Next, connect the motor’s power cables to the battery and controller. It is essential to double-check the polarity and make sure the connections are secure. A common issue during motor installation is incorrect wiring, which can lead to motor failure or performance problems. To avoid this, follow the manufacturer’s instructions carefully and refer to the wiring diagram provided.
If you encounter any issues, such as unusual noises or motor malfunction, consult the troubleshooting guide or seek professional assistance.
Now, let’s move on to connecting the battery and controller for the final step in converting your bike into an electric one.
Connect the Battery and Controller
After installing the electric motor, the next step is to connect the battery and controller. This is a crucial step in the conversion process as it allows the motor to receive power and be controlled effectively. To do this, you will need to establish the necessary wiring and connections between the battery and controller. It is important to carefully follow the manufacturer’s instructions and ensure that all connections are secure and properly insulated to prevent any electrical mishaps. Additionally, troubleshooting common issues such as loose connections or faulty wiring should be addressed to ensure optimal performance. Once the battery and controller are successfully connected, you can proceed to the next section where we will discuss how to mount the throttle and display, allowing you to control and monitor your electric bike.
Mount the Throttle and Display
To mount the throttle and display, you’ll need to securely attach them to your electric bike.
Start by choosing a suitable location on your handlebars for the throttle. Make sure it is within reach and comfortable to operate while riding. Use the provided clamp or screws to fasten the throttle securely in place.
Next, find a convenient spot on your bike’s frame or handlebars to mount the display. Ensure it is easily visible and does not interfere with your riding experience. Use zip ties or mounting brackets to secure the display firmly.
Once both accessories are mounted, double-check all connections and tighten any loose screws. If you encounter any issues, such as a non-responsive throttle or a malfunctioning display, consult the user manual or contact the manufacturer for troubleshooting guidance.
Now, let’s move on to the next section and install the pedal assist system (optional).
Install the Pedal Assist System (Optional)
You can choose to install the pedal assist system for an enhanced riding experience. The pedal assist system, also known as PAS, is a feature that provides additional power to your electric bike when pedaling.
There are different types of pedal assist systems available, including cadence sensor, torque sensor, and combined sensor systems.
Benefits of using a pedal assist system include a more natural-feeling ride as the system automatically adjusts the assistance level based on your pedaling speed or force. It also allows you to ride longer distances with less effort, making it suitable for commuting or tackling hilly terrains.
When installing the pedal assist system, make sure to follow the manufacturer’s instructions carefully. This may involve attaching the sensor to the bottom bracket or crank arm, connecting it to the motor controller, and adjusting the sensitivity settings.
Next, we will move on to attaching the electric brake sensors to ensure a safe and responsive braking experience.
Attach the Electric Brake Sensors
The next step is attaching the electric brake sensors to ensure a safe and responsive braking experience. Electric brake maintenance is crucial to keep your bike running smoothly.
Start by locating the brake levers and identify the brake sensor attachment points. Securely attach the brake sensors by aligning them with the brake levers and tightening the screws or bolts provided. Make sure the sensors are positioned close enough to detect the movement of the brake levers.
Once attached, test the brake sensors by squeezing the brake levers and checking if the motor stops or slows down accordingly. Troubleshooting brake sensor issues may involve checking the wiring connections, adjusting the sensor position, or replacing faulty sensors.
With the brake sensors properly installed, you can now move on to the next section and fine-tune the system for optimum performance.
Adjust and Fine-Tune the System
Once the brake sensors are securely attached, it is time to adjust and fine-tune the system for optimum performance. To ensure the electric conversion operates smoothly, it is essential to adjust the settings and optimize its performance. This can be done by accessing the control panel or display unit of the electric conversion kit. The table below provides an overview of the key settings that can be adjusted and their impact on the system:
| Setting | Impact |
|---|---|
| Power level | Determines the amount of assistance provided by the motor. Adjust according to personal preference and terrain. |
| Speed limit | Sets the maximum speed the electric conversion will assist you to achieve. Ensure it complies with local regulations. |
| Regenerative braking | Adjusts the amount of energy that is regenerated when applying the brakes. Higher settings provide more battery recharge. |
| Acceleration | Controls the responsiveness of the motor when pedaling. Fine-tune to achieve a balance between power and efficiency. |
By carefully adjusting these settings, you can optimize the performance of your electric bike. Once this is done, it’s time to test ride and make any necessary adjustments to ensure a smooth and enjoyable experience.
Test Ride and Make Adjustments
After adjusting the settings, it’s important to test ride the electric bike and make any necessary adjustments for a smooth and enjoyable experience. Here are some test ride tips to ensure everything is working properly:
-
Start with a short test ride in a safe and open area to get a feel for the electric assist and braking system. Pay attention to how responsive they are and make note of any issues or concerns.
-
Gradually increase the distance and terrain complexity during subsequent test rides to assess the bike’s performance under different conditions. This will help identify any limitations or potential improvements needed.
-
Troubleshoot common issues such as unusual noises, vibrations, or inconsistent power delivery. Check the battery level, inspect the wiring connections, and ensure the brakes are properly adjusted.
By carefully test riding and addressing any issues that arise, you can fine-tune your electric bike to deliver the best riding experience possible.
In the next section, we will learn how to use and maintain your electric bike effectively, ensuring its longevity and optimal performance.
Learn How to Use and Maintain Your Electric Bike
To effectively use and maintain your electric bike, it’s important to learn the proper techniques and procedures. Electric bike maintenance is crucial for ensuring optimal performance and longevity.
Regularly inspect the battery, motor, and electrical components for any signs of damage or wear. Keep the battery charged according to the manufacturer’s instructions and avoid overcharging.
Clean the bike regularly, paying special attention to the chain, gears, and brakes. Troubleshooting common issues such as loss of power, strange noises, or faulty brakes is essential. Consult the user manual or seek professional assistance if needed.
Remember to follow safety precautions and regulations when riding your electric bike, such as wearing a helmet and obeying traffic laws. By properly maintaining your electric bike and addressing any issues promptly, you can enjoy a safe and efficient ride.
Now, let’s discuss how to follow safety precautions and regulations.
Follow Safety Precautions and Regulations
Make sure you always wear a helmet and obey traffic laws when riding an electric bike. Safety should be your top priority to ensure a smooth and enjoyable experience.
Invest in proper safety gear, such as gloves, knee pads, and reflective clothing, to protect yourself in case of accidents.
Additionally, it is essential to explore local regulations regarding electric bikes. Some areas may have specific laws regarding speed limits, bike lanes, and where electric bikes are allowed to be ridden. Familiarize yourself with these regulations to avoid any legal issues and ensure a safe ride.
By following safety precautions and adhering to regulations, you can confidently enjoy the benefits of electric bike conversion, such as increased speed and reduced effort in pedaling.
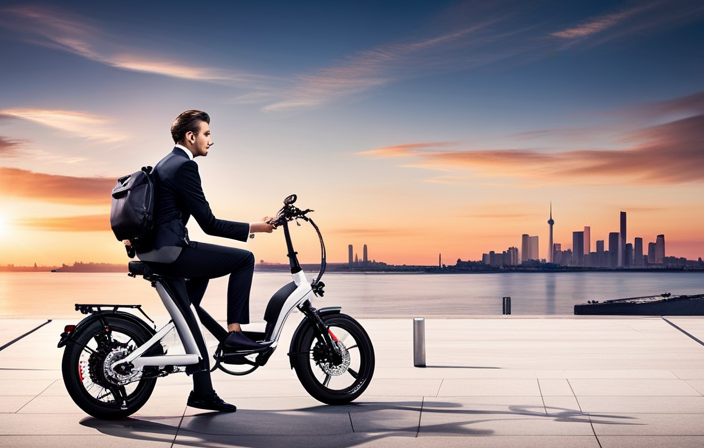
Enjoy the Benefits of Electric Bike Conversion
Experience the advantages of electric bike conversion, including faster speeds and less effort while pedaling. Converting your bike into an electric one opens up a whole new world of possibilities.
Here are three reasons why you should consider electric bike conversion:
-
Increased speed: With an electric motor assisting your pedaling, you can easily reach higher speeds than on a regular bike. This means you can cover more ground in less time, making your daily commute or weekend rides more efficient.
-
Reduced effort: The electric motor provides a boost to your pedaling, making it easier to tackle inclines and ride for longer distances. Say goodbye to sweaty and exhausting rides, and hello to a more enjoyable biking experience.
-
Environmental friendliness: By converting your bike into an electric one, you are contributing to a greener environment. Electric bikes produce zero emissions, helping to reduce air pollution and combat climate change.
Now that you know the benefits of electric bike conversion, you can share your experience and inspire others to go electric.
Share Your Experience and Inspire Others to Go Electric
Share your story of going electric and inspire others to join the movement. Joining the electric bike community has been a game-changer for me. Not only do I contribute to a cleaner environment, but I also enjoy the convenience and thrill of riding an electric bike. Let me share my experience through this table:
| Inspiration Stories | Electric Bike Community |
|---|---|
| Riding uphill became effortless | Meet like-minded individuals |
| Increased my commuting speed | Share tips and tricks |
| Longer and more enjoyable rides | Discover new routes |
| Reduced my carbon footprint | Participate in group rides |
Being part of the electric bike community has opened doors to new friendships and endless possibilities. The inspiration stories I’ve heard from fellow riders have motivated me to explore more and push my limits. Together, we support and encourage each other, making the electric bike journey even more rewarding. So, share your story and inspire others to experience the joy and benefits of going electric.
Frequently Asked Questions
Can I convert any type of bike into an electric bike?
Yes, any type of bike can be converted into an electric bike using electric bike conversion kits. The benefits of converting a bike into electric include increased speed, reduced effort in pedaling, and the ability to tackle hilly terrains with ease.
How long does it typically take to complete the conversion process?
Converting a bike to electric can take anywhere from a few hours to a few weeks, depending on the complexity of the project and the availability of parts. Common challenges include finding compatible components and troubleshooting electrical issues.
Can I still use my bike’s gears after converting it into an electric bike?
Yes, you can still use your bike’s gears after converting it into an electric bike. Using gears can have a positive impact on the bike’s performance, allowing for better control, improved efficiency, and the ability to climb hills more easily.
Are there any weight limitations for the bike when converting it into an electric bike?
When converting a lightweight bike into an electric one, the pros include improved speed and power. However, challenges arise when dealing with a heavier bike, such as decreased maneuverability and the need for stronger components to handle the extra weight.
How often do I need to charge the electric bike’s battery?
I need to charge my electric bike’s battery regularly to ensure optimal performance. The battery lifespan depends on usage and quality, but typically ranges from 2-5 years. It’s important to consider charging station availability for longer rides.
Conclusion
In conclusion, converting your bike into an electric one can be a game-changer in terms of convenience and sustainability.
Did you know that electric bikes can reach speeds of up to 20 miles per hour? This fascinating statistic not only showcases the power and efficiency of electric motors but also highlights the potential for faster and more enjoyable rides.
By following the steps outlined in this article, you can join the growing community of electric bike enthusiasts and experience the numerous benefits it offers.
So why wait? Start your electric bike conversion journey today and revolutionize your biking experience.