Did you know that you can convert your regular bike into an electric one for under $100? That’s right, with just a few simple steps and the right conversion kit, you can transform your trusty two-wheeler into a powerful and eco-friendly mode of transportation.
In this article, I will guide you through the process of converting your bike to electric, from assessing compatibility to wiring the electrical system.
Get ready to enjoy the benefits of an electric bike without breaking the bank.
Key Takeaways
- Electric bike conversions are a cost-effective way to enjoy the benefits of an electric bike.
- Assessing bike compatibility is crucial before starting the conversion process.
- Choosing the right conversion kit is essential, considering factors such as motor power and battery range.
- Proper installation, wiring, and testing are crucial for a successful electric bike conversion.

Under Armour Squeeze Water Bottles, 32 oz Water Bottles, Sideline Sports Water Bottle with Quick-Shot Lid, Quick & Easy Hydration, Gym Water Bottles, Squeeze Bottle, 1 32oz Bottle
- Easy Hydration: Quick-shot lid and one-way valve
- On-the-Go Use: One-hand operation for active hydration
- Measurement Markings: Ounces and milliliters for tracking
As an affiliate, we earn on qualifying purchases.
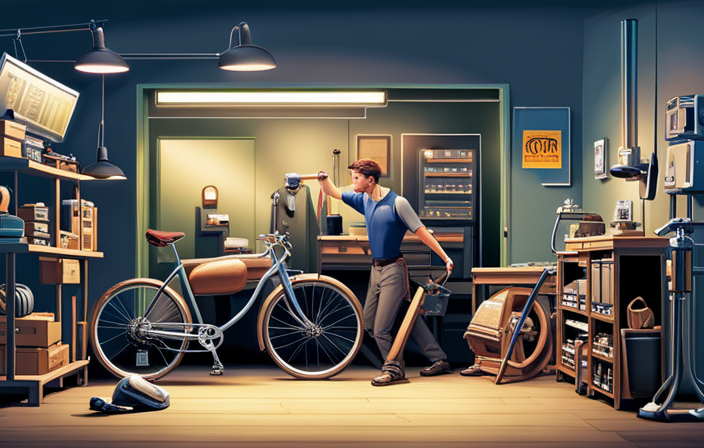
Understanding Electric Bike Conversions
Understanding electric bike conversions is essential for anyone looking to convert their bike to electric under $100. Electric bike motors are the heart of these conversions, providing the power needed to turn a regular bike into an electric one.
One of the main advantages of electric bike conversions is the ability to effortlessly tackle hills and long distances without breaking a sweat. With a converted electric bike, you can easily commute to work or run errands without worrying about arriving sweaty and tired.
Another advantage is the potential for cost savings compared to buying a brand new electric bike. By converting your existing bike, you can enjoy the benefits of an electric bike without breaking the bank.
So, understanding the ins and outs of electric bike conversions is crucial for anyone looking for an affordable and eco-friendly transportation option.
Assessing Your Bike’s Compatibility
To determine if it’s possible, you’ll need to assess if your bicycle is compatible with the necessary modifications.
Evaluating the compatibility of your bike is crucial before embarking on an electric conversion. Start by checking if your bike has a standard frame, as this will make the conversion process much easier. Look for enough space in the frame to accommodate the battery, motor, and controller.
Additionally, ensure that the bike has a rear wheel with a freewheel or cassette, as these types of wheels are suitable for electric conversion. Assess the brake system and determine if it is compatible with the electric components.
Lastly, check the weight capacity of your bike to ensure it can handle the added weight of the electric components.
By carefully evaluating compatibility and making the necessary modifications, you can successfully convert your bike to electric.
Choosing the Right Conversion Kit
When choosing the right conversion kit, it’s important to consider the specific needs and requirements of your bicycle. There are various conversion options available, each with their own features and benefits. To help you make an informed decision, here is a comparison of three popular conversion kits:
| Kit Name | Motor Power | Battery Range |
|---|---|---|
| Kit A | 250W | 15-30 miles |
| Kit B | 500W | 20-40 miles |
| Kit C | 750W | 25-50 miles |
Kit A is suitable for those looking for a basic electric boost, with a lower motor power and battery range. Kit B offers a more powerful motor and longer battery range, making it ideal for longer commutes. Kit C is the most powerful option, providing a significant boost for those who need extra power for hills or off-road adventures. Consider your riding needs and preferences before choosing the kit that best suits you.
Gathering the Necessary Tools and Materials
To gather the necessary tools and materials for the conversion, you’ll need to make a list of items required for the process.
First and foremost, you’ll need a conversion kit, which typically includes a motor, battery, controller, and other components necessary for electric conversion.
Additionally, you’ll need basic tools like a wrench, screwdriver, and pliers to disassemble your bike and install the conversion kit. It’s also important to have a torque wrench to ensure proper tightening of bolts and nuts.
In terms of materials, you’ll need zip ties and electrical tape to secure and organize the wiring. Depending on the specific conversion kit, you may also need extra brackets or adapters to fit the motor onto your bike frame.
With these tools and materials in hand, you’ll be well-equipped to start converting your bike to electric.
Removing and Replacing the Bike’s Components
Start by removing the bike’s components that are not needed for the electric conversion. This will make room for the new electric components and ensure a smooth installation process. Here are four items to consider when removing and replacing the bike’s components:
-
Increased Speed: With an electric conversion, your bike will gain extra power, allowing you to reach higher speeds effortlessly. Imagine the thrill of cruising down the road at a faster pace than ever before.
-
Improved Efficiency: Electric bikes are known for their energy efficiency. By converting your bike, you’ll be able to go further on a single charge, saving money and reducing your carbon footprint.
-
Enhanced Control: Upgrading your bike’s tires will provide better traction, giving you more control and stability on different terrains. Say goodbye to slipping and sliding, and hello to a safer and more enjoyable ride.
-
Smooth Braking: Adjusting your bike brakes is crucial after the conversion. With the added power of the electric motor, it’s important to ensure your brakes are properly aligned and responsive for a smooth and safe stopping experience.
By following these steps and considering these benefits, you’ll be well on your way to converting your bike to electric under $100.
Installing the Electric Motor and Battery
Installing the electric motor and battery is an essential step in the process of transforming your bicycle into an electric vehicle. The electric motor installation involves mounting the motor onto the bike frame, usually in the center or rear wheel hub. This requires removing the existing wheel and replacing it with an electric motor wheel. Make sure to secure the motor properly and align it with the bike’s chain and gears. Next, the battery installation involves finding a suitable location to mount the battery, usually on the bike frame or in a bag attached to the frame. Connect the battery to the motor using the provided wiring harness and ensure all connections are secure. Finally, test the motor and battery to ensure they are functioning properly before taking your newly converted electric bike for a ride.
| Electric Motor Installation | Battery Installation |
|---|---|
| Mount motor onto bike frame | Find suitable location to mount battery |
| Replace existing wheel with electric motor wheel | Connect battery to motor using wiring harness |
| Secure motor and align with bike’s chain and gears | Ensure all connections are secure |
| Test motor for proper functioning | Test battery for proper functioning |
| Enjoy your newly converted electric bike! |
Wiring and Connecting the Electrical System
Now that we have installed the electric motor and battery, it’s time to move on to the next step: wiring and connecting the electrical system. This is a crucial part of the conversion process as it ensures that all the components work together seamlessly.
To begin, gather all the necessary wires and connectors. Make sure to carefully route and secure the wires to prevent any damage or interference. Next, identify the appropriate electrical connections for the motor, battery, and controller. Use wire strippers to remove a small section of insulation from each wire end, and then connect them using crimp connectors or soldering.
Here are three key things to keep in mind when wiring and connecting the electrical system:
- Double-check all connections to ensure they are secure and properly insulated.
- Test each connection before moving on to the next to catch any potential issues early on.
- Follow the wiring diagram provided by the electric motor manufacturer for accurate and safe connections.
By following these guidelines, you’ll be well on your way to successfully wiring and connecting your bike’s electrical system.
Testing and Troubleshooting the Conversion
Once you have completed the wiring and connecting process, it’s time to test and troubleshoot the conversion to ensure everything is working properly.
Start by turning on the power and checking if the motor is running smoothly. If it’s not, there may be a common issue with the wiring connections or the throttle. Double-check the connections and make sure they are secure.
If the motor still doesn’t run, try replacing the throttle or controller. Another common issue is a weak or dead battery. Test the battery voltage and recharge it if necessary.
If the battery is fine, but the motor still doesn’t run, there may be a problem with the motor itself. Contact the manufacturer or seek professional help for further troubleshooting.
Remember to always follow safety precautions and consult the conversion kit’s manual for specific troubleshooting tips.
Adding Additional Features and Accessories
To enhance your electric bike, you can easily customize it by adding additional features and accessories. Bike customization is a great way to personalize your ride and improve its performance.
One popular accessory is a bike computer, which can track your speed, distance, and even your heart rate. It’s a useful tool to monitor your progress and set goals for yourself.
Another important feature to consider is a powerful headlight and taillight set. These lights not only make you more visible to other road users but also ensure your safety during night rides.
Upgrading your bike’s brakes is also a smart move, as it will provide better stopping power and control.
Additionally, consider installing fenders and a rear rack for added convenience and versatility.
By adding these features and accessories, you can take your electric bike to the next level and enjoy a customized ride that meets your specific needs.
Enjoying the Benefits of Your Electric Bike
Experience the numerous advantages of owning an electric bike. Not only does it provide a more eco-friendly mode of transportation, but it also offers a range of benefits that enhance your overall biking experience. One of the key advantages of an electric bike is the ability to enhance its range. By investing in a higher quality battery, you can extend the distance you can travel on a single charge. Additionally, maintaining and servicing your electric bike is important to ensure its longevity. Regularly checking the tire pressure, cleaning the drivetrain, and inspecting the battery are essential tasks to keep your bike in optimal condition. By following these simple steps, you can enjoy the full benefits of your electric bike and make the most out of your investment.
| Enhancing the range of your electric bike | Maintaining and servicing your electric bike |
|---|---|
| Invest in a higher quality battery | Regularly check tire pressure |
| Extend the distance you can travel | Clean the drivetrain |
| on a single charge | Inspect the battery |
Frequently Asked Questions
How long does the battery last on a converted electric bike?
The battery life on a converted electric bike can vary depending on factors such as battery capacity, usage, and maintenance. Regular battery maintenance and proper charging can help extend its life and minimize range anxiety.
Can I still use my bike as a regular bicycle after the conversion?
Yes, you can still use your bike as a regular bicycle after converting it to electric. The benefits of using an electric bike conversion kit include increased speed and ease of riding. Regular maintenance and servicing are important to ensure optimal performance.
Are there any weight limitations for the bike when using a conversion kit?
There are weight limitations to consider when using a conversion kit. It is important to check the compatibility of the kit with different bike frames to ensure it can handle the additional weight of the electric components.
Can I charge the battery while riding the bike?
No, you can’t charge the battery while riding the bike. Charging efficiency depends on battery capacity and charging speed. It’s important to plan your rides and charge the battery beforehand to ensure a smooth and uninterrupted ride.
Is it possible to convert a bike with disc brakes to electric?
Yes, it is possible to convert a bike with disc brakes to electric. However, it is important to consider the bike conversion process and the pros and cons of electric bike conversion kits before making a decision.
Conclusion
In conclusion, converting your bike to electric under $100 is an exciting project that can transform your riding experience.
As I pedaled down the road, the gentle hum of the electric motor propelled me forward with ease.
The wind brushed against my face as I effortlessly glided up hills and cruised along flat stretches.
With a few simple steps and the right conversion kit, I was able to create my own electric bike, opening up a world of possibilities for exploration and enjoyment.