Hello! Are you into biking or just love sketching? If so, you may want to know how to sketch a bike. Bikes have a distinct design that might seem tricky to get right on paper. However, with a bit of dedication and perseverance, you can become skilled at illustrating a bicycle.
Before we get started, you’ll need a few materials. Grab a pencil, eraser, and a piece of paper to sketch on. You may also want to have a ruler handy to ensure your lines are straight and proportional.
Don’t worry if you’re not an expert artist this guide is designed for beginners and will take you through each step of the process, from sketching the basic frame to adding shading and texture.
So, let’s get started and learn how to draw a bicycle!
Key Takeaways
- Sketch the basic frame of the bicycle with two diagonal lines meeting at a point.
- Draw the wheels and handlebars with circles in perspective and two angled lines for the handlebars.
- Add pedals and chain, and then add shading and texture for realism such as highlights/shadows, spokes, bolts, etc.
- Customize the bicycle with color, accents, and personal touches to make it unique.
Gather Your Materials
Gather all the materials you’ll need for drawing the bike. This includes pencils, paper, and erasers. Choosing appropriate materials is crucial to achieve the desired outcome. Opt for good-quality drawing paper that is sturdy enough to handle erasing and sketching multiple times.
A set of pencils of varying lead grades will help in shading and adding depth to the drawing. Additionally, a kneaded eraser is necessary to clean up any mistakes or smudges. Setting up your workspace is equally important. Choose a well-lit area with a flat surface to work on.
Make sure you have enough space to move around comfortably and access all your materials easily. Keep your pencils sharpened and organized to save time during the drawing process. With all the materials and workspace ready, it’s time to sketch the basic frame of the bicycle.
Sketch the Basic Frame
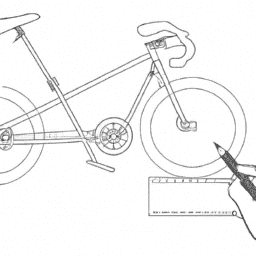
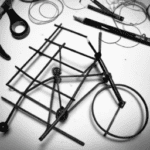
Now let’s start with outlining the basic structure of the bike frame. To start, I usually draw a vertical line down the center of the page to serve as the backbone of the bike.
From there, I sketch in the main triangle of the frame. This consists of two diagonal lines that start at the top of the vertical line and meet at a point near the bottom of the page. Practice techniques that I’ve found helpful include lightly sketching in the lines to adjust proportions before committing to a solid outline.
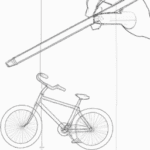
Additionally, pay attention to the angles of the diagonal lines to ensure that the frame looks balanced. Sketching tips include drawing the lines with fluid motions and using a ruler or straight edge to ensure straight lines.
Once the basic frame is sketched, move on to the next step of drawing the wheels and handlebars to complete the bike drawing. Without further ado, let’s move onto the next section where we’ll draw the wheels and handlebars.
Draw the Wheels and Handlebars
Let’s kick things up a gear and map out the wheels and handlebars to bring our bike frame to life!
To start with, let’s draw two circles for the wheels, making sure that they’re of the same size. Drawing them in perspective and depth will give them a more realistic look. Start by drawing one circle, then draw a second circle next to it, making sure that they’re the same distance apart. This will be the width of your bike.
Next, it’s time to draw the handlebars. Start by drawing a line from the top of the front wheel to the top of the back wheel. This line will serve as the spine of the bike. Now, draw a small circle at the top of the front wheel and another one at the bottom of the back wheel. These’ll be the pivot points for the handlebars. Draw two lines from the pivot points to the top of the spine. These lines’ll represent the handlebars. Make sure that they’re angled slightly towards the rider.
Now that we’ve drawn the wheels and handlebars, it’s time to add pedals and chain to complete our bicycle. By adding these elements, we’ll be able to visualize the complete bike and see how all the parts come together.
Add Pedals and Chain
To complete the bike frame, we’ll need to add the pedals and chain, which play a crucial role in propelling the rider forward. Pedal placement is important when drawing a realistic bicycle. The pedals should be positioned at a 90-degree angle to the ground and should be aligned with each other. Additionally, the pedals should be placed at the same distance from the bottom bracket.
Once you have the pedals in place, it’s time to add the chain. Chain tension is important when drawing a realistic bicycle. The chain should be taut and running smoothly between the front and rear sprockets. To achieve this, make sure the chain is not sagging or too tight. A chain that is too loose will cause slippage, while a chain that is too tight will cause unnecessary wear and tear on the sprockets. With these tips, you can create a realistic bicycle drawing that accurately depicts the pedal placement and chain tension. Moving forward, we’ll learn how to add shading and texture to make the drawing even more realistic.
Add Shading and Texture
Now that we’ve added pedals and a chain to our bicycle drawing, it’s time to add some shading and texture to really make it pop.
First, I’ll create highlights and shadows on the frame and wheels to give the bike dimension and depth.
Then, I’ll add texture to the frame and wheels to make it look more realistic.
Lastly, I can customize the design with unique colors and patterns to make it my own.
Create Highlights and Shadows
Highlighting and shadowing the bicycle’s curves and spokes will add depth and dimension, making it appear more realistic and three-dimensional. To achieve this, I recommend considering the light source orientation and creating highlights on the areas where light hits the bike, while adding shadows to areas that would naturally be darker. Here are three sub-lists to evoke emotion in the audience:
-
Use lighter shades to create highlights on the spokes, handlebars, and seat. This will give the impression that these parts are reflective and shiny, adding a sense of excitement and energy to the overall image.
-
Darken the areas where the frame overlaps, such as the joints and welds, to create depth perception. This will make the bike look more solid and sturdy, evoking feelings of reliability and durability.
-
Add subtle shadows underneath the bike, especially on the ground or surface it’s resting on. This will anchor the bike to its environment and create a sense of weight and realism, eliciting a feeling of groundedness and stability.
By following these techniques, you can make your bicycle drawing look more realistic and dynamic.
Next, we’ll move onto adding texture to the frame and wheels, which will further enhance the details and overall appearance of the bike.
Add Texture to the Frame and Wheels
Get ready to add some serious texture to your bike’s frame and wheels! This step is all about adding depth and dimension to your drawing, making it more realistic and tactile. To achieve this, you’ll need to use texture techniques and carefully consider your color choices.
For the frame, you can create a wood-like texture by using short, straight lines to mimic the grain of the wood. For a more industrial look, you can add rivets and bolts by drawing small circles and dots. Wheels can be made to look more realistic by drawing spokes and using shading to create shadows and highlights. Consider using a mix of dark and light colors to add depth and dimension to your drawing.
As you finish adding texture and color to your bike, take a step back and admire your work. At this point, you might want to customize your design by adding your own personal touches or changing up the color scheme. Let your creativity guide you as you bring your bike to life on paper!
Customize Your Design
Make your design unique by adding your own personal flair and style. When it comes to customizing your bike, the possibilities are endless.
You can choose from a variety of color options to make your bicycle stand out from the crowd. From bold and bright hues to softer pastels, there’s a color scheme for everyone. Consider your own personal style and what colors you gravitate towards in your wardrobe. This can help guide your decision when selecting the perfect color for your bike.
In addition to color options, you can also add decorative accents to your bike. These can include stickers, decals, and even custom paint jobs. Get creative and let your imagination run wild. You can choose to add a favorite quote or image, or even incorporate a special design that holds personal meaning to you.
The possibilities are truly endless when it comes to customizing your bike. So go ahead and make it your own, adding your own personal touch to create a one-of-a-kind bicycle that truly reflects who you are.
Frequently Asked Questions
How can I make my bicycle drawing look more realistic?
To make my bicycle drawing look more realistic, I use shading techniques to add depth and dimension. Adding texture with crosshatching or stippling can also create a more lifelike appearance.
What are some common mistakes to avoid when drawing a bicycle?
When drawing a bicycle, common mistakes to avoid are incorrect proportions and perspective. To improve accuracy, use reference images and practice sketching techniques. These tips will help achieve a more realistic and detailed drawing.
Are there any tips for drawing the spokes on the wheels?
Did you know that the average bicycle wheel has 32 spokes? When it comes to drawing spokes, I recommend starting with spoke placement and then using shading techniques to add depth and dimension.
How do I draw the gears and brakes on a bicycle?
To draw gears and brakes on a bicycle, start with the handlebars and pedals. Then, sketch the chain and cassette, adding shading for depth. Remember to show the brake levers and shifters for accuracy.
Can I use colored pencils or markers to add color to my bicycle drawing?
I prefer using colored pencils when adding color to my bicycle drawing. I find that they are better for shading and highlighting. However, markers can be useful for creating bold lines and vibrant colors.
Conclusion
So that’s how you draw a bicycle! It may seem intimidating at first, but with a little practice and patience, anyone can create a beautiful drawing of this classic mode of transportation.
Before you start, did you know that bicycles are the most common mode of transportation globally? According to the World Health Organization, there are over one billion bicycles in the world, outnumbering cars two to one. This fascinating statistic shows just how important bicycles are to people around the world, and how drawing one can be a great way to connect with others who share a love for this simple yet effective means of getting around.
To draw a bicycle, it’s important to start with the basic frame, including the seat, top tube, down tube, and chain stays. Then, add the wheels and handlebars, paying close attention to the placement and angle of each component. Finally, add details such as pedals and a chain, and finish off with shading and texture to make your drawing really pop.
With these steps in mind, you’ll be well on your way to creating a beautiful bicycle drawing that you can be proud of.
