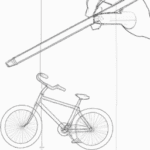
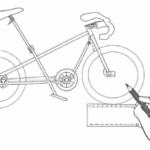
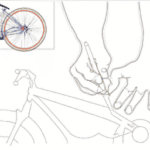
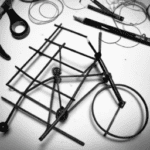
Are you prepared to start an artistic adventure that will take you pedaling through creativity?
In this easy-to-follow guide, I’ll show you how to draw a bicycle with effortless finesse.
With just a pencil and paper, you’ll be able to construct a two-wheeled masterpiece that will leave your friends amazed.
From the sleek handlebars to the intricate details on the wheels, every stroke of your pencil will bring your bicycle to life.
So grab your art supplies and let’s embark on this exciting drawing adventure!
Key Takeaways
- Choose thick, erasable paper for drawing
- Hold the pencil lightly for better control
- Use basic shapes like circles, ovals, rectangles, and curved lines
- Pay attention to details like proper connections and shading techniques
Gather Your Materials
Gather your materials to start drawing a bicycle easily. Choosing the right drawing paper is essential for a successful drawing. Look for a paper that is thick enough to withstand erasing and sketching, but not too textured that it interferes with the details of your drawing.
As for the pencil, hold it lightly and closer to the end for better control and precision. This way, you can easily adjust the pressure and create different line thicknesses. Remember to keep your pencil sharp to achieve finer details.
Now that we have our materials ready, let’s move on to the next step of drawing a bicycle, which is starting with basic shapes.
Start with Basic Shapes
To get started, you can begin by sketching some simple shapes. Basic shapes are important because they provide the foundation for your bicycle drawing. There are different drawing techniques you can use to create these shapes, such as using circles for the wheels and ovals for the frame. By using these techniques, you can ensure that your bicycle looks proportional and realistic.
To help you visualize this process, I have created a table below that outlines the basic shapes you can use for each part of the bicycle:
| Part | Shape |
|---|---|
| Wheels | Circles |
| Frame | Ovals |
| Pedals | Rectangles |
| Handlebars | Curved lines |
By starting with these basic shapes, you can easily build upon them to create a more detailed bicycle drawing. In the next section, we will sketch the handlebars and seat to further bring our drawing to life.
Sketch the Handlebars and Seat
Now let’s sketch the handlebars and seat to add more detail to our drawing.
To create realistic handlebars, start by drawing two curved lines extending from the center of the bicycle’s frame, angling slightly towards the front wheel.
Next, draw a small circle on top of each line to represent the grips.
For the seat, draw a curved line extending from the top tube of the frame, slightly tilted upwards. Then, add two smaller curved lines below it to create the seat base.
To make the drawing more visually appealing, use different drawing techniques like cross-hatching or stippling to add depth and texture to the handlebars and seat. Shading techniques can also be applied to create a three-dimensional effect.
Now, let’s move on to connecting the wheels and frame seamlessly.
Connect the Wheels and Frame
After sketching the handlebars and seat, I connect the wheels and frame by drawing the necessary lines and curves. This step is crucial as it forms the foundation of the bicycle’s structure. To achieve a sturdy and balanced bike, I carefully connect the frame components, ensuring they are aligned and proportional. I attach the wheels to the frame using strong and secure connections, guaranteeing they spin freely and smoothly. To highlight the importance of this step, consider the following table:
| Frame Components | Wheel Connections |
|---|---|
| Main Triangle | Axle and Fork |
| Rear Triangle | Chainstays |
| Seat Tube | Dropouts |
| Top Tube | Spoke Nipples |
By connecting these vital parts correctly, the bicycle gains stability and functionality. Now, let’s move on to the next section and add intricate details to the wheels.
Add Details to the Wheels
Let’s add some intricate details to the wheels. To make the bicycle drawing more realistic, we can start by adding shadows. By carefully observing the light source, we can determine where the shadows would fall on the wheels. Adding shadows not only adds depth but also helps to create a sense of realism.
Additionally, we can enhance the wheels by adding reflections. Reflective surfaces, such as the spokes and rims, can add a touch of shine and realism to our drawing. By carefully observing the surrounding environment, we can determine where the reflections would appear. Adding these details will make our bicycle drawing stand out and come to life.
Now, let’s transition into the next section where we will define the frame and handlebars, bringing our drawing closer to completion.
Define the Frame and Handlebars
Defining the frame and handlebars adds structure and functionality to the bicycle drawing. Visualizing the bicycle structure and understanding the importance of proportions in drawing bicycles are key to creating an accurate and realistic representation. The frame provides the foundation for the entire bike, while the handlebars determine the rider’s control and comfort. To ensure accuracy, it’s important to pay attention to the angles and proportions of these elements.
In order to create a visually appealing bicycle, I recommend following these guidelines:
-
Frame: The frame should be drawn as a simple, elongated oval shape, with the top tube slightly curving downward towards the seat tube.
-
Handlebars: Draw a straight line extending from the top of the frame, angling slightly downward. At the end of this line, create a curved shape to represent the handlebars.
-
Proportions: Ensure that the frame and handlebars are proportionate to each other and the overall size of the bicycle. The handlebars should be wide enough to comfortably grip, while the frame should be long enough to accommodate the rider’s height.
By defining the frame and handlebars with precision, we can now move on to the next step of adding pedals, chain, and gears to complete the bicycle.
Add Pedals, Chain, and Gears
To add pedals, chain, and gears, you’ll need to focus on the functionality and placement of these components. Proper maintenance is crucial for the smooth operation of bicycle pedals, chain, and gears. Regular cleaning and lubrication will ensure their longevity and prevent any potential issues.
When it comes to choosing the right pedals, chains, and gears, there are various options available. Clipless pedals provide a secure connection between your shoes and the bike, while platform pedals offer a more casual and versatile option. Chains come in different widths and materials, each affecting the bike’s performance differently. Gears, on the other hand, determine the bike’s speed and cadence options. Considering these factors will help you make informed decisions about what components will work best for your riding style.
Now, let’s move on to illustrating the seat and frame details seamlessly.
Illustrate the Seat and Frame Details
The seat and frame details can be easily illustrated to showcase their unique design and functionality. When drawing a bicycle seat, you have the freedom to experiment with different styles. You can depict a sleek and modern seat with clean lines, or a vintage seat with more ornate details.
Techniques for adding realistic details to a bicycle frame include paying attention to proportions and angles. Make sure the frame is symmetrical and accurately represents the shape of a real bicycle frame. Add small details such as weld marks and bolts to enhance the realism.
Now that we have covered the seat and frame details, let’s move on to the next section on how to draw the front fork and wheel, where we will continue to bring this bicycle drawing to life.
Draw the Front Fork and Wheel
Start by sketching the front fork and wheel, paying attention to the angles and proportions to create a realistic representation. Drawing techniques and artistic perspective are essential in capturing the details of these components accurately.
Begin by lightly sketching the main lines of the fork, ensuring that they flow smoothly and convey a sense of depth. Next, carefully add the wheel, ensuring that it is aligned with the fork and maintaining proper perspective. Pay attention to the size and position of the spokes, as they add realism to the drawing.
Once you have completed the front fork and wheel, you can then move on to adding the rear wheel and chain, which will further enhance the overall look of the bicycle.
Add the Rear Wheel and Chain
Adding the rear wheel and chain completes the overall look of the bicycle and adds an extra level of detail. To ensure proper rear wheel alignment, it is important to place it symmetrically to the front wheel. This ensures smooth and stable riding experience. Lubricating the chain effectively is crucial for optimal performance. Applying a high-quality bicycle chain lubricant evenly along the inner length of the chain will minimize friction and prevent rust.
To help you understand the process better, here is a table that outlines the steps for adding the rear wheel and chain:
| Steps for Adding Rear Wheel and Chain |
|---|
| 1. Align the rear wheel symmetrically to the front wheel |
| 2. Slide the rear wheel into the dropouts |
| 3. Tighten the axle nuts or quick-release skewer |
| 4. Attach the chain to the rear sprocket |
By following these steps, you can confidently add the rear wheel and chain to your bicycle. Next, we will move on to refining the details and cleaning up to give your drawing a polished look.
Refine the Details and Clean Up
Now you can focus on refining the details and cleaning up to give your drawing a polished look.
To add depth and dimension to your bicycle drawing, use refining techniques such as shading and highlighting. Pay attention to the curves and edges of the bike, adding subtle shadows and highlights to create a more realistic appearance.
Use a variety of line weights to add depth and dimension to the different parts of the bicycle, such as the frame, wheels, and handlebars.
Take your time and be patient as you refine each detail, ensuring that everything is proportionate and accurate.
Once you are satisfied with the overall look of your drawing, it’s time to erase unnecessary lines and clean up any smudges or mistakes.
Erase Unnecessary Lines
To give your drawing a more polished look, you can begin by erasing any unnecessary lines. This step is crucial in improving the overall composition of your bicycle drawing.
Take a closer look at your sketch and identify any lines that may not contribute to the form or structure of the bike. These could be stray lines, overlapping lines, or lines that are too heavy or dark. By carefully erasing these unnecessary lines, you can create a cleaner and more refined image. This will help emphasize the important details and make your drawing appear more professional.
Once you have erased these lines, you can move on to the next step of adding shading and texture, which will bring your bicycle drawing to life.
Add Shading and Texture
Enhance the realism of your drawing by incorporating shading and texture. Adding realistic shading to your bicycle drawing can make it appear three-dimensional and more lifelike. Use various shading techniques, such as hatching, cross-hatching, and blending, to create depth and shadows on different parts of the bicycle.
Pay attention to the light source and add shadows accordingly, making sure they are consistent throughout the drawing. Additionally, using different textures can add visual interest and make the bicycle look more detailed. Experiment with different strokes and patterns to represent different materials, such as the smoothness of metal or the roughness of rubber tires.
By incorporating shading and texture, you can bring your bicycle drawing to life. Now, let’s move on to adding color to your drawing.
Color Your Drawing
Once you’ve added shading and texture, it’s time to bring your drawing to life by adding color. Coloring techniques play a crucial role in making your bicycle drawing vibrant and realistic.
To achieve the desired effect, it’s important to choose the right colors that complement each other and accurately represent the different elements of your bicycle. Begin by observing the real-life colors of a bicycle and use reference images if needed.
Experiment with different coloring materials such as colored pencils, markers, or watercolors to find the medium that works best for you. Consider using blending techniques to create smooth transitions between colors. Remember to apply lighter shades for highlights and darker shades for shadows.
By carefully selecting and applying colors, you can make your bicycle drawing look more dynamic and captivating.
Now, let’s move on to finalize your bicycle drawing by adding the finishing touches.
Finalize Your Bicycle Drawing
Now it’s time to put the finishing touches on your bicycle drawing. To make it come alive, you can add shading and texture.
Start by determining the light source and adding shadows accordingly. This will give your drawing a three-dimensional look.
Use cross hatching or stippling techniques to create texture on different parts of the bicycle, such as the tires or the frame.
You can also experiment with different coloring techniques to make your drawing pop. Consider using colored pencils, markers, or even watercolors to add vibrant hues to your bicycle.
Don’t be afraid to mix and blend colors to achieve the desired effect.
Remember to take your time and have fun with it.
With these tips, your bicycle drawing will surely impress!
Frequently Asked Questions
How do I choose the right materials for drawing a bicycle?
To choose the right materials for drawing a bicycle, I consider the type of paper and pencils that work best for sketching detailed frames. I also use rulers and erasers to ensure accurate proportions and clean lines in my sketches.
What are some tips for drawing the handlebars and seat accurately?
To draw the handlebars accurately, start by sketching the basic shape and then add the details. Pay attention to the angles and proportions. For the seat, outline the shape and make sure it aligns with the frame.
How do I add realistic details to the wheels of the bicycle?
To add depth and realism to the wheels of a bicycle, I would carefully shade and highlight different areas, creating the illusion of curves and shadows. By adding reflections, I can make the wheels appear shiny and lifelike.
Can you provide step-by-step instructions for drawing the pedals, chain, and gears?
To draw the pedals, chain, and gears, start by sketching the basic frame of the bicycle. Then, add the pedals and connect them with a chain. Finally, draw the gears on the rear wheel. Once complete, add color to bring your drawing to life.
What techniques can I use to add shading and texture to my bicycle drawing?
To create depth and dimension in bicycle drawings, I would suggest using techniques like hatching and cross-hatching to add shading. Additionally, experimenting with different shading styles such as stippling or blending can enhance the texture of your bicycle illustration.
Conclusion
Well, drawing a bicycle may seem easy, but let me tell you, it’s not as simple as it sounds.
After gathering your materials and starting with basic shapes, you’ll find yourself navigating the intricate details of the handlebars, seat, wheels, and frame.
It’s like riding a bike, they say, but this artistic journey requires precision and creativity.
So, grab your pencil and embark on this challenging yet rewarding adventure of drawing a bicycle.
Good luck, you’ll need it!


