
So, you’re tired of that feeble, barely noticeable scooter horn and you want to upgrade to something that demands attention? Well, my friend, you’ve come to the right place. In this article, I’m going to show you how to fit an electric bike horn to your scooter horn, transforming your ride into a sound machine that can’t be ignored.
Get ready to ride with confidence and turn heads as we dive into the technical, precise, and detailed steps of this horn upgrade.
Let’s get started!
Key Takeaways
- Properly connect the positive and negative wires of the electric bike horn to the corresponding terminals on the scooter’s battery.
- Securely fasten the wires using appropriate connectors and troubleshoot any loose or damaged wires.
- Adjust the horn’s angle and position for optimal sound projection and ensure it is securely fastened to the scooter’s handlebars or frame.
- Consider adding a horn button extension for easier access and install it according to the manufacturer’s instructions while prioritizing safety.

Schwinn Sporterra RX Gravel Bike, 700c Mens and Womens Bike, 14-Speed Drop Bar Gravel Bicycle, Mechanical Disc Brakes, Rigid Fork, Aerodynamic Riding Position, Quick Release Seat Post, Adult Bicycle
GRAVEL BICYCLE: Enjoy next level riding with the Sporterra RX by Schwinn. With 700c wheels, this mens and...
As an affiliate, we earn on qualifying purchases.
Assess Your Scooter’s Horn Capability
Before you can proceed with fitting an electric bike horn to your scooter, you need to assess if your scooter’s horn is capable of being upgraded.
Start by evaluating the volume of your current horn. Is it loud enough to meet your needs? If not, you may want to consider upgrading to an electric bike horn, which typically produces a louder sound.
Additionally, troubleshoot any issues with your current horn. Is it working properly? Are there any defects or malfunctions? If your current horn is in good condition but lacks the volume you desire, upgrading to an electric bike horn is a viable solution.
Once you have assessed your scooter’s horn capability, the next step is to research and purchase an electric bike horn that suits your needs.

SAVADECK T800 Carbon Gravel Bike, with Shimano GRX610 12-Speed, Hydraulic Disc Brakes, 700x40c Tires for Road & Off-Road Adventure, Men's/Women's Bicycle(Elegant White, 51cm)
【With SHIMANO GRX Drivetrain Setup】Equipped with SHIMANO GRX610 shifters and RX822 rear derailleur, matched with a 12-speed M6100...
As an affiliate, we earn on qualifying purchases.
Research and Purchase an Electric Bike Horn
First, you should start by researching and buying a new horn for your scooter. When it comes to choosing an electric bike horn over a traditional horn, there are several benefits to consider.
An electric bike horn is not only louder but also produces a more distinct sound, ensuring that you are heard in busy traffic. Additionally, electric bike horns are more environmentally friendly as they do not rely on gas or other non-renewable resources.
When selecting an electric bike horn, factors to consider include the volume, sound quality, and ease of installation. Make sure to choose a horn that meets your specific needs and preferences.
Once you have researched and purchased the right electric bike horn for your scooter, you can move on to the next step of gathering the necessary tools and materials for installation.
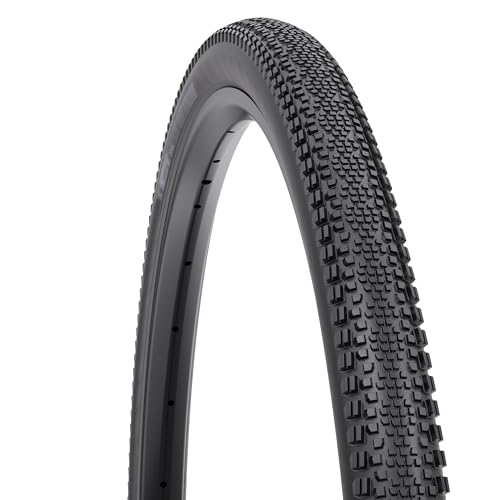
WTB Riddler Gravel Bike Tire (700 x 37) Tubeless Folding - Light & Fast Rolling - Bikepacking (Black)
SUBSTANTIAL CORNERING KNOBS meet a low-profile center tread, making the Riddler an excellent choice for gravel grinding or...
As an affiliate, we earn on qualifying purchases.
Gather the Necessary Tools and Materials
Once you’ve researched and purchased the right horn, it’s time to gather the tools and materials needed for installation. Here are the things you’ll need:
- Screwdriver set: A set of screwdrivers will help you remove any screws or bolts that are holding the old horn in place.
- Wire cutters/strippers: These tools will come in handy when you need to cut and strip the wires of the old horn and connect them to the new one.
- Electrical tape: Use electrical tape to secure the connections and prevent any exposed wires from causing a short circuit.
- Mounting bracket: Depending on the type of horn you’ve chosen, you may need a mounting bracket to attach it to your scooter securely.
Assessing horn compatibility and researching horn options is crucial to ensure a successful installation.
Now that you have gathered the necessary tools and materials, let’s move on to locating a suitable mounting location on your scooter.

SAVADECK Carbon Gravel Bike - T800 Carbon Frame & Fork | Shimano U6000 11-Speed Groupset | Hydraulic Disc Brakes | 700CX40mm All-Terrain Tires | Men & Women Road/Off-Road Bicycle (Gray, 53cm)
【Ultralight T800 Carbon Performance】: Featuring a premium T800 R21 carbon fiber frame and fork weighing just 10.4kg (22.92...
As an affiliate, we earn on qualifying purchases.
Locate a Suitable Mounting Location on Your Scooter
Now that you have all the necessary tools and materials, let’s find a suitable spot on your scooter to mount the horn.
The first step is to locate an area that allows for easy access and visibility, while also keeping the horn secure. Look for a flat surface that is away from moving parts and won’t interfere with your riding experience.
Once you’ve found the perfect spot, it’s time to gather the suitable mounting hardware. This may include brackets, screws, and washers that are compatible with your scooter’s frame. Ensure that the hardware is sturdy and will hold the horn securely in place.
Next, you’ll need to wire the horn to the scooter’s electrical system. Consult the horn’s instruction manual for the specific wiring diagram and follow it carefully to ensure a proper connection. This typically involves connecting the positive and negative wires to the appropriate terminals on the scooter’s battery or fuse box.
Once the horn is securely mounted and properly wired, you can move on to preparing the mounting area for a clean and professional installation.
Prepare the Mounting Area
Before proceeding, make sure the area where you plan to mount the horn is clean and free of any debris. This is crucial to ensure proper adhesion and stability of the horn.
To mount the electric bike horn onto your scooter, there are a few techniques you can use. One option is to use zip ties to securely fasten the horn to a suitable location, such as the handlebars or the front fork. Another technique is to use a mounting bracket specifically designed for bike horns. This bracket can be attached to the handlebars or any other appropriate spot on the scooter.
Once the horn is securely mounted, it is important to adjust the sound to your desired level. This can be done by using the sound adjustment knob or button on the horn itself.
With the mounting area prepared, it is now time to install the mounting bracket for the horn.
Install the Mounting Bracket
To install the mounting bracket, you’ll need to gather the necessary tools and locate a suitable spot on your handlebars or another area of your choice. The mounting bracket is a crucial component for attaching the electric bike horn securely to your bike.
Here are some tips for a successful mounting bracket installation:
-
First, ensure that the mounting area is clean and free of any debris that could interfere with the installation process.
-
Use the provided screws and bolts to secure the mounting bracket to the chosen spot. Make sure to tighten them securely to prevent any movement during rides.
-
Double-check the alignment of the bracket to ensure that it is straight and level. This will ensure optimal functionality and a streamlined appearance.
-
Test the stability of the bracket by gently shaking it. If it feels loose, tighten the screws further.
Troubleshooting common installation issues:
-
If the mounting bracket doesn’t fit properly on your handlebars, try adjusting the position or consider using an alternative mounting spot.
-
If the bracket feels unstable or wobbly, check that the screws are tightened enough.
-
If you encounter any difficulties during the installation process, refer to the manufacturer’s instructions or seek assistance from a professional.
With the mounting bracket securely in place, you’re now ready to attach the electric bike horn to the bracket. This ensures that the horn is easily accessible and functions optimally while you’re on the road.
Attach the Electric Bike Horn to the Bracket
Once the mounting bracket is securely in place, you’re ready to attach the electric bike horn to it. Here’s how:
- Start by aligning the screw holes on the horn with the holes on the bracket.
- Insert the screws through the holes and tighten them using a screwdriver.
- Make sure the horn is firmly attached to the bracket to prevent any vibrations during operation.
Next, it’s important to connect the wiring of the electric bike horn to your scooter’s electrical system. This will ensure that the horn functions properly and can be easily controlled.
Stay tuned for the next section where I’ll guide you through the wiring connections and the necessary techniques to integrate the horn seamlessly into your scooter’s electrical setup.
Connect the Wiring to Your Scooter’s Electrical System
First, you’ll need to locate the necessary wiring connections on your scooter’s electrical system. Begin by identifying the positive and negative terminals on the battery. The positive terminal is usually marked with a plus (+) sign, while the negative terminal is marked with a minus (-) sign.
Once you have located these terminals, connect the positive wire from the electric bike horn to the positive terminal of the battery, and the negative wire to the negative terminal. Make sure to securely fasten the wires using appropriate connectors or crimps to ensure a solid electrical connection.
It is important to troubleshoot any issues that may arise during this process, such as loose or damaged wires, to prevent any malfunctioning of the horn.
Once the connections are secure, you can proceed to the next step and test the horn to ensure proper functionality.
Test the Horn to Ensure Proper Functionality
After connecting the wiring of the scooter’s electrical system to the electric bike horn, it is crucial to test the horn to ensure it functions properly. Testing the horn will help identify any potential issues or malfunctions before actually using it on the road.
There are a few test methods that can be employed to check the horn’s functionality. Firstly, ensure that all connections are secure and free of any loose wires or connections. Activate the horn using the designated button or switch and listen for a clear and audible sound.
If the horn produces a weak or distorted sound, troubleshooting tips may include checking the battery or power source, inspecting the wiring for any damage, or adjusting the horn’s position for optimal sound projection.
Once the horn has been tested and any necessary adjustments have been made, it is time to secure and adjust the horn as needed for optimal functionality.
Secure and Adjust the Horn as Needed
To ensure optimal functionality, you should securely fasten and make any necessary adjustments to the horn. Start by locating the horn mounting bracket on your scooter. Use the appropriate tools to securely attach the bracket to a sturdy and accessible part of your scooter, such as the handlebars or the frame.
Once the horn is securely fastened, you may need to adjust the horn angle and position to ensure proper sound projection. Refer to the horn manufacturer’s instructions for specific adjustment techniques.
If you encounter any issues with the horn, such as a weak sound or no sound at all, try troubleshooting tips like checking the wiring connections and verifying that the horn is receiving power.
By securely fastening and adjusting the horn, you can ensure its optimal performance on your scooter.
Consider adding a horn button extension for easy access, allowing you to activate the horn without taking your hands off the handlebars. This accessory can improve convenience and safety when riding your scooter.
Consider Adding a Horn Button Extension for Easy Access
Consider adding a horn button extension for easy access, as it can improve convenience and safety while riding your scooter. The placement of the horn button on scooters is often inconvenient, requiring you to stretch your hand or remove it from the handlebar to activate the horn.
By adding a horn button extension, you can position the button closer to your thumb, allowing for quick and easy access without compromising your grip on the handlebar. Additionally, there are alternative horn options available that can be mounted in a more accessible location, such as on the handlebar itself. These options provide a convenient way to alert others of your presence while riding.
Now, let’s move on to ensure proper wiring protection and insulation.
Ensure Proper Wiring Protection and Insulation
After considering the addition of a horn button extension for easy access, it is crucial to ensure that the wiring of the electric bike horn is properly protected and insulated. This step is vital to guarantee the longevity and functionality of the horn.
To begin, carefully route the wires from the horn to the scooter’s existing horn button. It is essential to avoid any sharp edges or heat sources that could damage the wiring. Additionally, employing waterproofing techniques, such as using heat shrink tubing or silicone sealant, is crucial to protect the wires from moisture and ensure their longevity.
By taking these measures, you can safeguard the wiring and prevent any potential issues that may arise from exposure to weather elements. This will ensure that your horn operates efficiently and reliably in various conditions.
Now, let’s move on to the next section and double-check the horn’s compatibility with your scooter’s voltage.
Double-check the Horn’s Compatibility with Your Scooter’s Voltage
Make sure you check if the horn is compatible with your scooter’s voltage before proceeding further. Assessing compatibility is crucial to ensure the horn functions properly and doesn’t cause any electrical issues.
Start by referring to your scooter’s user manual or contacting the manufacturer to determine the voltage requirements. Once you have this information, compare it to the voltage specifications provided by the horn manufacturer. It’s important to match the voltage to prevent damage to the horn or your scooter’s electrical system.
If the horn’s voltage is higher or lower than your scooter’s, it may not work or could potentially cause damage. Always prioritize safety and follow the recommended voltage requirements to avoid any complications.
Now that we have assessed compatibility, let’s move on to the next step: following safety precautions and local regulations.
Follow Safety Precautions and Local Regulations
It’s important to always prioritize safety and follow any local regulations when installing and using a horn on your scooter.
When choosing the right electric bike horn for your scooter, there are a few factors to consider.
Firstly, check the voltage compatibility to ensure it matches your scooter’s voltage.
Additionally, consider the sound output of the horn, as some may be louder than others.
It’s also crucial to understand the legal requirements for using an electric bike horn on a scooter in your area.
Some jurisdictions may have specific regulations regarding the type of horn allowed or the maximum decibel level.
By adhering to these guidelines, you can ensure that you are using a horn that is both suitable and legal.
Enjoy your upgraded scooter horn and ride with confidence!
Enjoy Your Upgraded Scooter Horn and Ride with Confidence!
To fully enjoy your newly upgraded scooter horn, you can confidently ride knowing you have a reliable and attention-grabbing sound.
Upgrading scooter accessories, such as adding an electric bike horn, offers several benefits. Firstly, an electric bike horn provides a louder and more distinct sound compared to traditional scooter horns. This ensures that you can easily alert pedestrians and other vehicles of your presence, enhancing overall safety on the road.
Additionally, electric bike horns often come with multiple sound options, allowing you to choose a tone that suits your style and preference. Furthermore, these horns are powered by batteries, which means they can be easily recharged and are more environmentally friendly than traditional scooter horns.
With the added benefits of an electric bike horn, you can enjoy your rides with confidence and peace of mind.
Frequently Asked Questions
What are the safety precautions that should be followed when installing an electric bike horn on a scooter?
When installing an electric bike horn on a scooter, safety precautions are crucial. Regular maintenance ensures the horn functions properly. Proper horn usage and etiquette, such as using it sparingly and not unnecessarily alarming others, is important while riding a scooter.
How can I ensure that the electric bike horn I purchase is compatible with my scooter’s voltage?
To ensure electric bike horn voltage compatibility with your scooter, select a horn that matches your scooter’s voltage specifications. Consult your scooter’s manual or contact the manufacturer for the correct voltage information before purchasing a horn.
Are there any local regulations or laws that I need to be aware of when upgrading my scooter horn?
When upgrading a scooter horn, it is important to be aware of local regulations and laws regarding noise levels and vehicle modifications. Additionally, safety precautions should be followed during the installation process to ensure proper functionality and prevent any damage or accidents.
What tools and materials are necessary for installing an electric bike horn on a scooter?
To install an electric bike horn on a scooter, you will need a few tools and materials. These include a wrench, screwdriver, electrical tape, and the electric bike horn itself. Compatibility between the scooter horn and electric bike horn must also be considered.
Can I add a horn button extension to make it easier to access the horn while riding the scooter?
To enhance horn accessibility while riding, I recommend adding a horn button extension. This allows for convenient placement and easy access to the horn, ensuring a clear and audible horn sound for safety purposes.
Conclusion
In conclusion, fitting an electric bike horn to my scooter horn was an exhilarating experience.
As I rode through the bustling city streets, the powerful sound of my upgraded horn cut through the noise like a bolt of lightning, commanding attention from pedestrians and motorists alike.
The carefully chosen mounting location and proper insulation ensured a secure and reliable installation.
With this upgrade, my scooter became a force to be reckoned with, giving me the confidence to navigate any urban environment with ease.
Ride on, and ride safe!