If you’re a cyclist, it’s likely that you’ll encounter a flat tire sometime. Knowing how to repair a flat is crucial so you can resume your cycling promptly and with safety. This article will walk you through the steps necessary to fix a flat tire on your bike, in a detailed manner.
First, you’ll need to identify the problem. This may seem obvious, but it’s important to make sure you actually have a flat tire before you start trying to fix it. Look for signs of damage to the tire or tube, such as punctures or tears.
Once you’ve confirmed that you do have a flat, you’ll need to remove the wheel and tire from the bike. From there, you can patch or replace the tube, and then reinstall the tire and wheel.
We’ll walk you through each of these steps in detail, so that you can fix your flat with confidence.
Key Takeaways
- It is important to know how to fix a flat tire on a bicycle quickly and safely.
- The step-by-step guide to fixing a flat tire involves identifying the problem, removing the wheel and tire, inspecting the inner tube, deciding whether to patch or replace it, and reinstalling the tire and wheel.
- Proper tire pressure and regular maintenance can prevent flats, and using tire liners can add an extra layer of protection against punctures.
- Tire liners significantly reduce the risk of punctures caused by thorns, glass, or other sharp objects on the road.
Identify the Problem
You’re out on a ride and suddenly you feel your tire go flat, now you need to figure out what the problem is.
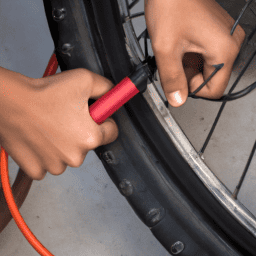
The first thing you should do is check the tire pressure. Use a tire pressure gauge to see if the tire pressure is lower than what it should be. If this is the case, you may just need to pump up the tire to the right pressure level.
If the tire pressure is fine, then you need to inspect the tire for punctures or damage. Inspect the tire for any objects that may have punctured it. Check the tread and sidewalls for any cuts or tears. If you find a puncture or damage, you will need to repair or replace the tire.
If there is no visible damage or puncture, the problem may be with the inner tube. In this case, you will need to remove the wheel and tire to inspect the inner tube.
Remove the Wheel and Tire
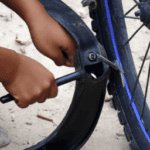
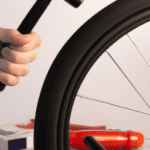
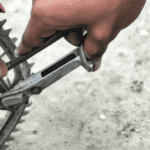
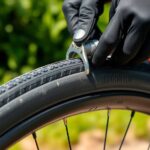
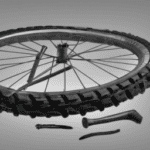
Once you’ve got the wheel off, it’s smooth sailing from there on out. First, you’ll need to use the proper tools to remove the tire from the wheel. Use a tire lever to pry the tire away from the rim, starting at one end and working your way around the tire. The tire should come off fairly easily once you get it started.
Once the tire is off, you’ll need to remove the inner tube. Start by deflating the tube completely, then use your fingers to push the tire away from the rim and expose the tube. Carefully remove the tube from the tire, being sure not to damage it.
Troubleshooting techniques can be helpful at this stage – check the tube for any holes or punctures that may have caused the flat. Now that you have the tire and tube removed, it’s time to move on to the next step – patch or replace the tube.
Patch or Replace the Tube
Before deciding whether to patch or replace the inner tube, it’s important to carefully inspect it for any potential damage or punctures. Here are some pros and cons to consider before making a decision:
-
Pros and Cons:
- Patching a tube is more cost-effective than replacing it.
- Replacing a tube ensures a fresh and reliable tube, reducing the risk of future flats.
- Patching a tube may not work if the puncture is too large or in an awkward location.
-
Cost Comparison: Patch vs Replace Bicycle Tube:
- A patch kit typically costs around $5-10.
- A new tube can cost anywhere from $5-20, depending on the quality and size.
With these considerations in mind, decide whether to patch or replace the tube. Once you’ve made your choice, it’s time to move onto the next step: reinstalling the tire and wheel.
Reinstall the Tire and Wheel
Now it’s time to get your ride back on the road by putting the tire and wheel back in place. First, make sure the tire bead is properly seated on the rim, starting opposite the valve stem. Use your thumbs to push the bead into the rim well, being careful not to pinch the tube between the tire and rim. Continue working your way around the tire, pushing the bead into the rim well until it’s fully seated on both sides. Check that the tire is evenly seated on the rim and not bulging out anywhere.
Next, inflate the tire to the recommended pressure, which is usually printed on the tire sidewall. Proper inflation is important for both ride quality and preventing future flats. Finally, reinstall the wheel onto your bike, making sure the quick release or axle nuts are tightened securely. It’s also a good idea to lubricate your gears and chain to ensure smooth shifting and minimize wear. With your tire fixed and bike properly maintained, you’ll be back on the road in no time.
Transitioning into the subsequent section about preventing flat tires, it’s important to remember that proper tire pressure and regular maintenance can go a long way in preventing flats. However, there are other steps you can take to minimize your risk of getting a flat, such as avoiding debris on the road and choosing puncture-resistant tires.
Preventing Flat Tires
Proper inflation and the use of tire liners can go a long way in preventing flat tires. The first step is to ensure your tires are inflated to the recommended pressure, which can be found on the sidewall of the tire.
Riding on underinflated tires can cause excessive wear and tear, making it easier for sharp objects to puncture the tire. On the other hand, overinflated tires can lead to a harsher ride and increase the likelihood of a blowout.
It’s important to check your tire pressure regularly, ideally before every ride, and make adjustments as needed. Another way to prevent flat tires is to use tire liners.
These are thin strips of material that go between the tire and tube, adding an extra layer of protection against punctures. Tire liners can be made of different materials, including Kevlar, nylon, or even old inner tubes.
Installing tire liners may require removing the tire and tube, but the added protection is worth the effort. While tire liners can’t guarantee a flat-free ride, they can significantly reduce the risk of punctures caused by thorns, glass, or other sharp objects on the road.
Frequently Asked Questions
Can I fix a flat tire on a bicycle without removing the wheel and tire?
Quick fixes and temporary solutions exist to fix a flat tire without removing the wheel and tire. However, these solutions have pros and cons such as compromising safety and stability. It’s recommended to properly fix the tire by removing the wheel and tire.
What if I don’t have a patch kit or spare tube with me?
If you don’t have a patch kit or spare tube, emergency solutions and temporary fixes include using duct tape, a dollar bill, or even a piece of a tire. But these may not last long and won’t fix the underlying issue.
How do I know if my tire is damaged beyond repair?
To determine if a bicycle tire is damaged beyond repair, perform a thorough tire inspection. Look for punctures, cuts, and tears in the tire. If the damage is severe, consider seeking professional repair services.
Is it safe to ride on a patched bicycle tire?
Riding on a patched tire is generally safe, but there are pros and cons to using tire sealant. The effectiveness of patching depends on the size and location of the puncture, as well as the quality of the patch. The lifespan of a patched tire can also be affected by factors such as the type of surface ridden on and the weight of the rider.
Are there any preventive measures I can take to avoid getting a flat tire while riding?
To avoid getting a flat tire while riding, engage in regular bicycle tire maintenance. Check for debris and wear, and ensure proper tire inflation to reduce the risk of punctures and blowouts.
Conclusion
Congratulations! You’ve successfully fixed your flat tire on your bicycle. But before you take off on your next ride, it’s important to take a few preventative measures to avoid getting another flat tire.
First, make sure to regularly check the pressure in your tires. This will not only help prevent flats, but it will also make your ride smoother and more efficient.
Additionally, inspect your tires for any foreign objects that may have caused the flat and remove them if necessary.
Another preventative measure is to consider investing in puncture-resistant tires. These tires have extra layers of protection to prevent punctures and can be a great investment for avid cyclists.
Now that you know how to fix a flat tire and how to prevent them in the future, you can hit the road with confidence. Remember, accidents happen and flat tires are a part of cycling, but with the right knowledge and preparation, you can easily handle the situation.
So, are you ready to tackle any flat tire that comes your way?
