Were you aware that the National Highway Traffic Safety Administration reports more than 800 fatalities and upwards of half a million injuries annually in the United States, all due to bicycle accidents?
Ensuring that your bike’s brakes are in good working order can go a long way in preventing these accidents.
If you’re looking to fix the brakes on your bicycle, you’ve come to the right place.
Before we get started, it’s important to note that fixing your bike’s brakes can be a bit of a technical process.
However, with the right tools and a bit of patience, you’ll be able to adjust and replace brake pads, adjust brake tension, and perform maintenance and prevention tasks to keep your brakes working smoothly.
So, grab your tools and let’s get started on fixing those brakes!
Key Takeaways
- Identifying brake issues such as worn brake pads, loose cables, and uneven brake performance is important for safe biking.
- Solutions to brake issues include adjusting brake pads, tightening or replacing cables, truing the wheel, or replacing brake pads.
- Proper tools and parts are necessary for repairs, and choosing the right brake pads is crucial for improving brake power.
- Regular cleaning, lubrication, and maintenance can prevent future brake issues and ensure a safe ride.
Top picks for "brak bicycle"
Open Amazon search results for this keyword.
As an affiliate, we earn on qualifying purchases.
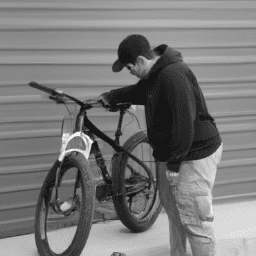
Assess the Problem
Before we start fixin’ those brakes, let’s take a sec to assess the problem and figure out what we’re workin’ with.
Identifying issues is the first step in fixing the brakes on your bicycle. The most common issues with brakes are worn brake pads, loose cables, and uneven brake performance.
To identify the issue, you need to test the brakes by squeezing the brake levers and checking how the brake pads react. If the brake pads don’t grip the wheel tightly, it’s time to replace them. If the brake levers feel loose or don’t return to their original position, the cables may need tightening. If the brakes feel uneven, the wheel may need truing or the brake pads may need adjusting.
Once you have identified the issue, it’s time to find solutions. This may involve adjusting the brake pads, tightening or replacing cables, truing the wheel, or replacing brake pads.
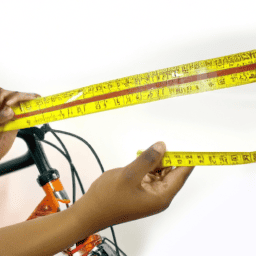
It’s important to make sure that you have the correct tools and parts before starting any repairs. Gather the necessary tools, such as a wrench, pliers, and new brake pads, to ensure that you can complete the repair efficiently and effectively.
With the right tools and knowledge, you can fix your bicycle brakes and get back on the road in no time.
Gather the Necessary Tools
You’ll need a few tools to get started, but don’t worry, it won’t be too complicated. Tool organization is important to ensure that you have everything you need before you start. Here are three items you’ll need:
- A set of Allen wrenches
- A pair of pliers
- A screwdriver
Make sure you have the appropriate size Allen wrenches for your bike’s brake system. Pliers are useful for adjusting cable tension and for holding brake pads in place while adjusting. The screwdriver will come in handy for loosening and tightening bolts.
Proper tool usage is important to avoid damaging any components. Always use the correct size wrench or tool for the job. Tighten bolts to the appropriate torque specifications to prevent over-tightening or under-tightening.
Once you have all the necessary tools, you can move on to adjusting and replacing brake pads.
Adjust and Replace Brake Pads
To properly maintain your bike’s braking system, it’s important to know how to adjust and replace brake pads. Improving braking power starts with choosing the right brake pads. There are different types of brake pads available in the market, and you need to choose the one that suits your riding style and the conditions you ride in.
Most brake pads are made of rubber and have wear indicators that let you know when they need to be replaced. To replace the brake pads, first release the brake tension by squeezing the brake lever and removing the wheel. Then, remove the retaining clip or pin that holds the brake pads in place and slide out the old brake pads. Install the new brake pads, making sure they are properly aligned and secure.
Once the new brake pads are installed, reattach the retaining clip or pin and reinstall the wheel. Now that you have replaced your brake pads, you need to adjust the brake tension to ensure they work properly. To do this, you can adjust the brake tension screw located on the brake lever or the brake caliper. This will allow you to fine-tune the brake tension to your liking.
With properly adjusted brake pads and tension, you will have the confidence to stop on a dime.
Adjust Brake Tension
To adjust the brake tension on your bicycle, you’ll need to focus on three key points:
-
Adjusting the brake pads so that they are positioned correctly against the rim of the wheel.
-
Adjusting cable tension to ensure that the brake pads engage the wheel at the appropriate pressure.
-
Testing the brakes to make sure they stop the bike effectively and smoothly.
Start by adjusting the brake pads. Then, adjust cable tension. Finally, test the brakes.
Adjust Brake Pads
When adjusting your brake pads, they should be positioned like a bird’s beak, just barely touching the rim of the wheel. This ensures that the brake pads will make proper contact with the rim when you squeeze the brake lever.
Before making any adjustments, check the brake pad wear. If the brake pads are worn down, they should be replaced. There are two common types of brake pads: rubber and metal. Rubber brake pads are softer and provide better stopping power, but they wear out faster. Metal brake pads are harder and last longer, but they don’t provide as much stopping power.
To adjust the brake pads, you’ll need an Allen wrench. Loosen the bolt that holds the brake pad in place and adjust the pad so that it’s just touching the rim. Make sure that the pad is centered on the rim and tighten the bolt. Repeat the process on the other side.
Once both brake pads are properly adjusted, check the cable tension. To adjust cable tension, turn the barrel adjuster located on the brake lever. This will either tighten or loosen the cable, depending on which way you turn it. Make small adjustments until the brake pads make firm contact with the rim when you squeeze the brake lever.
Adjust Cable Tension
Now you can easily fine-tune your brake performance by adjusting cable tension, just by turning the barrel adjuster located on your brake lever.
Start by squeezing the brake lever to check the distance between the brake pads and the rim. If the pads are too far away or too close, use the barrel adjuster to make the necessary adjustments.
Proper alignment of the brake pads is crucial in ensuring optimal brake performance. Make sure the brake pads are aligned with the rim to avoid any rubbing or squeaking sounds.
Additionally, cable lubrication is important to ensure smooth movement of the cable. Apply a small amount of lubricant to the cable and wipe off any excess.
Once you have made the necessary adjustments and ensured proper alignment and lubrication, it’s time to test the brakes to ensure they’re functioning properly.
Test the Brakes
As you give your brake lever a gentle squeeze, you’ll feel the brake pads engage with the rim, allowing you to test their responsiveness.
Here are some common issues to check when testing bike brakes:
- Make sure the brake cable is tight and properly connected to the brake lever.
- Check that the brake pads are making even contact with the rim and not rubbing against the tire.
- Test the brakes on different terrains, such as hills or bumpy roads, to see how they perform.
- Pay attention to any unusual sounds or sensations, such as squeaking or shuddering, which may indicate a problem with the brakes.
To ensure your bike’s brakes are working properly, it’s important to regularly test and maintain them.
In the next section, we’ll discuss some tips for brake maintenance and prevention.
Maintenance and Prevention
To ensure your bicycle is always in top condition, there are three key maintenance and prevention steps you should take.
Regularly cleaning and lubricating your bike will help prevent rust and keep the moving parts functioning optimally.
Additionally, replacing worn parts, such as brake pads and chains, will prevent further damage and ensure your bike is safe to ride.
Finally, taking preventative measures, such as storing your bike in a dry place and avoiding rough terrain, can help prevent future issues from arising.
By following these steps, you can keep your bike running smoothly and avoid costly repairs down the road.
Regular Cleaning and Lubrication
Keeping your bicycle’s brakes clean and lubricated is crucial for proper functioning, so make sure you regularly clean and lubricate them to avoid potential accidents. The importance of lubrication can’t be stressed enough, as it reduces friction between the moving parts of the brake system, increasing their lifespan.
To clean and lubricate your bicycle’s brakes, follow these three essential steps:
-
First and foremost, remove the wheels from your bicycle to access the brake system. Use a clean rag to wipe off any dirt or debris that may have accumulated on the brake pads and rotor. You can use a mild detergent solution to clean the brake pads, but make sure you rinse them thoroughly before proceeding to the next step.
-
Once the brake pads are clean, it’s time to lubricate the moving parts of the brake system. Apply a small amount of lubricant to the pivot points, caliper arms, and brake levers. Make sure you don’t overdo it, as excess lubricant can attract dust and debris, which can affect the brake’s performance.
-
After lubricating the brake system, reattach the wheels and test the brakes to ensure that they are working properly. If you notice any issues, it may be time to replace worn parts.
Regular cleaning and lubrication can go a long way in keeping your bicycle’s brakes in top condition. However, if you notice any signs of wear and tear, it’s important to replace worn parts to ensure your safety while riding.
Replacing Worn Parts
Now that you have cleaned and lubricated your bike brakes, it’s time to check for worn parts and replace them if necessary. It’s important to keep your bike in good condition to ensure your safety and the longevity of your equipment. When it comes to replacing worn parts, there are a few things to keep in mind.
Firstly, it’s crucial to choose the right replacement parts. Not all bike brake parts are made equally, so make sure to purchase parts that are compatible with your bike’s make and model. Secondly, proper installation techniques must be followed to ensure the new parts are installed correctly. This will not only ensure your safety, but it will also help your brakes work more effectively. Refer to the table below for a guide on which parts to replace and how to install them properly. Once you have replaced any worn parts, you’ll be ready to hit the road with more confidence in your bike’s braking system.
| Part to replace | Proper installation technique |
|---|---|
| Brake pads | Remove the old brake pads by loosening the retaining screw and sliding them out. Insert the new pads and tighten the retaining screw. |
| Brake cables | Loosen the cable anchor bolt and remove the old cable. Thread the new cable through the cable housing and reattach the anchor bolt. |
| Brake levers | Unscrew the old brake lever and remove it from the handlebar. Insert the new lever and tighten it securely. |
| Brake calipers | Remove the old caliper by loosening the mounting bolts. Install the new caliper and tighten the mounting bolts. |
| Brake rotors | Remove the old rotor by loosening the bolts. Install the new rotor and tighten the bolts. |
To prevent future issues with your bike brakes, it’s important to continue to maintain and inspect them regularly. This will help you catch any problems early on and avoid costly repairs or accidents.
Preventing Future Issues
You’ll want to make sure your ride is always smooth and safe, so let’s talk about some easy ways to keep your bike’s stopping power in top shape. Proper maintenance is key to preventing future brake issues.
First, make sure to regularly inspect your brake pads for wear and tear. If they’re worn down, replace them immediately to avoid damaging other parts of your bike.
Next, familiarize yourself with the different types of brakes your bike may have. Rim brakes, for example, require regular cleaning to prevent dirt and debris from building up and reducing their effectiveness. Disc brakes, on the other hand, require periodic adjustment to ensure that the pads are properly aligned with the rotor.
By staying on top of these maintenance tasks, you’ll be able to enjoy a safe and smooth ride every time you hit the road.
Frequently Asked Questions
How do I know if my brake cables need to be replaced?
To determine if your brake cables need replacing, look for signs of cable wear such as fraying or corrosion. If the brakes feel sluggish or don’t engage properly, it may be time to replace the cables.
Can I use any type of brake pads on my bicycle?
Before selecting brake pads, consider compatibility with your bike’s braking system. Options include organic, metallic, and ceramic pads. Ensure proper installation and break-in period for optimal performance and longevity.
How often should I check and adjust my brake tension?
To ensure optimal brake performance, it’s important to perform regular brake maintenance. Checking and adjusting brake tension should be done every 1-2 months. Common issues include loose cables and worn brake pads. Tips for adjusting brake tension include using a 5mm Allen wrench and ensuring equal tension on both sides.
Is it necessary to replace both brake pads at the same time?
Yes, it’s recommended to replace both brake pads at the same time for optimal performance. Replacing individual brake pads can be less cost effective in the long run due to uneven wear and potential damage to the rotor.
Can I use WD-40 to lubricate my brake components?
No, using WD-40 to lubricate your brake components is not recommended. Instead, use proper brake lubrication techniques like using silicone or lithium grease. WD-40 alternatives include Tri-Flow Superior Lubricant and Finish Line Ceramic Wax Lube.
Conclusion
Now that you’ve learned how to fix brakes on a bicycle, you can confidently hit the road without worrying about brake failure.
Remember to always assess the problem first before proceeding with any repairs. Gather all the necessary tools and replace any worn-out brake pads. Adjust the brake tension to ensure that your brakes are working optimally.
Finally, maintain your brakes regularly to prevent any future issues.
As you ride your bike with your newly repaired brakes, imagine the feeling of freedom and control that comes with a well-functioning bicycle.
You can now confidently tackle steep hills and sharp turns, knowing that your brakes will respond when you need them to. With this knowledge, you can enjoy your cycling experience to the fullest, exploring new trails and pushing your limits.
So go on, ride with confidence, and enjoy the journey.