
To fix a flat tire, start by pulling over to a safe spot and turning on your hazard lights. Gather your essential tools like a jack, lug wrench, and tire repair kit. Next, inspect the tire for punctures and determine if it’s repairable. If it is, remove the object, clean the hole, and insert a plug. Finally, reattach the tire, tighten the lug nuts, and check your spare. Keep going to learn more effective tire repair tips.
Key Takeaways
- Safely pull over and turn on hazard lights to alert other drivers before assessing the flat tire.
- Gather necessary tools, including a tire repair kit and air compressor, before starting the repair process.
- Inspect the tire for visible damage, determining if the puncture is in the tread or sidewall, and mark small holes for reference.
- Use a tire sealant for temporary fixes or patch the tire if applicable, but consult a professional for permanent solutions.
- After repair, ensure the tire is properly inflated, secure tools, and plan a visit to a tire shop for further evaluation.

Swagman Standard Fork Mount Rooftop Bike Carrier
EASY TO ASSEMBLE: The STANDARD is easy to assemble with no tools required, sets up in just minutes...
As an affiliate, we earn on qualifying purchases.
Identifying a Puncture
When you suspect a flat tire, it’s crucial to identify a puncture quickly. Pay attention to any steering wheel wobble or loud thumping sounds while driving—these often indicate a potential issue.
If you hear unusual noises, especially off-road, pull over at the first safe location to prevent further damage.
Once stopped, inspect the flat tire thoroughly for visible signs of damage. Look for nails, screws, or other foreign objects embedded in the tread, as these may be the source of your puncture.
If you do find something, resist the urge to remove it immediately; it can help slow air loss until you’re ready to repair the tire. Additionally, be aware that poor installation practices can lead to premature tire issues, much like how inadequate maintenance affects heat pumps.
Swagman UPRIGHT Roof Mount Bike Rack
EASY TO ASSEMBLE: The UPRIGHT roof rack installs in minutes following the instructions and carries one bike with...
As an affiliate, we earn on qualifying purchases.
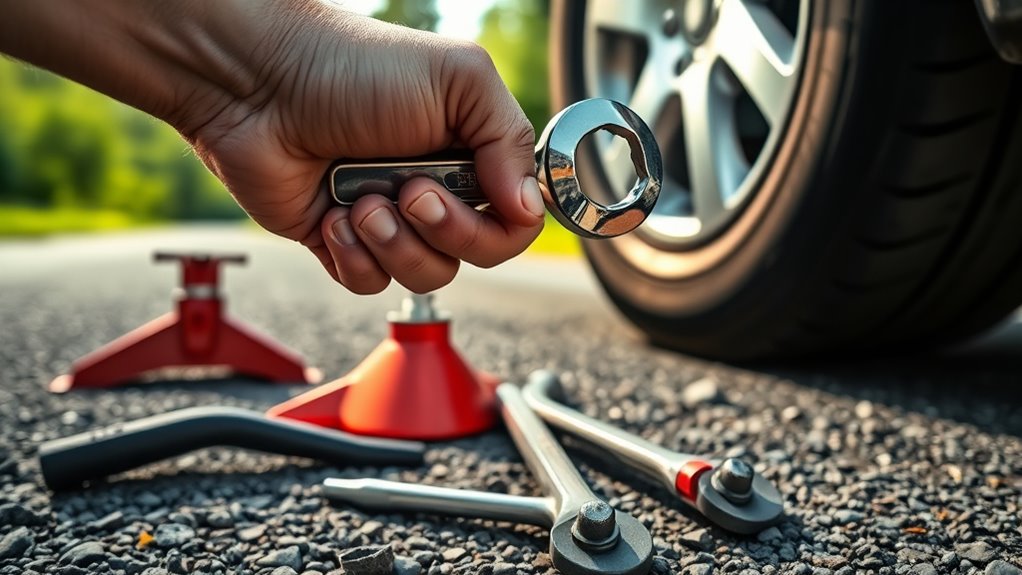
Essential Tools for Repair
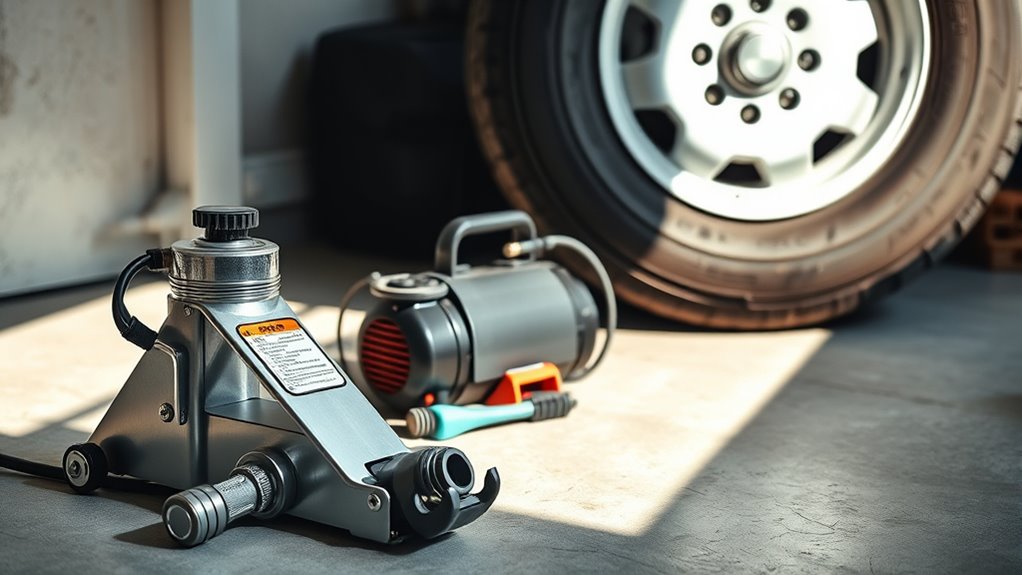
When it comes to fixing a flat tire, having the right tools is vital. You’ll need a tire repair kit, an air compressor, and essential tire tools like a lug wrench and jack. With these items, you can tackle most flat tire situations confidently and efficiently. Additionally, ensuring that you have color accuracy in your repair materials can further enhance your overall experience with tire maintenance.
Tire Repair Kits
A well-equipped tire repair kit can be a lifesaver during a roadside emergency. Your kit should include essential tools like rope plugs, installation tools, and sealants to effectively fix punctures.
A high-quality kit, such as the Boulder Tools kit, offers a cost-effective solution for minor repairs at around $38. Don’t forget the Fix-a-Flat aerosol sealant, which can temporarily seal small punctures without removing the tire.
Many kits also come with a compressor, like the $23 Slime compressor, for reinflating tires after a repair. Regular maintenance is vital; check your tire repair kit often to guarantee all components are functional and ready for use when you need them most. Energy-efficient models can also help you save on costs when purchasing replacement tires.
Being prepared can save you time and frustration.
Air Compressor Necessity
Having an air compressor on hand is essential for reinflating tires after a repair, ensuring your tire reaches the proper pressure for safe driving.
Portable air compressors, like the Slime compressor, are affordable and convenient, making on-the-go repairs easier. Regularly checking your tire pressure with an air compressor can improve fuel efficiency and enhance vehicle safety. Many toilet models use water efficiency features that can help reduce overall costs, similar to how maintaining proper tire pressure can save on fuel.
Many tire repair kits include a built-in compressor, allowing you to handle minor punctures without extra tools. When choosing an air compressor, look for one that can inflate tires quickly and efficiently.
It’s also advisable to have a pressure gauge to avoid over-inflation, ensuring your tires maintain ideal pressure for better performance on the road.
Essential Tire Tools
Essential tire tools can make all the difference when you’re faced with a flat. First, make sure you have a spare tire ready to go. Familiarize yourself with its location, along with the jack and lug wrench, as these are vital for a successful tire change.
A tire-repair kit, like Boulder Tools, is also valuable; it includes rope plugs and installation tools for effective puncture repairs. Don’t forget an emergency compressor, such as the Slime model, to reinflate your tire after repairs.
For quick fixes on small punctures, consider using Fix-a-Flat for temporary inflation without wheel removal. Finally, keep a quality tire pressure gauge in your car to monitor air pressure regularly, making sure your tires perform safely. Additionally, regularly check and clean filters in your air purification system to ensure optimal performance while driving.

SYDSZ Roof Bike Rack Mount Upright Roof Bike Rack 1 Bike Carrier Car Roof Bicycle for Car Only Suitable for Removable Universal Crossbars
【COMPATIBILITY】Only applicable for installation on the driver's roof, fits 20" - 29" wheels. 64" long tray. Fits up...
As an affiliate, we earn on qualifying purchases.
Evaluating the Puncture
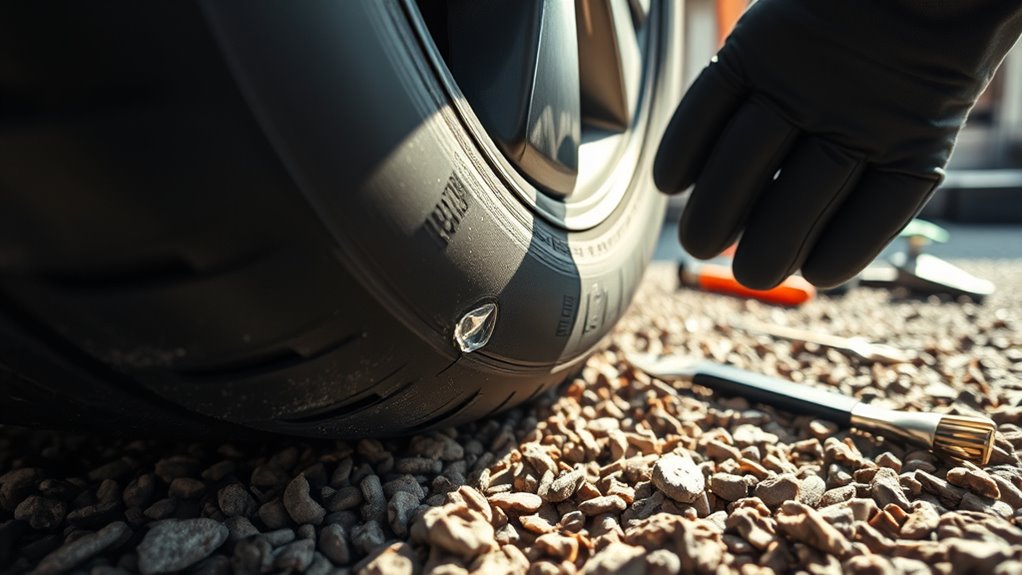
Before you start making repairs, it’s crucial to evaluate the puncture properly.
First, roll the tire to a well-lit area where you can inspect it for visible holes or any embedded foreign objects.
Determine if the puncture is in the tread or the sidewall; small holes in the tread are usually repairable, while sidewall punctures often mean you need a new tire.
If you find something like a nail or screw, don’t remove it just yet, as it might help hold air until you can repair it.
Mark any small, non-leaking holes for reference and check for additional damage to confirm the tire is safe for use.
Multiple punctures or sidewall damage can make it unsafe. Additionally, consider that improper disposal of damaged tires can contribute to environmental degradation and pose health risks to the community.

Schwinn Sporterra RX Gravel Bike, 700c Mens and Womens Bike, 14-Speed Drop Bar Gravel Bicycle, Mechanical Disc Brakes, Rigid Fork, Aerodynamic Riding Position, Quick Release Seat Post, Adult Bicycle
GRAVEL BICYCLE: Enjoy next level riding with the Sporterra RX by Schwinn. With 700c wheels, this mens and...
As an affiliate, we earn on qualifying purchases.
Removing the Problem
Once you’ve evaluated the puncture and identified any embedded objects, it’s time to remove the problem. Start by carefully extracting any foreign objects, like nails or screws, using needle-nose pliers. This prevents further damage during the repair.
Confirm the hole in the tire is clear of any debris, as leftover materials can hinder the sealing process.
- Mark small, non-leaking holes for reference.
- Verify the puncture area is clean and prepared for reaming.
- Remember that small holes in the tread can often be repaired; sidewall holes typically mean tire replacement.
Additionally, be mindful of your emotional state during this process, as self-protection is crucial when dealing with stressful situations like tire repairs.
After removal, you’ll be ready to install a plug that will create a tight seal.
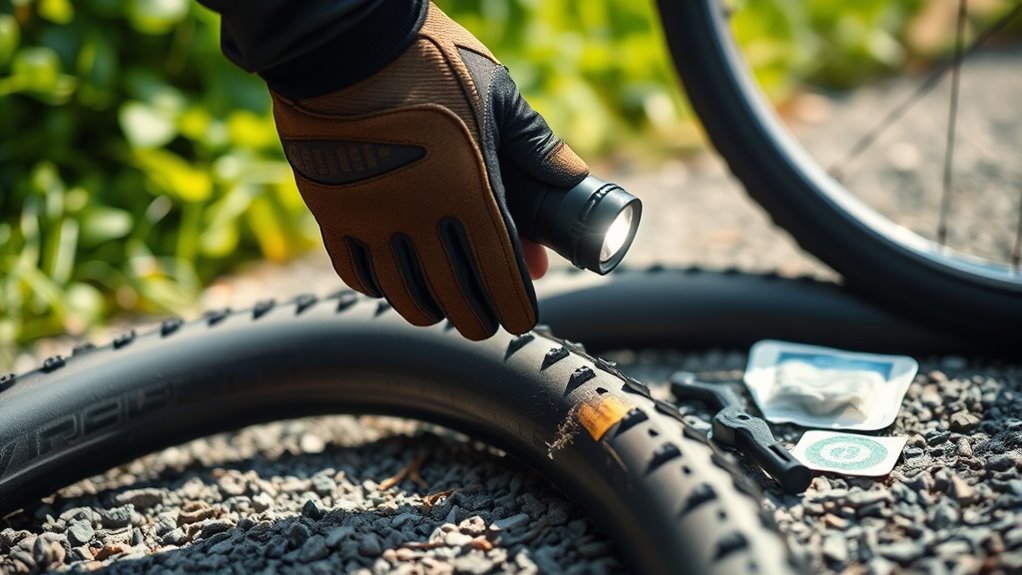
Installing the Plug
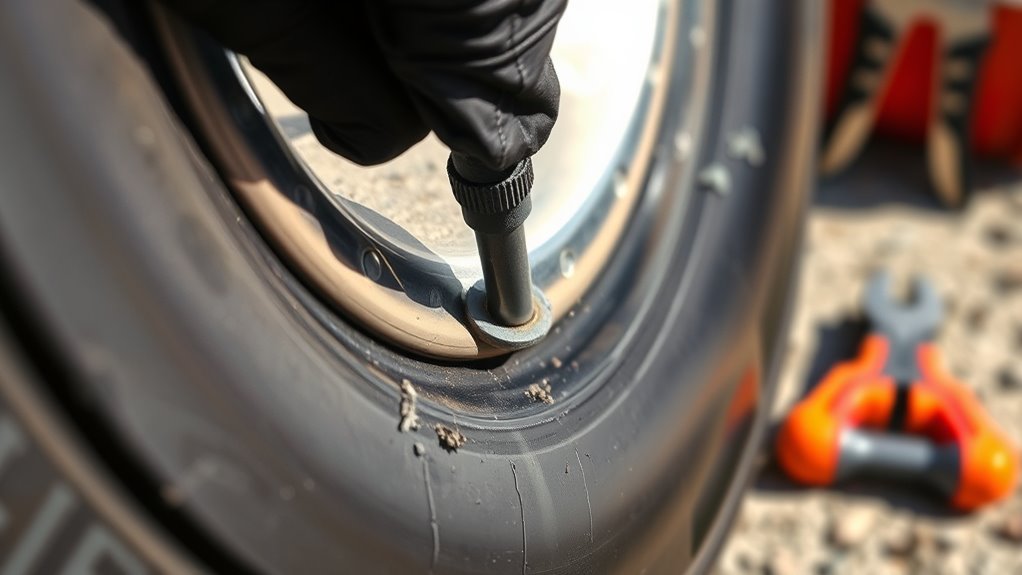
Now it’s time to install the plug and seal the puncture effectively.
Start by flattening one end of the rope plug and inserting it into the installation tool, making certain it’s lubricated for easier insertion.
Push the tool into the tire until the depth guide is flush with the tire surface, which guarantees the plug is inserted adequately to create a secure seal.
Once the tool is fully inserted, pull it out, leaving the plug embedded in the tire.
Trim any excess plug material sticking out to avoid imbalance and guarantee a smooth surface.
Finally, allow the plug to set for a few minutes before re-inflating the tire to the recommended pressure, confirming that your repair is effective. Remember, regular maintenance can help prevent issues like flat tires in the first place.
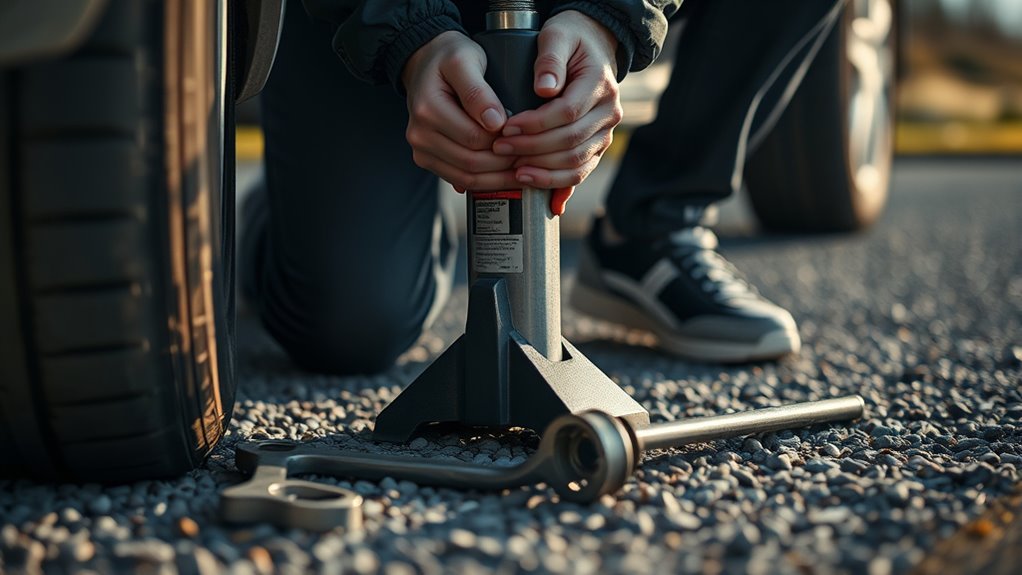
Finalizing the Repair
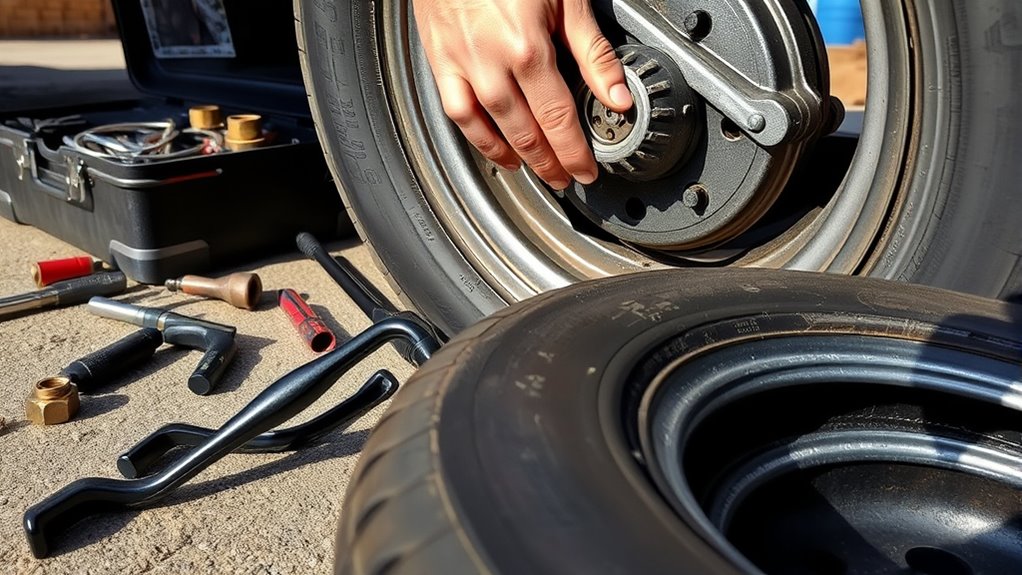
After you’ve installed the plug, it’s essential to finalize the repair properly to guarantee your safety on the road. Here’s what you need to do:
- Lower the car completely and remove the jack for stability.
- Tighten the lug nuts fully, using a star pattern to distribute pressure evenly.
- Check the spare tire’s air pressure with a tire gauge to verify it meets the manufacturer’s specifications.
- Store the flat tire and tools back in your vehicle, keeping a secure location.
Additionally, ensure that the safety precautions regarding tire maintenance and monitoring are followed to prevent future issues.
Once you’ve completed these steps, you’ll be ready to get back on the road.
After following these steps, you’ll be all set to hit the road again.
Drive cautiously and watch for any unusual noises or vibrations, planning to visit a tire shop for a permanent repair or replacement soon.
Frequently Asked Questions
How to Fix a Flat Tire Step by Step?
To fix a flat tire, start by parking your vehicle on a flat surface and engaging the parking brake.
Check the tire for visible damage and use a lug wrench to loosen the lug nuts, but don’t remove them just yet.
Position the jack under the designated point and lift the vehicle.
Remove the nuts completely, swap in the spare tire, and hand-tighten the nuts.
Lower the vehicle and tighten the nuts fully before driving away.
How to Change a Flat Tire in 9 Steps?
Did you know that around 30% of drivers experience a flat tire at some point?
To change a flat tire in 9 steps, start by securing your vehicle in a safe spot and turning on the hazard lights.
Gather your tools: a spare tire, jack, and lug wrench.
Loosen the lug nuts, lift the vehicle, remove the flat tire, and attach the spare.
Tighten the lug nuts in a star pattern, lower the vehicle, and store everything.
How to Change a Car Tire in 5 Steps?
To change a car tire in five steps, first, find a safe spot to park and gather your tools.
Next, loosen the lug nuts by turning them counterclockwise, but don’t take them off yet.
Use the jack to lift the vehicle until the tire’s off the ground, then remove the lug nuts and the flat tire.
Finally, replace it with the spare, tighten the nuts, and lower the vehicle back down.
How to Get a Flat Tire Fixed at Home?
When you’re faced with a flat tire, don’t panic; you can tackle this tire trouble!
First, gather your gear: a repair kit, installation tool, and compressor.
Next, pinpoint the puncture’s place, remove the tire, and inspect for intruders.
Then, insert a rope plug snugly into the hole, trimming any excess.
Finally, fill the tire with air using the compressor, ensuring it’s inflated to the proper pressure.
Regularly check for leaks to keep cruising confidently!
Conclusion
Now that you’ve tackled that flat tire, you’re ready to hit the road again! Remember, every journey has its bumps, but with a little know-how, you can steer through them smoothly. Just like a well-oiled machine, keeping your tools handy and your skills sharp will make all the difference. So, next time you face a tire trouble, you’ll be prepared to roll on without a hitch. Safe travels and happy driving!