Traveling by plane with a bicycle can seem daunting, but with proper preparation and insight, it can turn into a smooth experience. Having taken my bicycle on flights numerous times myself, I’ve picked up several helpful hints that can simplify the process.
In this article, I will share my experience and expertise on how to fly with a bicycle, from researching airline policies and fees to assembling and testing your bike upon arrival.
The first step in flying with a bicycle is to research the airline policies and fees. Each airline has different rules and regulations when it comes to transporting bikes, and it’s important to know these before booking your ticket. Some airlines may require you to pack your bike in a specific bag or box, while others may allow you to check it in as is. Additionally, there may be extra fees for transporting a bike, so it’s important to factor these into your travel budget.
By doing your research beforehand, you can avoid any surprises or setbacks at the airport.
Key Takeaways
- Research airline policies and fees before booking a flight with your bike.
- Choose the right bike bag – soft cases offer flexibility, while hard cases provide more protection. Renting is cost-effective for occasional trips, while purchasing is worthwhile for frequent travelers.
- Properly prepare your bike for travel by disassembling, cleaning, and inspecting components, and labeling the bag with your name, address, and flight information.
- Be aware of airline policies and fees for traveling with bikes, arrive early for check-in and security, and be prepared to pay additional fees. Assemble the bike correctly after the flight and adjust for comfort and control.

CXWXC Bike Repair Stand 88lbs- E Bike Stand for Maintenance Workstand - Ebike Repair Stand Shop Home Mechanics for Mountain Bike and Road Bike (Max. 88lbs)
【Easy-Breezy Bicycle Maintenance】: A bike repair stand is an essential item when you’re working on your bike or...
As an affiliate, we earn on qualifying purchases.
Research Airline Policies and Fees
You’ll want to check out each airline’s policies and fees for flying with a bicycle, so you don’t get hit with any unexpected charges or restrictions. Start by comparing fees across different airlines to find the most affordable option.
Some airlines charge a flat fee for transporting a bicycle, while others charge based on weight or size. It’s important to also check if there are any additional fees for oversized luggage or if the bike needs to be disassembled before being checked in.
Another important factor to consider is finding discounts. Some airlines offer discounts for members of cycling organizations or for booking early. It’s also worth checking if your credit card offers any perks for flying with a bicycle.
By doing your research and comparing fees, you can save money and ensure a smooth experience when flying with your bike. Now, let’s move on to the next step and choose the right bike bag or box.

GOEHNER's Upgrade 2.0 Bike Repair Stand (Max 110 lbs) – Portable Aluminum Bicycle Workstand for Electric, Mountain, and Road Bikes
【Max Load 110lbs】 Crafted from durable #6070 aluminum, this lightweight yet heavy-duty bike repair stand can support bikes...
As an affiliate, we earn on qualifying purchases.
Choose the Right Bike Bag or Box
When it comes to choosing the right bike bag or box for air travel, there are two main options to consider: soft cases and hard cases. Soft cases offer more flexibility in terms of storage and often come with additional features such as backpack straps for easy carrying. On the other hand, hard cases provide more protection for your bike but can be heavier and more cumbersome to transport.
Another important factor to consider is whether to rent or buy the bike bag or box. Renting can be a cost-effective option for occasional trips, but purchasing your own bag or box can be a worthwhile investment for frequent travelers.
Soft vs. Hard Cases
Packing your bike for a flight is like choosing between a suit of armor or a cozy sweater: hard cases provide more protection, but soft cases offer more flexibility.
Soft cases are made of durable, lightweight materials that offer more give than hard cases. This means you can fit more items inside the bag, including clothing and other gear. Soft cases are also easier to store when not in use, as they can be folded or rolled up for compact storage.
On the other hand, hard cases provide the ultimate protection for your bike during transit. They are made of tough, impact-resistant materials that can withstand rough handling. Hard cases also have additional features such as reinforced corners and locking mechanisms that ensure your bike stays safe and secure. However, hard cases can be heavier and more cumbersome to transport, and may not fit all types of bikes.
When it comes to choosing between a soft case and a hard case, it really depends on your specific needs and preferences. If you prioritize flexibility and ease of use, a soft case may be the better option. If you prioritize maximum protection for your bike, a hard case may be the way to go.
Now that you’ve chosen your bike bag or box, it’s time to decide whether to rent or buy one for your trip.
Renting vs. Buying
Opting for renting a bike bag or box instead of purchasing one may be a wise decision depending on your travel frequency and storage space. Here are the pros and cons of renting versus buying:
| Pros | Cons | |
|---|---|---|
| Renting | – Lower cost upfront – No need for storage – Access to a variety of cases |
– Limited rental availability – Potential for damage fees – Inconvenient to rent for frequent travelers |
| Buying | – Long-term cost savings for frequent travelers – Convenience of storing and using at any time – Ability to customize case for your bike |
– Higher upfront cost – Requires storage space – Limited options for customization |
A cost comparison is also important to consider. Renting a bike bag or box typically costs between $50-$150 per trip depending on the rental company and type of case. If you travel frequently, these costs can add up quickly. On the other hand, purchasing a case can range from $200-$1000, with the higher end cases providing better protection for your bike. However, if you travel frequently, the long-term cost savings may outweigh the initial investment.
To prepare your bike for travel, there are a few steps you should take.

E Bike Stand Repair (Max 132 lbs) - Foldable Bike Stand for Maintenance of Road Bike Stand& Mountain Bike Stand,Bicycle Repair Stand for E-bikes with Super-strong Tube,Height Adjustable Portable Bicycle Heavy Duty Mechanics Workstands
Please Watch our video to see how to properly use and adjust the repair stand.By watching the vedio...
As an affiliate, we earn on qualifying purchases.
Prepare Your Bike for Travel
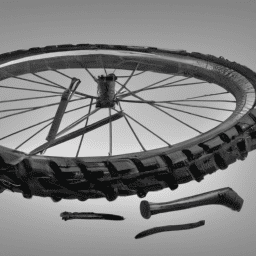
Like a marathon runner stretching before a race, it’s important to give your bike a thorough check-up before flying with it. This means disassembling, cleaning, and inspecting all the components to ensure they’re in good condition.
Start by removing the wheels, pedals, handlebars, and seat post. Use a soft cloth and mild soap to clean the frame, wheels, and other parts. Check the tires for wear and tear, and inflate them to the recommended pressure. Inspect the brakes, gears, and chain, and make necessary adjustments or repairs.
Once your bike is in top shape, it’s time to pack it for travel. Use a sturdy bike box or bag, and make sure the bike is securely fastened inside. Use bubble wrap or foam to protect fragile parts, and add padding around the frame to prevent scratches and dents.
Don’t forget to label the box with your name, address, and flight information. With your bike safely packed, you’re ready to head to the airport. Arrive early to allow plenty of time for check-in and security, and be prepared to pay any additional fees for oversize or overweight luggage.

VEVOR Bike Repair Stand, 4-Leg Steel Bicycle Repair Stand, 42.5"-74.8" Adjustable Height Bike Maintenance Work Stand with Magnetic Tool Tray, Foldable Bike Service Stand for Home, Shop (Max 80 Pounds)
80 lbs High Load Capacity: Crafted from heavy-duty non-rust steel with a thick column diameter, the bike repair...
As an affiliate, we earn on qualifying purchases.
Arrive Early at the Airport
When traveling with my bike, I always make sure to arrive at the airport early. This way, I have plenty of time to check in, drop off my bike, and clear security without feeling rushed.
Checking in involves presenting my bike as a piece of oversized luggage, while dropping it off typically involves taking it to a designated area or counter.
Once my bike is checked in and dropped off, I then proceed to clear security with my carry-on luggage.
Checking In
Before you head to the airport, make sure you’ve got all the necessary documents and fees required to check in your bicycle for the flight. Online check-in is available in most airlines, so take advantage of it to save time. Make sure to print your boarding pass and baggage tags if needed. If you’re unable to do online check-in, arrive early to the airport and head straight to the check-in counter. Always have your passport and flight reservation ready for the check-in agent.
When checking in your bicycle, the airline will ask you to fill out a baggage declaration form. Here are some things to keep in mind:
- Make sure your bike is packed securely in a bike box or bag
- Remove pedals and turn handlebars sideways to save space
- Deflate tires to reduce the risk of damage
- Double-check the weight limit and any additional fees for oversized baggage
- Keep your bicycle documentations handy in case of any issues during the flight
Once you’ve checked in your bicycle, it’s time to drop it off at the oversized baggage area. Don’t forget to attach your baggage tags and inform the agent that you have a bicycle to drop off.
From here, you’re one step closer to flying with your trusty two-wheeler.
Dropping Off Your Bike
Now that we’ve checked in our bikes, the next step is to drop them off at the designated area for oversize luggage. This is where logistics planning comes into play.
It’s important to know the shipping options available and the fees associated with each one. Some airlines offer free bike transportation as part of their baggage allowance, while others charge a fee for each bike. It’s also important to consider the weight and size of your bike as some airlines have specific restrictions.
Once we’ve determined the shipping option and fees, we can proceed to drop off our bikes. It’s important to have all necessary documents ready, such as the airline’s bike transportation policy and any waivers or release forms required. We should also ensure that our bikes are properly packed and secured to prevent any damage during transportation.
With everything in order, we can confidently drop off our bikes and proceed to clear security.
Transitioning into the subsequent section about ‘clearing security’, it’s important to note that we should always keep our bike documentation and boarding pass handy as we make our way through the security checkpoint.
Clearing Security
As we prepare to pass through security, it’s crucial to keep our important documents in hand and be aware of the potential obstacles we may face. Here are some tips for navigating TSA with a bike:
-
Remove all accessories – Before going through security, make sure to remove all accessories from your bike, such as water bottles, lights, and bags. These items can be packed separately in your carry-on or checked luggage.
-
Use a bike bag – If you’re traveling with your bike, it’s best to pack it in a bike bag. This will protect your bike during transport and make it easier to carry. Make sure to follow TSA guidelines for packing your bike bag.
-
Be prepared for inspection – TSA may need to inspect your bike bag, so make sure to pack it in a way that allows for easy inspection. You may also need to remove your bike from the bag for inspection.
-
Know your airline’s policies – Different airlines may have different policies for traveling with bikes. Make sure to check with your airline before traveling to avoid any surprises at the airport.
When clearing security, it’s important to be prepared and follow the rules to avoid any delays or issues.
Once you’ve successfully passed through security, it’s time to assemble and test your bike upon arrival.
Assemble and Test Your Bike Upon Arrival
Congratulations, you’ve finally arrived at your destination and have the pleasure of putting together your beloved bike while everyone else is enjoying their vacation. Assembling your bike requires patience, attention to detail, and of course, proper tools. Before you start, make sure you have all the necessary tools such as hex wrenches, a pedal wrench, and a torque wrench. These tools will make the assembly process seamless and prevent any damage to your bike’s components.
Once you have all the tools, it’s time to start assembling your bike. Follow the steps below and refer to the table for guidance on assembling your bike properly. It’s crucial to ensure that your bike is assembled correctly to avoid any accidents or damage during your ride. If you’re unsure about the assembly process, you can always consult local bike shops or consider bike rentals. Assembling your bike and getting it ready for your ride is an exciting and rewarding experience that will make your journey even more enjoyable.
| Step | Description |
|---|---|
| 1 | Install the handlebars onto the stem and tighten the bolts to the recommended torque |
| 2 | Install the front wheel, making sure it’s aligned properly with the fork and the quick release is tight |
| 3 | Install the seat post and saddle, adjusting the height to your preference |
| 4 | Install the pedals, making sure the left pedal is screwed in counterclockwise and the right pedal clockwise |
| 5 | Check the brakes, ensuring they’re centered, aligned, and functioning correctly |
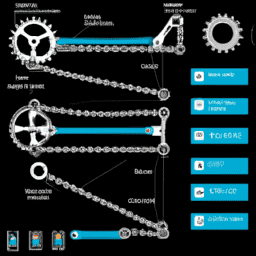
| 6 | Inspect the gears, making sure they’re shifting smoothly and the chain is lubricated |
| 7 | Inflate the tires to the recommended pressure, using a pump with a pressure gauge |
| 8 | Take a test ride, adjusting the saddle and handlebars as needed for comfort and control |
Frequently Asked Questions
Can I bring my bike on any airline or are there certain airlines that don’t allow it?
I’ve found that airline restrictions vary when it comes to bringing a bike. Some airlines allow it as a checked-in item while others require it to be disassembled and packed. If not an option, alternative transportation options may be necessary.
What types of fees can I expect when traveling with my bike?
Bike transport fees and airline restrictions vary, so research beforehand. Packing tips and bike disassembly can save money and hassle. As an experienced traveler, I suggest preparing thoroughly to avoid unexpected costs and delays.
How do I ensure that my bike is packed securely in the bag or box?
To ensure bike safety while flying, proper padding and securing straps are crucial. DIY bike packing requires attention to detail, such as removing pedals and handlebars, and packing them separately. Tighten all bolts and wrap fragile areas with protective materials.
Are there any specific tools or items I need to bring in order to assemble my bike upon arrival?
In order to assemble my bike upon arrival, I need a set of Allen keys, tire pump, and possibly a pedal wrench. The assembly process includes attaching the handlebars, pedals, wheels, and adjusting the brakes and gears.
What if my bike is damaged during the flight, what should I do?
If my bike is damaged during a flight, I immediately inspect it and take photos. Then, I notify the airline and file a claim for compensation. It’s important to have insurance options to cover any damages.
Conclusion
Flying with a bicycle can be a daunting task, but with the right preparation, it can be a breeze. After thoroughly researching airline policies and fees, I chose the right bike bag for my trip.
I made sure to prepare my bike for travel by removing pedals, lowering the seat, and protecting delicate parts with padding and foam. When arriving at the airport, I made sure to allow plenty of time for check-in and security.
Assembling and testing my bike upon arrival was also crucial in ensuring a smooth ride. I highly recommend double-checking all bolts and screws before taking off. Overall, flying with a bicycle may seem intimidating, but with the right preparation and attention to detail, it can be a great adventure.
As they say, "a stitch in time saves nine,"and this couldn’t be more true when it comes to flying with a bike. Taking the time to properly prepare and pack your bike will ultimately save you time and money in the long run.
Happy travels!