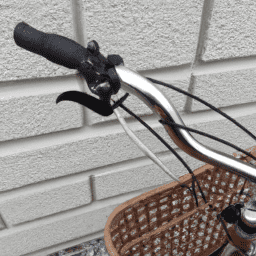
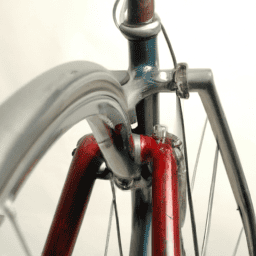
Fitting a bike basket might appear challenging at first, but with the proper equipment and some patience, it’s actually quite straightforward. Adding a basket to your bicycle offers a handy area for transporting personal items or shopping when you’re riding through the city.
Before you start, it’s important to choose the right basket for your bike. There are many different types of baskets available, from wire mesh to wicker, and each one can vary in size and shape.
Once you have chosen the right basket, it’s time to gather the necessary tools such as a screwdriver, wrench, and zip ties.
In this article, I will guide you through the process of installing a bicycle basket step by step, so you can enjoy all the benefits of having a handy storage space on your bike.
Key Takeaways
- Choosing the right basket is crucial and one should consider the size and material durability.
- Attaching the basket securely to the handlebars, rear, or front of the bike frame is important. One can use Velcro straps or alternative mounts with screws or bolts.
- Testing the basket stability by loading it with weight, ensuring it is level, and adjusting weight distribution and height. An unevenly loaded basket increases the risk of falling off the bike by up to 50%.
- Adjusting the basket position and making sure it is level with the ground, checking weight distribution, tightening screws in place, and testing stability again by adding weight to the basket are important steps. Shifting heavier items closer to the bike frame to lower the center of gravity and increase stability can also help.
Choose the Right Basket for Your Bike
You’ll wanna pick out the perfect basket that suits your bike style and needs. When choosing a basket, there are two important things to consider: size options and material durability.
Make sure that the basket you select fits your bike properly. Baskets come in different sizes, from small to large, so choose one that matches your bike’s size. You don’t want a basket that’s too small or too big for your bike because it might affect the balance and stability of your ride.
Aside from size, material durability is also an important factor to consider. Baskets can be made from different materials, such as metal, plastic, or wicker. Each material has its own advantages and disadvantages, so choose one that fits your lifestyle and needs. If you’re looking for a durable and long-lasting basket, consider getting a metal one.
Once you’ve chosen the perfect basket for your bike, let’s move on to the next step and gather the necessary tools.
Gather the Necessary Tools
Before you can get started, it’s important to make sure you have all the tools you need. Measuring dimensions and selecting materials are crucial steps in the installation process. Here is a list of the necessary tools to install a bicycle basket:
| Tools | Description |
|---|---|
| Measuring tape | Used to measure the dimensions of your handlebars |
| Screwdriver | Used to secure the basket to the bike |
| Allen wrench | Used to tighten screws and bolts |
| Pliers | Used to twist wires and adjust fittings |
| Basket hardware | Comes with the basket and includes screws, bolts, and brackets |
Measuring the dimensions of your handlebars is important in selecting the right size basket for your bike. Once you have the correct size basket, selecting materials that are durable and lightweight is also important. After you have gathered all the necessary tools, the next step is to prepare your bike for the installation process.
Prepare Your Bike
To get started, it’s important to make sure your bike is ready for the process by checking its condition and ensuring it’s clean and free of debris. Here are some steps to follow:
-
Inspect the frame for any cracks or damage that could affect the installation process.
-
Clean the surface where you plan on attaching the basket to remove any dirt or grime that could prevent the basket from securely attaching to your bike.
-
Remove any obstacles such as cables or other attachments that could get in the way of the basket installation.
-
Check the compatibility of the basket you’ve chosen with your bike’s frame and handlebars.
-
Adjust your bike’s handlebars if needed to make room for the basket.
With these steps completed, your bike should be ready for the basket installation process. Now, let’s move on to the next step of attaching the basket to your bike.
Attach the Basket to Your Bike
Now it’s time to attach that basket to your trusty ride. The first step is to determine where you want to place the basket. Most commonly, the basket is attached to the handlebars, but it can also be attached to the rear or front of the bike frame.
Once you’ve chosen the location, make sure the area is clean and free of dirt or debris. Next, secure the basket to the bike using the provided securing straps. These straps are usually made of Velcro and wrap around the bike frame or handlebars to hold the basket in place. Alternatively, some baskets come with alternative mounts that can be attached to the bike with screws or bolts.
Make sure the basket is level and securely attached before moving on to the next step. Now that the basket is attached, it’s time to test it out. Load the basket with some weight to see how it handles. Make sure the weight is evenly distributed and doesn’t cause the bike to become unbalanced.
Once you’re satisfied with how the basket handles, you’re ready to hit the road.
Test the Basket Out
Now that I’ve attached the basket to my bike, it’s time to test it out.
The first thing I need to do is make sure the basket is level. If it’s not, I’ll need to adjust it until it is.
Next, I’ll add some weight to the basket to test its stability. If it wobbles or feels unsteady, I’ll need to make some adjustments until it feels secure.
Overall, it’s important to take the time to properly test the basket before using it to carry any valuable items.
Make Sure the Basket is Level
First, make sure your basket is level with the ground. Did you know that an unevenly loaded basket increases your risk of falling off your bike by up to 50%? To ensure accurate measuring and weight distribution, follow these steps:
- Use a level to check if your basket is straight.
- Adjust the position of the basket until it is level with the ground.
Check the weight distribution by placing a small item in the center of the basket. If the basket tilts to one side, adjust the weight distribution by moving the item to the opposite side. Once the basket is level and the weight is distributed evenly, use a screwdriver to tighten the screws in place.
After ensuring that your basket is level, add weight to test its stability. This step is crucial to avoid potential accidents on the road.
Add Weight to the Basket to Test Stability
To test the stability of your loaded basket, you’ll want to add some weight. This will help you determine if the basket can handle the weight distribution you plan on carrying.
Try placing a few heavy items in the center of the basket and imagine how they’ll shift as you ride. Make sure you don’t exceed the basket’s capacity and keep the weight evenly distributed so the basket doesn’t tip over.
It’s important to note that you may need to make adjustments as needed. If the basket feels unstable or tips over, try redistributing the weight or removing some of the items. It’s better to be safe than sorry when it comes to riding with a loaded basket.
Once you feel confident in the stability of your basket, you’re ready to hit the road!
Make Adjustments as Needed
Don’t hesitate to tweak the weight distribution if needed, as small adjustments can make a huge difference in preventing a catastrophic spill.
If your basket is wobbling, try shifting the heavier items closer to the bike frame. This will lower the center of gravity and increase stability.
You may also need to adjust the height of the basket. If it’s too high, it will be unstable and prone to tipping. If it’s too low, it may interfere with your pedals or front wheel.
To adjust the height, use the screws or bolts provided with your basket to loosen the attachment points. Rearrange the brackets or supports as needed, then tighten everything back up.
Test the stability of the basket again with a small load, then make any final adjustments. With a little bit of tweaking, your basket should be perfectly stable and ready for all your hauling needs.
Frequently Asked Questions
Can I use any basket on any type of bike?
When choosing a bike basket, consider compatibility issues with your bike’s handlebars and frame. Some baskets may require customization options to fit properly. Always check the manufacturer’s specifications before purchasing.
How much weight can the basket hold?
When choosing a bicycle basket, weight capacity considerations are important. It’s crucial to select a basket that can support the weight of your items. Make sure to choose the right size basket that matches your needs.
Will the basket interfere with my brakes or gears?
When choosing a basket, make sure it’s compatible with your bike’s brakes and gears. Adjust the placement of the basket to avoid interference. Installation instructions vary depending on the type of basket.
How do I clean and maintain the basket?
To maintain my bicycle basket, I use a damp cloth and mild soap to wipe away dirt and grime. If the basket is made of metal or plastic, it should last a while. For natural materials like wicker, avoid harsh weather and extreme temperatures.
Can I easily remove the basket if I don’t need it?
Removing a bicycle basket is easy, but there are Pros and Cons. Some baskets use quick-release mechanisms, while others need tools. The Basket Material also affects the removal process. Be mindful of weight distribution before removing.
Conclusion
Phew, I’ve finally installed my bicycle basket and it feels like I’ve just unlocked a whole new level of convenience. It’s amazing how such a small addition can make such a big difference in my daily life.
Like a trusty sidekick, my basket is ready to carry my groceries, books, and even my furry friend when I’m out and about.
Installing a bicycle basket may seem daunting at first, but with the right tools and instructions, it can be a breeze. It’s like learning a new skill – it may take some time and effort at first, but once you get the hang of it, it becomes second nature.
So, don’t be afraid to dive in and give it a try. Who knows, installing a basket on your bike may just be the beginning of a whole new cycling adventure.
