Fed up with your bike’s lackluster and uninspiring paint job? Giving your bicycle a fresh coat of paint can radically transform its appearance, allowing it to really pop among the masses. Nevertheless, refinishing a bike frame is a task that demands adequate preparation, suitable equipment, and meticulous care.
In this article, we will guide you through the process of repainting your bike frame, step-by-step. Before you start, it is important to note that repainting a bike frame can be a time-consuming process. It requires patience and attention to detail, but the end result is well worth the effort.
In this article, we will take you through the steps of preparing your bike for repainting, gathering the necessary tools, applying the base and top coat, and reassembling your bike. By following these steps, you can give your bike a fresh new look that will make it look like new again.
So, let’s get started!
Key Takeaways
- Repainting a bike frame can give it a new look and make it stand out.
- Proper preparation, including removing old paint and rust and choosing the right primer, is essential for a smooth surface and professional-looking finish.
- Applying a base coat and top coat, as well as thoroughly cleaning and oiling all parts before reassembling, is crucial for achieving the desired result.
- Safety is important when riding, and wearing a helmet and other protective gear is recommended.
RegalRider Hybrid Bike, 700C Men's Bike, 7-Speed Commuter Bicycle, Low Step-Through Frame, Adjustable Seat & Handlebar, Reflectors, 90% Pre-Assembled
Ride in Easiness - Hybrid bike for adults features lightweight 700C aluminum double-wall rims paired with high-grip tires....
As an affiliate, we earn on qualifying purchases.
Prepare Your Bike for Repainting
Before you can start repainting your bicycle frame, you need to properly prepare it. This involves removing all the old paint and rust, and sanding it down to create a smooth surface for the new paint to adhere to.
Start by selecting the right sandpaper for the job. For removing old paint and rust, use a coarse-grit sandpaper, such as 80 grit. For smoothing out the surface, switch to a finer-grit, such as 120 or 220 grit.
Masking off any areas that you don’t want to paint is also an important part of the preparation process. Use painter’s tape and newspaper to cover any areas, such as the handlebars or seat post, that you want to protect.
Next, choose the right primer for your frame, depending on the type of paint you plan to use. Apply the primer evenly, and make sure to fill in any scratches or dents with a filler product before painting.
With the preparation complete, it’s time to gather your tools and get ready for the painting process.

WEIZE Beach Cruiser Bike, 26 inch Commuter Bicycle for Adult Men and Women,High-Carbon Steel/Front & Rear Fenders, Comfortable City Bikes with Rear Rack&Basket, Ergonomic Upright Design,White
【Classic & High-Carbon Steel】: The combination of three-spray and four-bake process with excellent welding technology makes it a...
As an affiliate, we earn on qualifying purchases.
Gather Your Tools
Just like a chef needs their tools in the kitchen, you’ll need your equipment in order to get your two-wheeled vehicle looking like new again. Before you start painting, gather all the necessary tools and materials such as sandpaper, primer, spray paint, clear coat, masking tape, and a drop cloth.
Here’s a helpful list to ensure you have everything you need:
-
Sandpaper: Choose a grit that’s appropriate for removing the current paint job, usually between 80-120 grit.
-
Primer: This is crucial for ensuring the new paint adheres to the frame properly. Make sure to choose a primer that’s compatible with the type of paint you’ll be using.
-
Spray Paint: When selecting the right type of paint, keep in mind the type of finish you want and the color you want to achieve. You can choose from a variety of finishes such as matte, satin, or glossy.
-
Clear Coat: This will protect your newly painted frame from scratches and UV damage.
Once you have gathered all your tools and materials, you can move on to selecting your paint colors and the right type of paint. With the right equipment, you’ll be ready to take on the next step: applying the base coat.

TST Electric Bike for Adults, 1500W Peak Motor 60 Miles Fat Tire E Bike 48V 15Ah Removable Battery 20" Electric Bike with Full Suspension SGS UL 2849 Certification Black
【Excellent Motor Performance】This electric bike is equipped with a high-performance 750W motor(1500W peak power) with 2 to 3...
As an affiliate, we earn on qualifying purchases.
Apply the Base Coat
Now it’s time to apply the base coat, so grab your spray paint and get ready to transform your two-wheeled beauty. Before you begin, it’s important to choose the right color for your bike. Consider the overall look you want to achieve and the colors that will complement your personal style. Once you have selected the perfect shade, it’s time to start preparing the frame.
First, use sandpaper or a sanding block to rough up the surface of the frame. This will help the paint adhere better and ensure a smoother finish. Make sure to sand all areas evenly, paying special attention to any rough spots or areas where the old paint is peeling. Once you have finished sanding, wipe down the frame with a clean cloth to remove any dust or debris.
Next, it’s time to apply the base coat. Hold the spray paint can about 8-10 inches away from the frame and spray in a sweeping motion, making sure to cover all areas evenly. It’s important to apply thin, even coats to avoid drips or uneven spots. Allow each coat to dry completely before applying the next. Depending on the color and type of paint you are using, you may need to apply 2-3 coats to achieve full coverage. Once you have finished applying the base coat, you are ready to move on to applying the top coat for a truly professional finish.
In the next section, we will cover how to apply the top coat to give your bike that final, polished look.

MOVINPE Patriotic Bike Decor Set 4th of July Bicycle Decorations USA All The Way Sign Hanging Paper Fans Tinsel Garland Streamer Flags Banner, Independence Day Kids Bike Parade (Blue&Red&White)
What You'll Get - This kit is all you need to deck out your bike in true American...
As an affiliate, we earn on qualifying purchases.
Apply the Top Coat
To achieve a professional-looking finish, you’ll want to apply a top coat to your newly painted bike, ensuring that the color lasts and doesn’t fade quickly. Don’t worry about the additional time it may take to apply the top coat, as it’ll protect your hard work from scratches and damage.
Here are some color options and painting techniques to help you with the process:
-
Color options: Choose a color that matches your personal style and preferences. You can opt for a classic color like black or white, or go for something more vibrant like red or blue. Metallic finishes are also popular for a sleek look.
-
Painting techniques: When applying the top coat, make sure to use even strokes and avoid over-spraying. You can use a spray can or a paint gun for larger surfaces. Allow the top coat to dry completely before handling the bike.
Now that you’ve applied the top coat, it’s time to reassemble your bike.
Reassemble Your Bike
Now that you’ve successfully painted your bicycle frame, it’s time to reassemble your bike.
Before you start, make sure you clean and oil all the parts to avoid any damage.
Next, reattach the parts to the frame. Ensure you use the correct tools and torque specifications.
Finally, test ride your newly painted bike to make sure everything is working correctly.
Clean and Oil the Parts
Before you begin painting, make sure to thoroughly clean and oil all parts of the bicycle frame to ensure a smooth and even finish. Start by choosing the right solvent to remove any dirt, grease, or old paint from the frame. You can use a degreaser or a solvent like acetone or mineral spirits. Apply the solvent to a clean rag and wipe down all parts of the frame until they’re free of debris. Be careful not to get any solvent on the bearings or other components that shouldn’t be exposed to solvents.
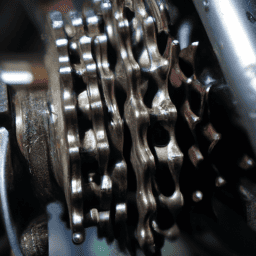
Next, lubricate all moving components of the bike, including the chain, derailleur, and brake pivots. Use a high-quality lubricant to ensure smooth operation and prevent rust and corrosion. Apply the lubricant sparingly, as excess oil can attract dirt and debris and cause problems later on.
Once you have cleaned and oiled all parts of the frame, you’re ready to move on to reattaching the parts to the frame.
Reattach the Parts to the Frame
Once all the parts are clean and oiled, it’s time to start reassembling the bike. Begin by reattaching the bottom bracket and headset, making sure to properly align them with the frame. Tighten the bolts slowly and evenly, ensuring that they aren’t over-tightened and causing damage to the frame.
Check the alignment of the handlebars and stem, and adjust as necessary. Next, attach the wheels by sliding them carefully into the frame dropouts and tightening the quick-release levers or bolts. Make sure that the wheels are properly aligned and that the brake pads are positioned correctly. Finally, reattach the pedals, seat, and any other remaining parts.
Apply a light coating of grease or oil to the bolts and threads to prevent rust and make future maintenance easier. With everything in place, your bike should be ready for a test ride to ensure that everything is functioning properly.
As you test ride your newly painted bike, pay attention to any unusual noises or movements. Make sure that the brakes are working properly and that the wheels are spinning freely. If anything feels off, stop and investigate the problem before continuing to ride.
Once you’re confident that everything is working as it should, take your bike out for a spin and enjoy your newly painted ride!
Test Ride Your Newly Painted Bike
Take your newly painted bike for a test ride to ensure that everything’s functioning properly and you can enjoy your ride without any issues.
Before you go on your ride, make sure all the parts are properly reattached to the frame. Check the brakes, gears, and wheels to ensure they’re functioning properly. If anything seems off, make sure to fix it before you start riding.
Proper fit is also important when it comes to riding your bike. Make sure your bike is adjusted to fit your body properly. Adjust the seat height and handlebars to ensure you’re comfortable and in control of your bike while riding.
Safety considerations are also important to keep in mind. Wear a helmet and any other protective gear you feel is necessary.
Lastly, choosing the right paint is important. Make sure you choose a paint that’s durable and will hold up against the elements.
With these tips, you can enjoy your newly painted bike with peace of mind.
Frequently Asked Questions
How do I choose the best paint color for my bicycle frame?
Choosing the right color for your bike frame is like selecting the perfect tie for a suit. Consider color psychology for bicycle frames and match it with your personal style. Choose wisely to make a statement.
Is it necessary to remove all the components from the bike before painting?
To repaint a bike frame, partial disassembly is recommended, but it’s not necessary to remove everything. Use masking techniques to protect areas you don’t want painted. Alternatives to removing components include wrapping them in plastic or using painter’s tape.
How long should I wait for the base coat to dry before applying the top coat?
Did you know that the average wait time for base coat to dry completely is around 24 hours? To ensure a smooth finish, apply thin, even coats and wait for each one to dry completely before moving on. Top coat drying techniques vary, but be sure to follow manufacturer’s recommendations for best results. Base coat application tips include using a primer and sanding between coats for optimal adherence.
Can I use regular spray paint for my bicycle frame or do I need specialized bike paint?
When repainting your bicycle frame, it’s important to choose the right primer. While regular spray paint may be cheaper, specialized bike paint has better durability and resistance to weathering. Consider the pros and cons before making a decision.
Can I use a paintbrush instead of spray paint to repaint my bicycle frame?
You could, but you’ll regret it. Painting with a brush takes forever, leaves brush strokes and doesn’t adhere as well. Spray paint dries faster, looks smoother and covers evenly. Use light coats and sand between layers.
Conclusion
Congratulations! You’ve successfully repainted your bicycle frame. Now you have a shiny new ride that looks like it just rolled off the assembly line. You can take pride in the fact that you did it all yourself, from preparing the bike to reassembling it.
You can proudly show off your new DIY skills to your friends, who will surely be impressed. Who knows, maybe you’ll even start a new trend of repainting old bikes in your community. Just be prepared for the onslaught of requests from friends and neighbors to repaint their bikes as well. But don’t worry, now that you’re an experienced bike painter, you can handle anything that comes your way.
So go ahead and ride off into the sunset on your newly painted bike, knowing that you are the envy of all the other cyclists out there.