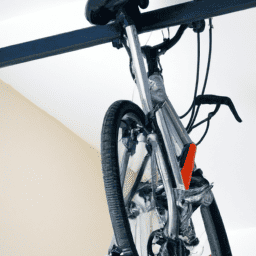
When considering upgrades or repairs for your bike, the fork should be at the top of your list. This component, which links the front wheel with the bike’s frame, is vital for ensuring good handling, stability, and comfort. Although the thought of fitting a new fork might appear intimidating, having the appropriate tools and instructions can simplify the process, significantly enhancing your cycling experience.
As the saying goes, ‘a chain is only as strong as its weakest link,’and the same can be said for a bicycle. Even if you have the best frame, wheels, and components, if your fork is worn out or damaged, it can compromise the overall performance and safety of your ride.
Whether you want to replace your fork with a lighter or more durable model, or simply need to fix a broken or bent one, this guide will provide you with step-by-step instructions on how to install a bicycle fork.
So, grab your tools and let’s get started!
Key Takeaways
- Upgrading or repairing a bicycle fork can greatly improve riding experience.
- A worn out or damaged fork can compromise performance and safety.
- Necessary tools for installing a bicycle fork include socket wrenches, adjustable wrench, pliers, and torque wrench.
- Proper alignment and tightening of the headset bolt and stem bolts are crucial for a safe and smooth ride.

Under Armour Squeeze Water Bottles, 32 oz Water Bottles, Sideline Sports Water Bottle with Quick-Shot Lid, Quick & Easy Hydration, Gym Water Bottles, Squeeze Bottle, 1 32oz Bottle
- Easy Hydration: Quick-shot lid and one-way valve
- On-the-Go Use: One-hand operation for active hydration
- Measurement Markings: Ounces and milliliters for tracking
As an affiliate, we earn on qualifying purchases.
Gather the Necessary Tools
You’ll need to grab some tools before you can get started on installing your new bike fork, so go ahead and rummage through your toolbox to find a trusty set of wrenches and pliers. You’ll need a set of socket wrenches, an adjustable wrench, a pair of pliers, and a torque wrench. It’s important to make sure that your tools are clean and free of debris to prevent any damage to your bike.
Before you start working on your bike, it’s important to take some time to clean your work area and your bike. You don’t want any dirt, dust, or debris getting into your bike’s delicate parts. You can use a soft cloth and some cleaning solution to wipe down your work area and your bike.
It’s also a good idea to use some maintenance techniques to keep your bike in good shape. Regular cleaning and maintenance will help prolong the life of your bike and keep it running smoothly.
With your tools and work area ready, it’s time to remove the old fork.
Remove the Old Fork
I’ll start by discussing how to remove the old fork from a bicycle.
The first step is to loosen the stem bolts that hold the handlebars to the fork.
Next, I’ll remove the front wheel by releasing the quick-release lever or loosening the nuts with a wrench.
Finally, I’ll detach the old fork from the bike frame by removing the headset and crown race.
Following these steps will allow me to replace the old fork with a new one.
Loosen the Stem Bolts
First, loosen the stem bolts by using a 5mm Allen key. Proper torque is important for stem bolts, and tightening them to 5-7 Nm ensures that the stem is stable and secure. Loosening the stem bolts requires the use of a 5mm Allen key. Once the stem bolts are loose, the stem can be removed from the fork. It is important to remember the stem angle adjustment and to ensure that it is properly aligned when reattaching the stem to the new fork.
To assist with the installation of the new fork, a table can be used to keep track of the different parts and their corresponding location. The table should include columns for the part name, location, quantity, and notes. This will help ensure that all parts are accounted for and in the correct location during the installation process. Once the stem bolts have been loosened and the stem has been removed, the next step is to remove the front wheel.
Remove the Front Wheel
Now it’s time to take off the front wheel, so make sure to release the brake caliper and loosen the quick release lever or axle nuts securing the wheel to the fork dropouts. Once the wheel is loose, lift it off the fork and set it aside. This step is important not only for installing a new fork but also for front wheel maintenance. Removing the wheel allows you to inspect the tire, rim, and spokes for any damage or wear. Additionally, it gives you access to the fork crown race, which may need to be cleaned or replaced.
To make the process smoother, I recommend following these nested bullet point lists:
-
Release the brake caliper:
-
Use a 5mm Allen wrench to loosen the bolt attaching the brake cable to the caliper.
-
Gently pull the caliper arms apart to release the brake pads from the rim.
-
Loosen the quick release lever or axle nuts:
-
If your bike has a quick release lever, flip it open and turn the adjusting nut counterclockwise to release the tension.
-
If your bike has axle nuts, use a 15mm wrench to loosen them a few turns.
Now that the front wheel is off, we can move on to removing the old fork.
Remove the Old Fork
To remove the old fork, you need to loosen the stem bolts and remove the stem cap using a 5mm Allen wrench. First, make sure the bike is secure and stable before starting the process. Use a bike stand or lean the bike against a wall so that it doesn’t tip over.
Next, loosen the stem bolts with a 5mm Allen wrench. Be sure to loosen both bolts evenly, so that the pressure on the fork is released evenly and the fork can be removed smoothly. Once the stem bolts are loosened, remove the stem cap with the 5mm Allen wrench.
The stem cap is located on top of the stem and holds the fork in place. After removing the stem cap, the fork should slide out of the head tube smoothly. Be careful when removing the fork so that it doesn’t damage the headset or the frame.
With the old fork removed, it’s time to install the new fork.
Install the New Fork
Ready to get your hands dirty? Let’s start installing the new fork onto your bike.
First, make sure that the new fork is properly aligned with the frame. The best way to do this is to place the fork in the frame and hold it steady while you tighten the headset. The top cap of the headset should sit flush with the top of the steerer tube. If it doesn’t, adjust the height of the fork until it does.
Once the fork is properly aligned, it’s time to install it onto the bike. Slide the fork into the head tube and make sure that the headset bearings are properly seated. Then, tighten the headset bolt slowly and evenly, making sure that the fork remains centered in the frame.
Finally, reattach the front wheel and make sure that it is properly aligned with the fork.
With the new fork installed, your bike should be ready to ride.
Reattach the Front Wheel
Well, would you look at that – it’s time to pop that front wheel back on! Here’s how to do it:
-
First, lift the wheel up and position the axle into the dropouts on the fork. Make sure the rotor (if you’ve got disc brakes) is seated properly in the caliper.
-
Next, tighten the quick release skewer or axle nuts, making sure that the wheel is centered between the fork legs. You can check this by eye-balling it or by using a ruler or caliper to measure the distance between the rim and the fork on both sides.
-
If the wheel isn’t centered, loosen the skewer or nuts and adjust by repositioning the wheel in the dropouts.
-
Once the wheel is centered, tighten the skewer or nuts to the manufacturer’s recommended torque.
After reattaching the front wheel, it’s important to make sure that the spokes are realigned properly and that the brake alignment is checked before taking the bike for a test ride and making any final adjustments.
Test Ride and Final Adjustments
Now it’s time to take the bike for a spin and make any final tweaks to ensure a smooth and safe ride.
Before going on a test ride, it’s important to ensure that the fork is properly fit and adjusted. Check the tightness of the headset by gently rocking the bike back and forth while holding onto the front brake. If there’s any looseness, adjust the headset until it’s snug.
Additionally, check the alignment of the fork by standing in front of the bike and looking at it head-on. The fork blades should be parallel to the wheel and the frame.
Safety considerations should also be taken into account before going on a test ride. Ensure that the front wheel is securely attached and that all bolts and screws are tightened. Double-check the brake system to ensure that it’s functioning correctly and that the pads are properly aligned with the rim. Make sure that the handlebars are securely fastened and that they’re aligned with the front wheel.
Finally, wear a helmet and other protective gear to stay safe during the test ride. By taking these precautions, you can enjoy a smooth and safe ride with your newly installed bicycle fork.
Frequently Asked Questions
How do I know if my old fork needs to be replaced?
I can determine if my old fork needs to be replaced by looking for signs of wear such as cracks, corrosion, or bent tubes. If I want to upgrade, I should consider the fork’s weight, material, and compatibility with my bike.
Can I use a fork from a different brand or model on my bicycle?
I wouldn’t recommend using a fork from a different brand or model on my bicycle. Compatibility issues could arise, affecting performance and safety. It’s best to stick with the manufacturer’s recommended fork for optimal performance comparison.
What is the proper torque specification for tightening the fork onto the frame?
The proper torque specification for tightening the fork onto the frame is crucial for the safety and performance of your bicycle. It can vary depending on the specific make and model, so consult the manufacturer’s instructions or a professional mechanic for the correct specifications.
Do I need to grease the headset bearings before installing the new fork?
Greasing headset bearings before installing a new fork is essential. It ensures smooth operation, reduces wear, and prevents damage. Common mistakes when installing a fork include overtightening the headset and not properly aligning the fork.
How often should I inspect and maintain my new fork?
Regular maintenance is crucial to ensure a safe and reliable ride on your new fork. Inspect it regularly for signs of wear, such as cracks or dents. Grease the stanchions and change the oil as recommended by the manufacturer.
Conclusion
Well, that’s it! Installing a bicycle fork might seem daunting, but with the right tools and a little bit of patience, it can be done in just a few simple steps. Remember, safety should always come first, so make sure to follow all the instructions carefully and wear protective gear.
One interesting statistic to note is that a study conducted by the National Highway Traffic Safety Administration found that bicycles accounted for 2.3% of all traffic fatalities in the United States in 2019. While this number may seem small, it highlights the importance of properly maintaining and repairing your bike to ensure your safety on the road.
As a cyclist, taking care of your bike not only improves its longevity, but it also ensures a smoother and safer ride. So, next time you need to install a new fork or perform any other maintenance task, don’t hesitate to give it a try yourself. With a little bit of practice, you’ll be a pro in no time!