Fitting brake cables onto a bicycle may appear challenging at first, yet with the appropriate equipment and a bit of fundamental understanding, it can be a simple task. As a cyclist with plenty of experience, I’ve repeatedly installed brake cables on my bicycles and am eager to pass on what I know to you.
One of the most important things to keep in mind when installing brake cables is safety. Properly functioning brakes are crucial for your safety while riding, so it’s important to take the time to install them correctly.
In this article, I will guide you through the process of:
- Gathering the necessary tools and materials
- Removing old brake cables
- Installing new brake cables
- Adjusting brake tension
- Testing your brakes to ensure they are functioning properly.
Let’s get started!
Key Takeaways
- Proper tools and knowledge are required for installing brake cables on a bicycle.
- Safety is crucial throughout the entire process.
- The process involves removing old cables, installing new ones, adjusting tension, and testing brakes.
- Regular cleaning and lubrication can prevent corrosion and wear, and damaged cables should be replaced immediately.
Gather the Necessary Tools and Materials
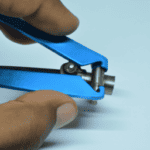
Before you can start installing your bicycle brake cables, you’ll need to gather all the necessary tools and materials. Some of the tools that you’ll need include wire cutters, a cable cutter, and pliers.
Additionally, you’ll need new brake cables and cable housing. There are different types of brake cables available in the market, including stainless steel, galvanized, and coated cables. Make sure to choose the right type of cable that fits your bicycle’s brake system.
To ensure that your brake cables last longer, it’s essential to maintain them properly. Regular cleaning and lubrication can go a long way in preventing corrosion and wear. You should also inspect your cables regularly for any signs of damage, such as fraying or kinking.
If you notice any issues with your cables, it’s best to replace them immediately. With all the necessary tools and materials in hand, you can move on to removing the old brake cables.
Remove Old Brake Cables
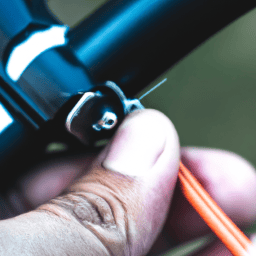
First, grab your pliers and locate where the cable is attached to the brake lever. Then, gently pull and twist the cable to release it from the lever.
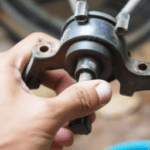
Next, move to the caliper and remove the cable end bolt, which will release the cable from the brake caliper. Once the cable is free from the caliper, pull it through the housing until it completely comes out.
Proper cable maintenance is essential for the longevity of your bicycle. If you notice any cable wear issues such as fraying, rust, or corrosion, it’s time to replace your brake cables.
With the old cables removed, it’s time to move on to the next step: installing new brake cables.
Install New Brake Cables
Now that I’ve removed the old brake cables, it’s time to install new ones. The process involves threading the cable through the housing, attaching it to the brake caliper, and securing it to the brake lever.
As an experienced cyclist, I know that having properly functioning brakes is crucial for safety on the road, so I’ll take my time to ensure that each step is done correctly.
Thread Cable Through Housing
To get started, slide the brake cable through the housing like a snake slithering through a hole. This technique may require a bit of skill, but with practice, you’ll be able to thread the cable through without any issues.
One of the most common mistakes people make during this process is failing to properly align the cable with the housing, causing it to get stuck or fray. To avoid this, make sure the cable is straight and in line with the housing before pushing it through.
As you thread the cable through the housing, make sure to use your fingers to guide it through smoothly. You should also periodically check the cable to ensure it’s running through the housing without any kinks or tangles.
Once you’ve successfully threaded the cable through the housing, you’re ready to move on to the next step of attaching it to the brake caliper.
Attach Cable to Brake Caliper
Before attaching the cable to the brake caliper, you’ll want to ensure the caliper arms are in the open position by squeezing them together with your fingers. This will make it easier to thread the cable through the brake caliper.
Once the caliper arms are open, thread the cable through the brake caliper and make sure that the cable is seated properly in the cable anchor bolt.
After the cable is threaded through the brake caliper, it’s important to check the caliper alignment and cable tension. The caliper should be centered over the wheel and the cable should have enough tension to engage the brake pads when the brake lever is squeezed.
To adjust the caliper alignment, loosen the mounting bolts and center the caliper over the wheel. To adjust the cable tension, turn the barrel adjuster on the brake lever until the brake pads engage properly.
Once the caliper alignment and cable tension are correct, you can move on to securing the cable to the brake lever.
Secure Cable to Brake Lever
Ready to attach the cable to your brake lever? Here’s how to do it in just a few easy steps.
First, make sure that the cable is properly inserted into the brake lever. If it’s not, you won’t be able to secure the cable and it won’t function properly. To do this, simply thread the cable through the hole in the brake lever and pull it tight.
Once the cable is properly inserted, it’s time to secure it to the brake lever. To do this, follow these steps:
- Use a 5mm Allen wrench to loosen the cable anchor bolt on the brake lever.
- Insert the cable into the anchor bolt and tighten it to the manufacturer’s recommended torque specification.
- Pull on the brake lever to ensure that the cable is properly secured and has proper tension. If the lever feels loose or there is too much slack in the cable, adjust the tension until it feels right.
Proper cable tension is important for the brake to function properly. If you experience any issues with your brake after attaching the cable, it may be due to improper tension. Troubleshooting issues with your brake should be done carefully and with the help of an experienced mechanic if necessary.
Now that you have your brake cable securely attached to the lever, it’s time to adjust the brake tension so that it has the right amount of stopping power.
Adjust Brake Tension
First, make sure your bike is securely in place so you can easily access the brake cable tension adjustment screw. This screw is typically located on the brake caliper or brake lever. Before adjusting the tension, it’s important to take some safety precautions. First, ensure that the brake pads are properly aligned and in good condition. Second, wear protective gloves to avoid injury while handling the cable.
Once you’ve taken the necessary safety precautions, you can begin adjusting the tension. The table below outlines the steps to adjust the brake cable tension. Remember to make small adjustments and test the brakes after each adjustment to ensure they are functioning properly. Once the tension is set correctly, you can move on to the final step of testing and finalizing.
| Column 1 | Column 2 | Column 3 |
|---|---|---|
| Step | Action | Result |
| 1 | Turn the adjustment screw clockwise to increase tension | Brake pads move closer to the rim |
| 2 | Turn the adjustment screw counterclockwise to decrease tension | Brake pads move away from the rim |
| 3 | Test the brakes after each adjustment | Ensure proper function and adjust as needed |
With the brake cable tension properly adjusted, it’s time to move on to the next step of testing and finalizing.
Test and Finalize
Now that you’ve got the brake tension adjusted just right, it’s time to put the finishing touches on your bike and ensure it’s road-ready with the cherry on top.
One of the most important things to check for is proper cable tension. Make sure that the brake cable is taut enough to engage the brake pads when the lever is pulled, but not so tight that the brakes are constantly engaged.
A quick test is to pull the brake lever and make sure the brake pads engage the wheel properly, but don’t rub against it. If they do rub, adjust the cable tension accordingly.
Once you’ve confirmed that the cable tension is correct, it’s a good idea to give your brakes a test ride to make sure they’re working properly. Take your bike around the block and test the brakes at different speeds and on different terrain.
If you notice any issues, such as the brakes not engaging properly or feeling spongy, it’s time to troubleshoot. Check for any loose connections or kinks in the cables, and adjust accordingly.
With proper cable tension and troubleshooting tips in mind, your bike should be ready to hit the road with confidence.
Frequently Asked Questions
How often should I replace my bicycle brake cables?
I replace my bicycle brake cables every 1-2 years, depending on how frequently I ride and the conditions I ride in. It’s important to regularly inspect cables for wear and fraying, and replace them as needed to ensure safe and reliable braking. Cable lifespan can vary, but it’s better to err on the side of caution and replace them before they fail.
What is the difference between brake cables and brake housing?
Brake cables and brake housing are two separate components of a bicycle’s braking system. Brake cable materials can vary, but housing is typically made of steel or aluminum. Using brake housing provides benefits such as increased durability and smoother cable movement.
Can I use any type of brake cable for my bicycle?
Compatibility concerns are crucial when selecting a brake cable for your bike. Always check your bike’s specifications to ensure compatibility. Cable material options include stainless steel, galvanized steel, and titanium, each with their own benefits.
How do I know if my brake cables need to be adjusted?
To determine if my brake cables need adjusting, I check for signs of worn out cables such as fraying, slack or reduced braking power. Bicycle brake cable adjustment: when and how? It’s best to consult a professional for proper adjustment techniques.
Is it necessary to lubricate the brake cables during installation or maintenance?
OMG, lubricating brake cables is crucial for optimal bike performance! It reduces friction, prevents rust, and extends the cables’ lifespan. The best lubricants for brake cables are Teflon-based. Trust me, I know from experience.
Conclusion
Well folks, that’s how you install bicycle brake cables! It may seem daunting at first, but with the right tools and a bit of patience, it’s a task that anyone can tackle.
But wait, there’s more! Before you hop on your newly-cabled bike and pedal off into the sunset, it’s important to remember that safety should always come first. Take the time to double check your work, making sure that your brake tension is adjusted correctly and that everything is securely fastened.
A loose cable or faulty brake could lead to a dangerous situation on the road. So, take your time, trust in your skills, and ride with confidence knowing that your brakes are in top shape.
Happy cycling!
